


Creating new users on the eBanqo platform allows you to manage who has access to your business dashboard and assign roles accordingly. Follow the step-by-step guide below to create users for your team.
Step 1: Log in to Your Admin Account
- Visit the eBanqo portal and log in using your admin credentials.
- Once logged in, you will be directed to the dashboard.
Step 2: Navigate to the Users Section
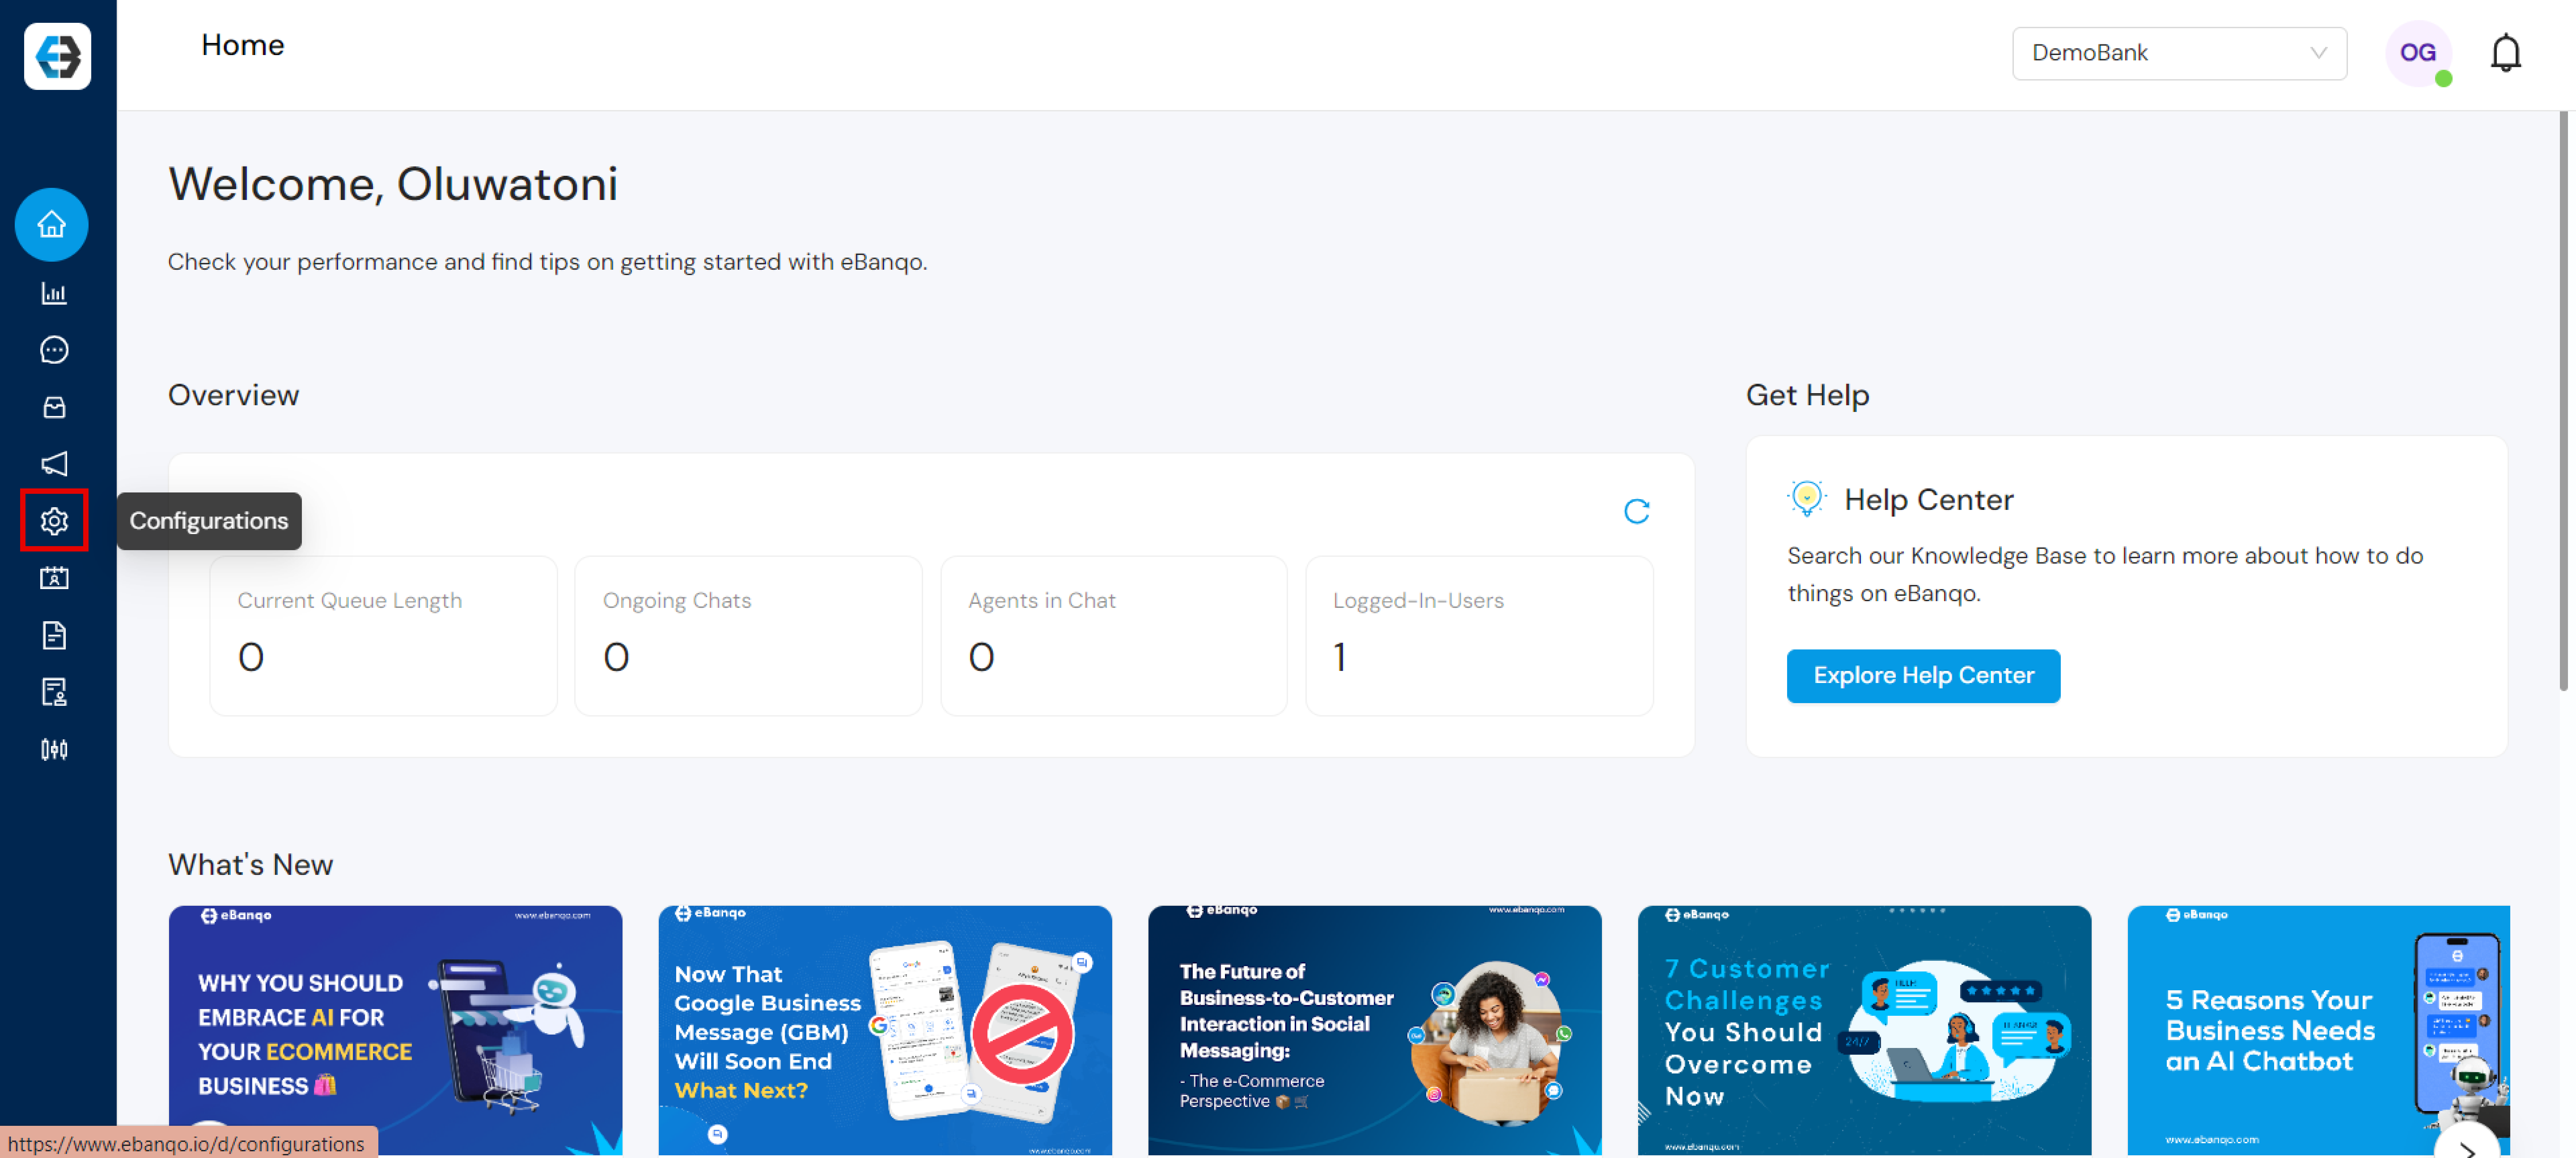
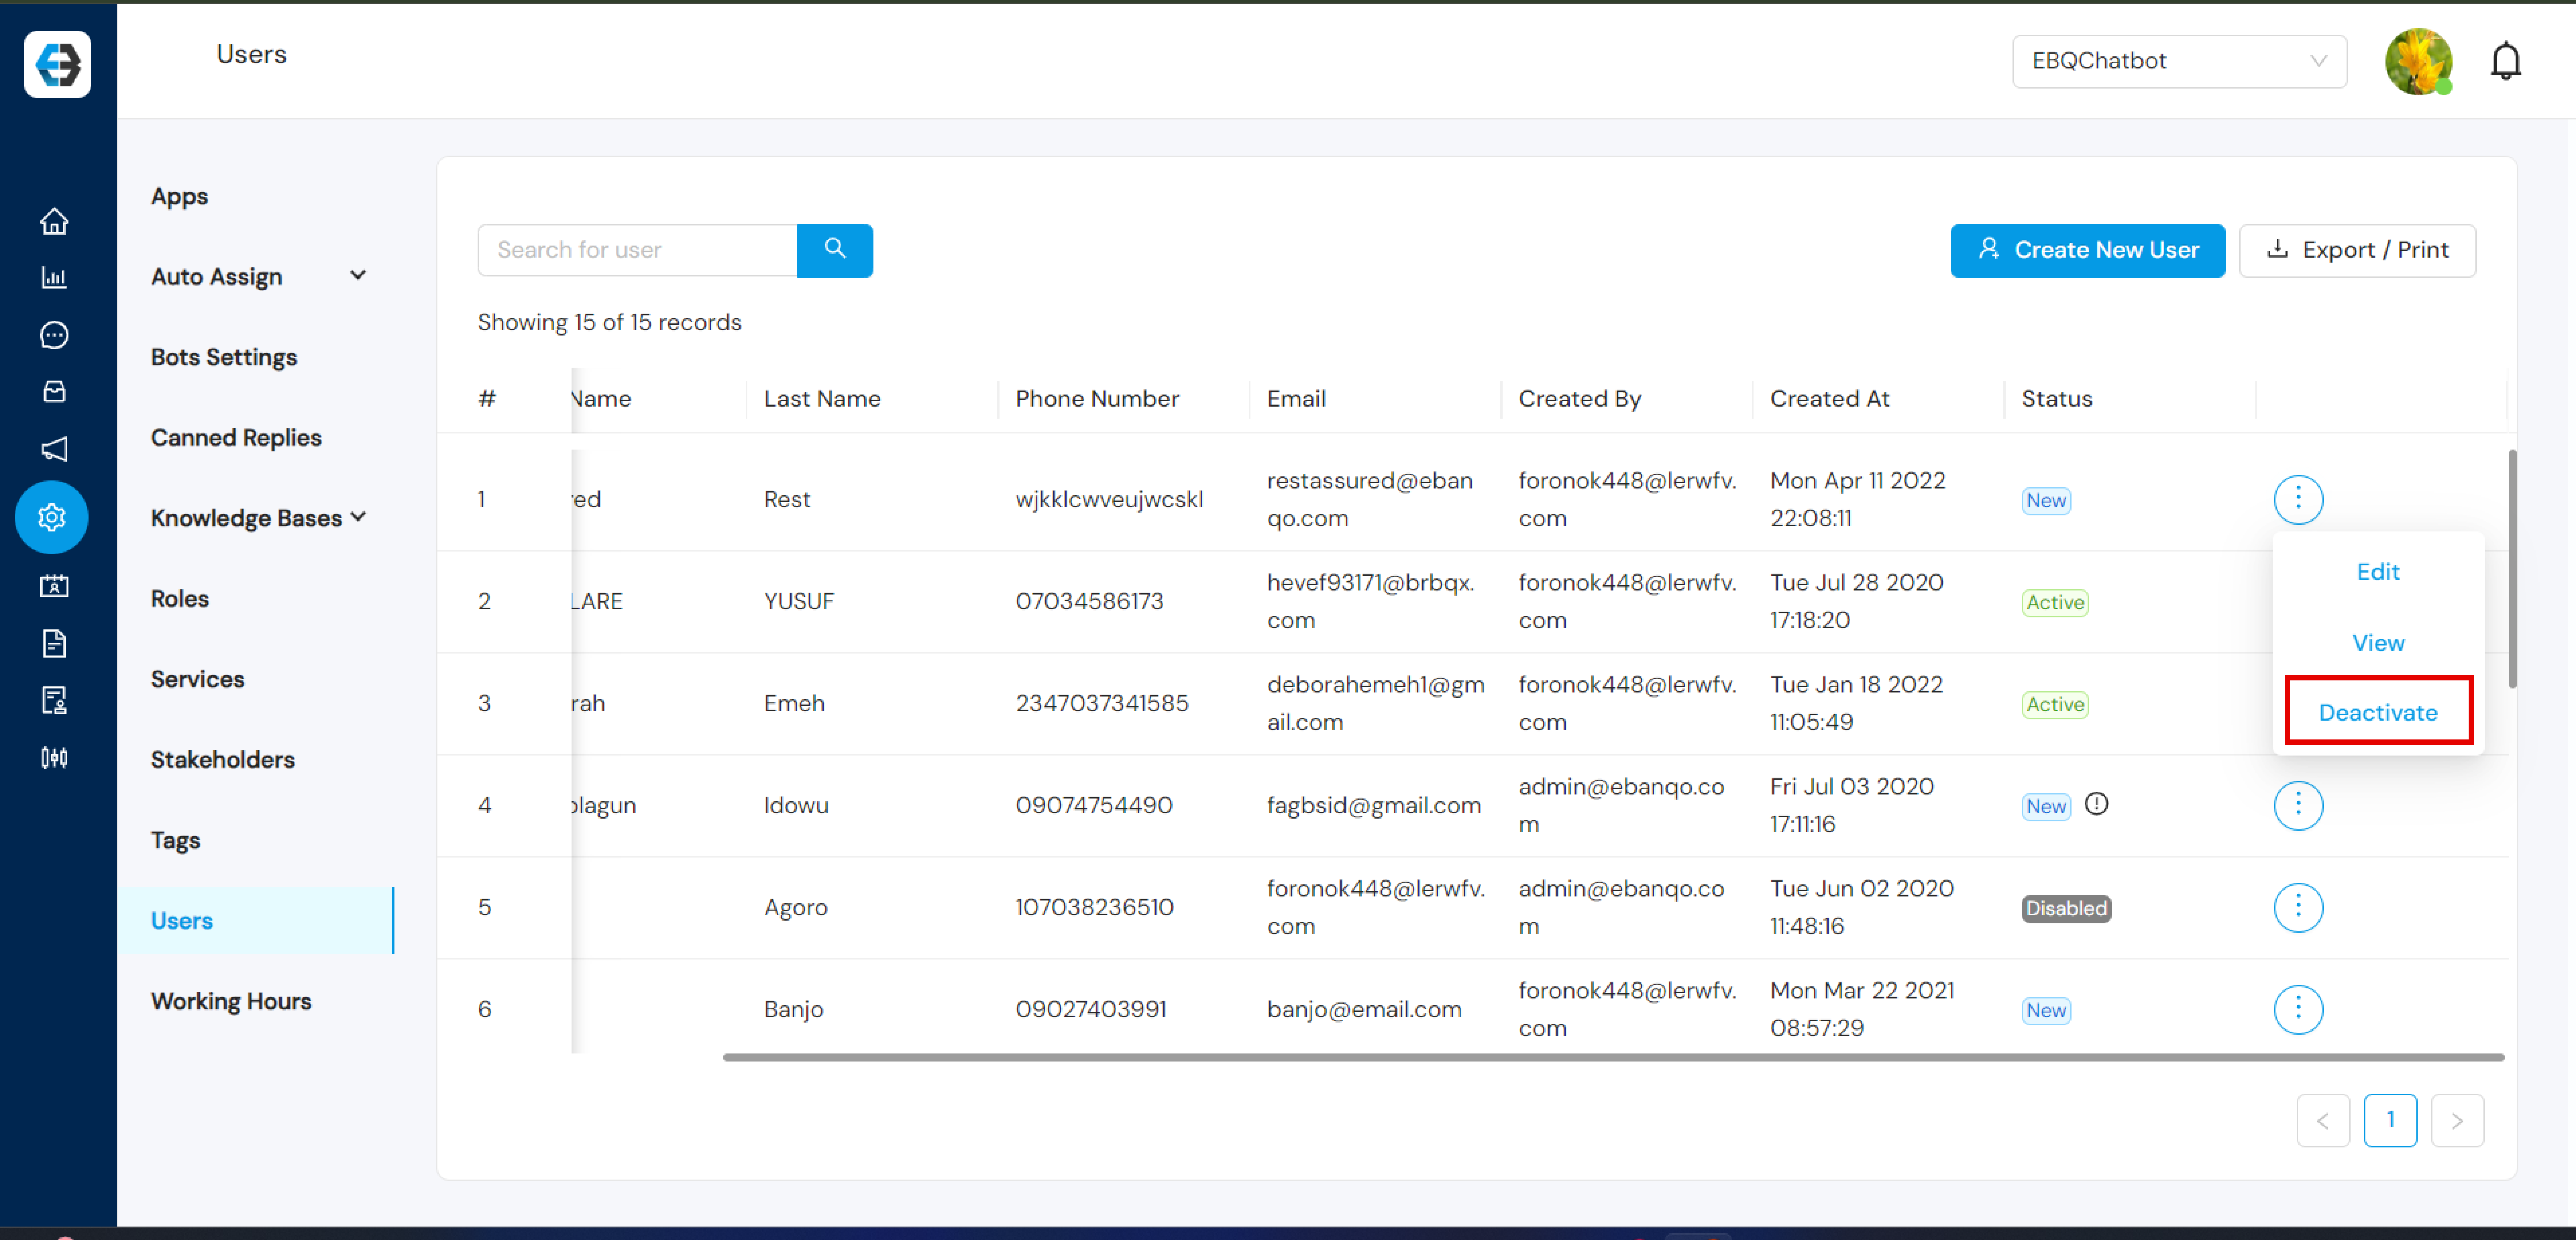
- Click on Configurations in the left-hand menu.
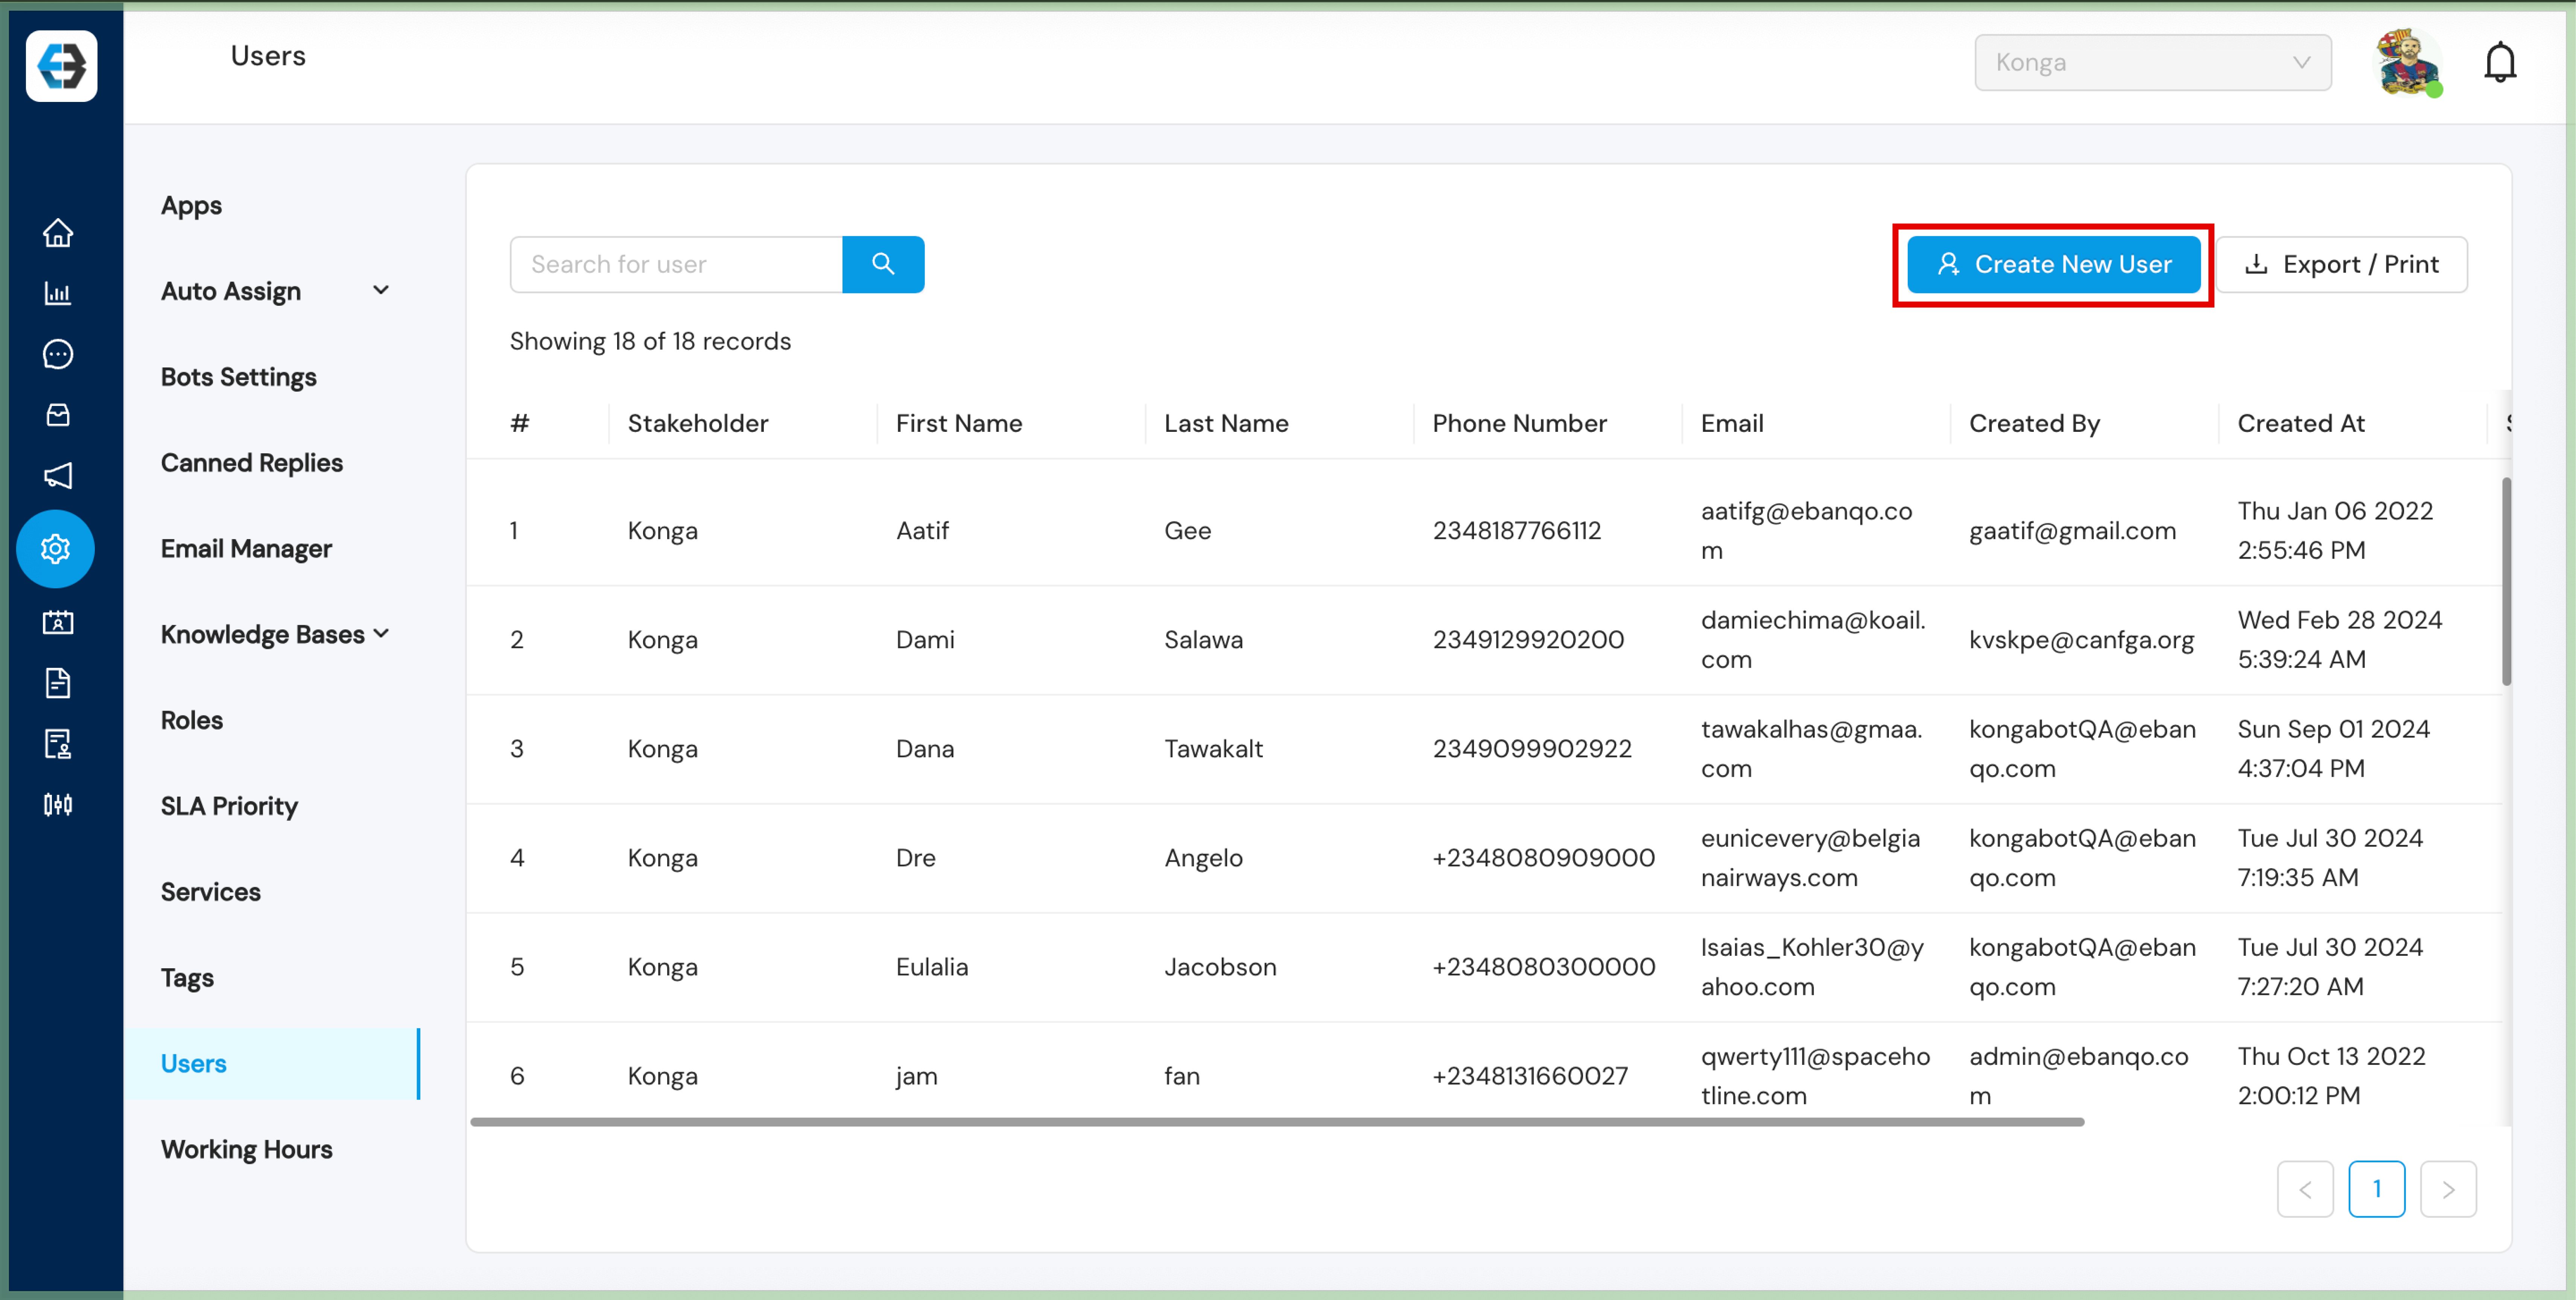
- Select Users.

Step 3: Create a New User
- Click the Create New User button.
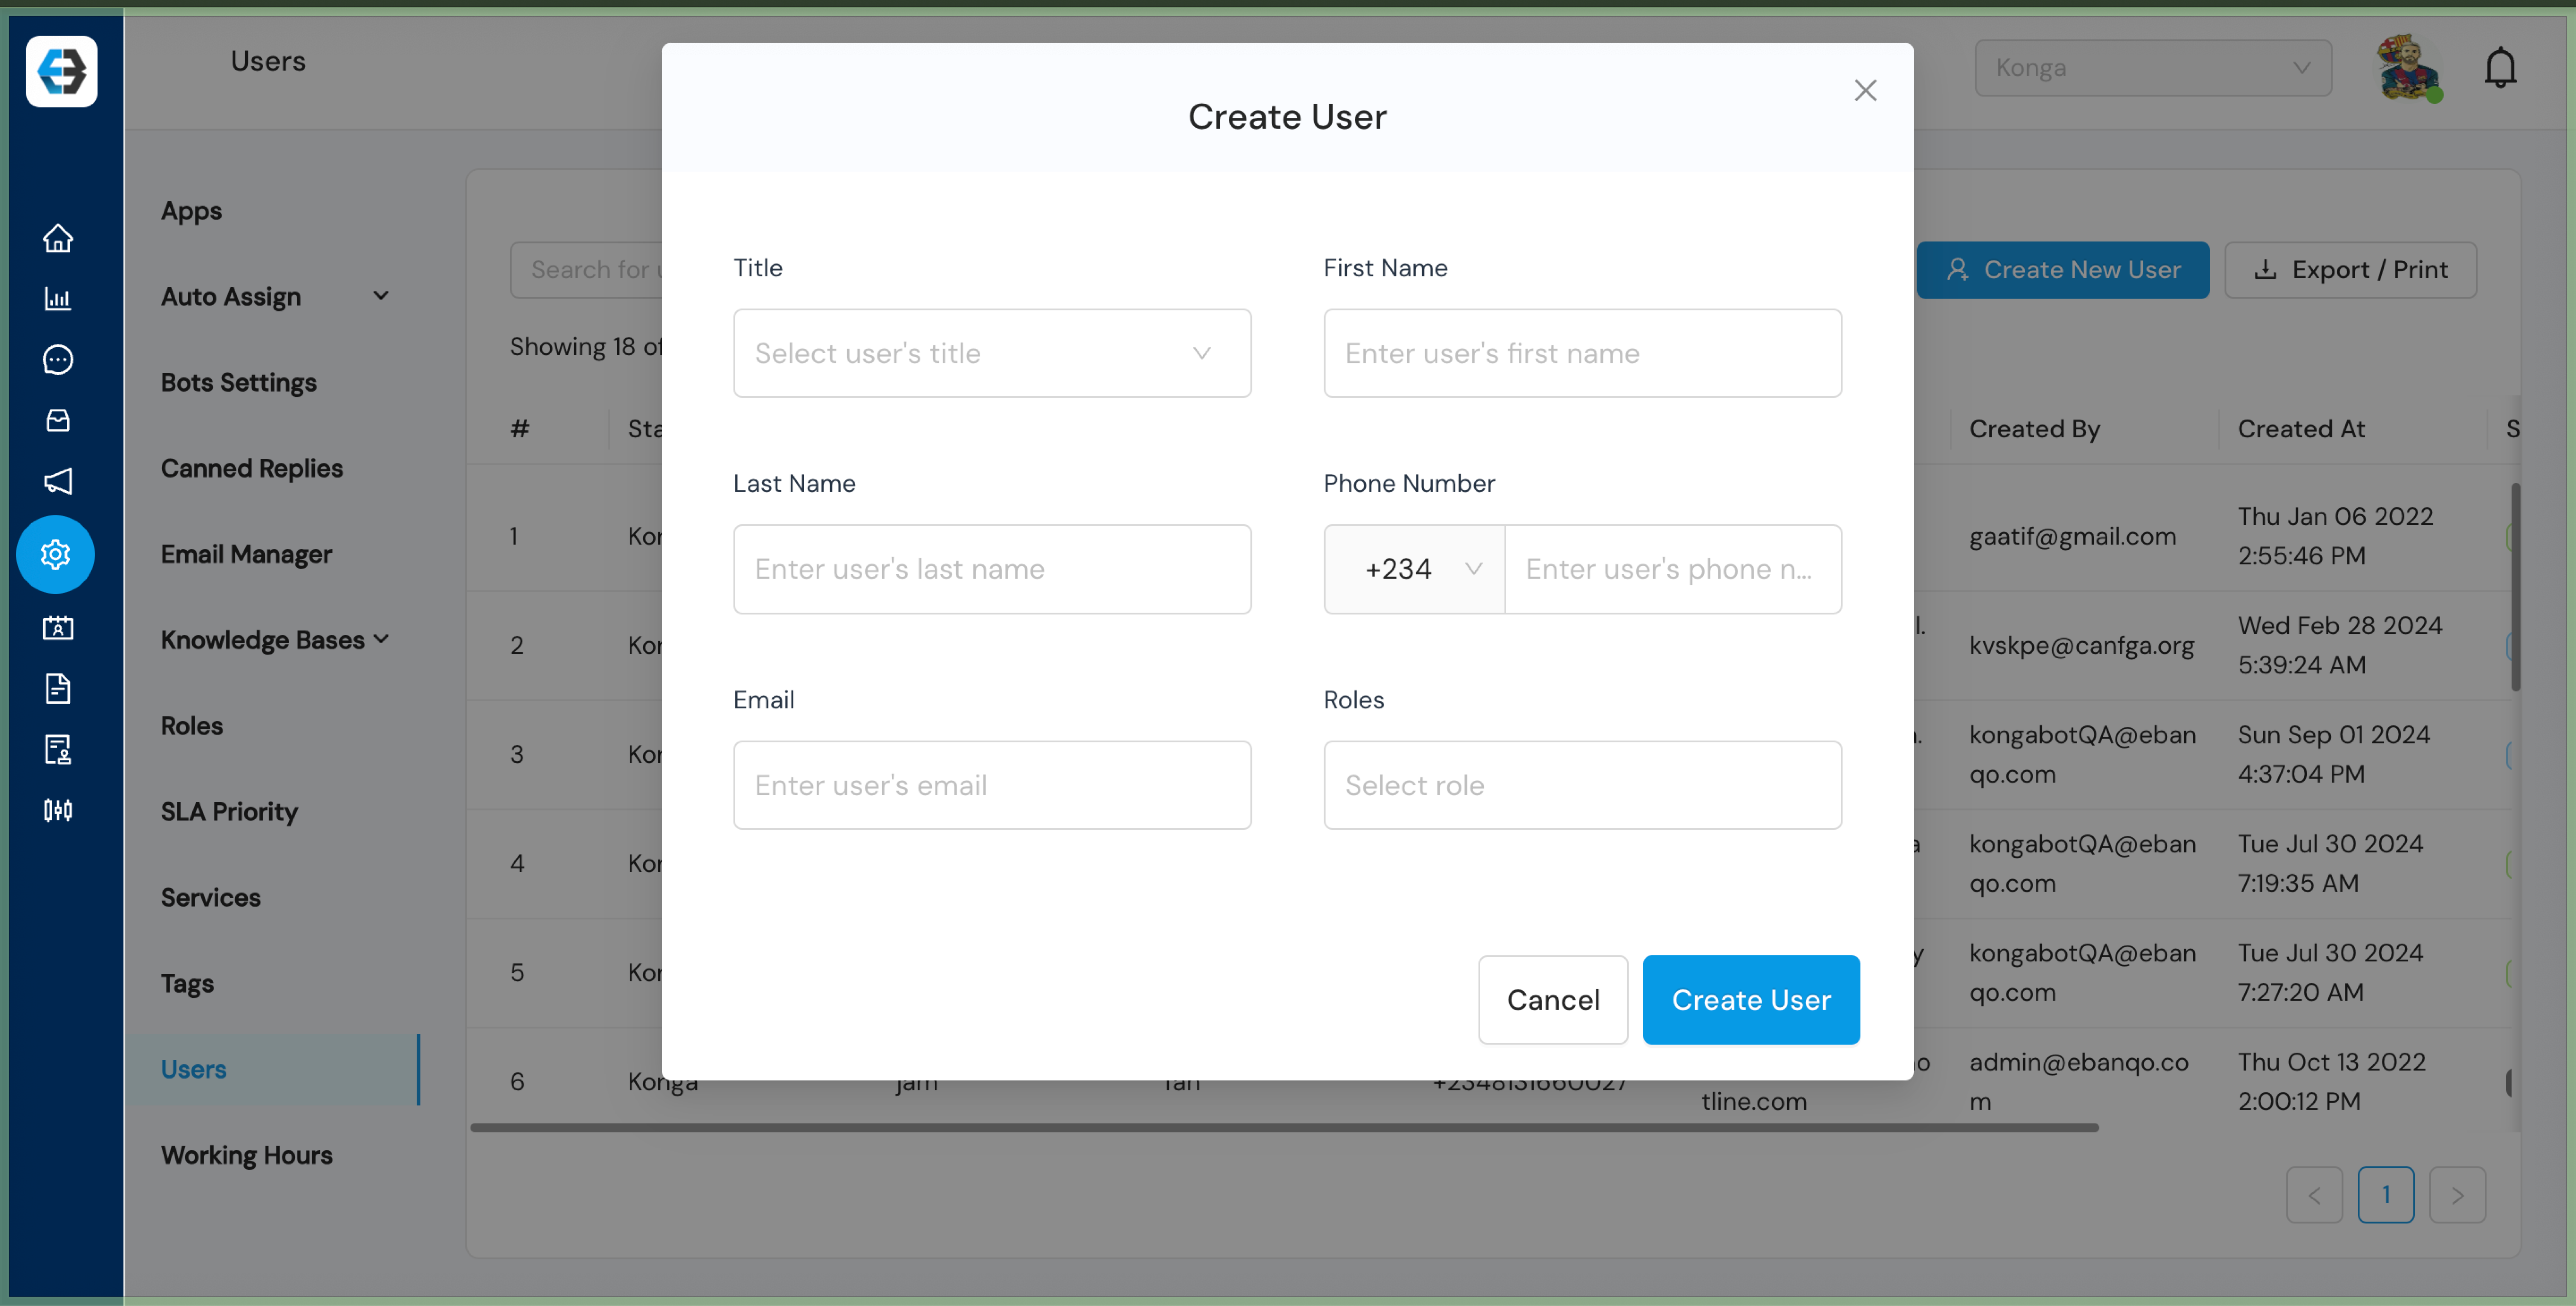
- A form will appear where you can enter the new user’s details.
Step 4: Fill in User Details
Provide the following information:
- Full Name – Enter the user’s first and last name.
- Email Address – The email the user will use to log in.
- Phone Number – Enter the user’s contact phone number.
- Role – Assign a role such as Admin, Agent, or Supervisor.

Step 5: Create and Send Credentials
- Click Create User.
- The system generates login credentials and sends them to the user’s email.
Step 6: Confirm User Creation
The new user will appear in the user list under the Users section.
Notes:
- Ensure the email address is correct to avoid login issues.
- Assign roles carefully to maintain proper access control.
- You can deactivate users anytime from the Users section.
How to Deactivate Users on eBanqo
Deactivating a user ensures that inactive or former team members can no longer access your organization’s account.
Step 1: Log in to Your Account
Step 2: Navigate to the Users Section
- Locate the Configurations icon in the left sidebar.
- Select Users.

Step 3: Find the User
- Search for the user by name or email.
- Click the three-dot menu beside the user’s details.

Step 4: Deactivate the User
- Select Deactivate in the user profile.
- Click the deactivate button to remove platform access.
Step 5: Confirm Deactivation
- A confirmation popup will appear.
- Click Yes, Deactivate.
The user’s status will now appear as Inactive in the user list.