


Setting up your preferred channel(s) on eBanqo takes only a few simple steps. Follow the guide below to configure the channels you want your chatbot to operate on.
Set Up Your Preferred Channels
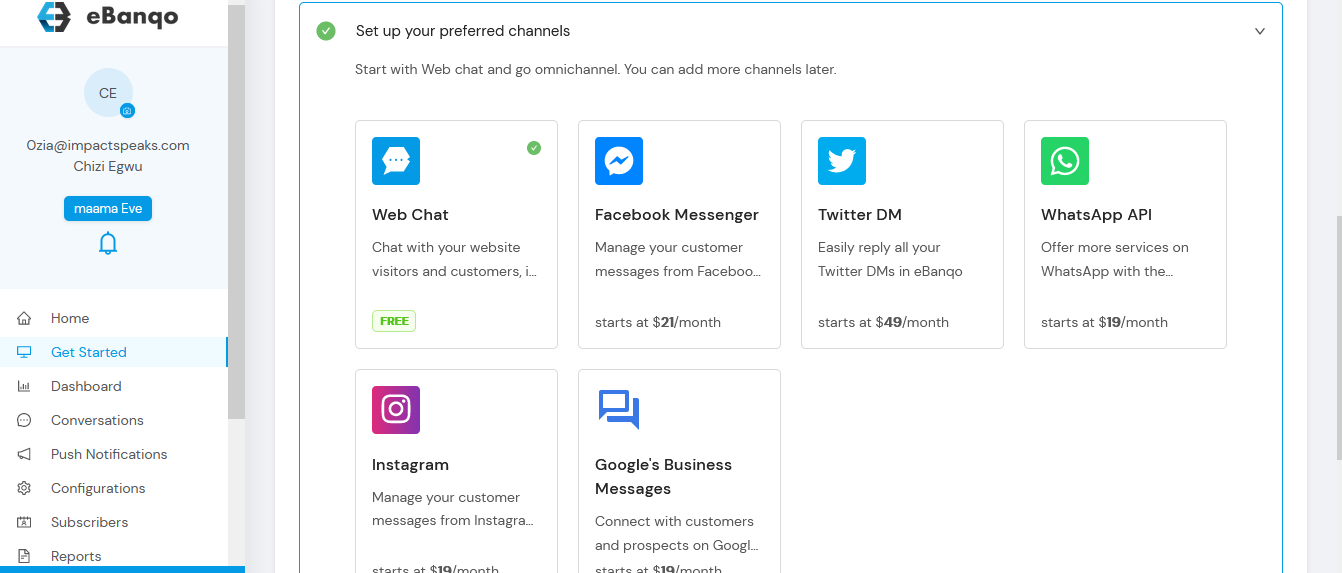
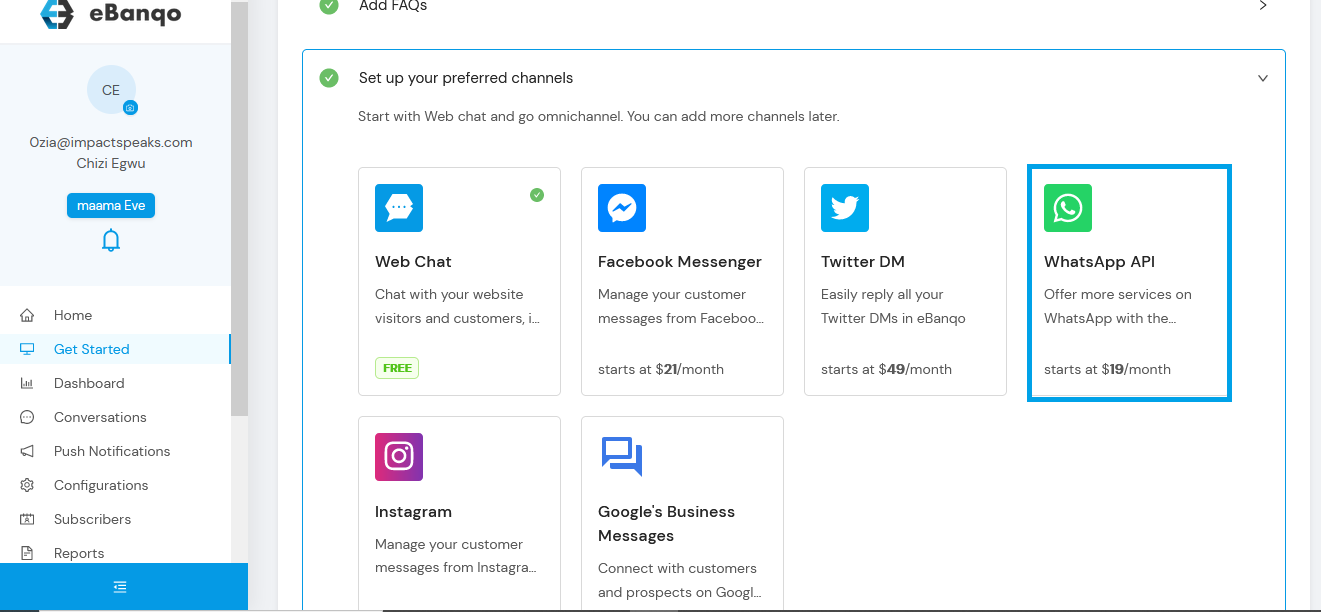
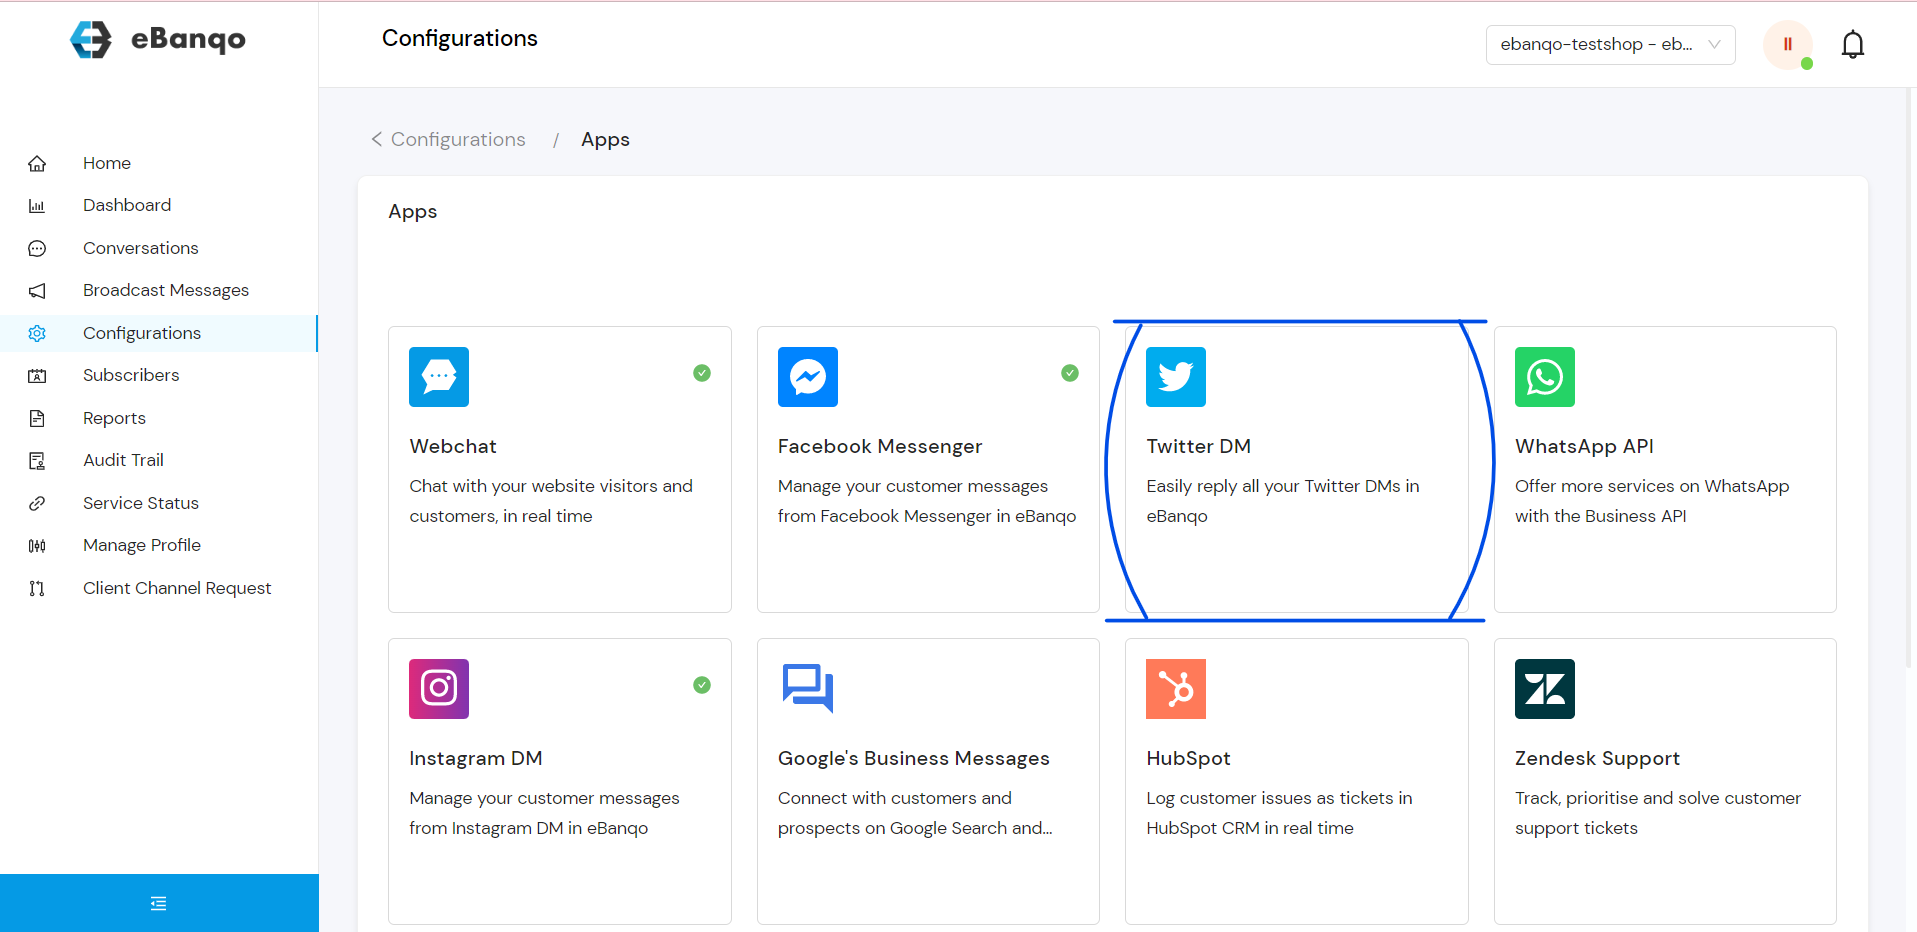
Here you choose the channels you want to connect your chatbot to. The Webchat channel is selected by default, but you can also add other channels such as Facebook, Twitter, and WhatsApp.
Set Up Your Webchat
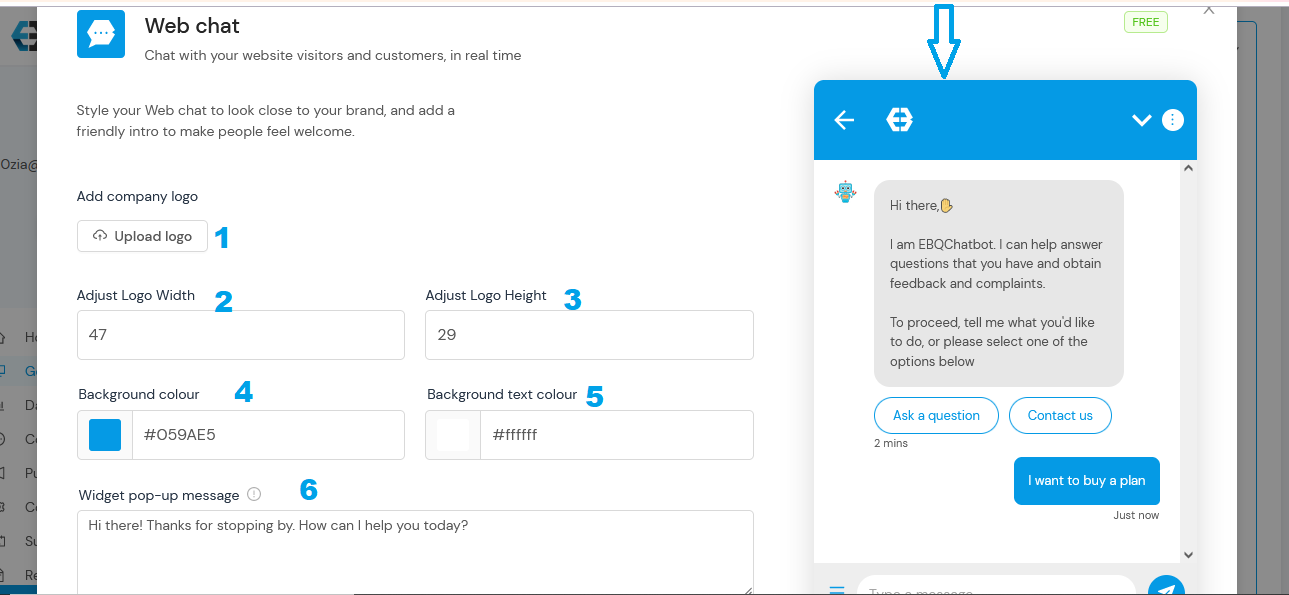
Step 1: Upload your business logo. This logo will appear in the header section of your web chat.
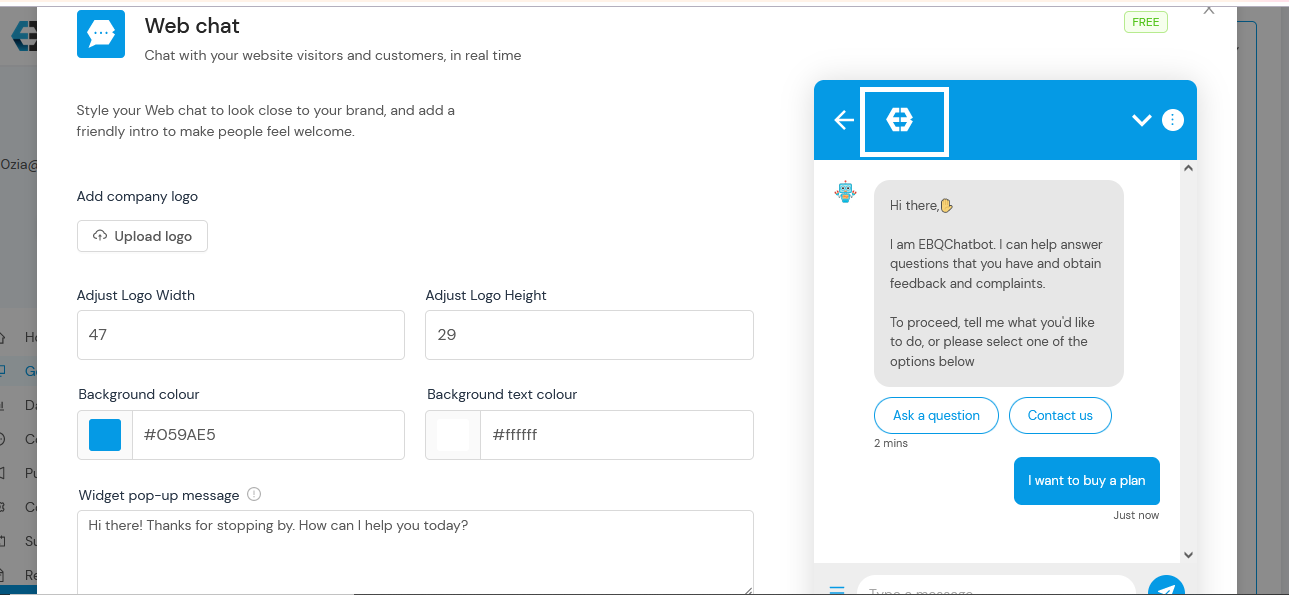
Step 2 & Step 3: Adjust the width and height of your logo. You can either enter your preferred size manually or use the toggle to resize it.
As you adjust the logo size, watch the preview in the header section to see how it will appear.
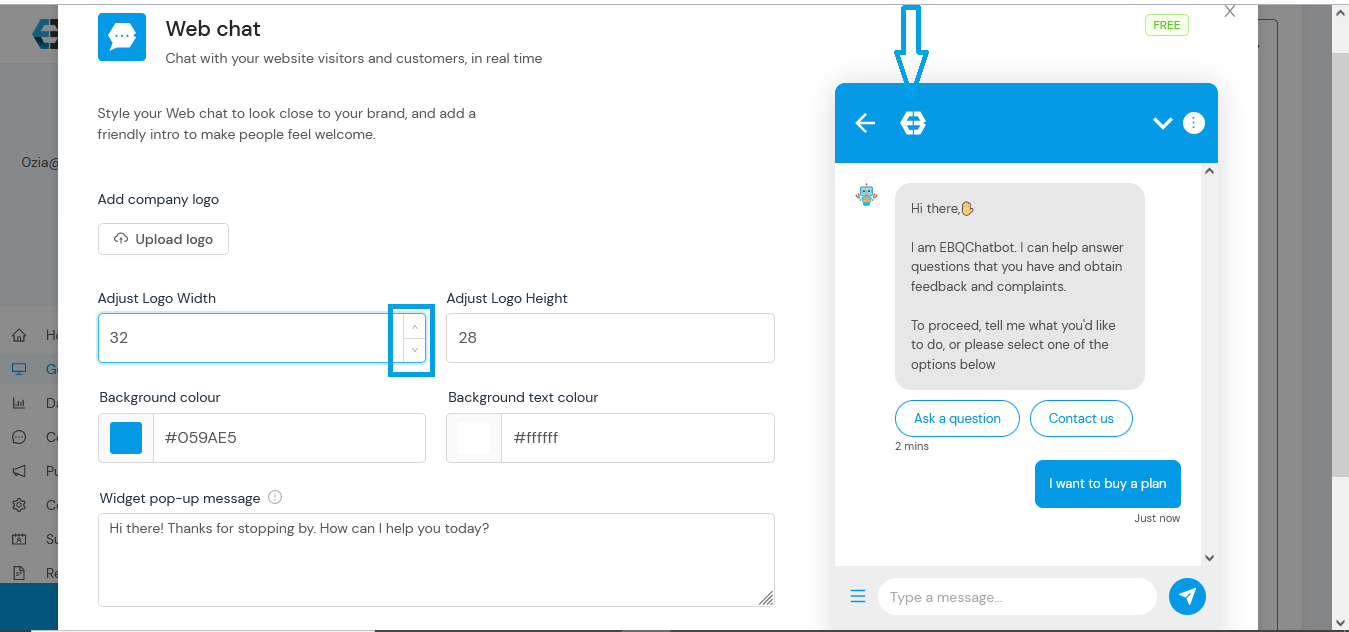
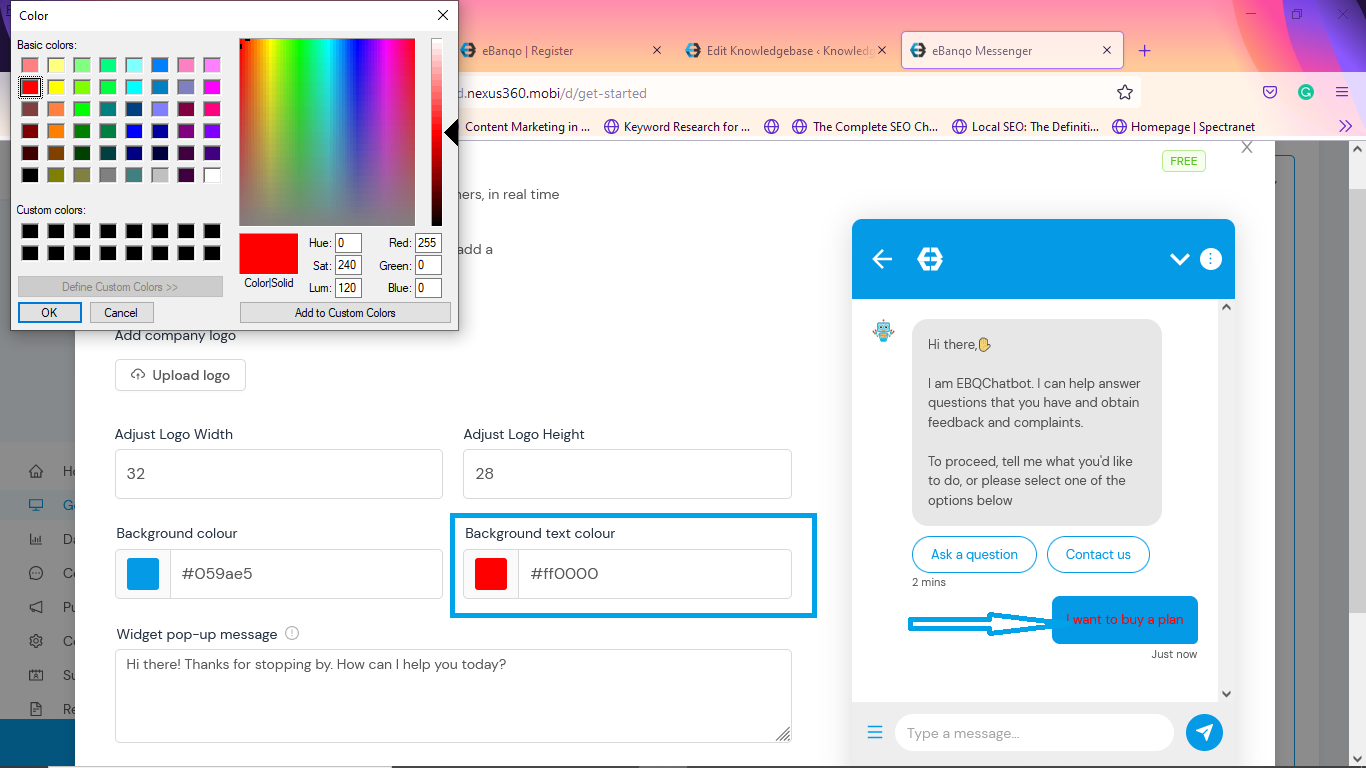
Step 4: Select your header and button colors.
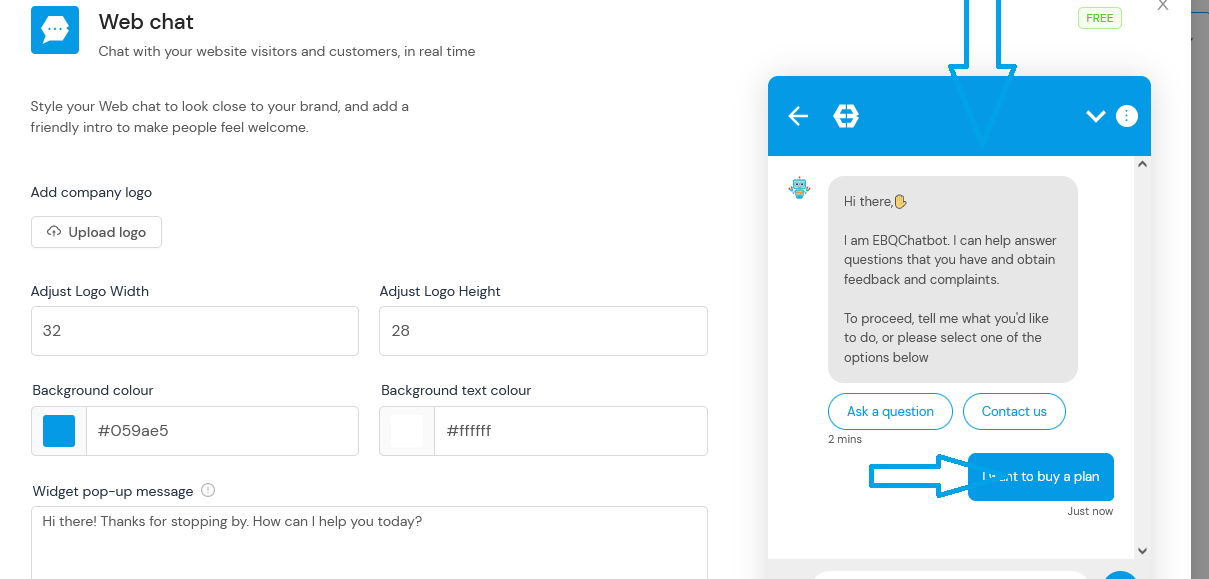
To choose your header color, click on Background Colour and select your preferred color.

Step 5: Choose your preferred text color the same way you selected the background color.
Step 6: Add your widget pop-up message.
This message invites customers to click the widget and begin chatting. It appears before the welcome message.

Click Save to apply your changes.
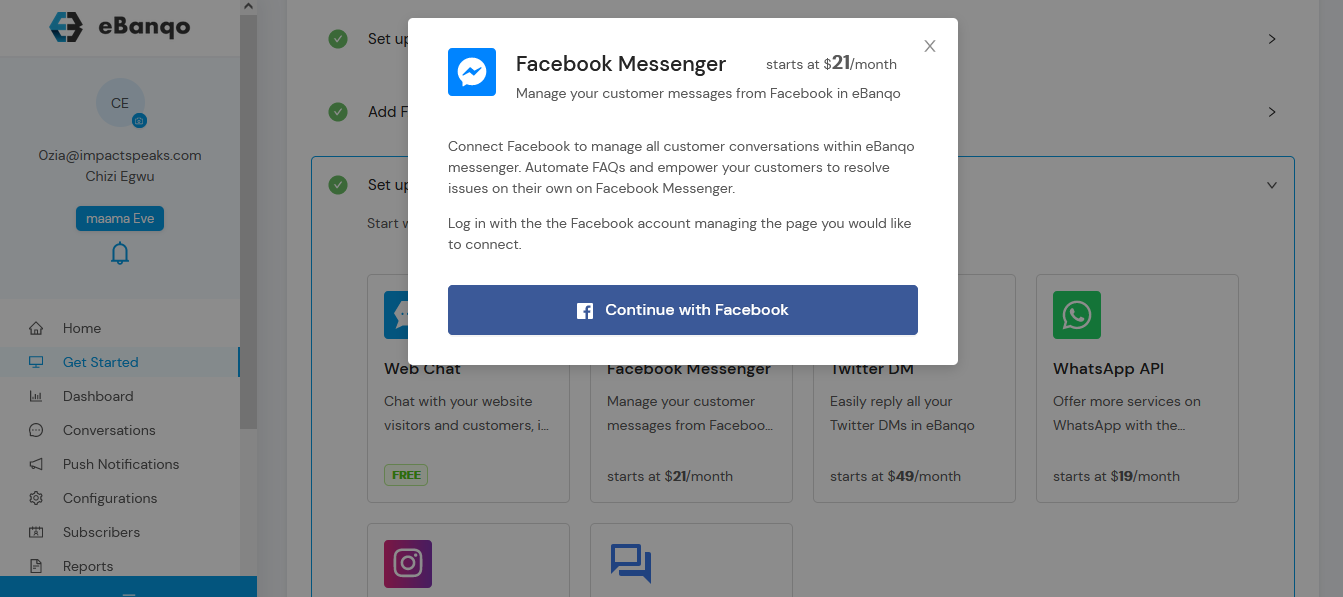
Connect Your Facebook Messenger
To connect your chatbot to Facebook Messenger, click Facebook Messenger and select Continue with Facebook.
Follow these steps:
- Click Continue with Facebook.
- You will see a notification asking you to confirm your Facebook account.
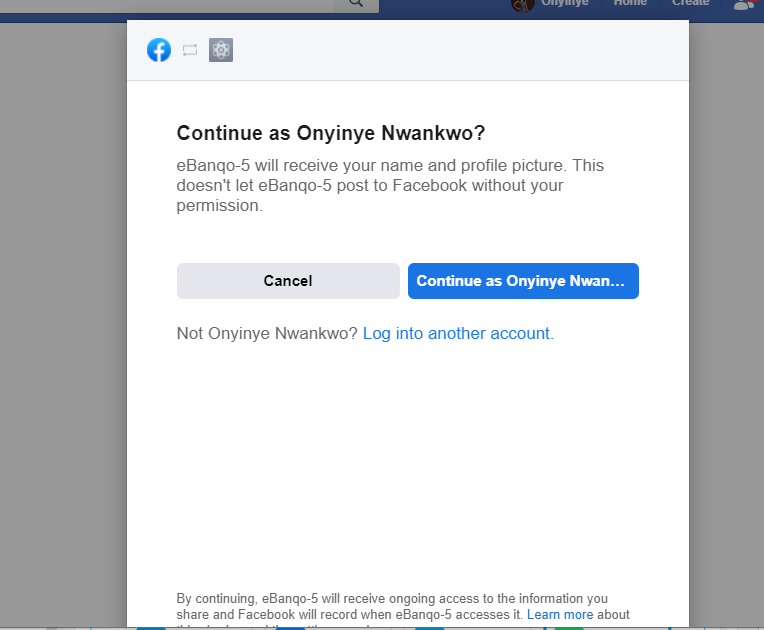
If the correct account is displayed, click Continue As. Otherwise choose Log into another account.
Next, select the Facebook page you want to connect.
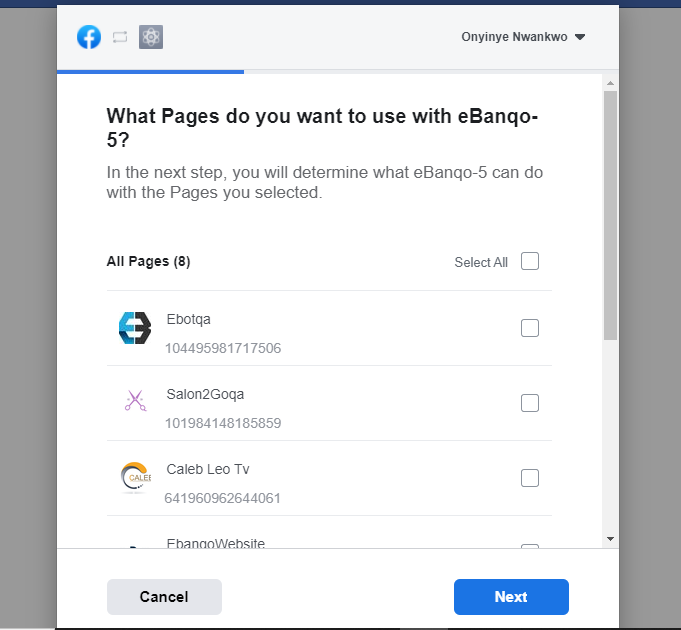
After selecting the page, you will see a confirmation screen.
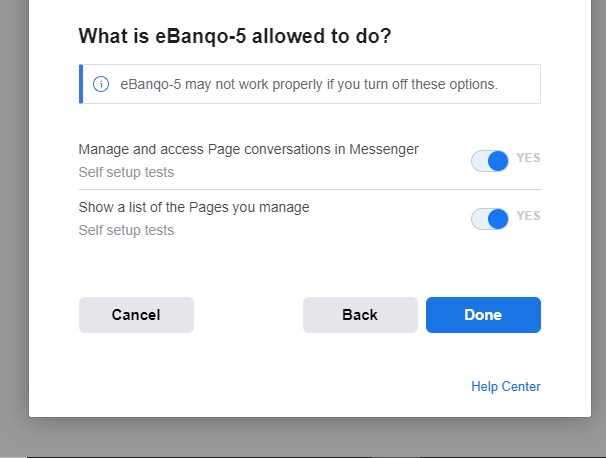
Click Done.
You will then receive a confirmation that your Facebook account is connected.

Click OK to return to your eBanqo Messenger dashboard.
Set Up Your WhatsApp
Note: WhatsApp is only available on paid plans. If you attempt to add it on a free plan, you will be prompted to upgrade.
- Select WhatsApp from the available channels.
- You will see two integration options: 360dialog or Gupshup.
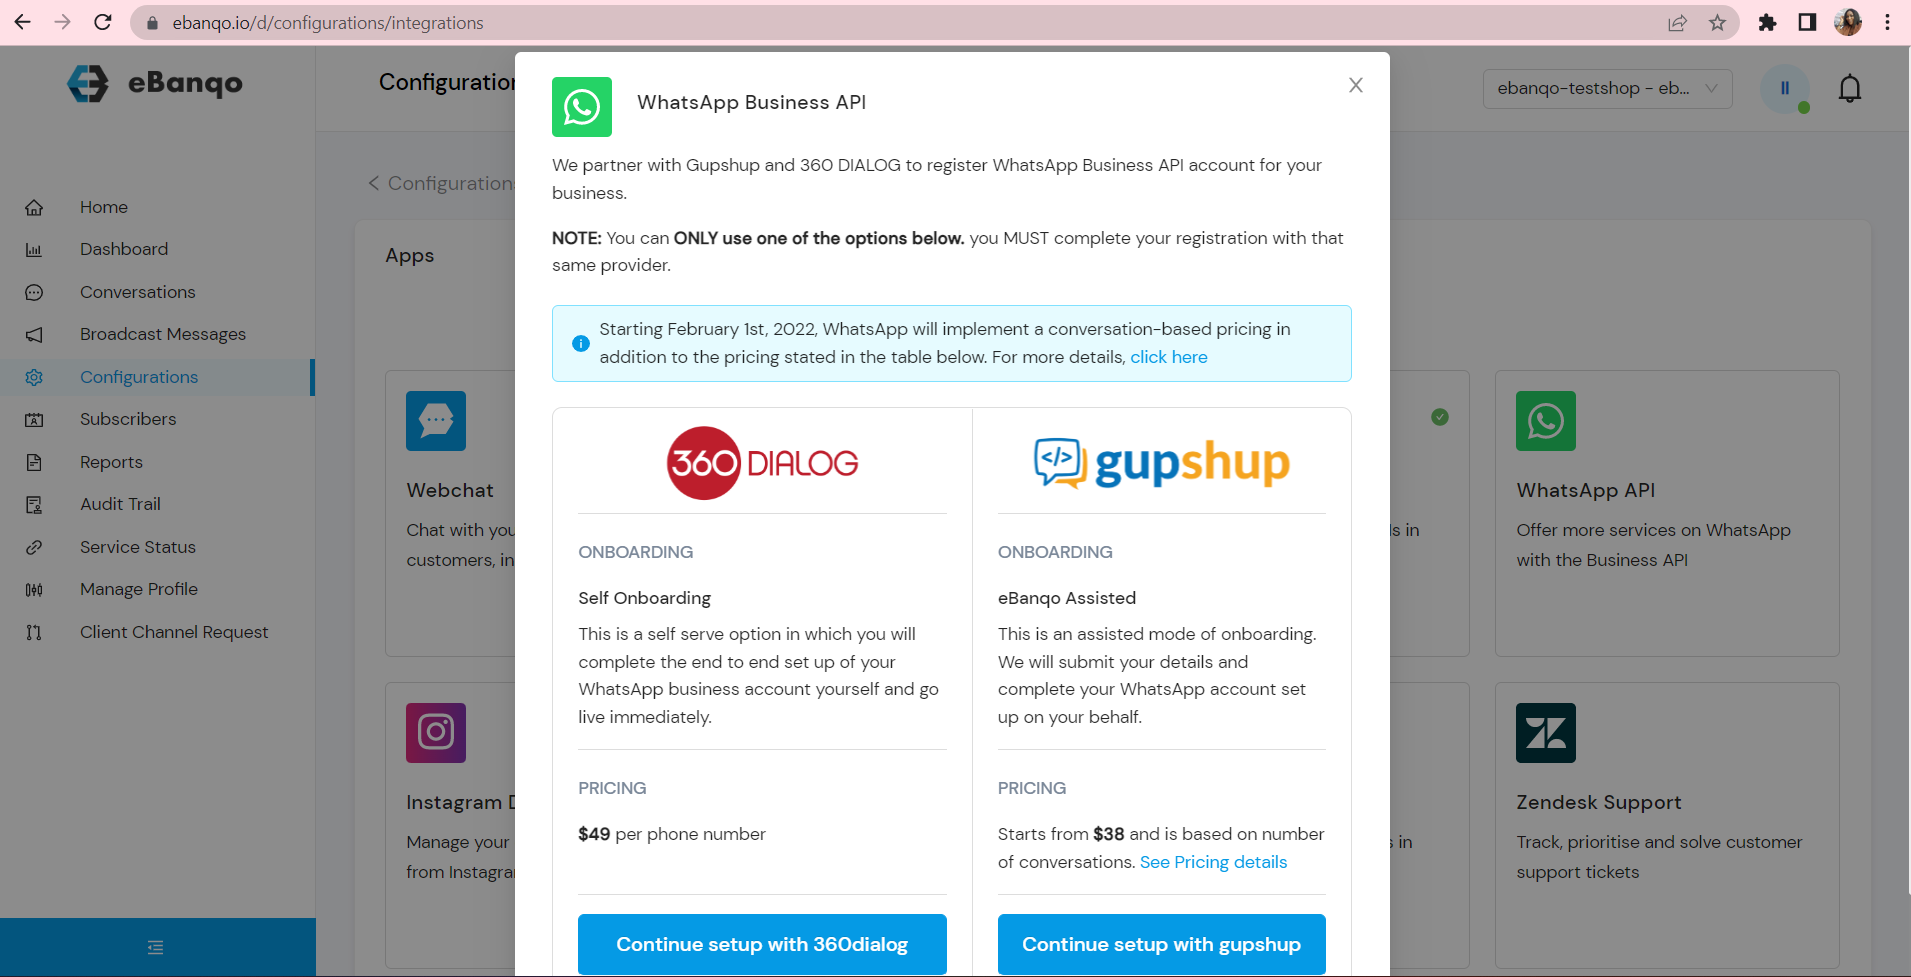
If using Gupshup, continue with the setup form and provide your business details.

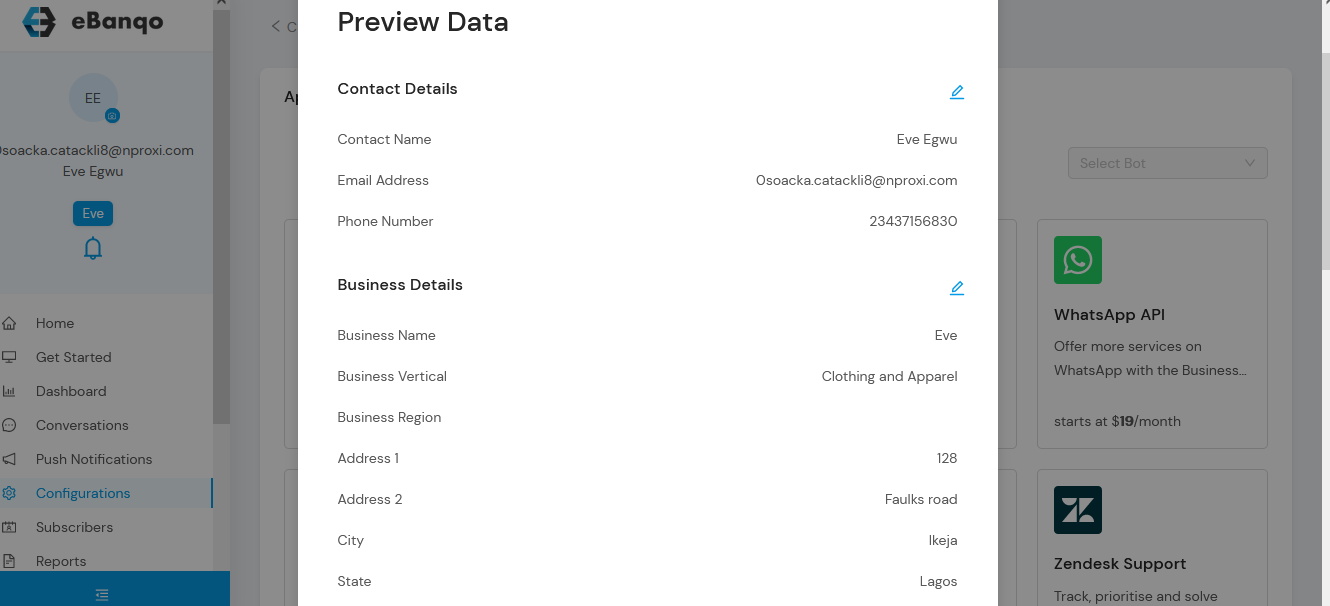
The form is pre-filled with your signup information. You can edit the details if necessary.
Complete the next pages of the form and review the information before submission.
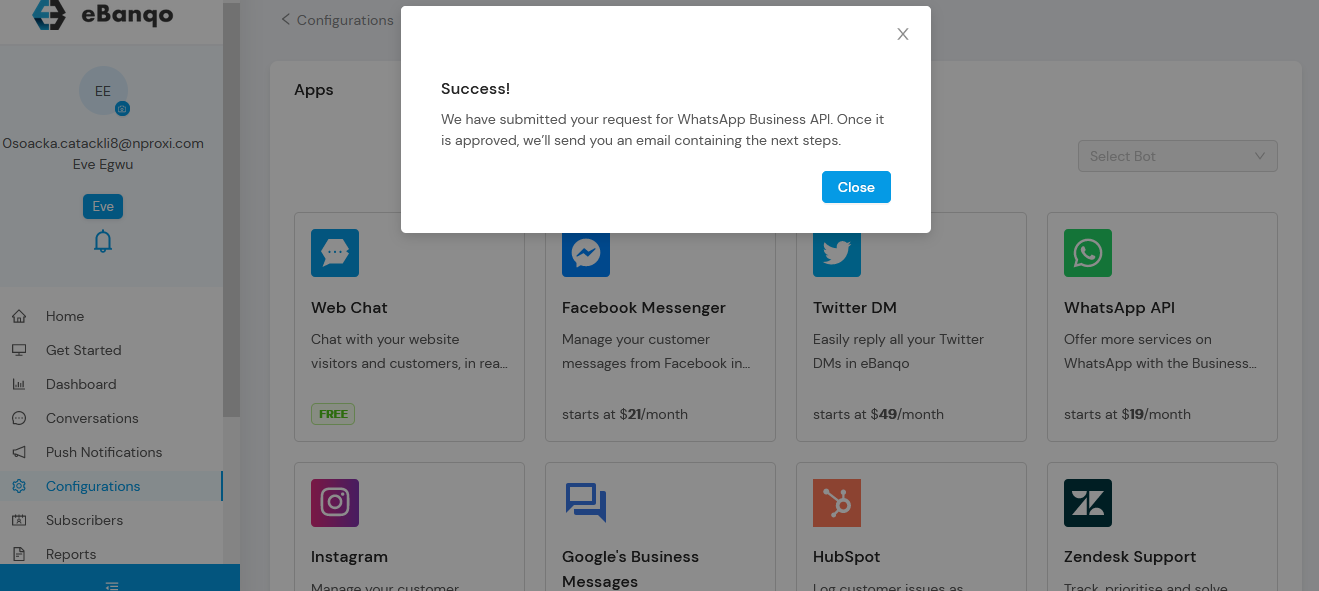
After submission, you will receive confirmation once WhatsApp approves the request.
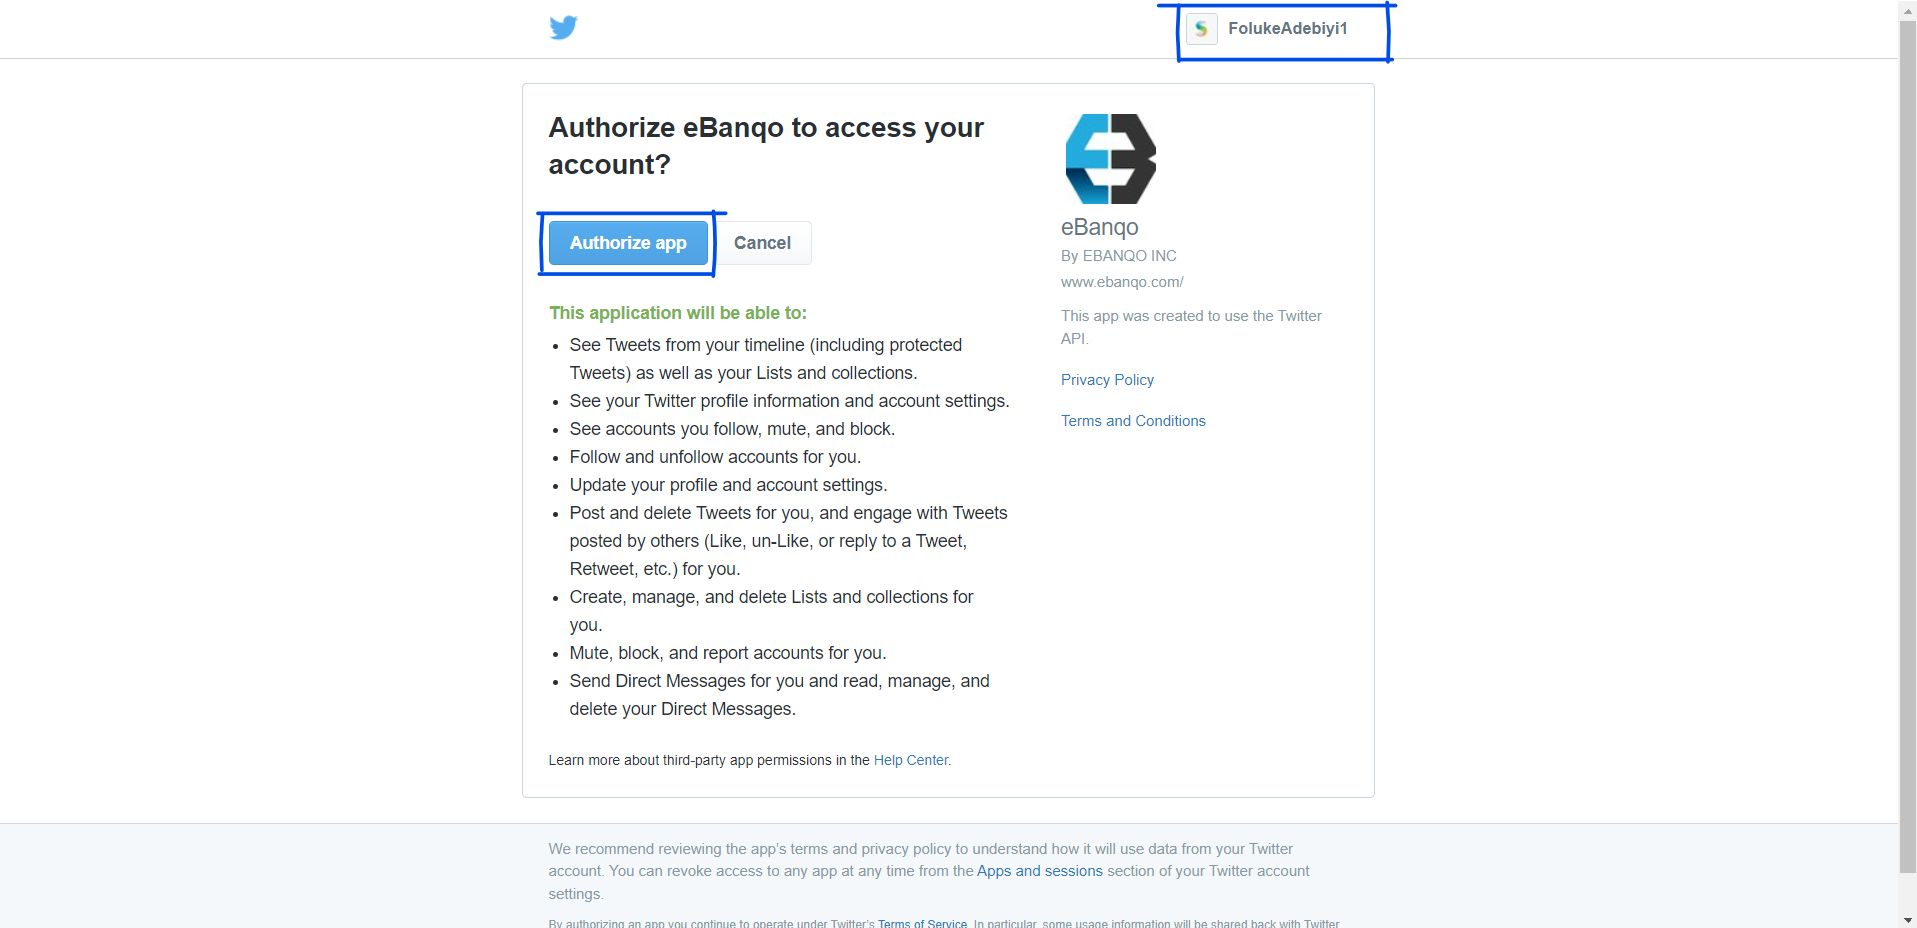
Set Up Your Twitter
Note: Twitter integration is available on upgraded plans.
- Select Twitter from the channels list.
Click Continue with Twitter.
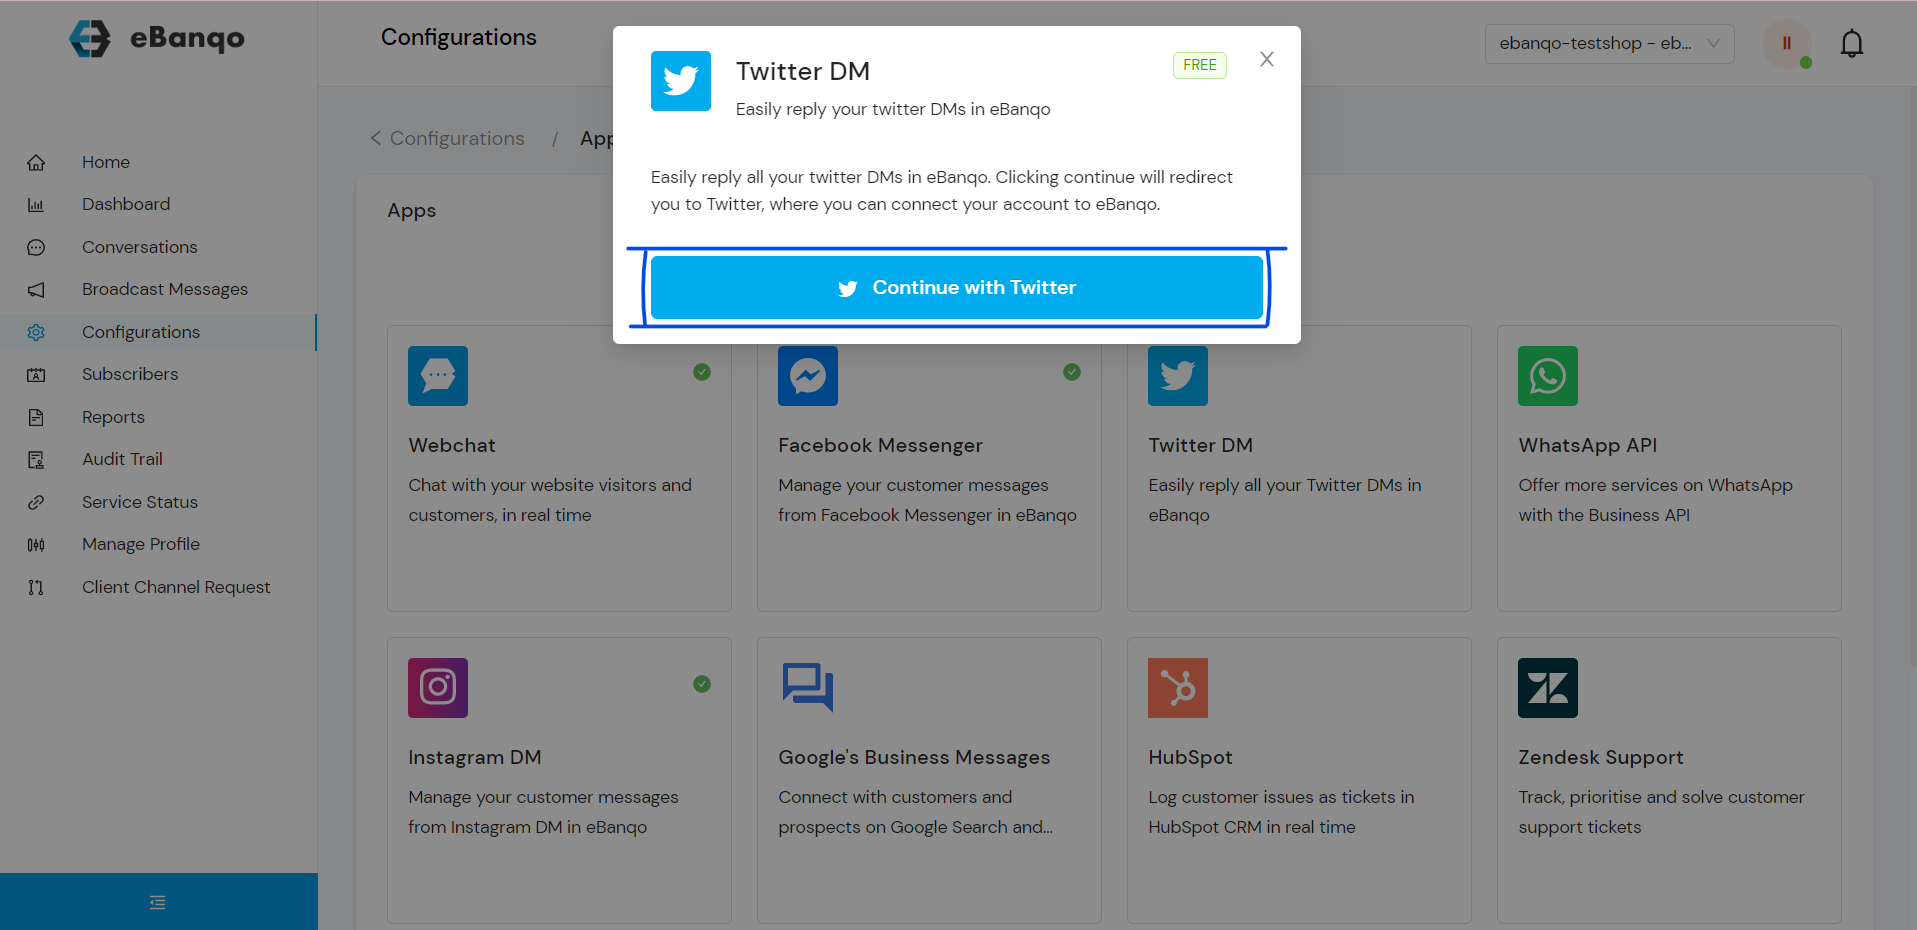
Select Authorize App to connect your Twitter account.
Once connected, you will see a success notification confirming that your Twitter account is linked.
