Reports give you insight into platform analytics. Some reveal your agent’s activities, others depict how often your customers are using the services in your chatbot.
eBanqo Messenger has six (6) broad categories of reports. Here’s a summary of what each of them is:
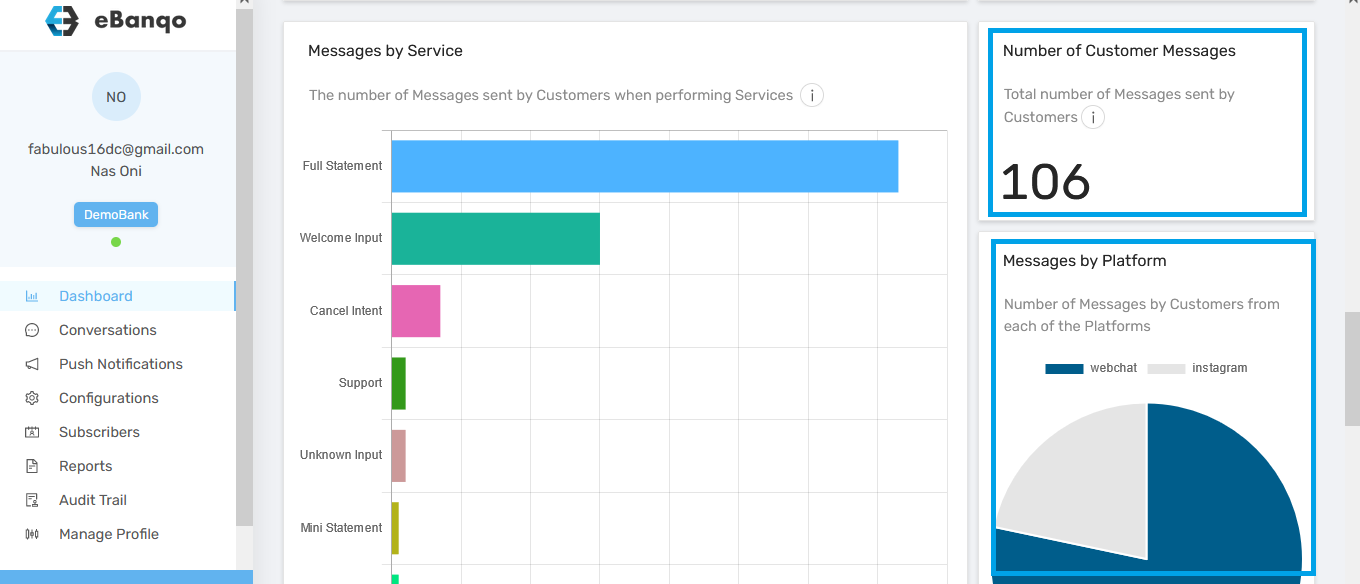
1. Messages
Messages tell you the total number of messages exchanged between customers, your bot and support people on your platform. It has two sub-categories:
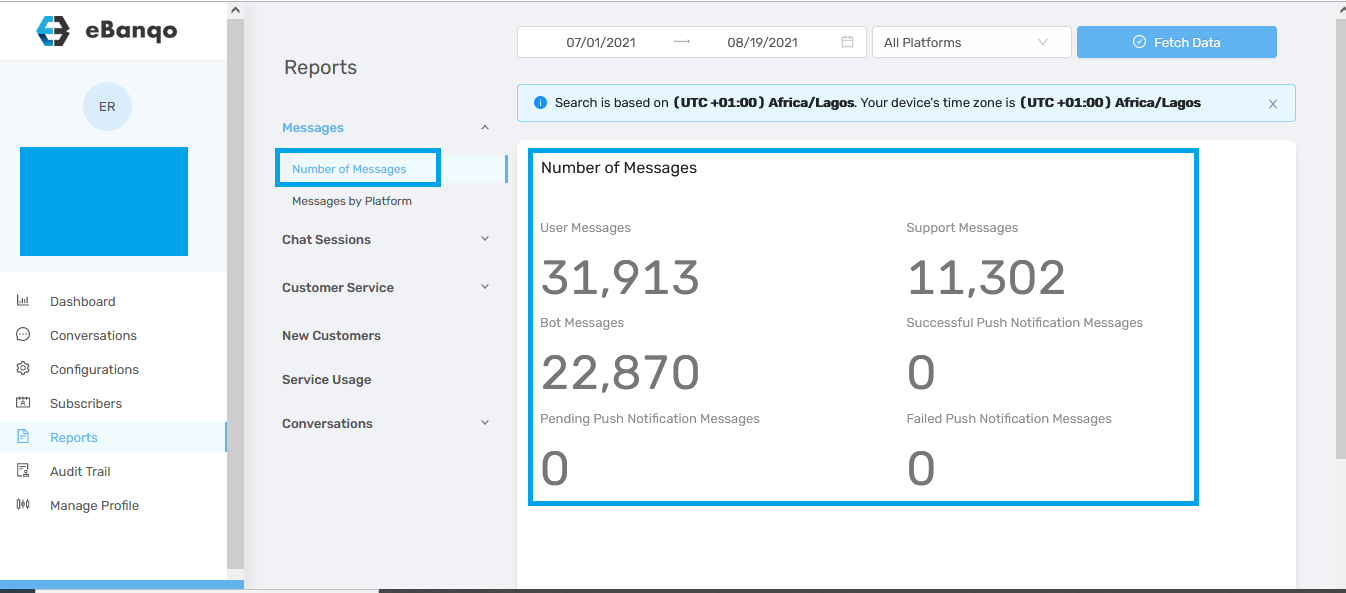
a. Number of Messages: This is the sum of all messages either from a platform of your choice or all the platforms your bot is active on. These messages are divided into different categories:
- User messages refer to all messages from customers
- Support messages which is the sum of all messages exchanged between your customers and support reps
- Bot messages refer to messages between your customers and your chatbot
- Successful push notifications is the number of broadcast messages you’ve sent
- Pending push notifications refer to broadcast messages that are yet to be delivered.
- Failed push notifications are those that weren’t delivered.
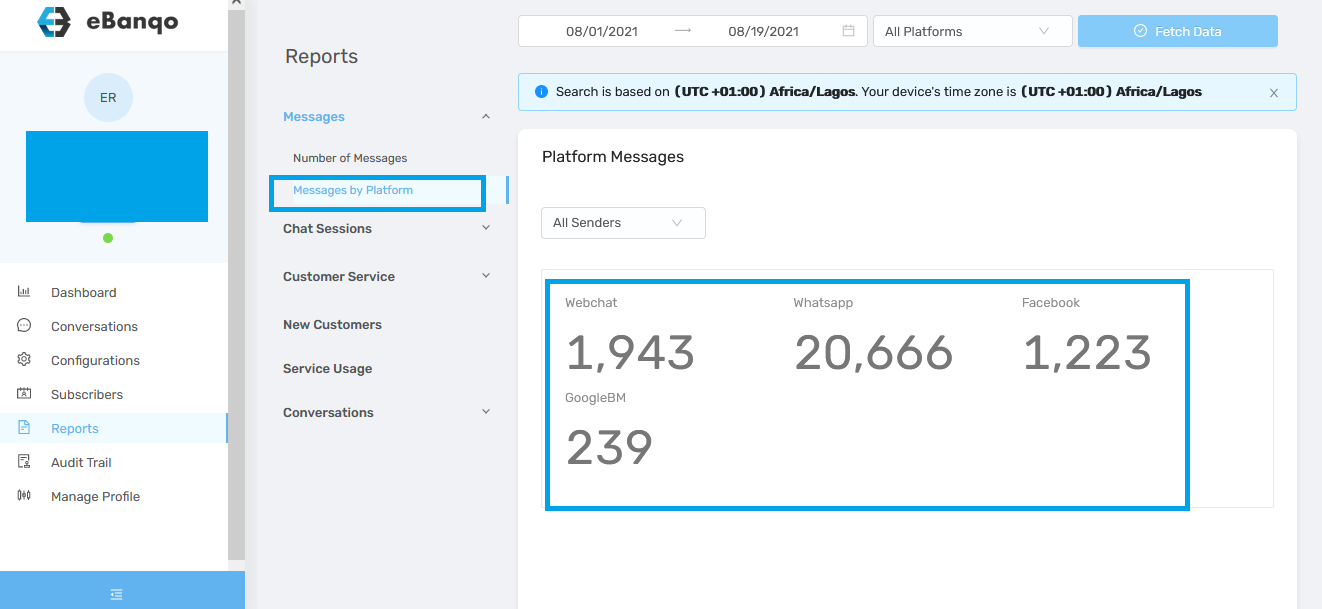
b. Messages by platform: Messages by the platform is the sum of all messages exchanged on the platforms you’re active on.
In the later part of this article, we’ll show you how to find and download reports
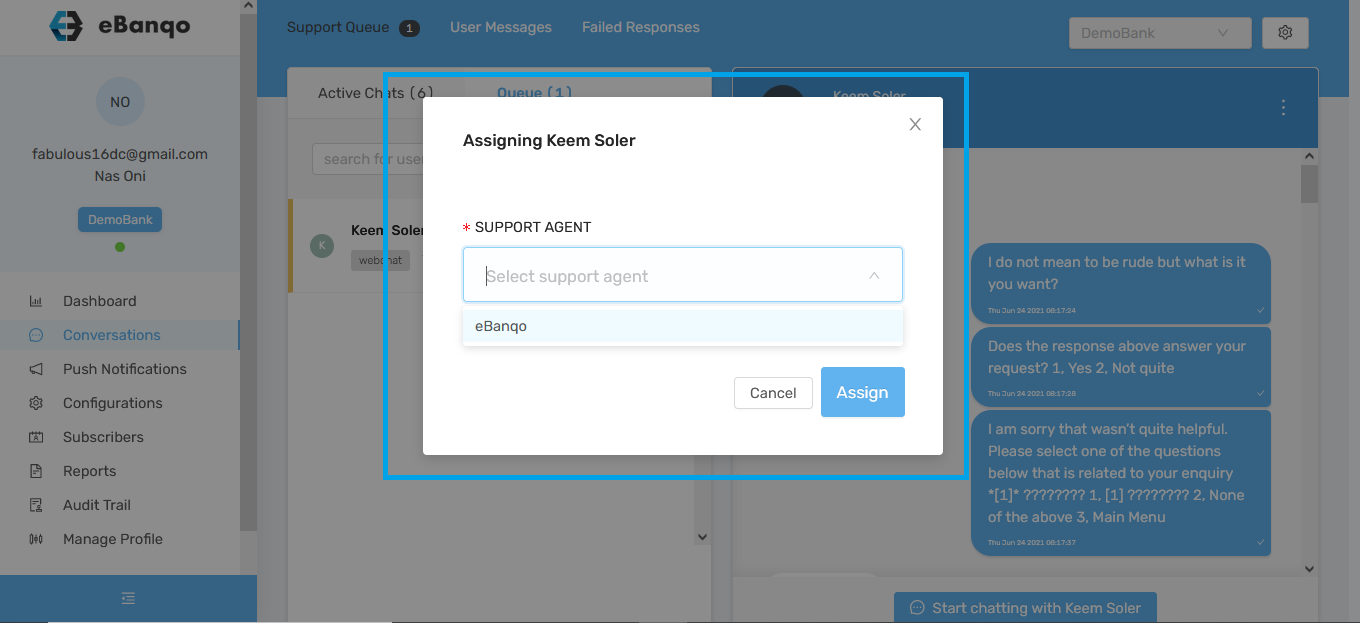
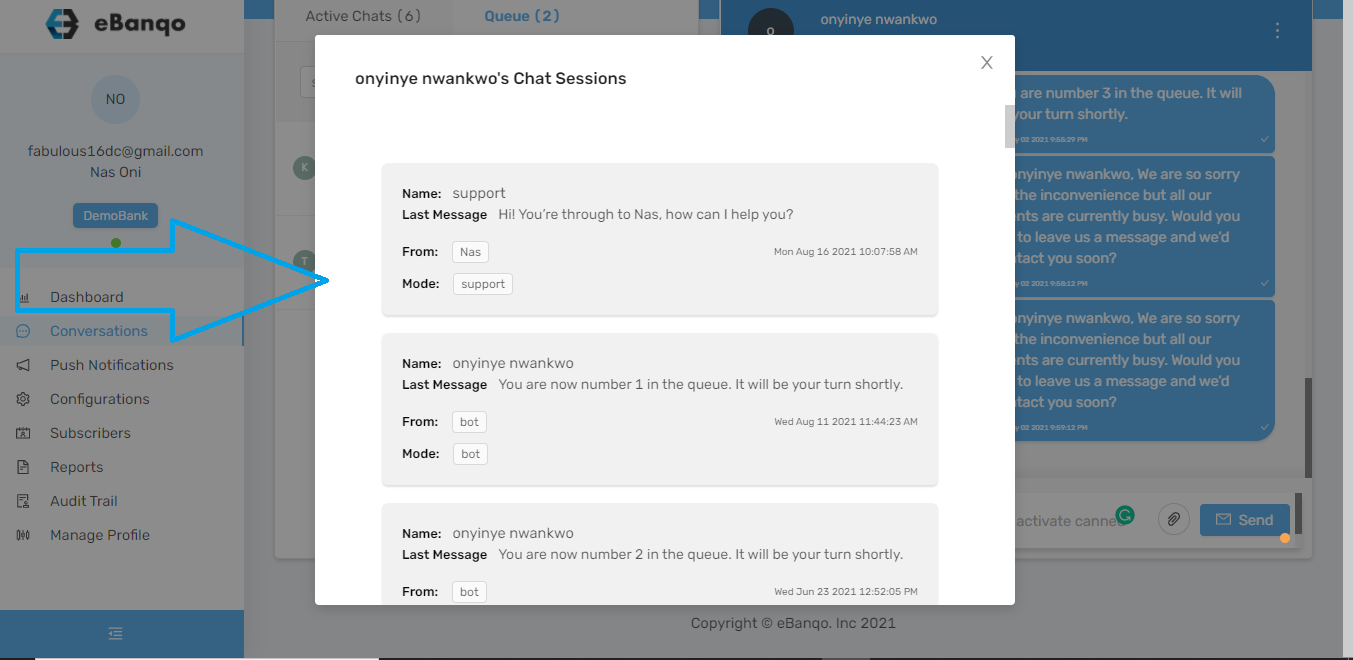
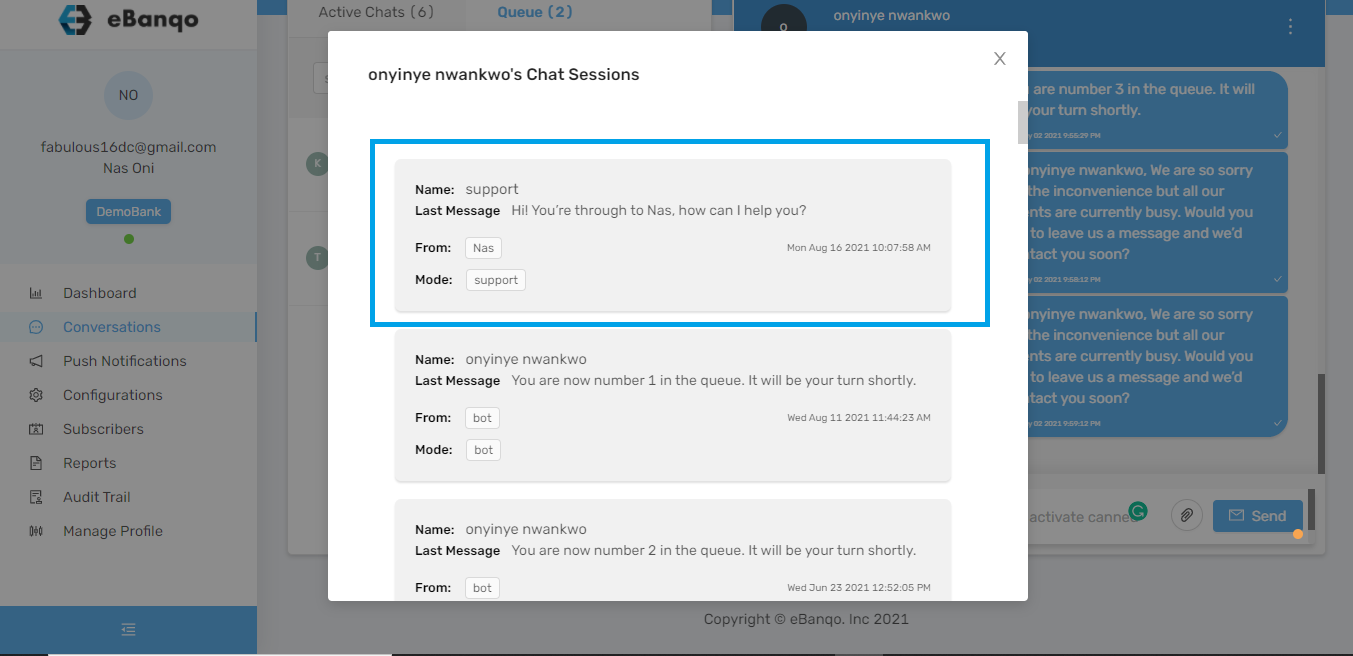
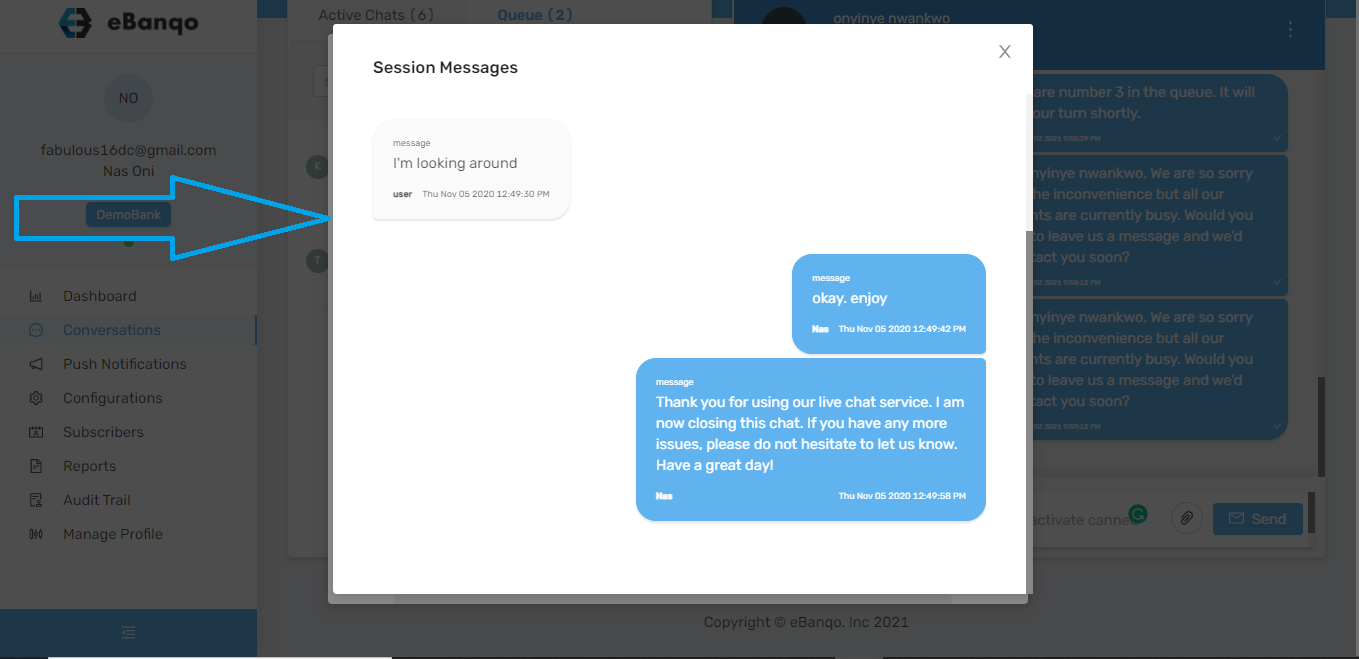
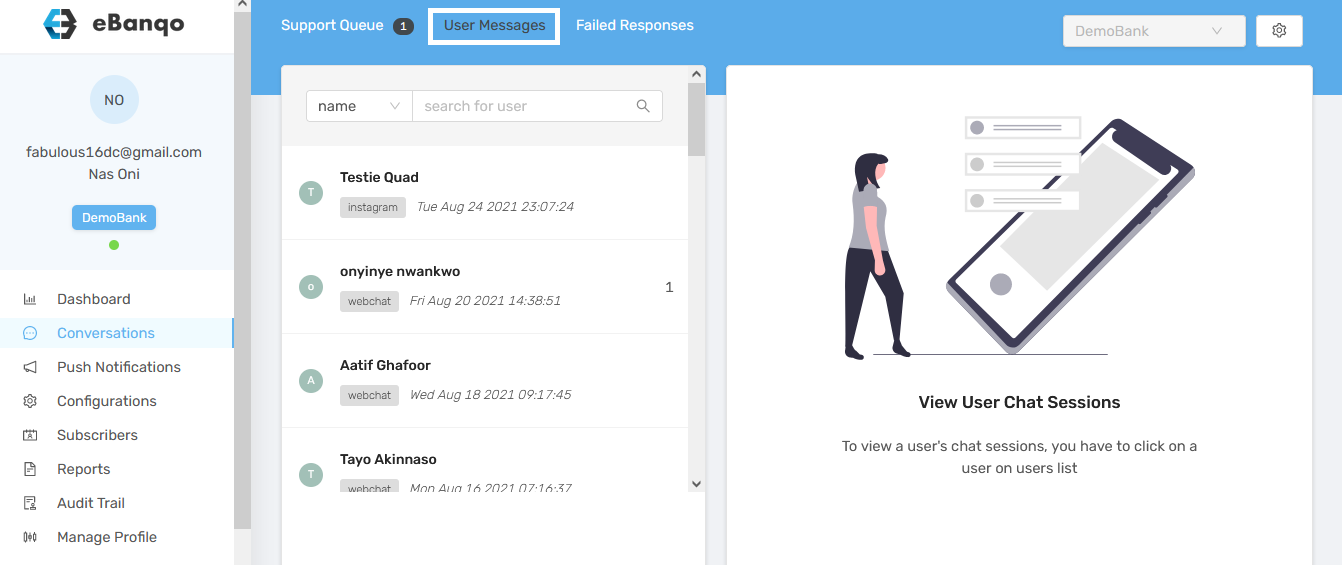
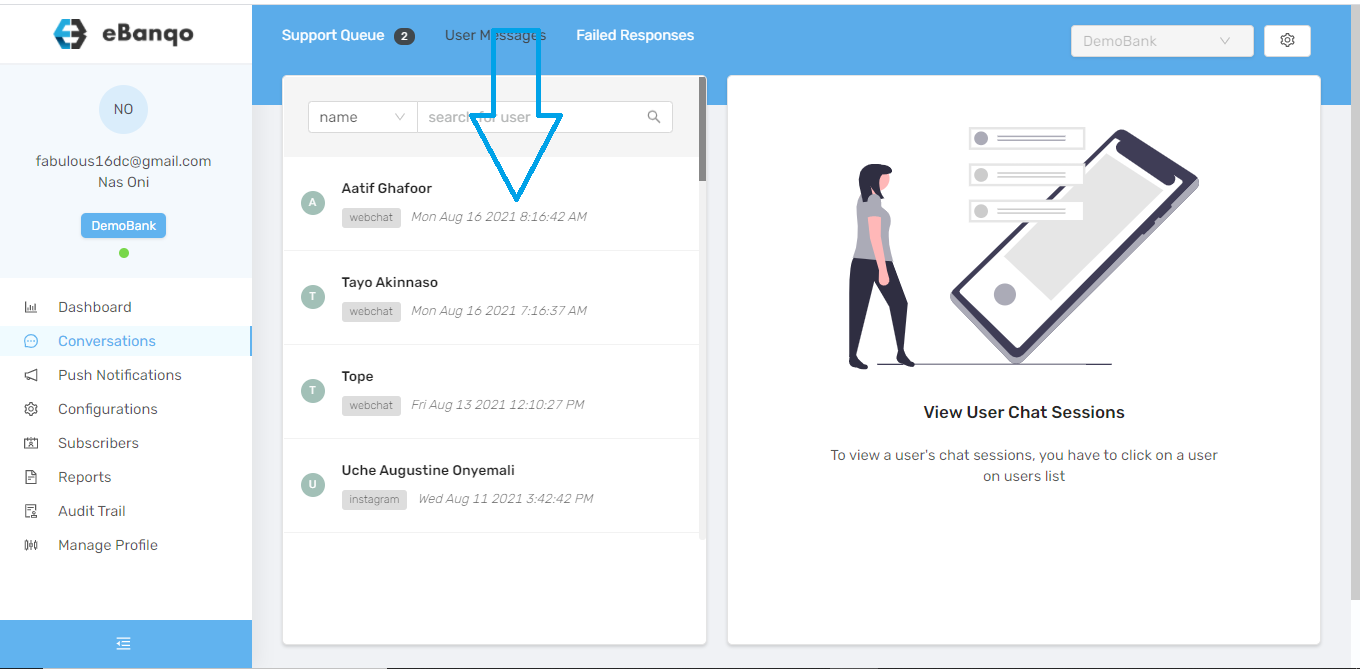
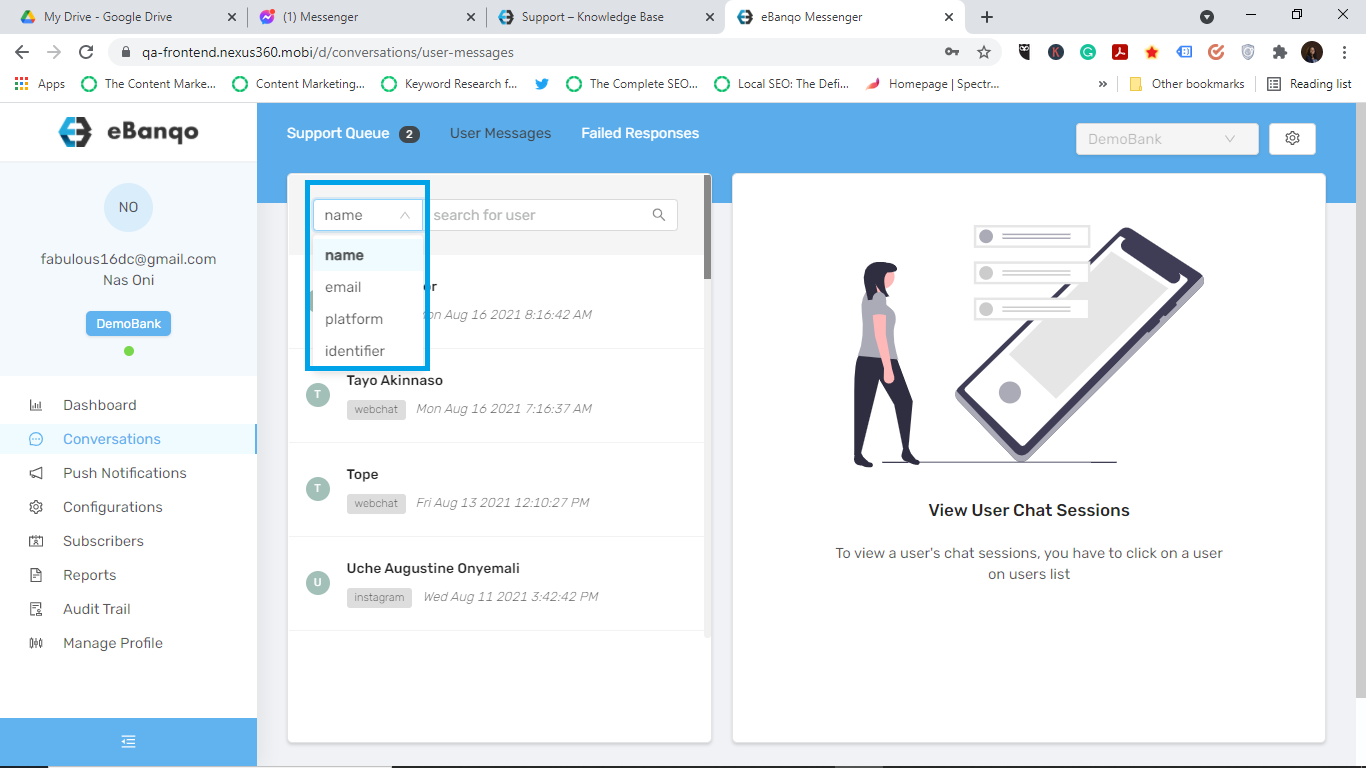
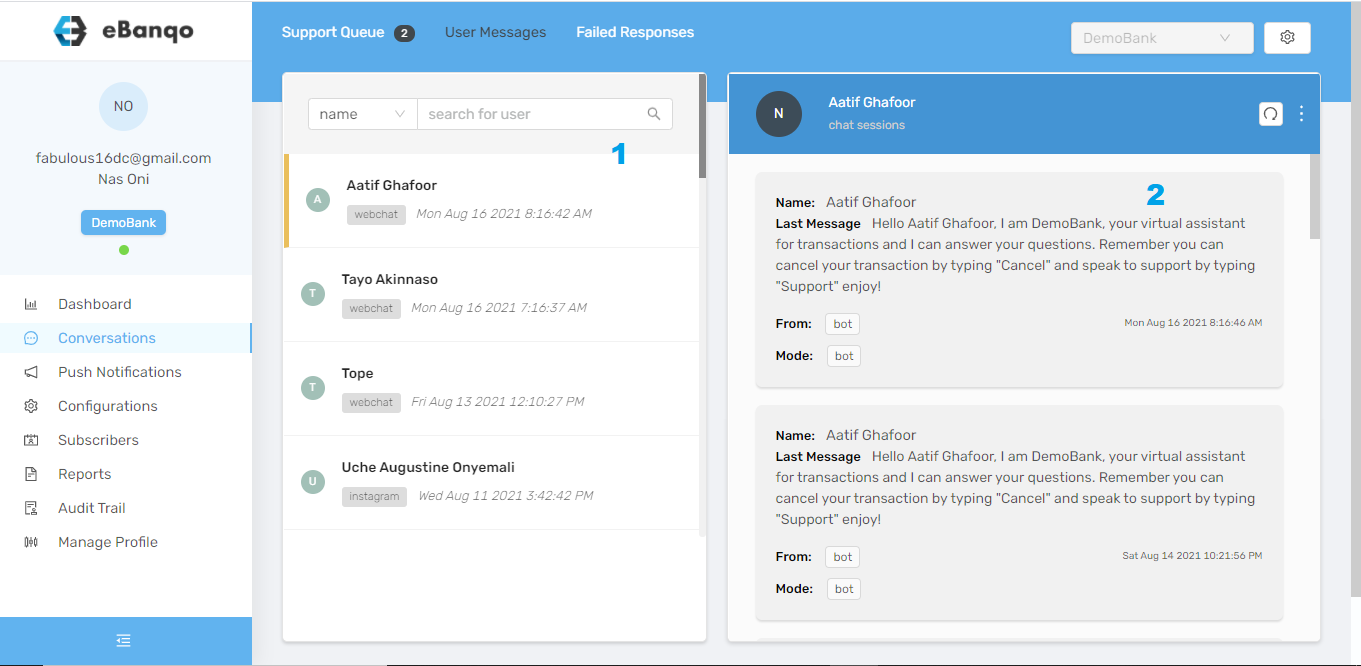
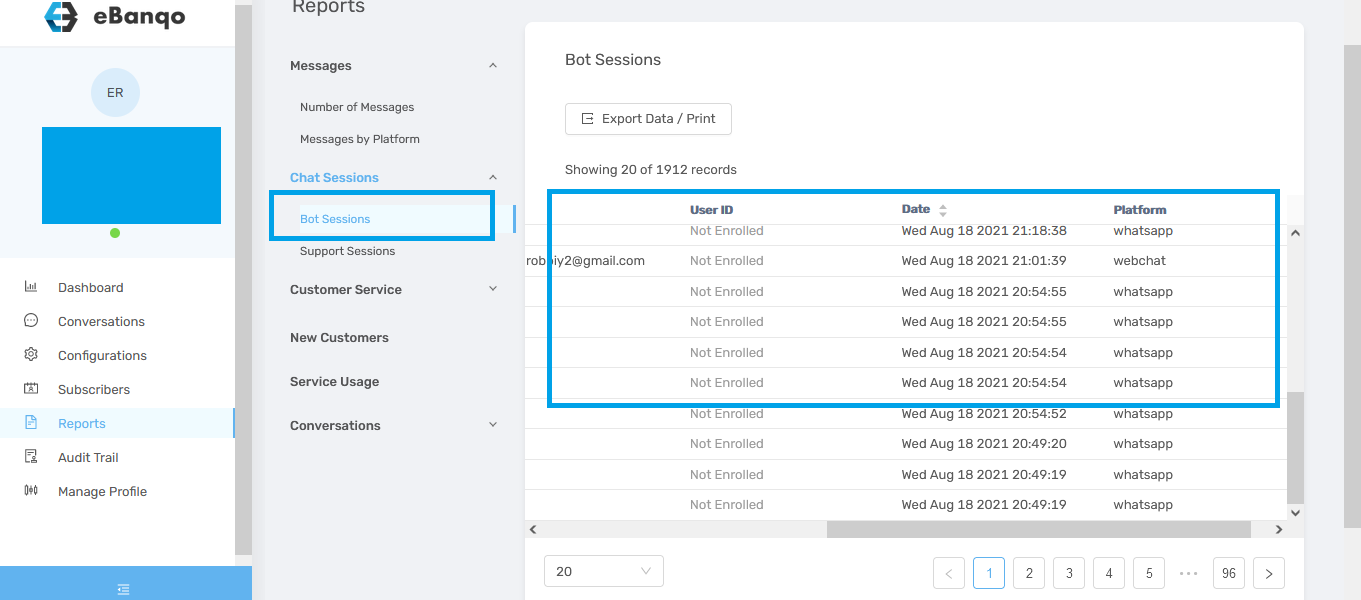
2. Chat Sessions
Chat Sessions is a list of customers that have chatted with you. It’s divided into two subcategories: Bost sessions and Support sessions.
a. Bot sessions: This is a list of customers who’ve chatted with your bot. This list contains their names, platform, and date of last chat.
b. Support sessions; It contains a list of customers who have chatted with your support team. Just like bot session, this list contains their names, platform, and date of last chat.
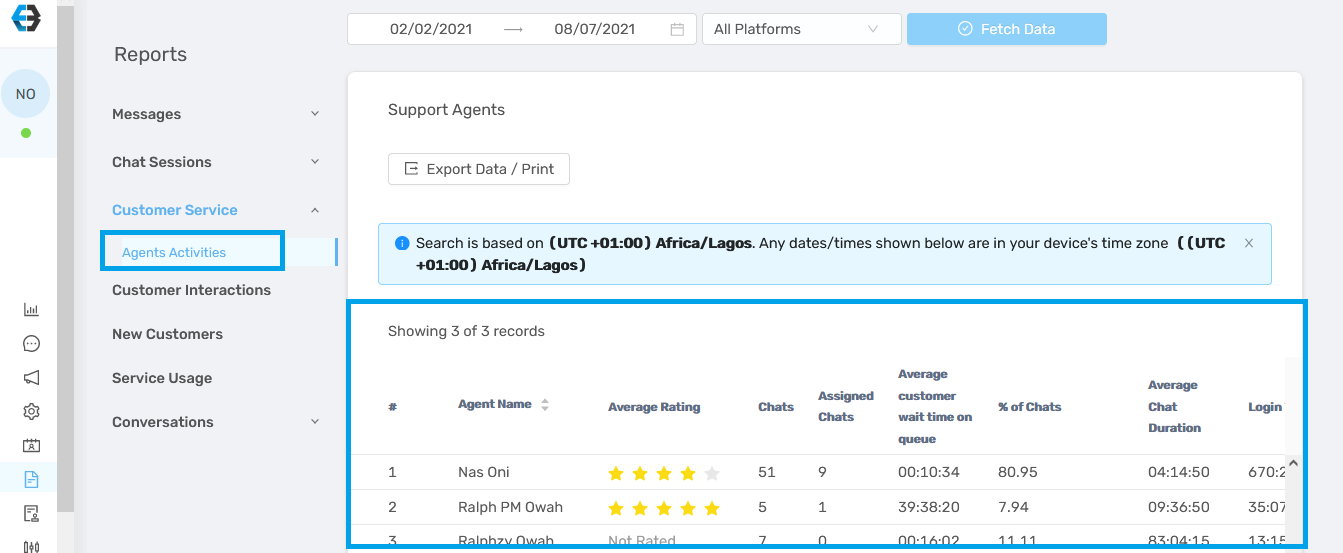
3. Customer Service
Customer service report contains information about your agents’ activities. If you’re looking for data on your agents’ performance, you’ll find it here.
This report contains your agent’s name, the number of customers they’ve chatted with in a selected timeframe, the average rating and how often they log into the platform.
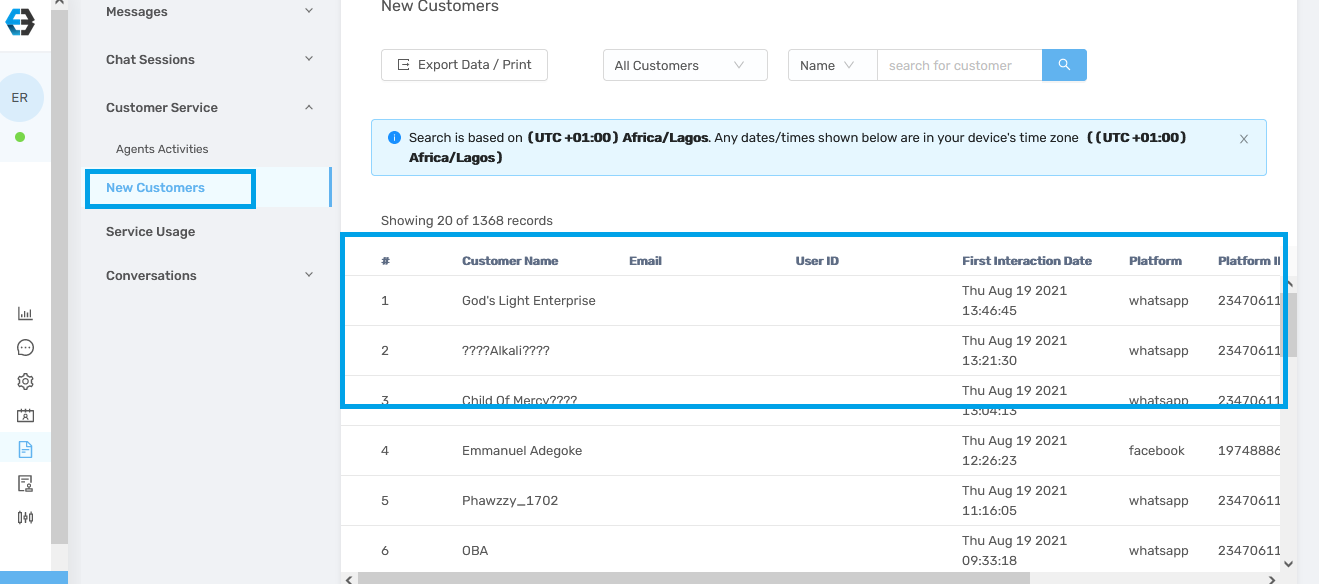
4. New customers
This report shows you the number of customers who’re chatting with you for the first time on a selected channel or all your channels.
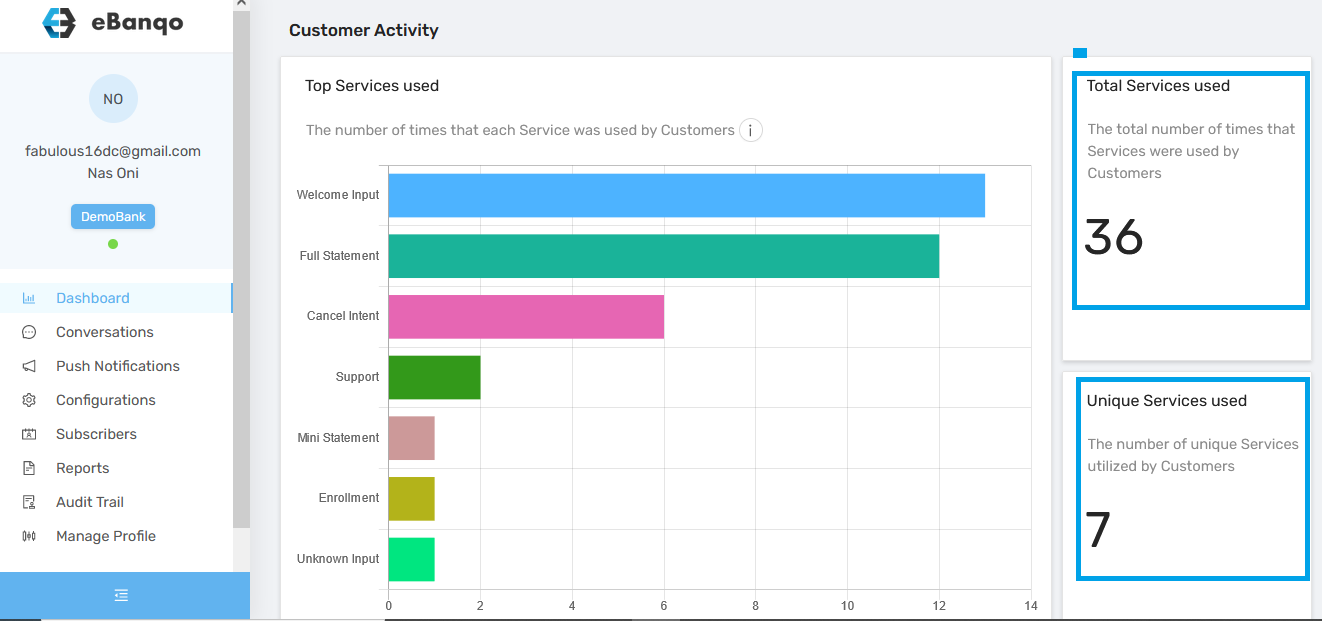
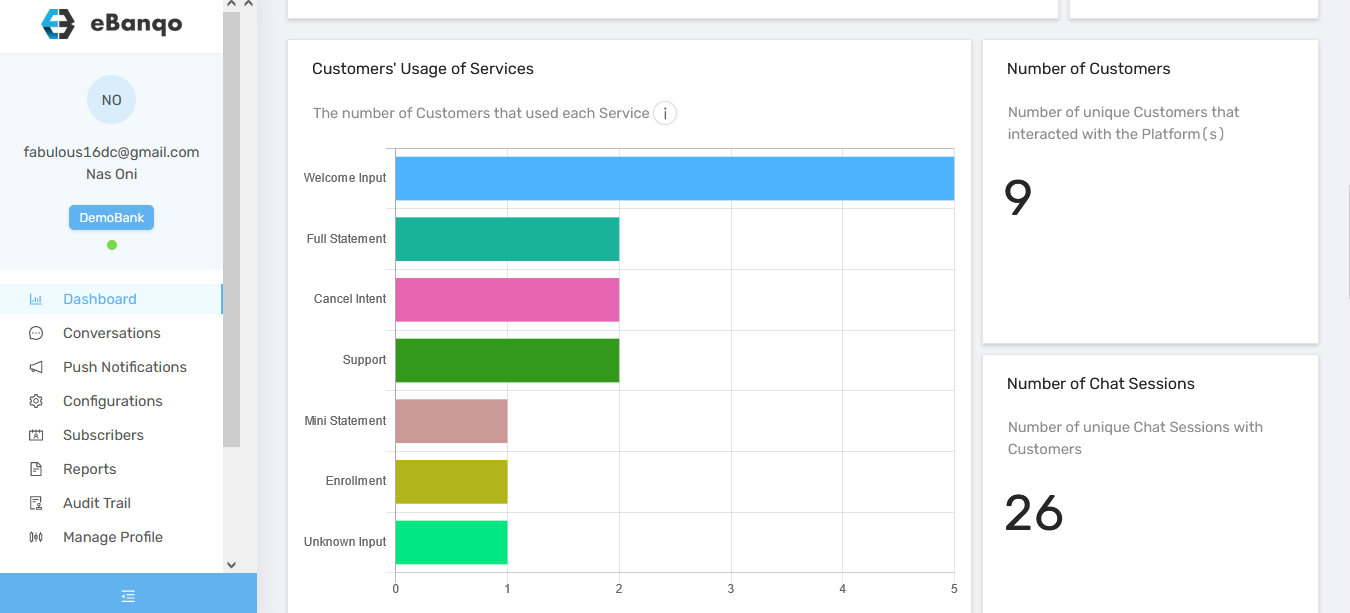
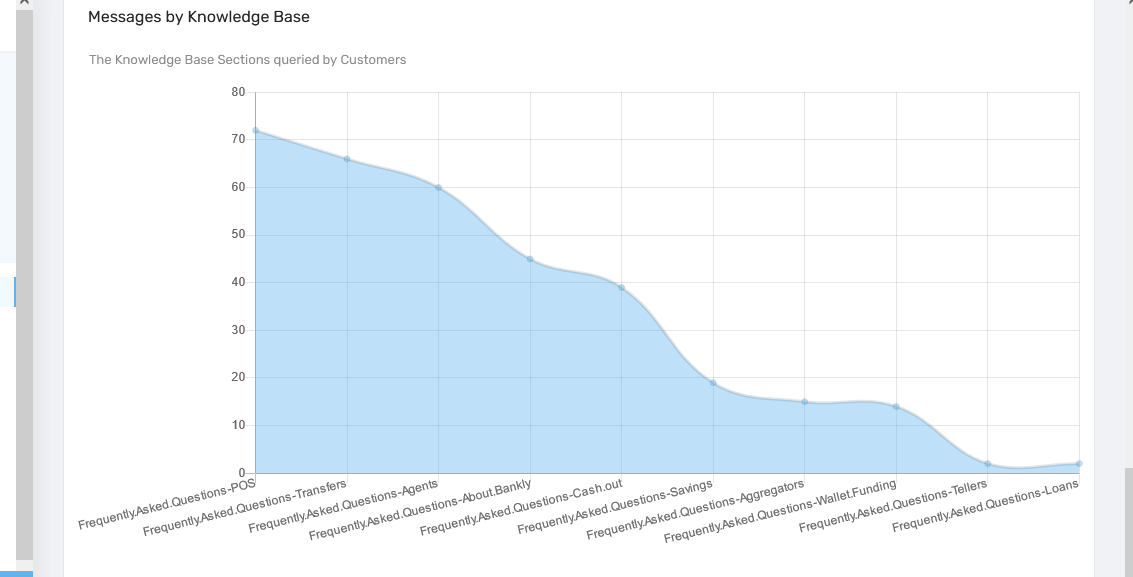
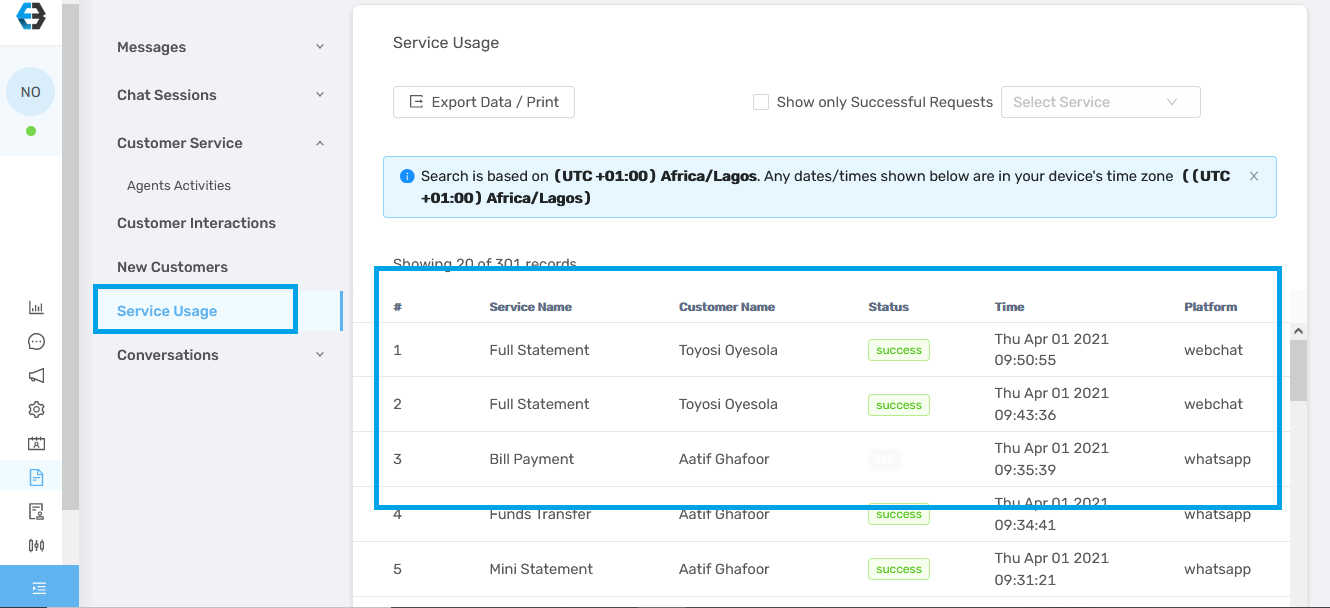
5. Service Usage
Service usage gives you insight into the services each customer performed on your chatbot, the status of the transaction (successful or unsuccessful) date and the channel the transaction was carried out.
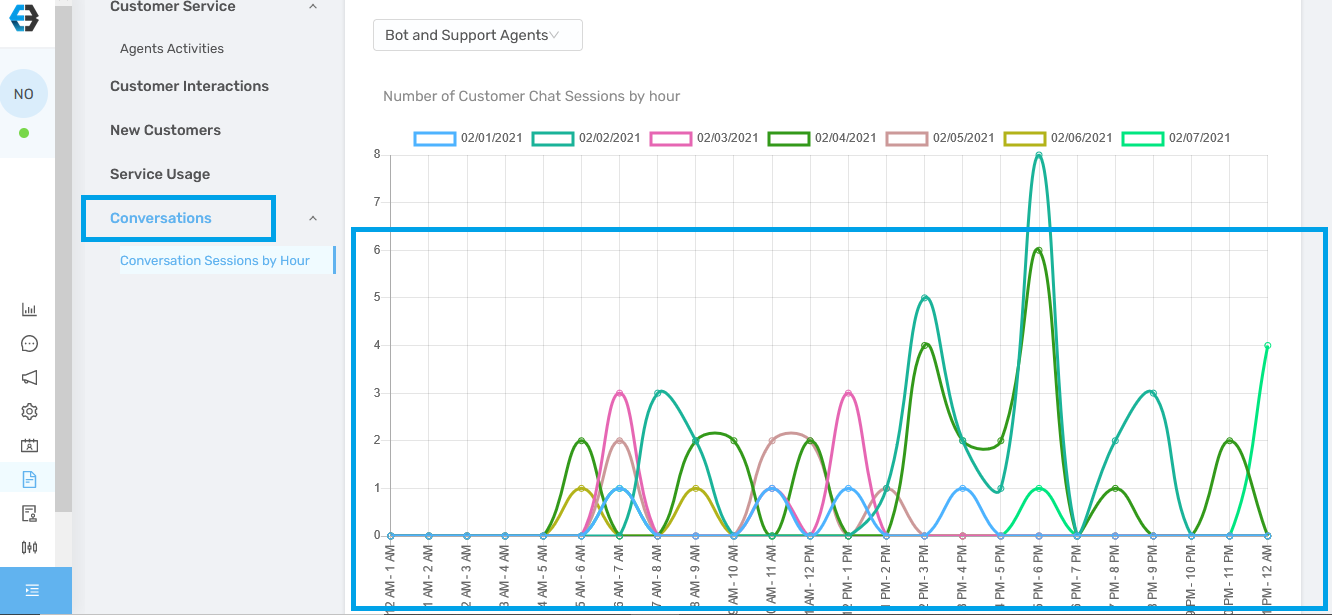
6. Conversations
Conversations give you insight into your peak hours. You see the conversation flow on selected days and hour, and can use the data to make more accurate predictions.
How to retrieve reports
You can print and download your reports as PDF, Excel, and CSV from eBanqo Messenger. Follow these steps below to export your documents. Note that these steps work for any report you want to export.
1. Log in to your account and click on reports
2. On the right hand tab, click on the report you want to download
3. Once the report loads, follow these steps to export your reports.

Step 1: Click on the report you want to export
Step 2: Select the date range. When you click on the date selector, it’ll load like the image below:
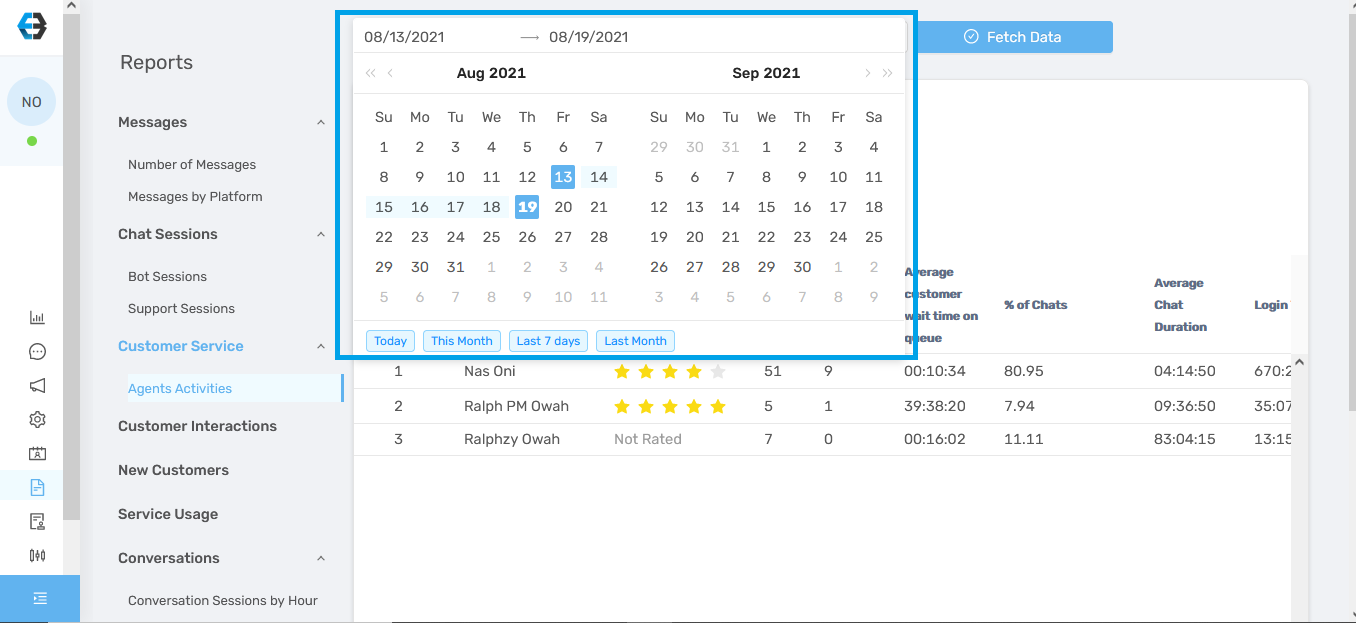
Select the date range for the report you want to view. Note that you cannot view or download reports older than six (6) months.
Step 3: Next, select the platform report you want to view.
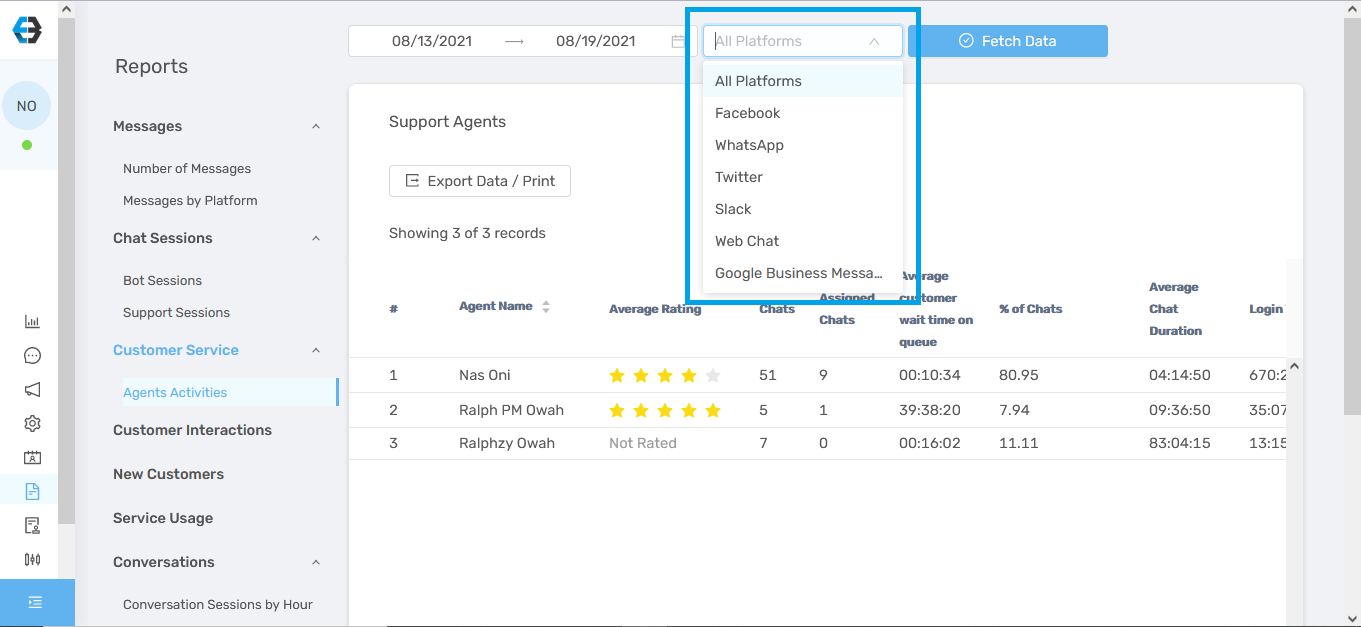
If you want to view or download the report for all your platforms, select, All platforms
Step 4: Click on fetch Data to retrieve your report.
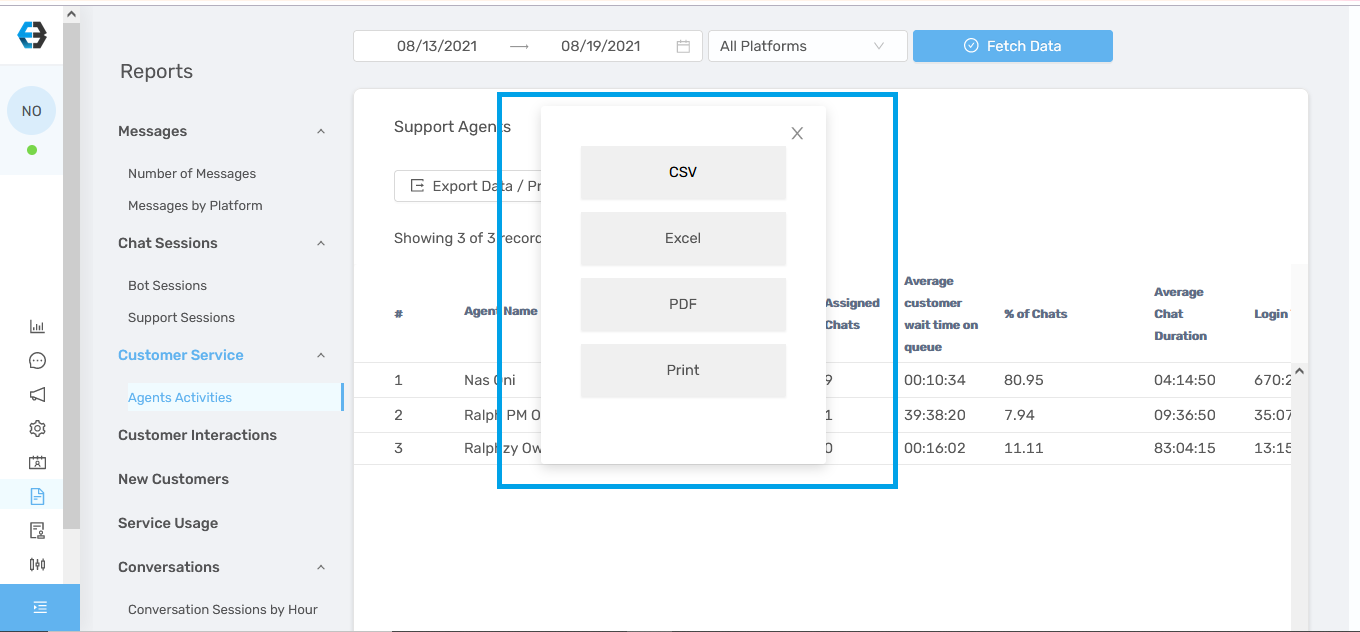
Step 5: You can either print, download as PDF, as CSV or Excel.
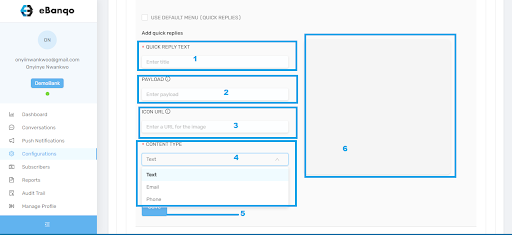
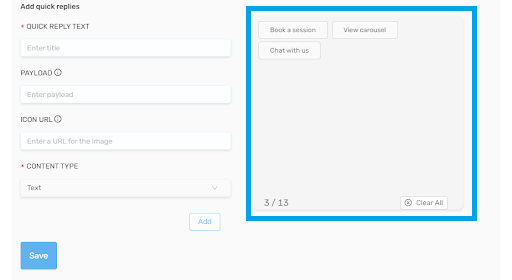
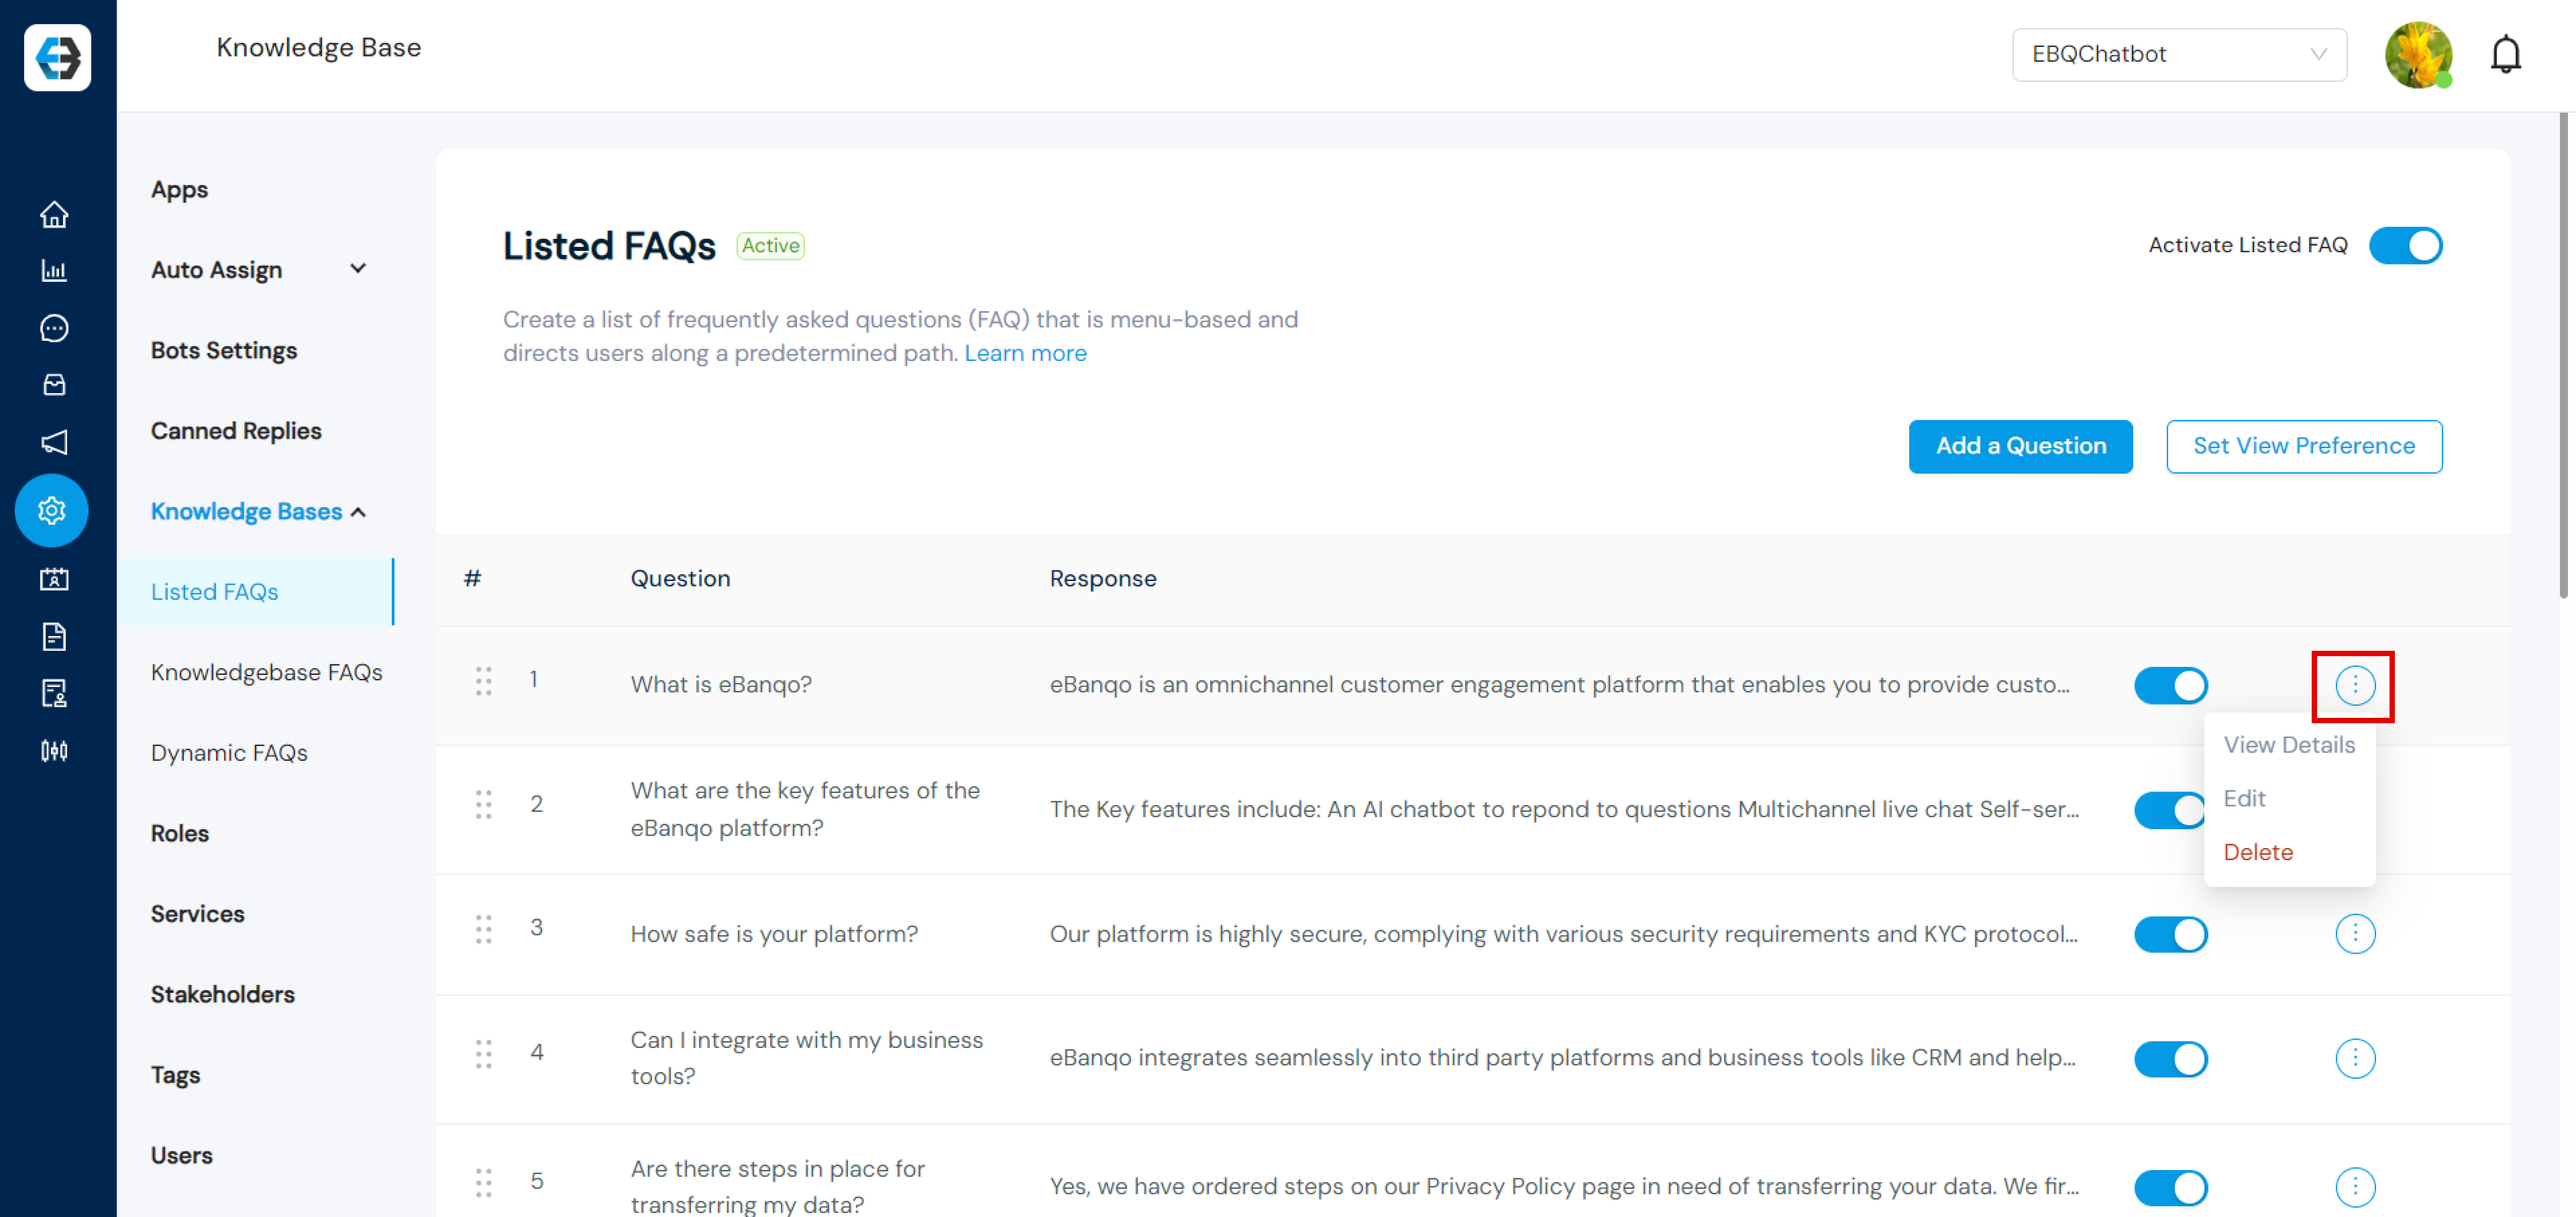
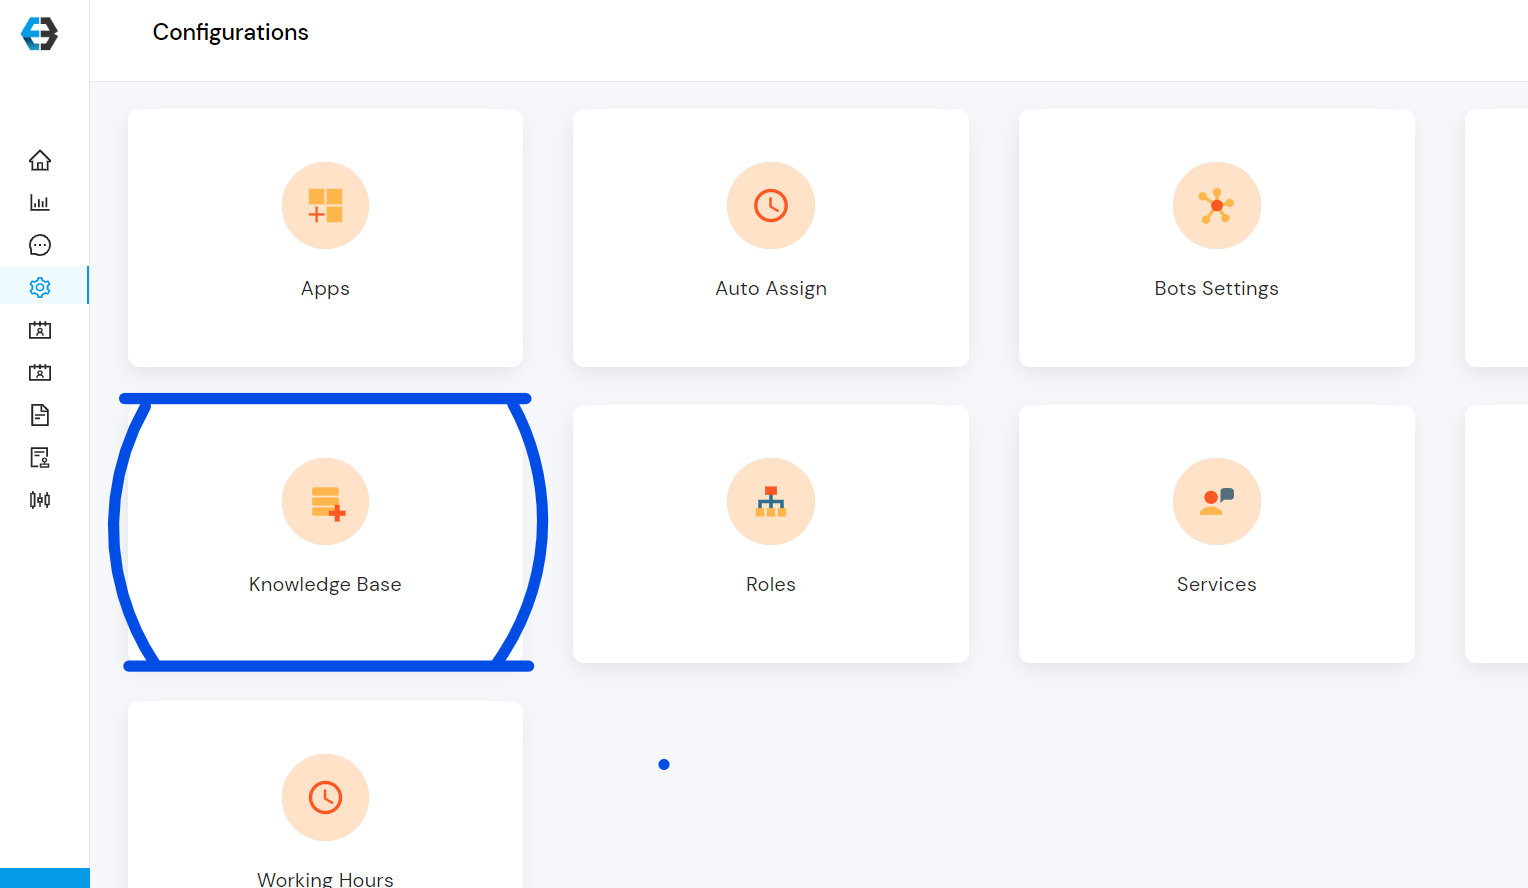 3. Select Listed FAQs and activate it
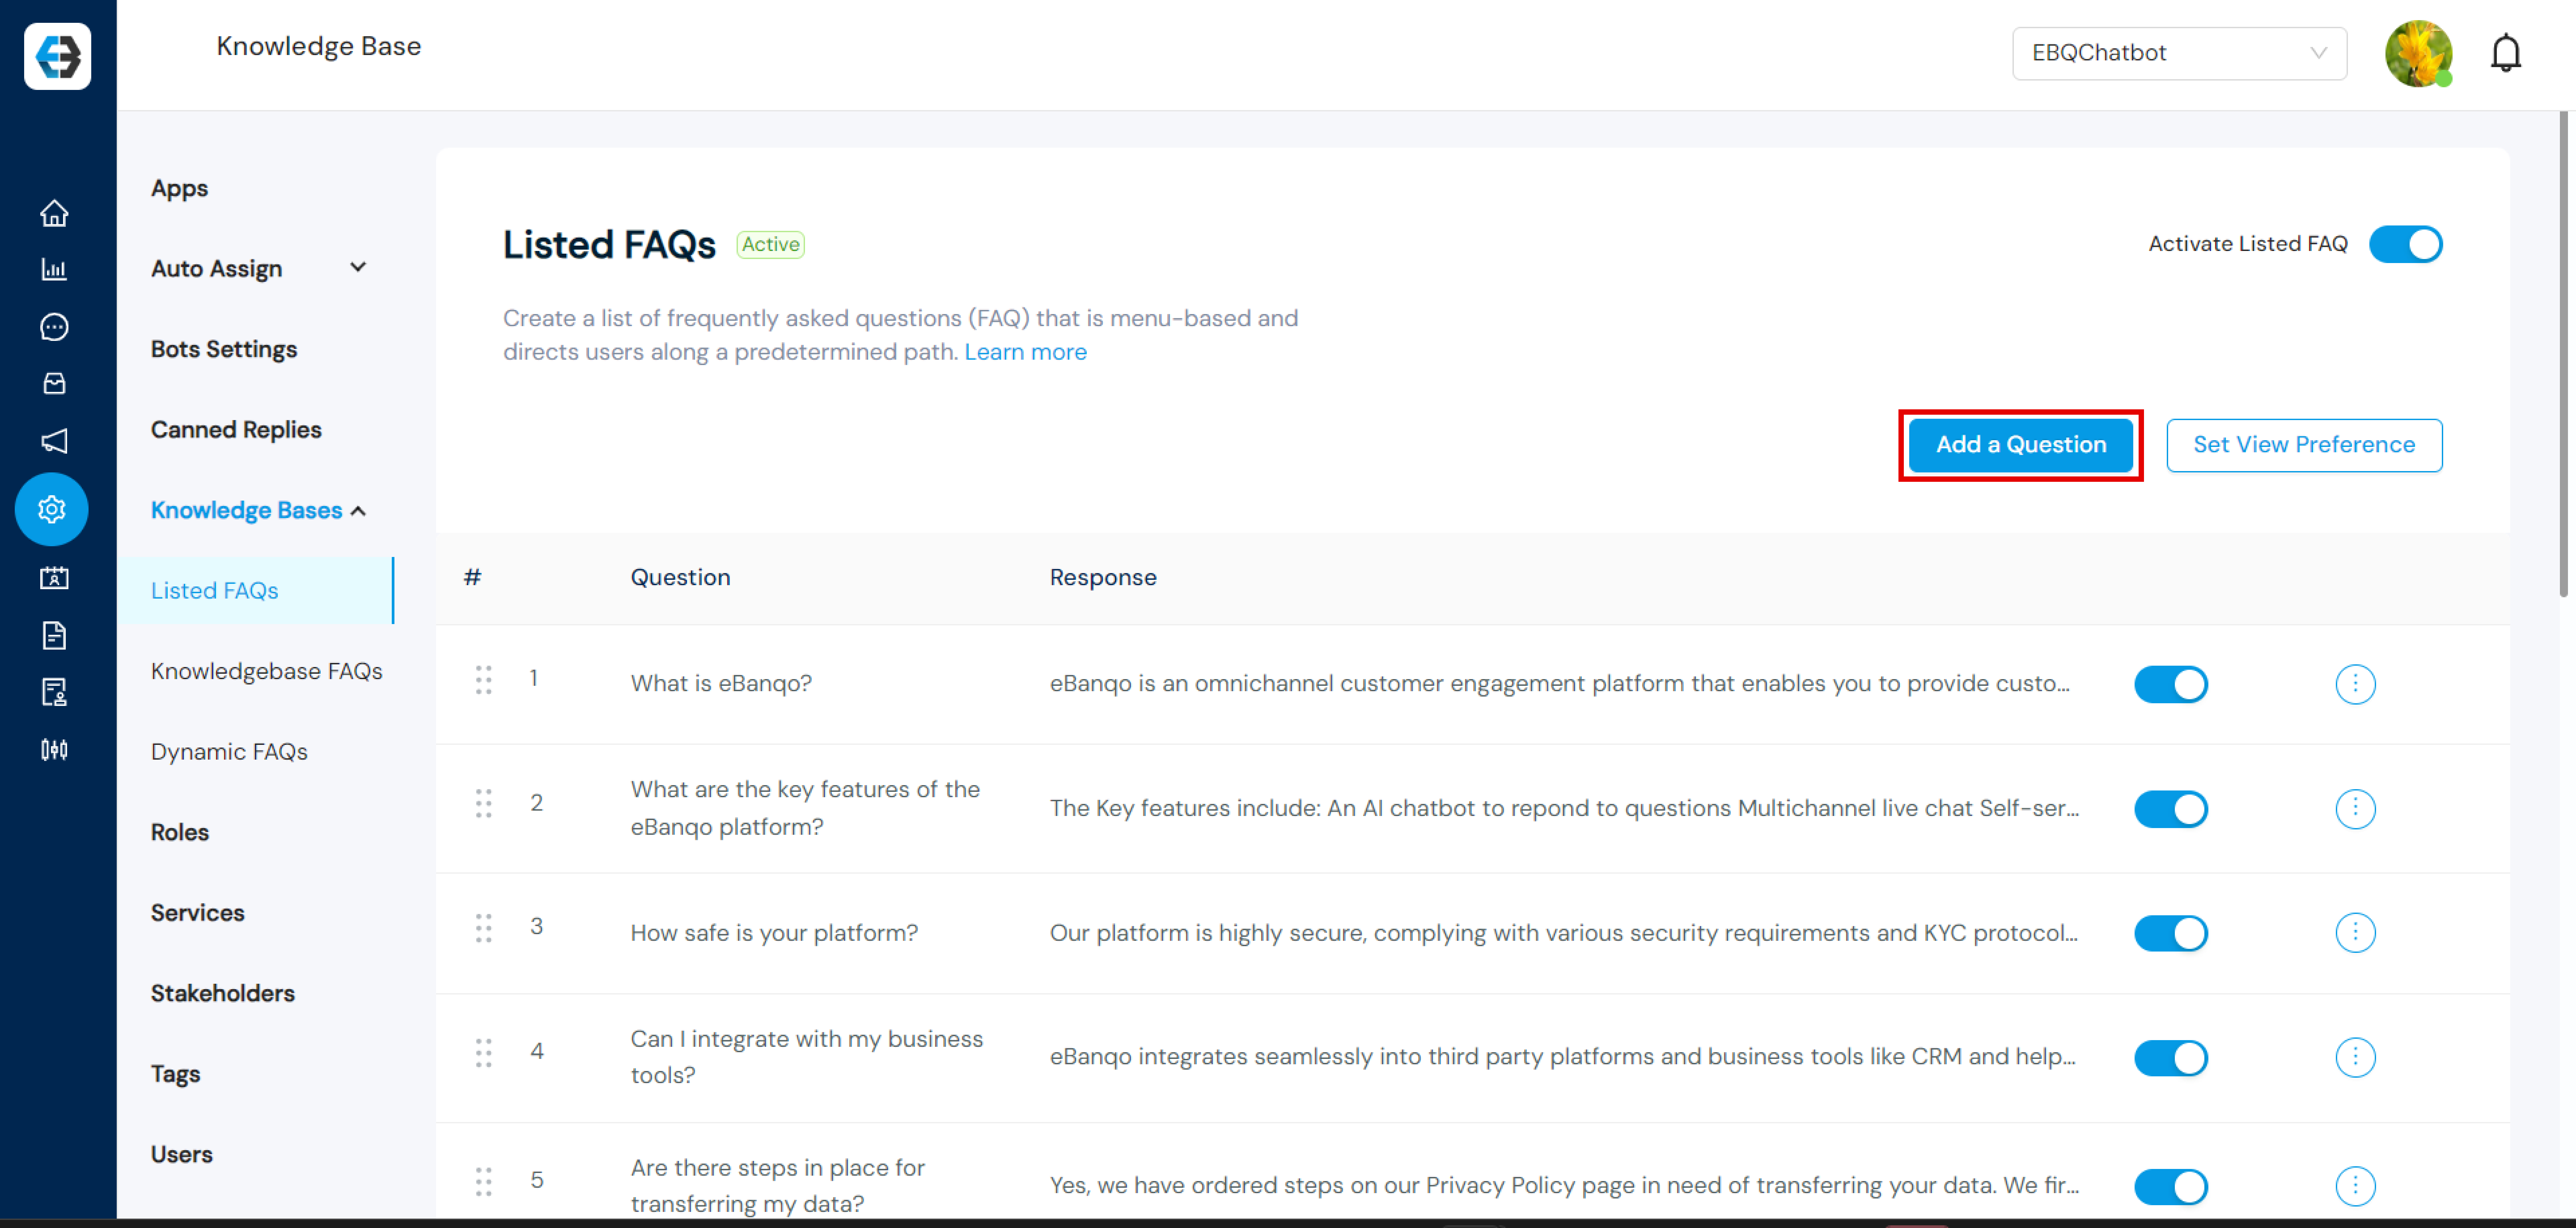
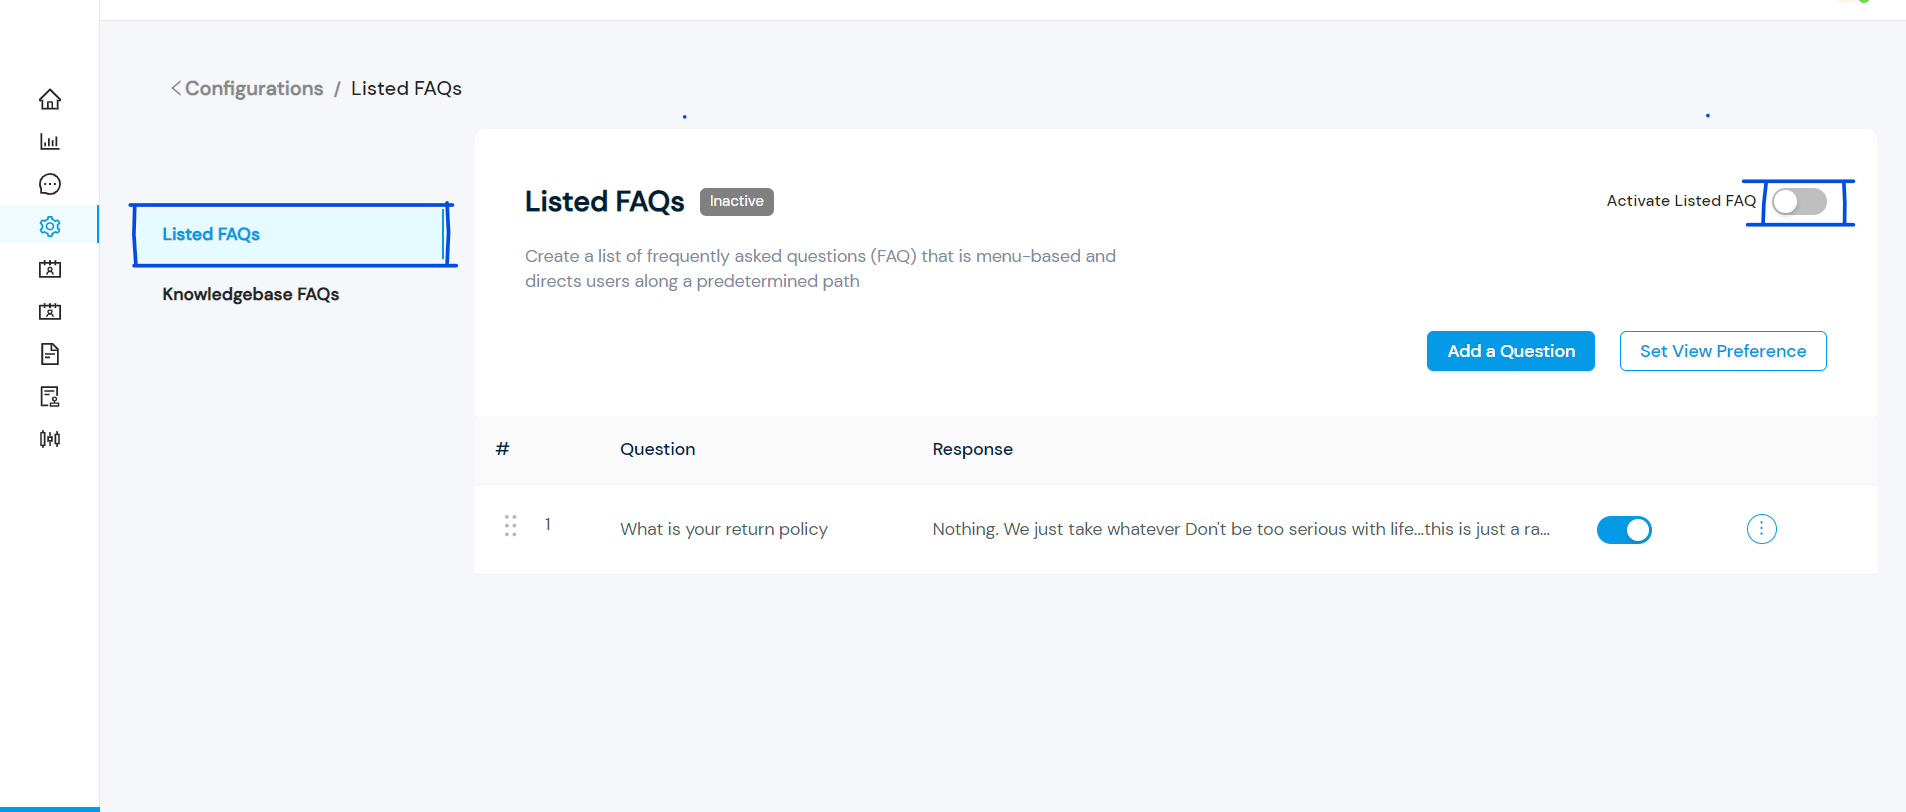 4. Select Add a Question and the Question and Response fields will appear
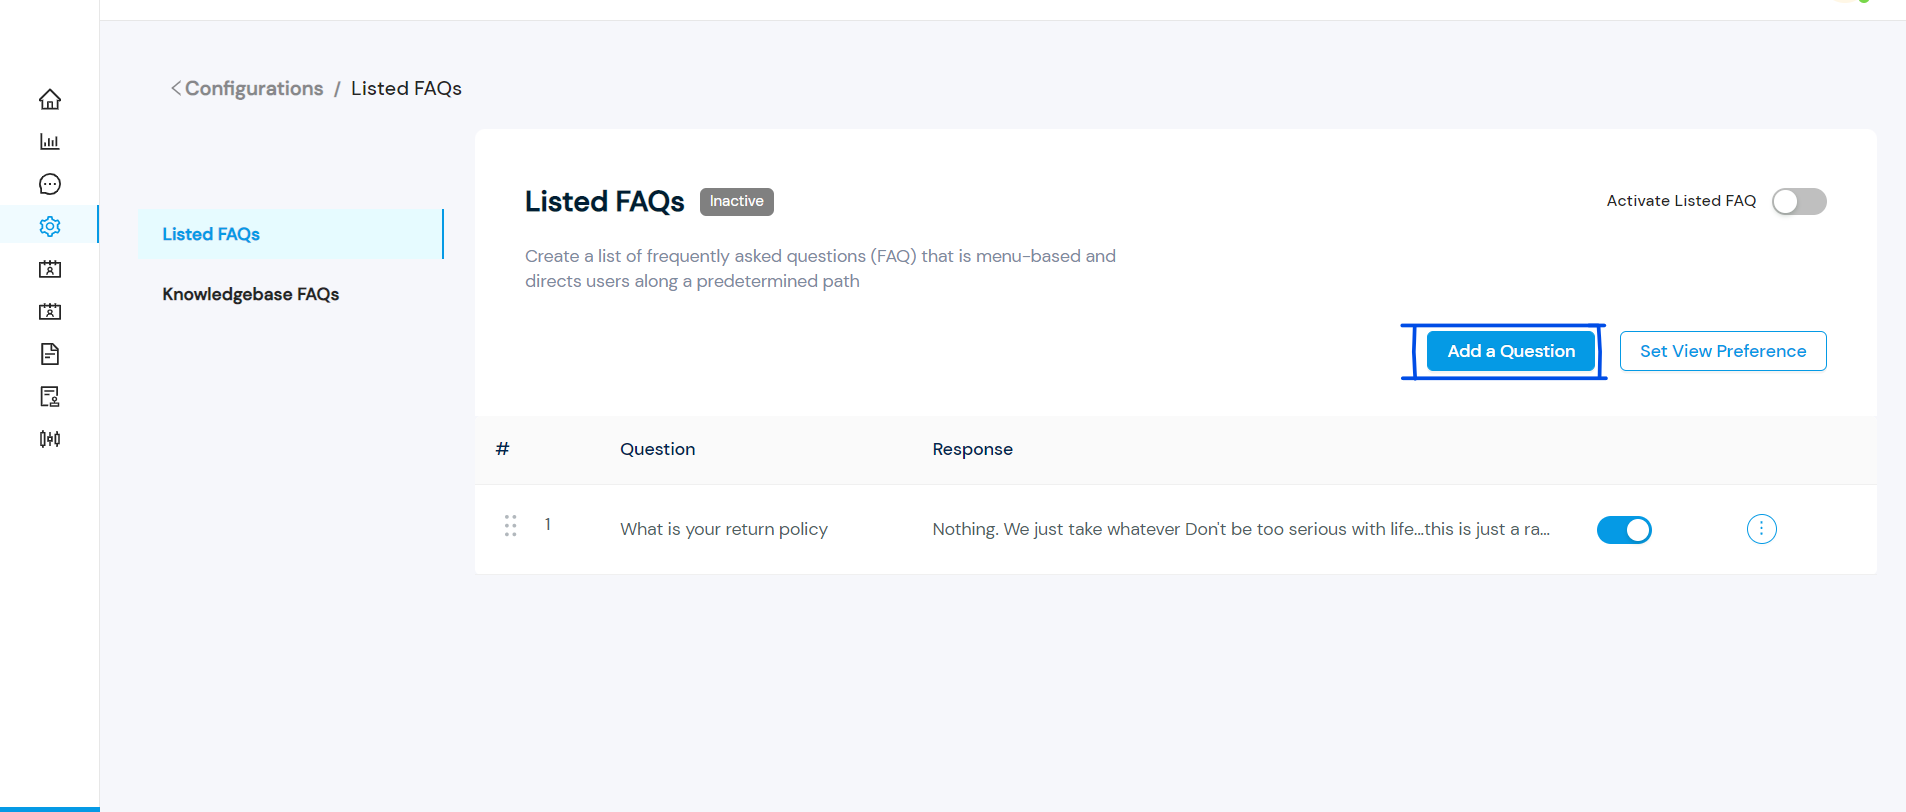 5. Fill out the Question and Response fields and select Create to create a FAQ. Add more FAQs to list as much as you want.
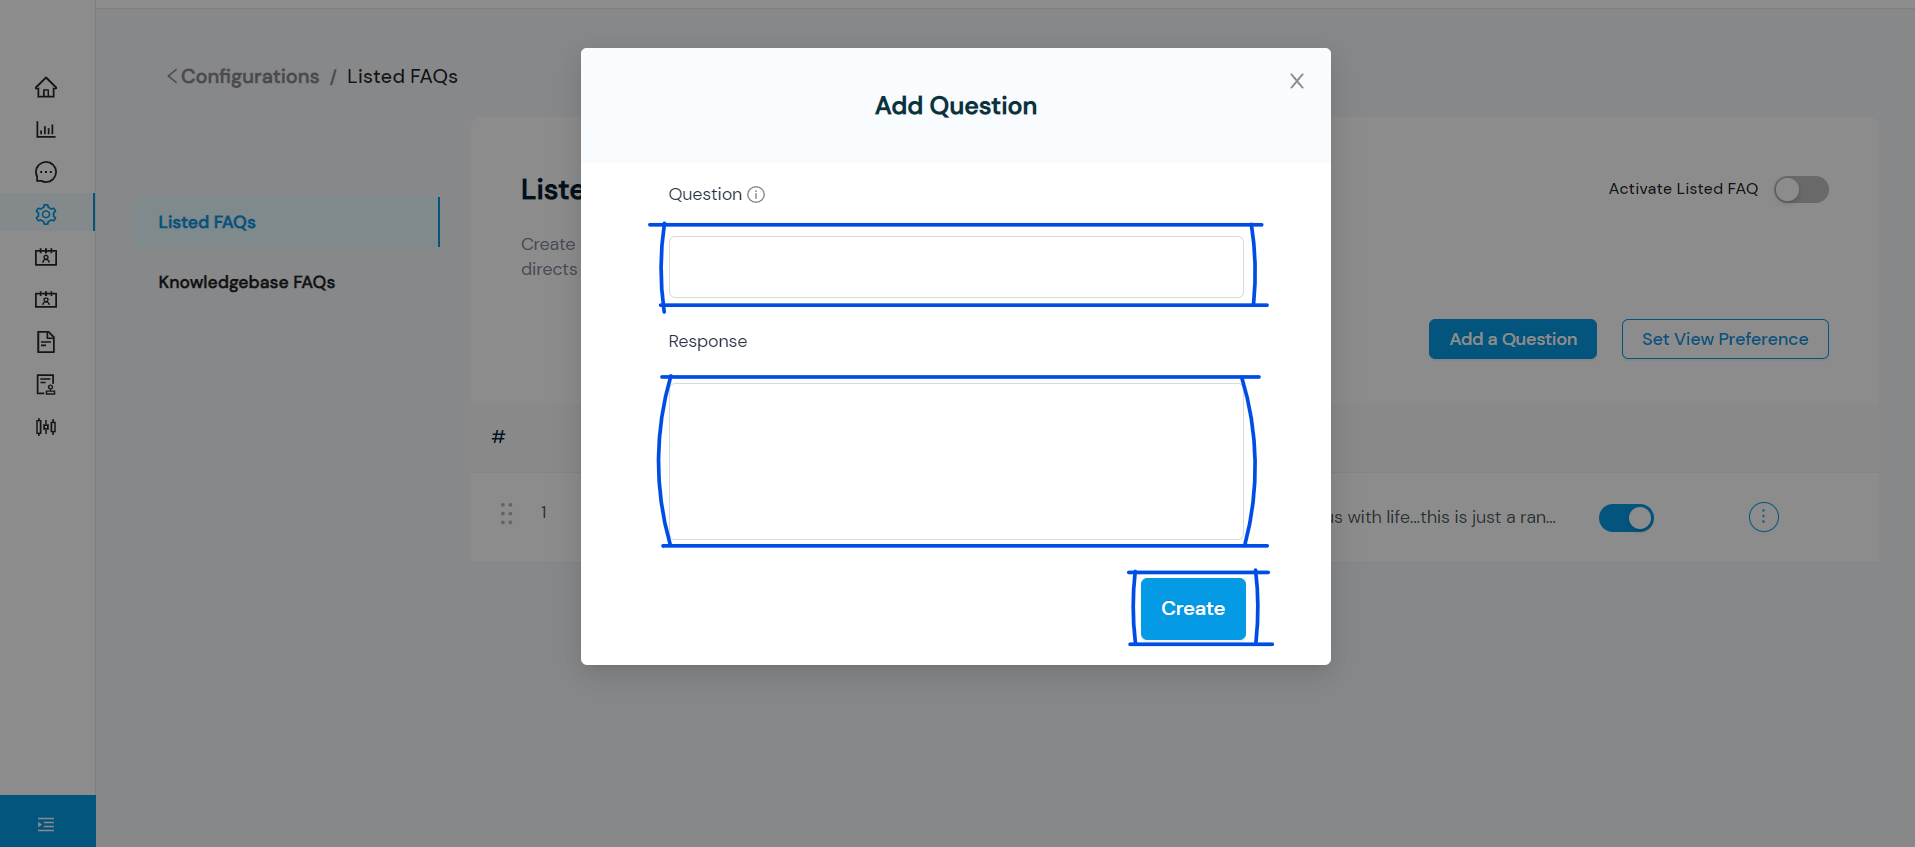 6. Select the FAQs you want to display to your customers by switching on the toggle button. Note that you cannot select more than twelve (12) FAQs.
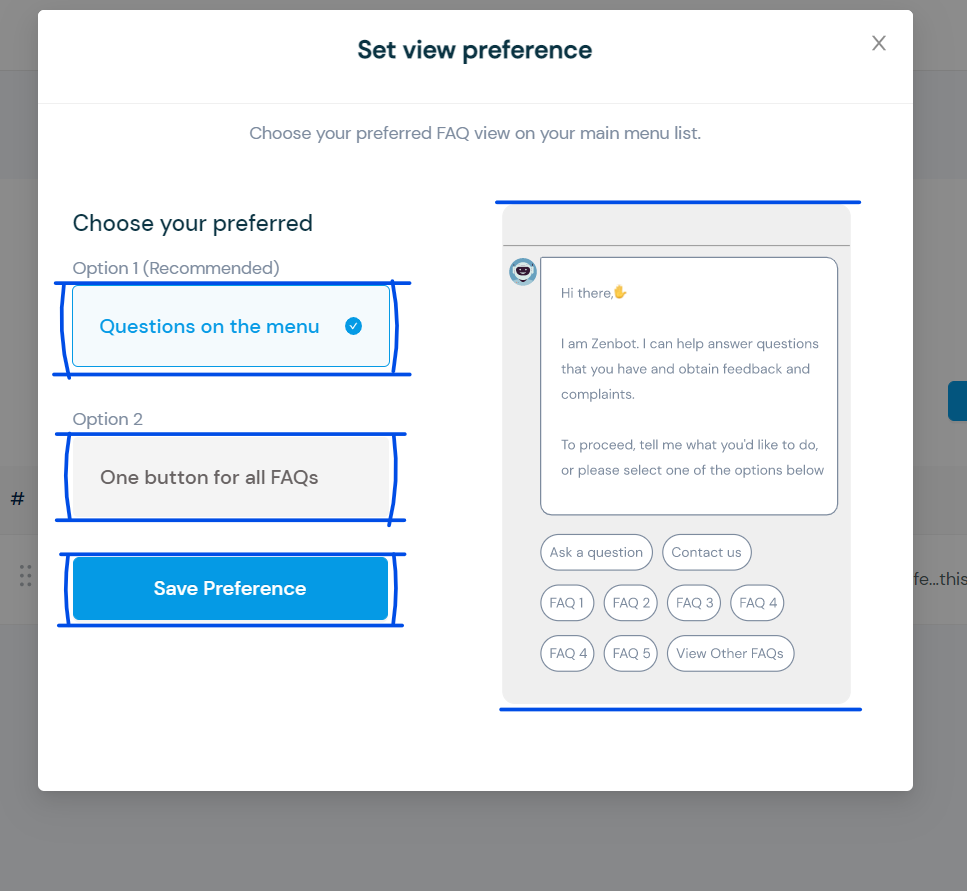
 7. Select set view preference to set up your preferred preview option.
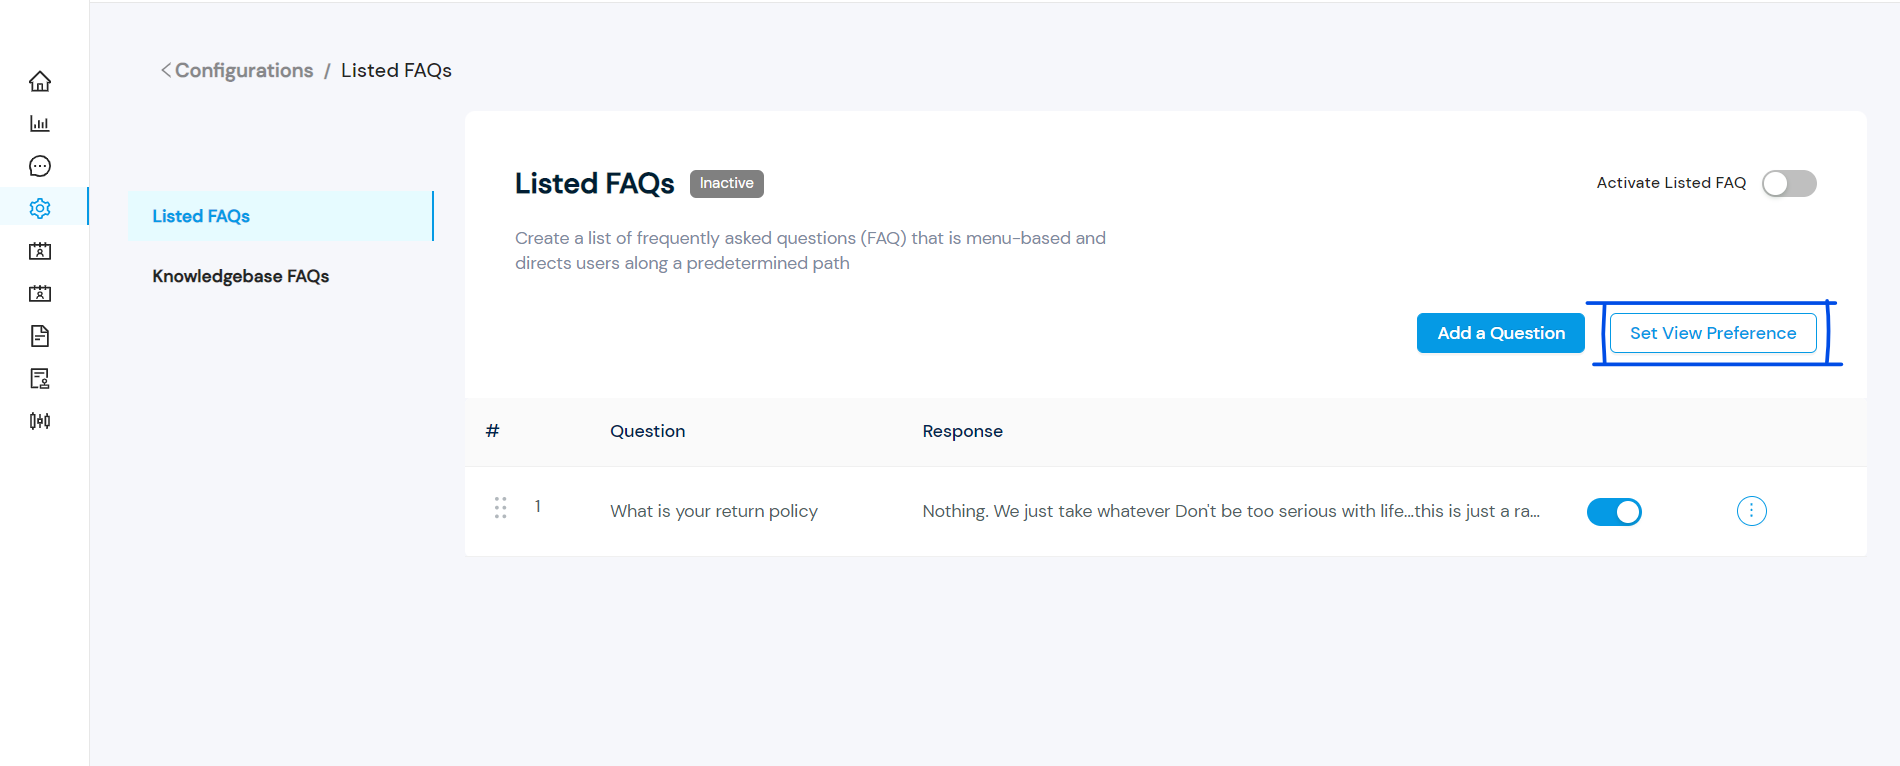 8. Choose either the ‘Questions on menu’ or ‘One buttons for all FAQs’ options based on your preference. The outlook of the preference you selected will be displayed at the right side of your screen to enable you to make your decisions. Select ‘save preference’ to save your chosen view preference.