How to create a knowledge base section

A knowledgebase section is a subset of your knowledge base. Remember that a knowledge base contains different but related section, each containing its questions. Here’s how to add new sections to your knowledge base.

After you’ve created your knowledge base (link to how to create a Knowledgebase above), you might want to add more sections to your Knowledgebase. Here’s how to do it.

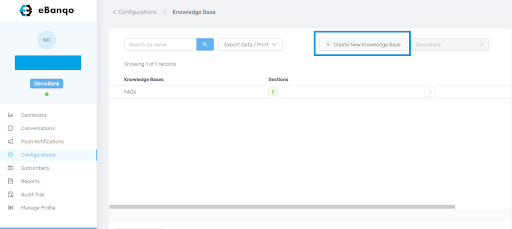
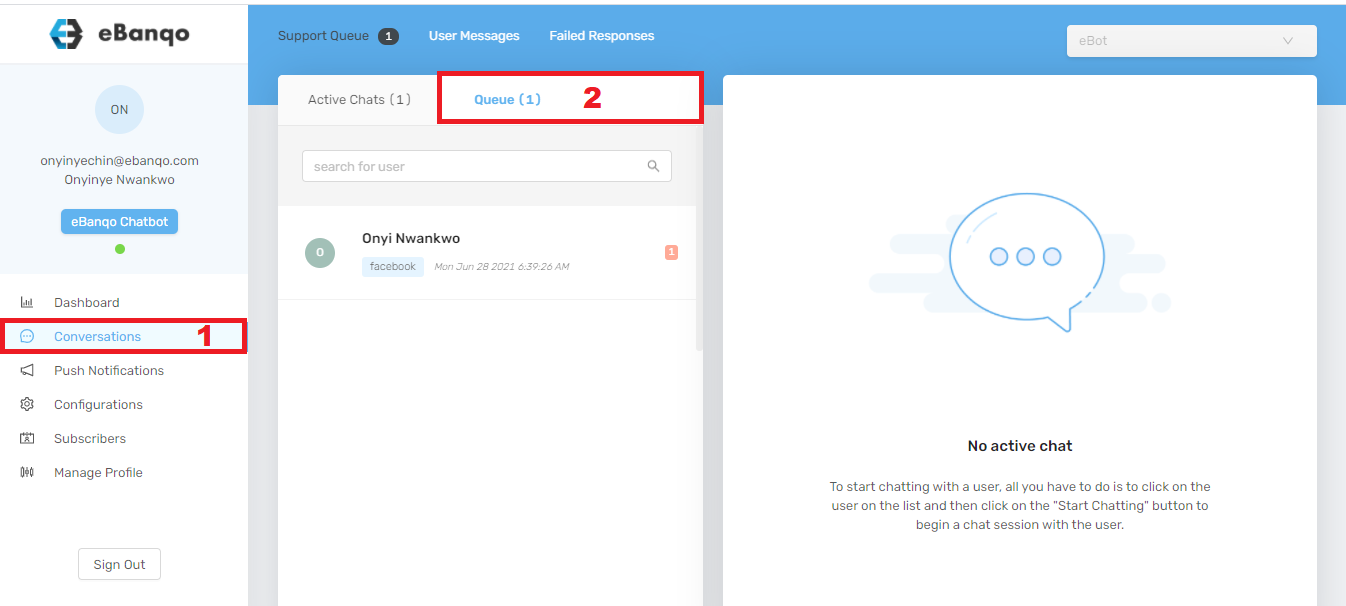
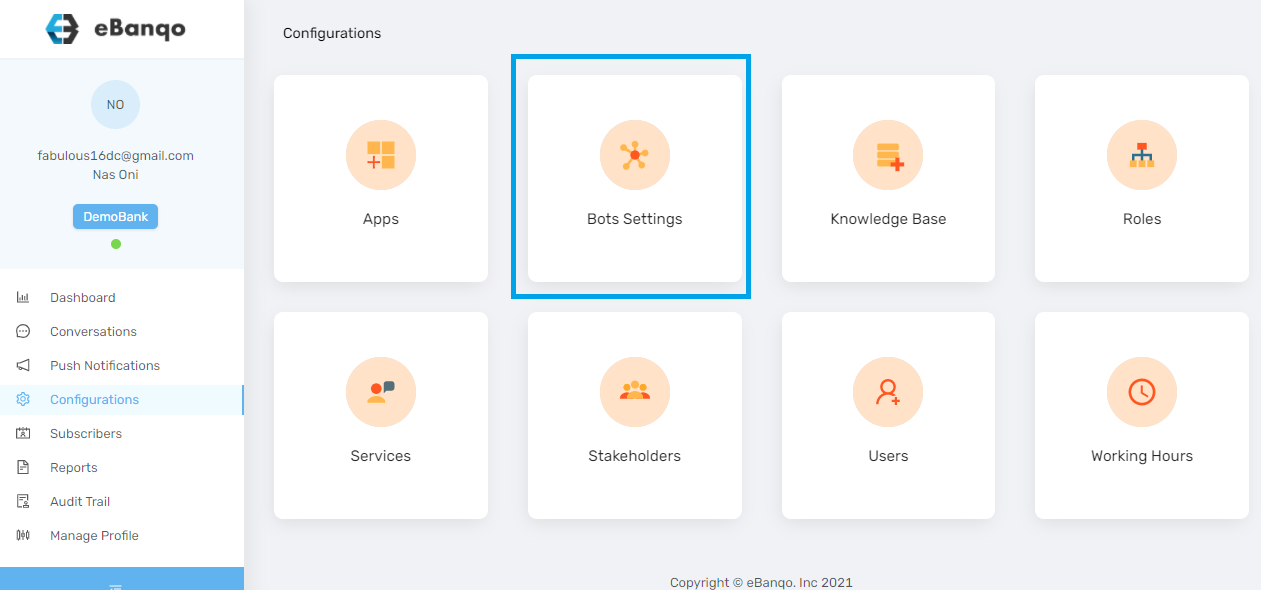
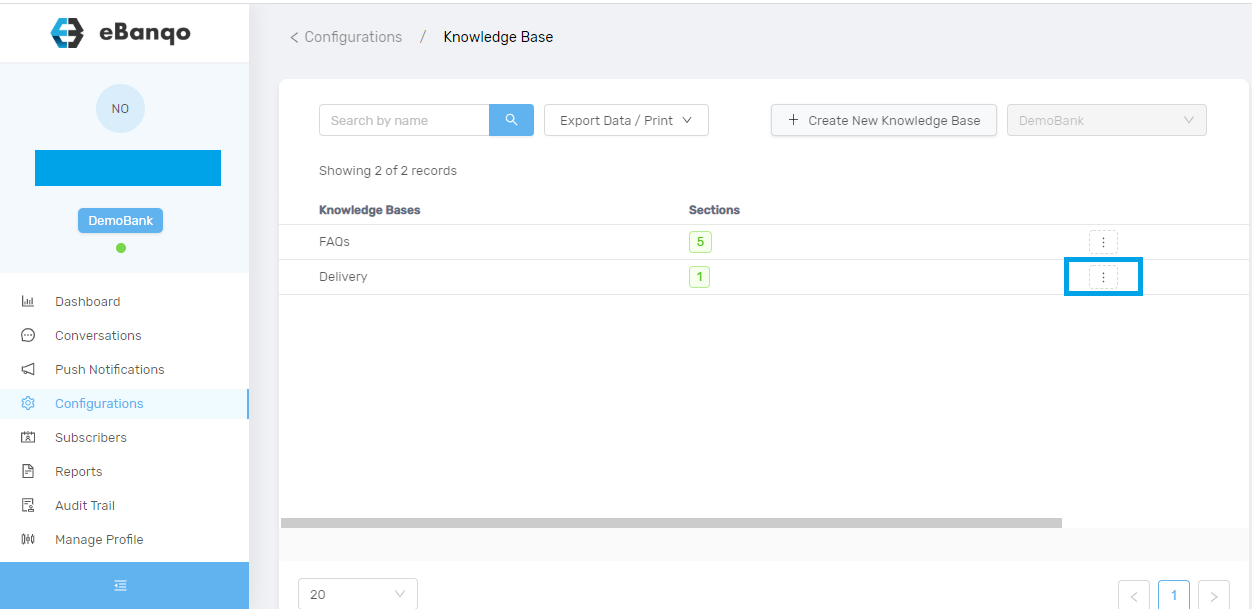
1. Go to configuration > Knowledgebase.

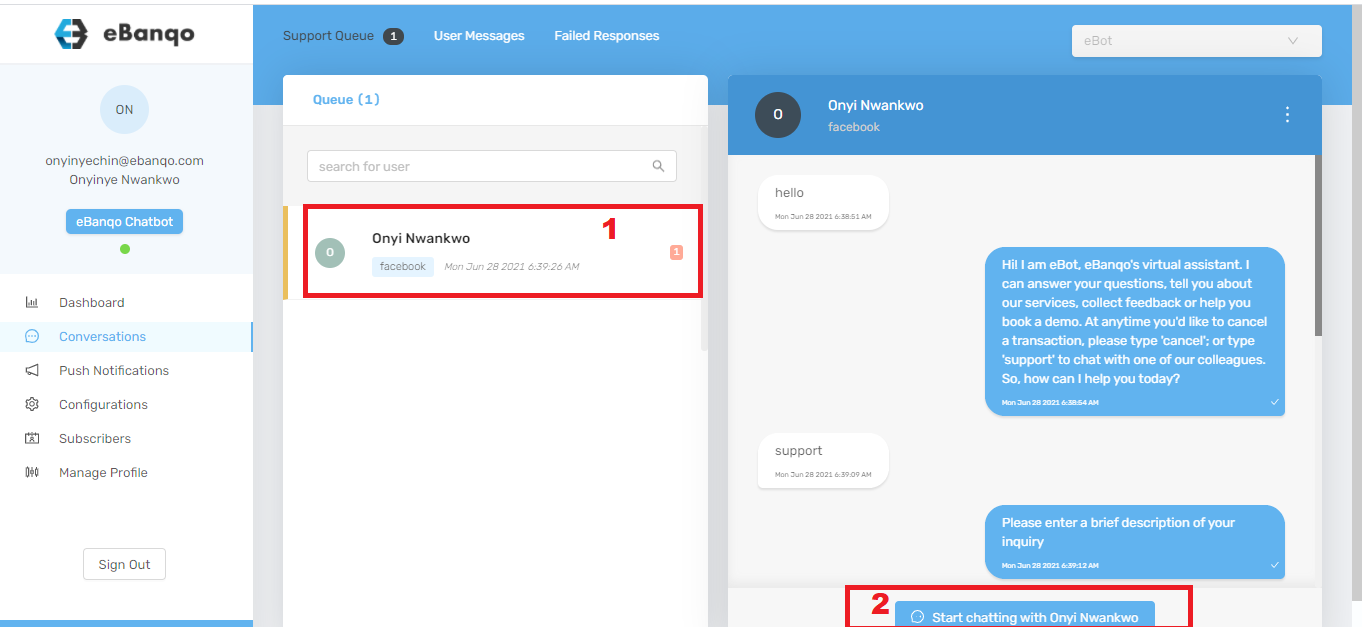
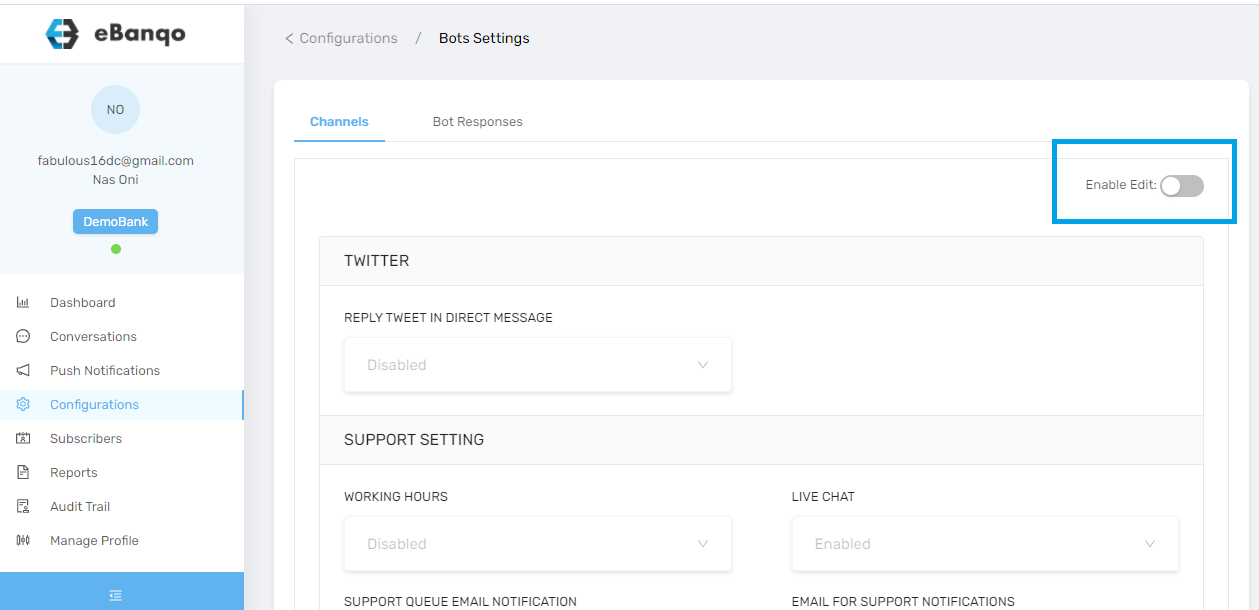
2. Move your mouse to the knowledge base you want to add a section to and click on the hamburger tab.

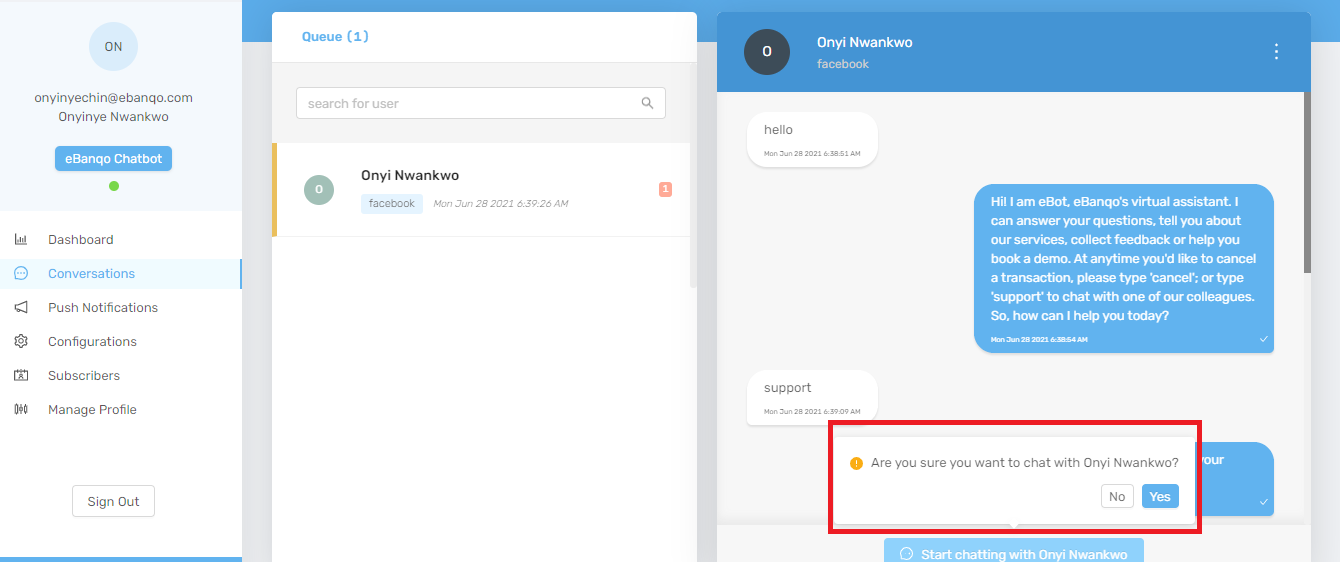
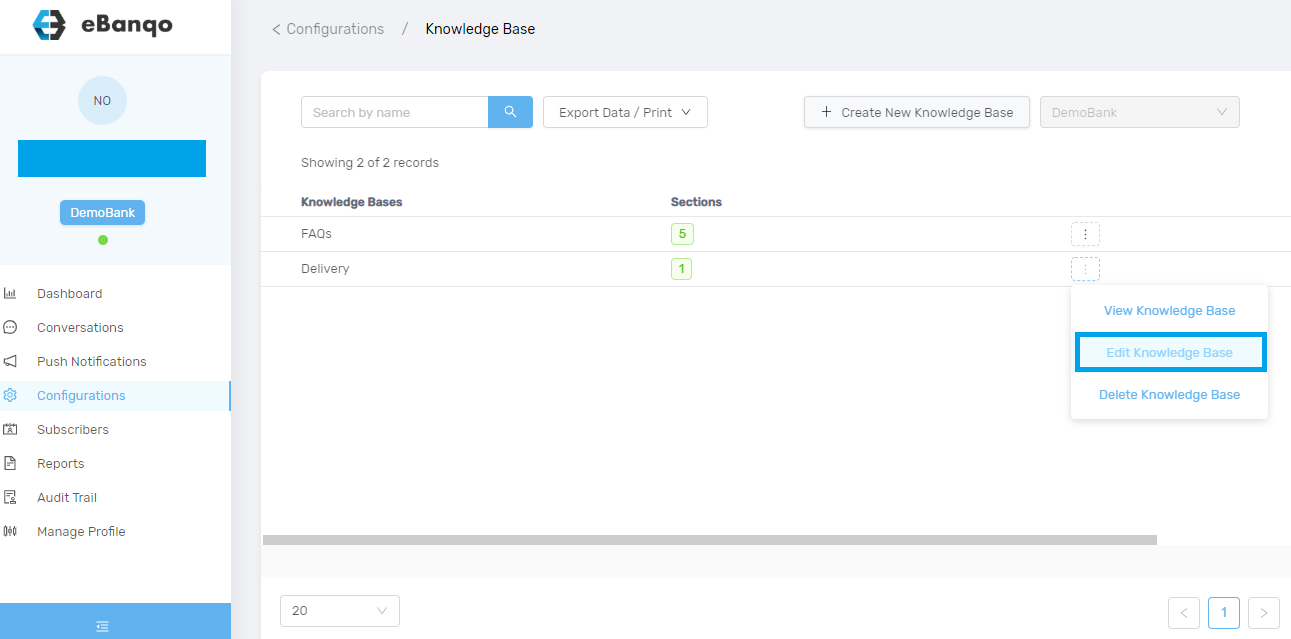
3. Once you click on it, a drop-down menu containing three options will appear. Click on edit knowledge base.

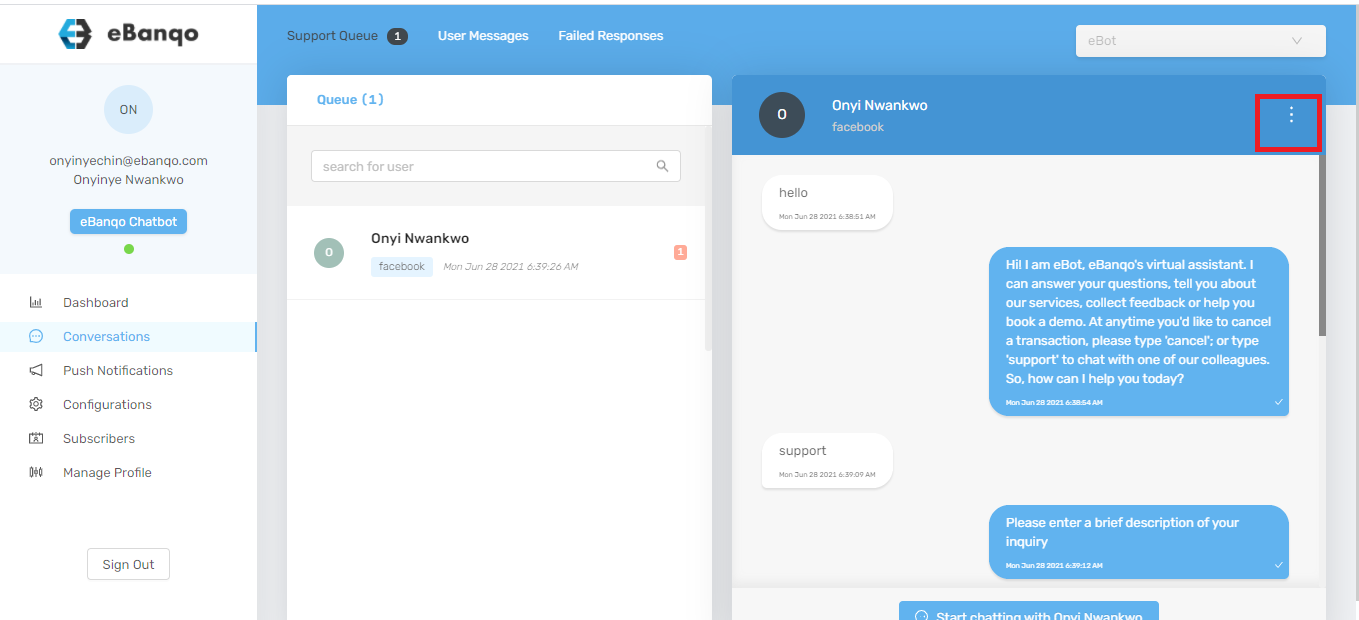
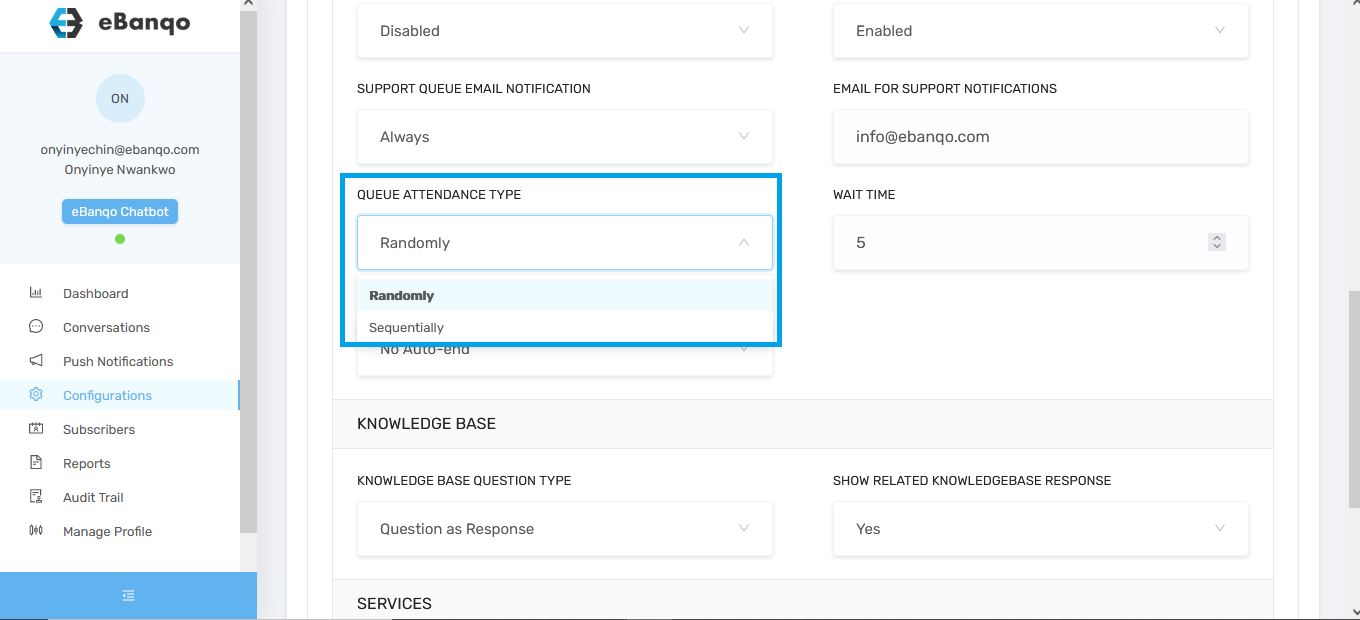
4. Once it opens, click on the button create new section

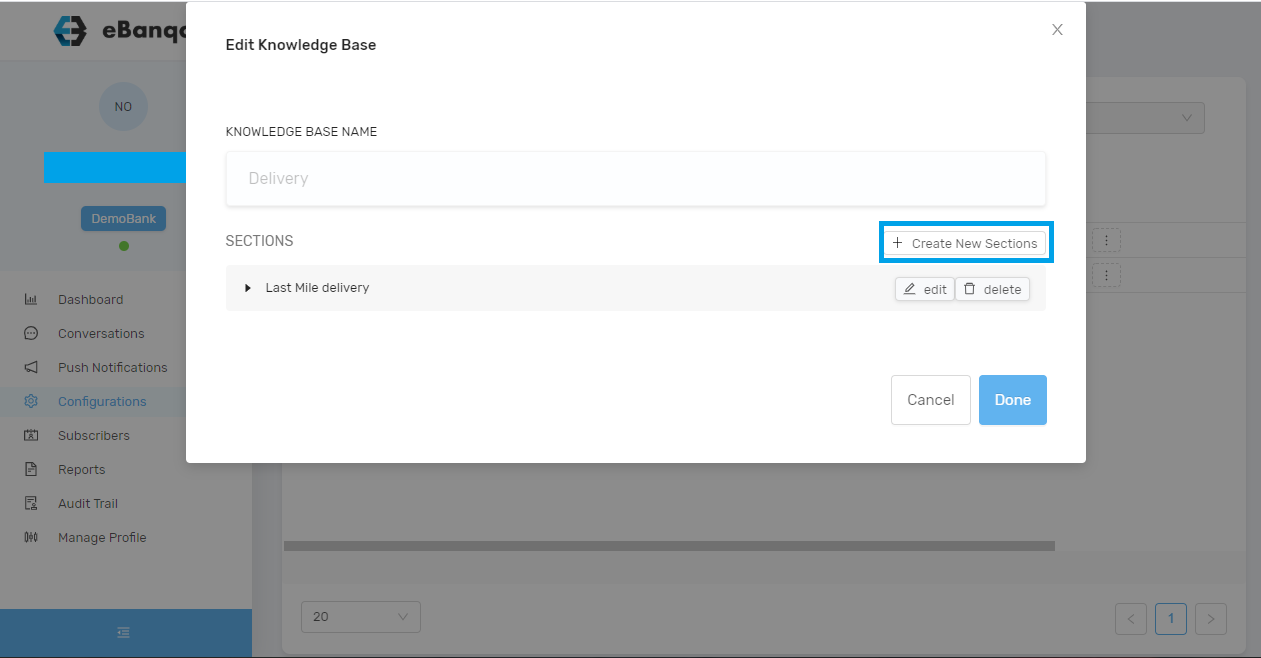
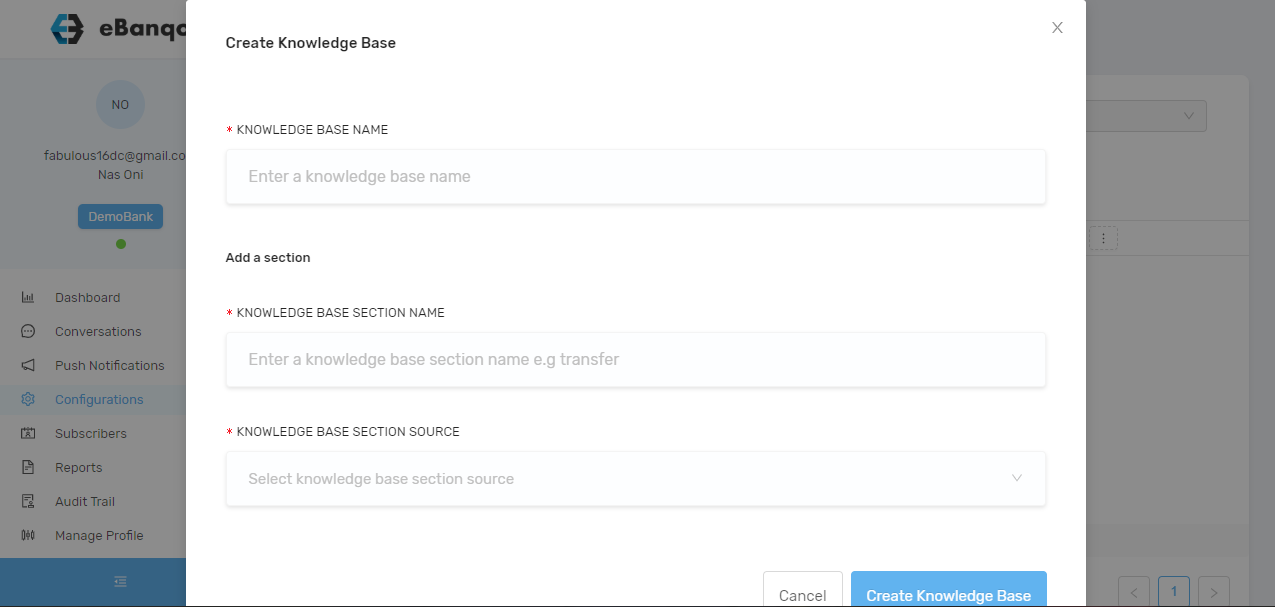
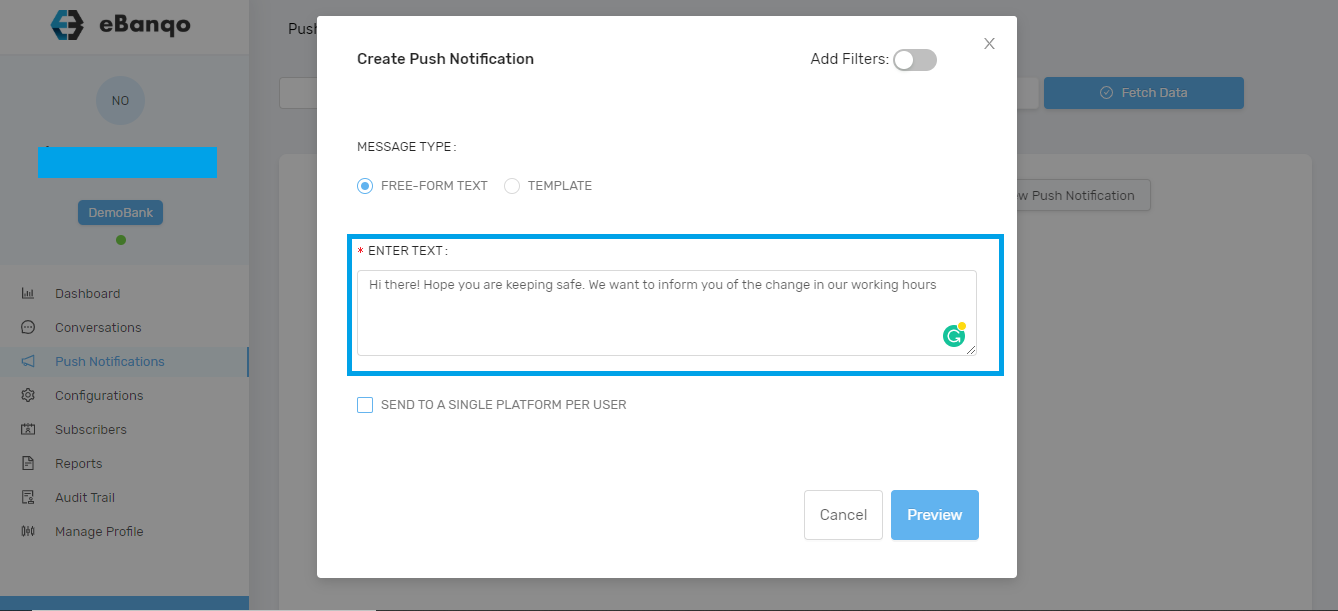
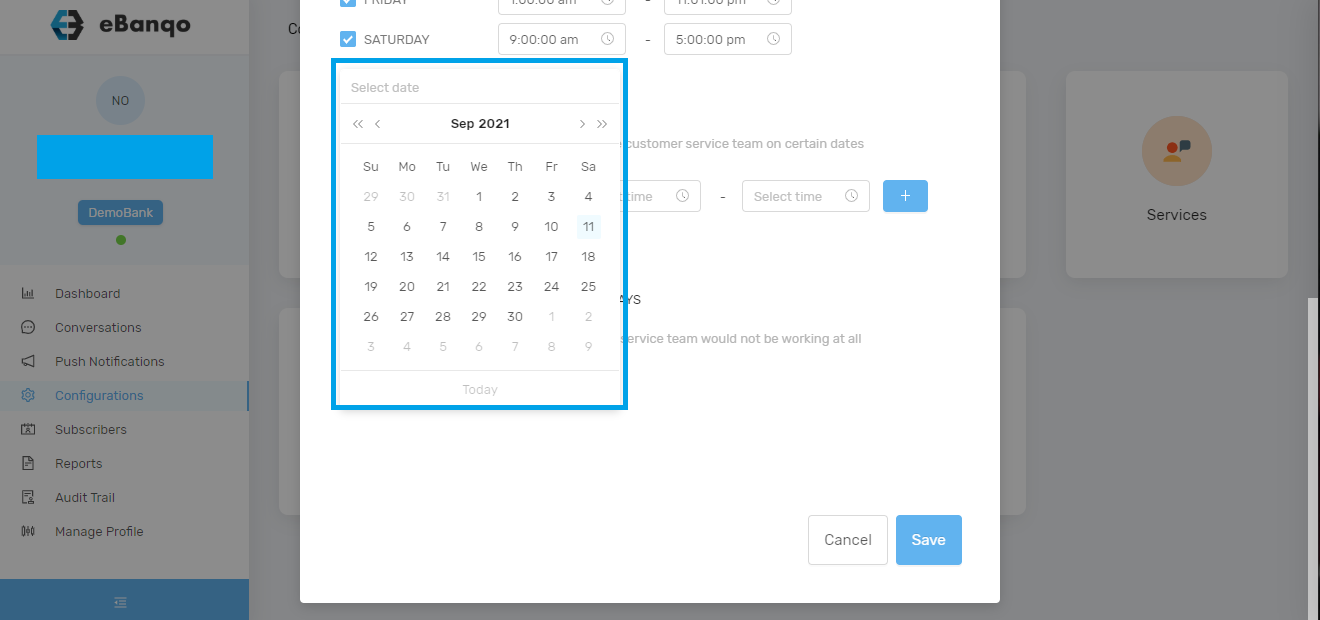
5. Once you click the button, a modal appears.

Fill out the Knowledgebase section name field.  When you get to Knowledgebase section source, select either create manually or from the FAQ page.

For create manually (To add your questions and answers manually):

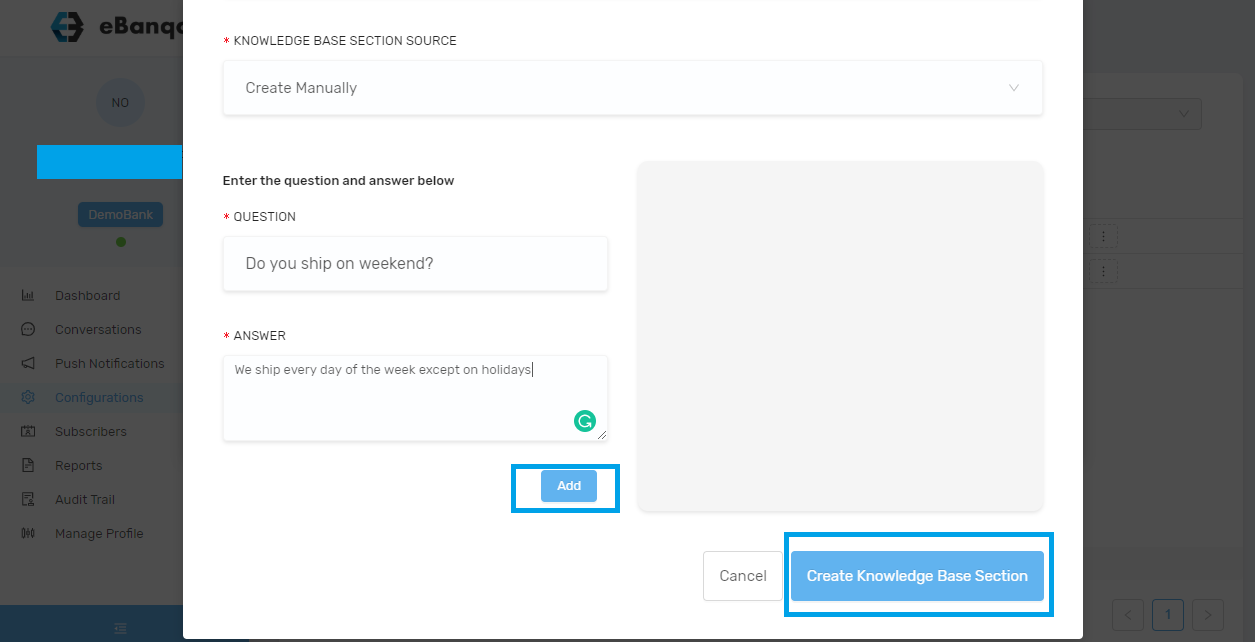
Add the question alongside the response. Click on Add to add the question to your new section. Then click on create knowledge base section to add the new section to a knowledge base.

To create from FAQ page:

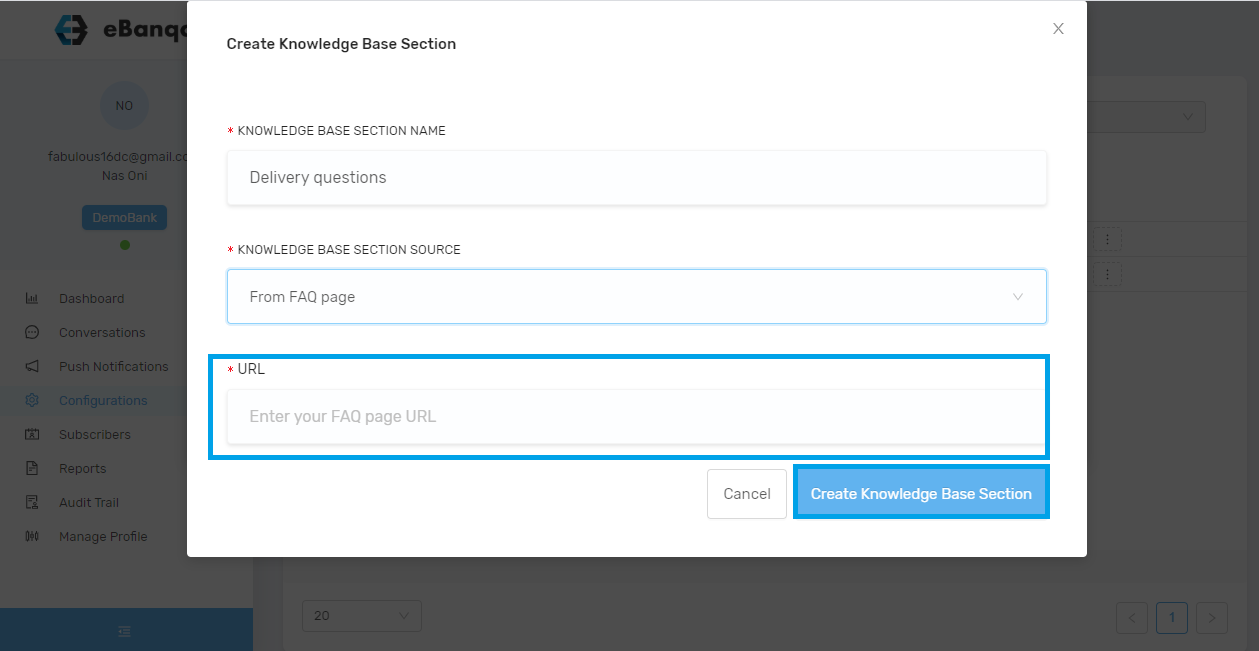
Insert the FAQ page URL and click on create Knowledge base.


How to create a knowledge base

A new knowledge base is a central hub that houses other related question. It unifies different but related questions under one umbrella.

1. To create your knowledge base, log into your eBanqo Messenger. Click on configurations > knowledge base. 

2. Click on “create new Knowledge Base”.

3. Afterwards, a modal opens. Fill in the name of your knowledge base, the section name and the source. You can either choose to fill in the questions manually (we’ll show you how in the subsequent section) or link to a source like your website FAQ page


4. Click on create knowledge Base


How to create a push notification

1.  To create a new push notification, log in to your account.

2. Go to push notifications.

3. Click on create new push notification button


4. When you click on create new push notification button, a modal opens

5. There are two options: Freeform text or Template

  • Freeform text
  • Template

a. For a freeform text, you compose a new message that you intend to send to your customers.

b. After entering your message, decide if you want to send it to one platform per customer or if you want to send it to all the platforms each customer has used to interact with you.  To send to one platform for each customer, check send to a single platform per user

c. If you want customers to receive the push notifications on all the platforms they’ve used in contacting you, then leave them unchecked.

d.  Then preview your message before sending it. Click on the preview button.

e. Once you click the preview button, a modal containing the details of your push notifications appears.

f. If you are satisfied, click on send. If not click cancel it takes you back to the text editor to make further changes.

  • Template:

The option to send push notifications using a template is not yet available. Once it is, we’ll update this article with the steps.


Chatting with customers

How to chat with customers on the queue

1. To chat with a customer on the queue, go to conversations > support queue

how to chat with a customer on the queue in eBanqo Messenger


2. Select a customer on the queue to start a chat. When you do that, a tab containing the customer’s chat history opens on the right-hand side. On the bottom right-hand corner, click on start chatting with < customers’ name>

how to chat with a customer on the queue on eBanqo Messenger

3. Click on start chatting with Onyi Nwankwo. This modal appears

How to chat with customers on eBanqo Messenger

4. Click yes to begin a conversation with the customer.


How to reassign a customer on the queue

You reassign a customer on the queue to another agent if, after going through the customer’s inquiries, you decide another agent is better equipped to help a customer.

1. To reassign a customer, ensure you have selected the customer from the queue. Your screen will look this way:

howto reassign a customer to another agent

2. Click on the three dots at the top right-hand corner of your screen:

how to reassign a customer in eBanqo Messenger

3. Two options appear. Click on assign to another support agent

How to reassign a customer in eBanqo messenger


4. A modal appears. Select the preferred agent from the drop-down menu or simply type the name. Click on assign.

how to reassign a customer to another agent

How to end a conversation or chat

You end a chat to close the open conversations tab on the right-hand side. There are several reasons to end a chat. Either the customer’s issue is resolved or the customer stopped responding.  To end a chat,

1. Click on the three dots at the top right-hand corner.

how to end a chat in eBanqo Messenger

2. A modal appears. Click on the drop-down menu to select a reason for ending the chat.

how to end a chat in eBanqo Messenger

3.Click on end chat.


How to change your eBanqo Messenger Password

To change your password, log into your account and go to Manage Profile.  Click on change password.

how to change your eBanqo Messenger password

A modal appears. Complete the fields and click on submit. Your password will be updated.

how to change your eBanqo messenger password