Dynamic FAQs

Understanding eBanqo Dynamic FAQs

Dynamic FAQs is an AI-powered FAQ bot that generates answers using multiple data sources.

Upload sitemap files and documents to enhance the AI knowledge base.

Configure bot settings like Bot Name, Instruction, Exclusive Mode and Chat Memory.

How to Create and Deactivate Users on eBanqo

Creating new users on the eBanqo platform allows you to manage who has access to your business dashboard and assign roles accordingly.

Step 1: Log in to Your Admin Account

  1. Visit eBanqo’s portal and log in using your admin credentials.
  2. Once logged in, you will be directed to the dashboard.

Step 2: Navigate to the Users Section

  1. Click on Configurations in the left-hand menu.
  2. Select Users.

Step 3: Create a New User

  1. Click on the Create New User button.
  2. A form will appear where you can enter the details of the new user.

Step 4: Fill in User Details

  1. Full Name: Enter the user’s first and last name.
  2. Email Address: Provide the email address the user will use to log in.
  3. Phone Number: Enter the user’s contact phone number.
  4. Role: Assign a role to the user.

Step 5: Create and Send Credentials

  1. Click Create User.
  2. The system will generate login credentials and automatically send them to the user’s registered email.

Step 6: Confirm User Creation

After successfully creating the user, they will appear in the user list under the Users section.

How to Deactivate Users on eBanqo

Step 1: Log in to Your eBanqo account

Step 2: Navigate to the Users Section

  1. Locate the Configurations icon on the left sidebar menu.
  2. Click Users under the Configurations menu.

Step 3: Find the User You Want to Deactivate

  1. Search for the user you want.
  2. Click the three-dot menu beside their details.

Step 4: Deactivate the User

  1. Open the user’s profile.
  2. Click Deactivate.

Step 5: Confirm Deactivation

  1. Confirm by clicking Yes, Deactivate.
  2. The user will now appear as Inactive.

Broadcast Messages

Users with permissions are allowed access to Broadcast messages to initiate two-way engagement with customers for promos, feedback, information distribution, OTP authentication, etc.

Types of Broadcast messages:

  • Template broadcast messages
  • Free Text broadcast messages

Creating Broadcast Message Templates

  1. Go to Broadcast messages on the side menu.
  2. Select Manage Templates and click on “Add Template”.
  3. Fill in the provided fields.
  4. Select the template category.
  5. Select the template type (Standard text or Media/Interactive) then preview and submit.

Send Broadcast Message (Free Text)

  1. Go to Broadcast messages.
  2. Click “Create Broadcast Message”.
  3. Select Free Text and insert the message body.
  4. Add buttons if needed.
  5. Add filters like channel, location, gender, or age.
  6. Preview and submit.

Send Broadcast Message (Template)

  1. Go to Broadcast messages.
  2. Click “Create Broadcast Message”.
  3. Select Template and choose an approved template.
  4. Insert custom placeholders if required.
  5. Add filters if needed.
  6. Preview and submit.
  7. Select the recipients from the contact list.

Tags and Notes

How to create tags

  • Login to ebanqo.io and go to configurations on the menu bar
  • Select Tags from the list of available apps
  • Click on “Create new tags”
  • Input the preferred tag name and description, select the preferred color, and create

View the list of available tags

How to use created Tags

  • For ongoing conversations an agent is chatting with a customer you can select a tag to label the conversation appropriately
  • For concluded chat conversations agents can label conversations through ticketing.
  • Within Conversation select ticketing
  • Under ticketing select the appropriate conversation and choose your preferred reference tag
  • Apply the tag for easier reference

How to Configure Listed FAQ

How to Configure Listed FAQ

  1. Go to Configuration
  2. Select Knowledge Base
  3. Select Listed FAQs and activate it
  4. Select Add a Question and the Question and Response fields will appear
  5. Fill out the Question and Response fields and select Create to create a FAQ. Add more FAQs to list as much as you want.
  6. Select the FAQs you want to display by switching on the toggle button. You cannot select more than twelve FAQs.
  7. Select Set View Preference to set up your preferred preview option.
  8. Choose either “Questions on menu” or “One button for all FAQs” and save preference.

How to view chat history

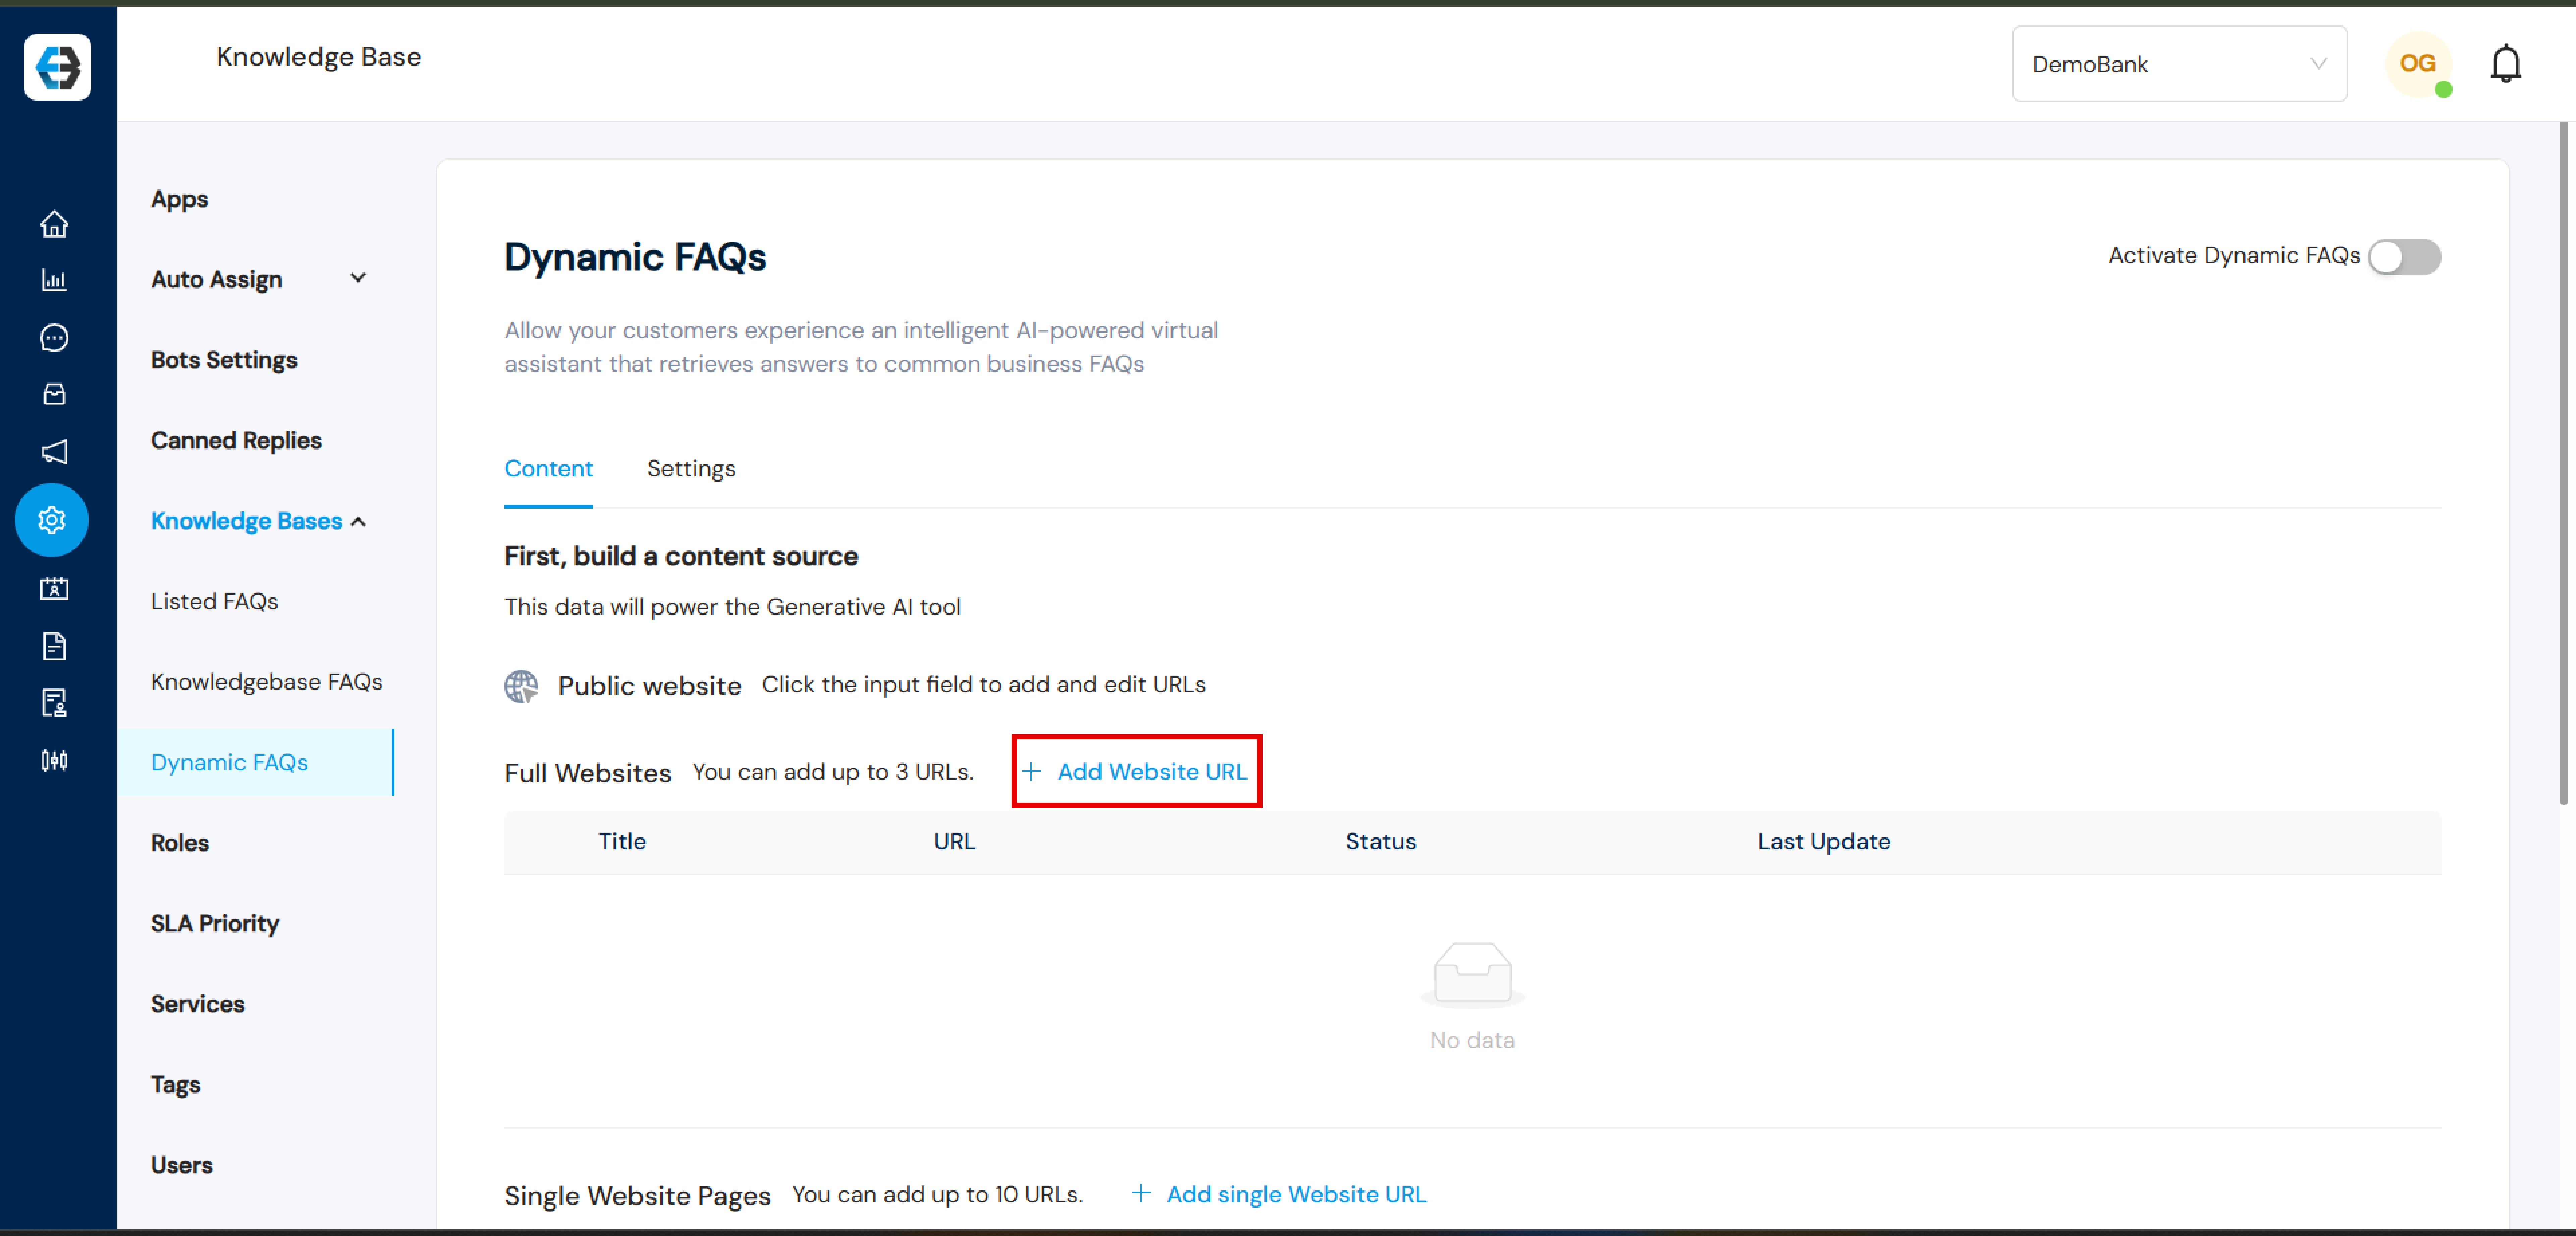
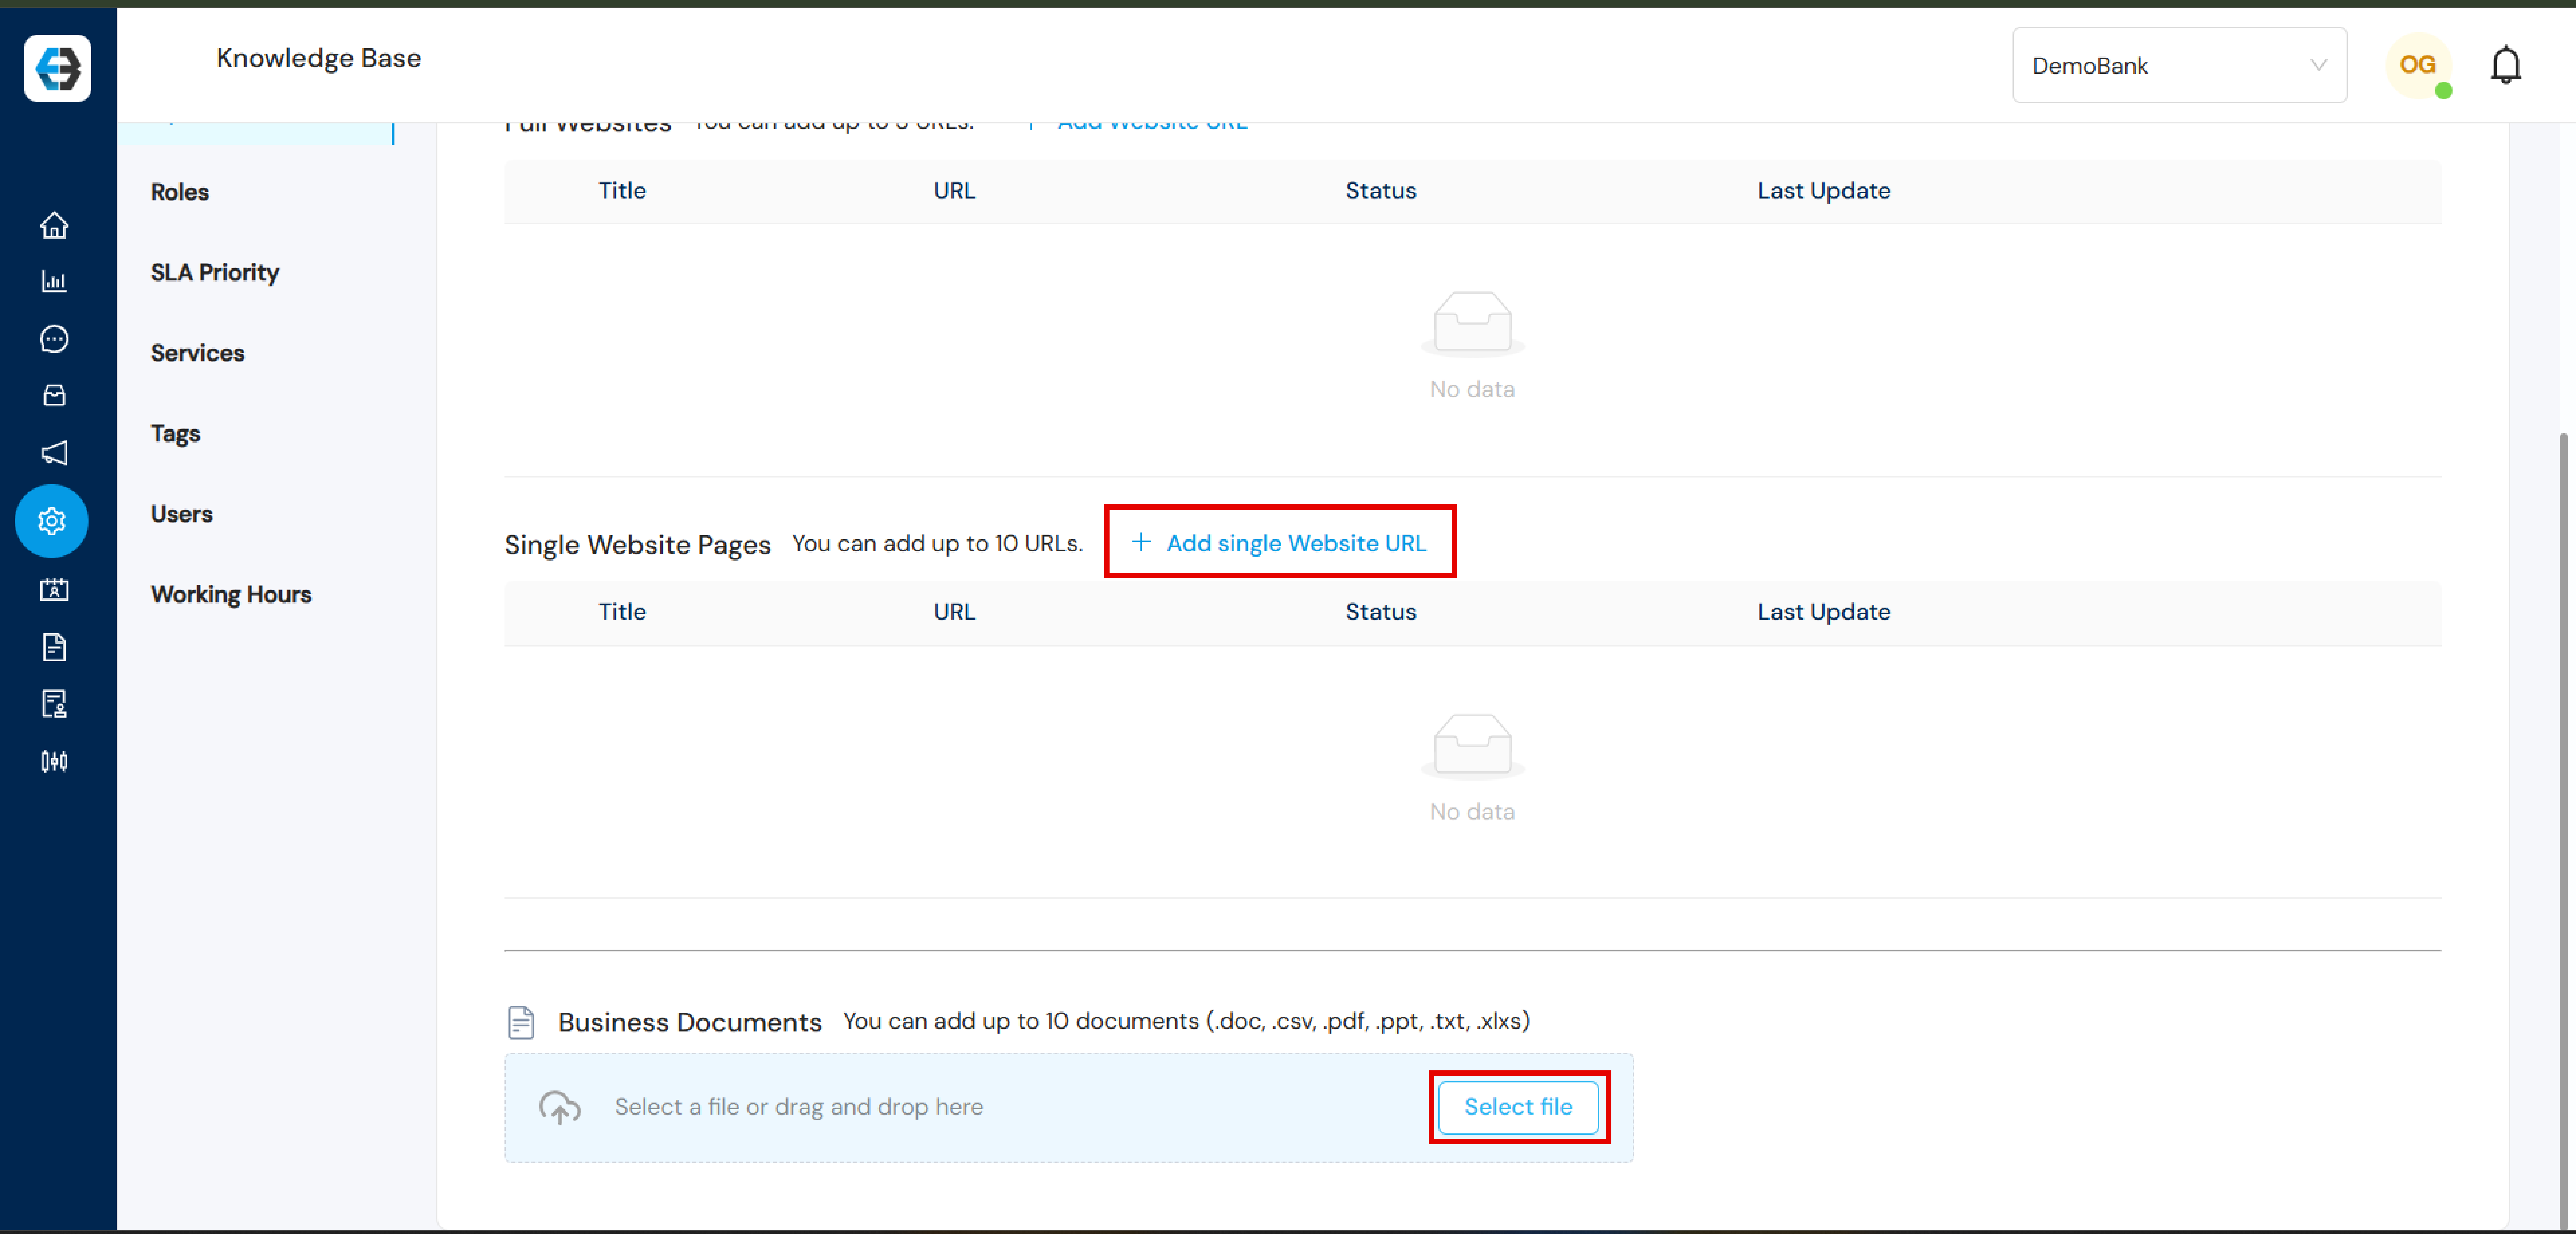
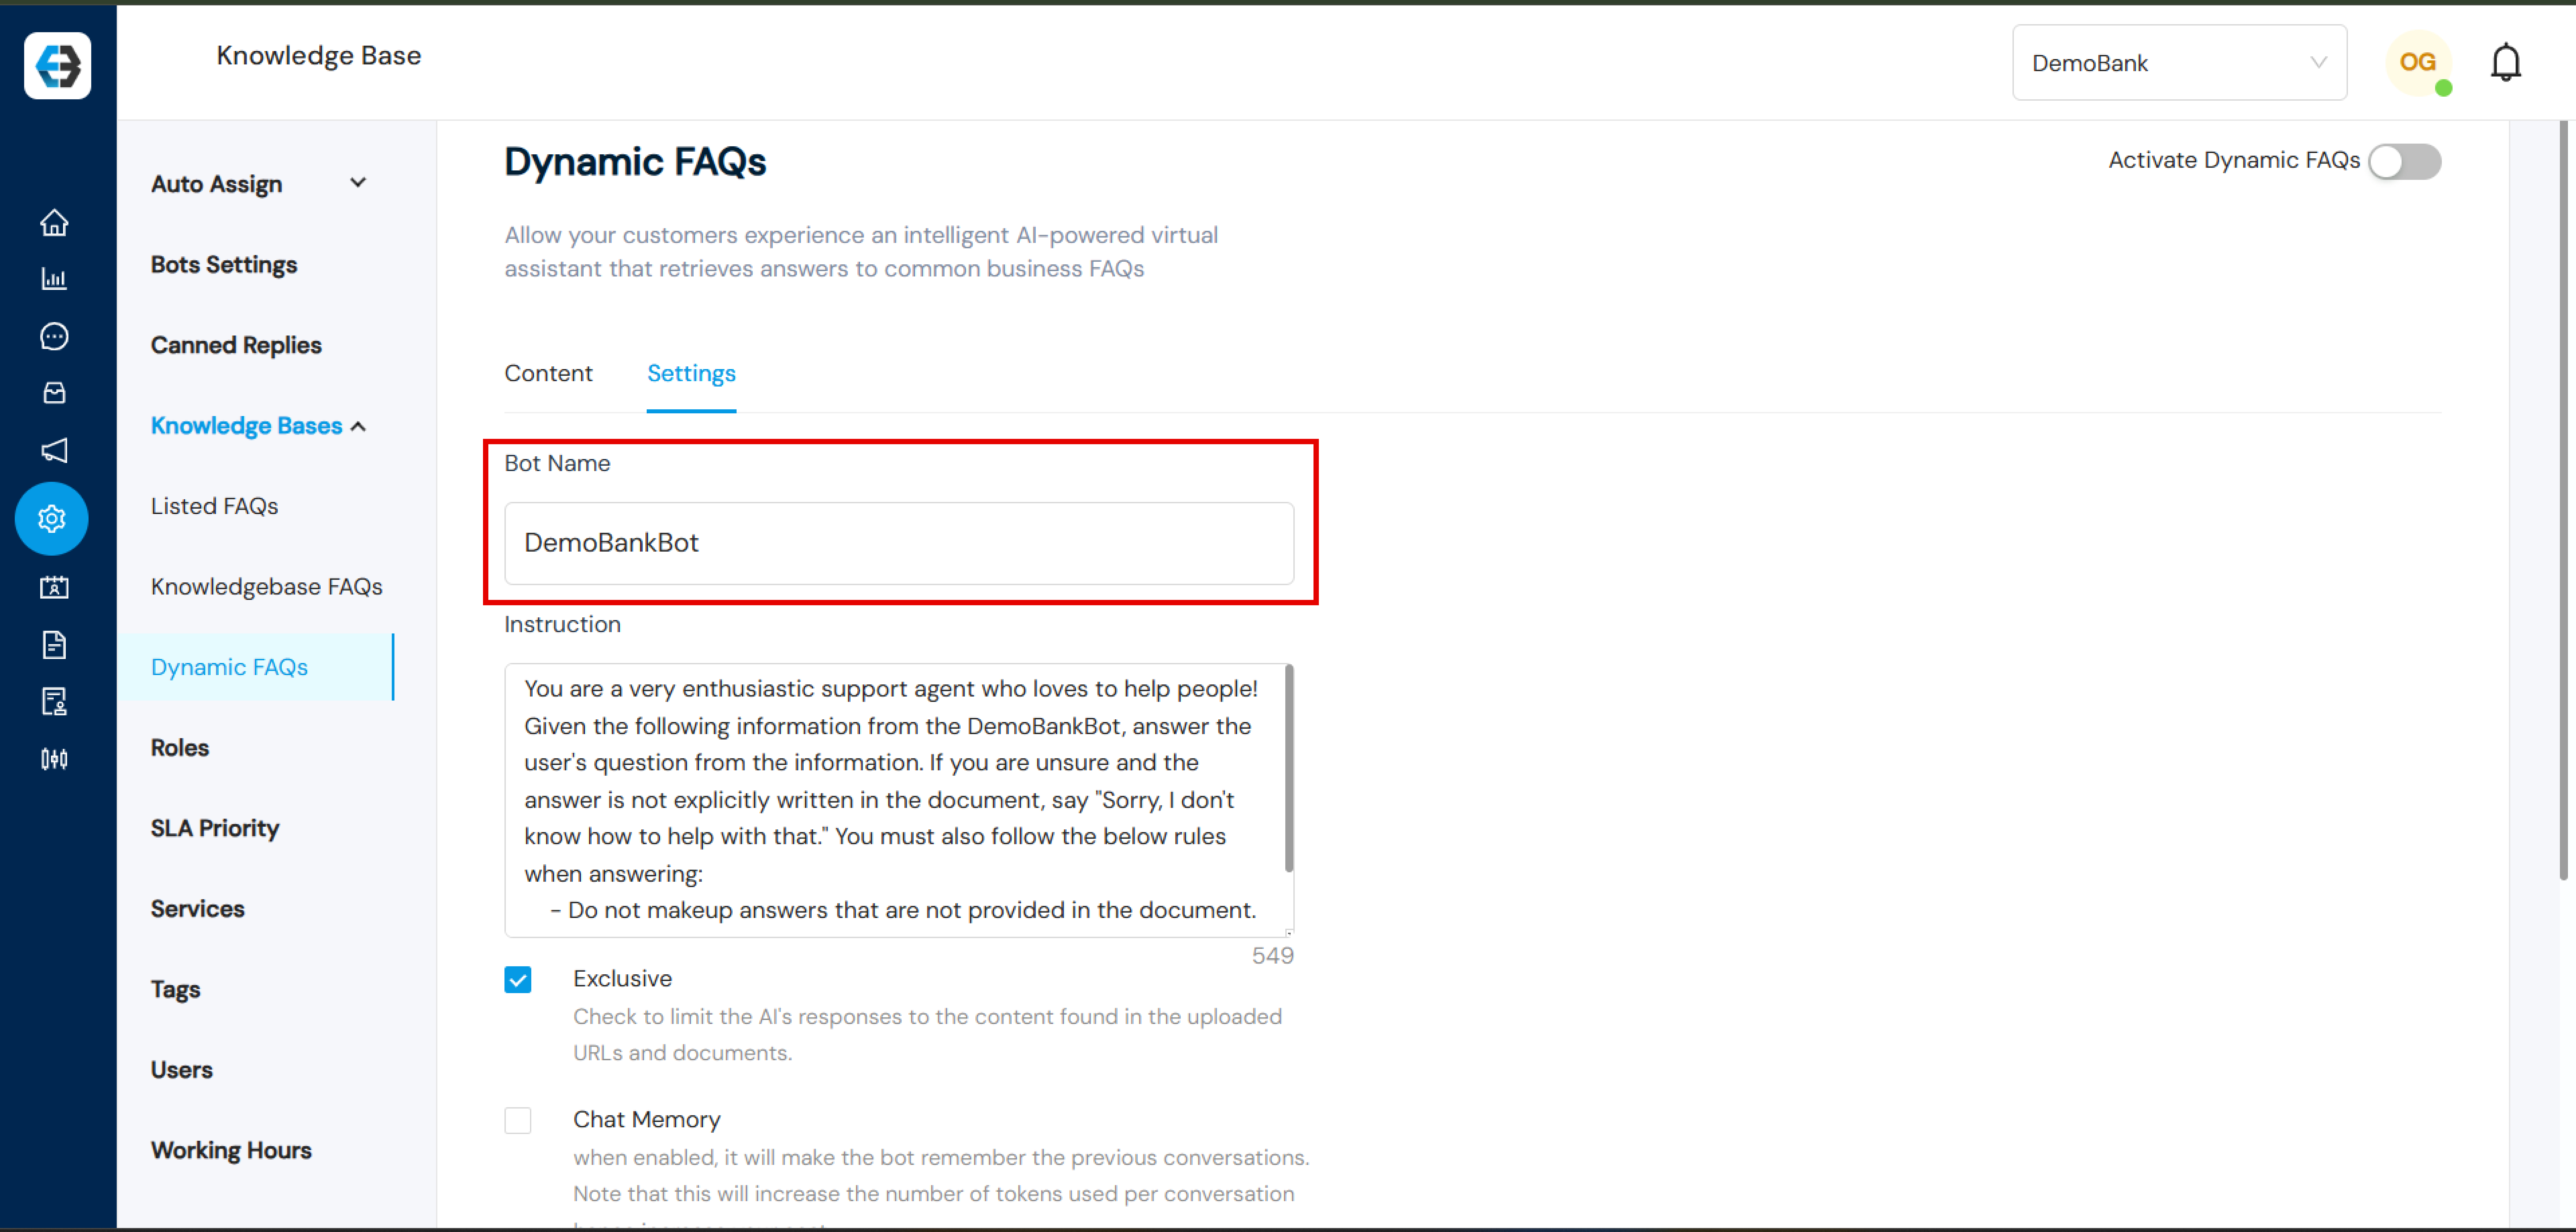
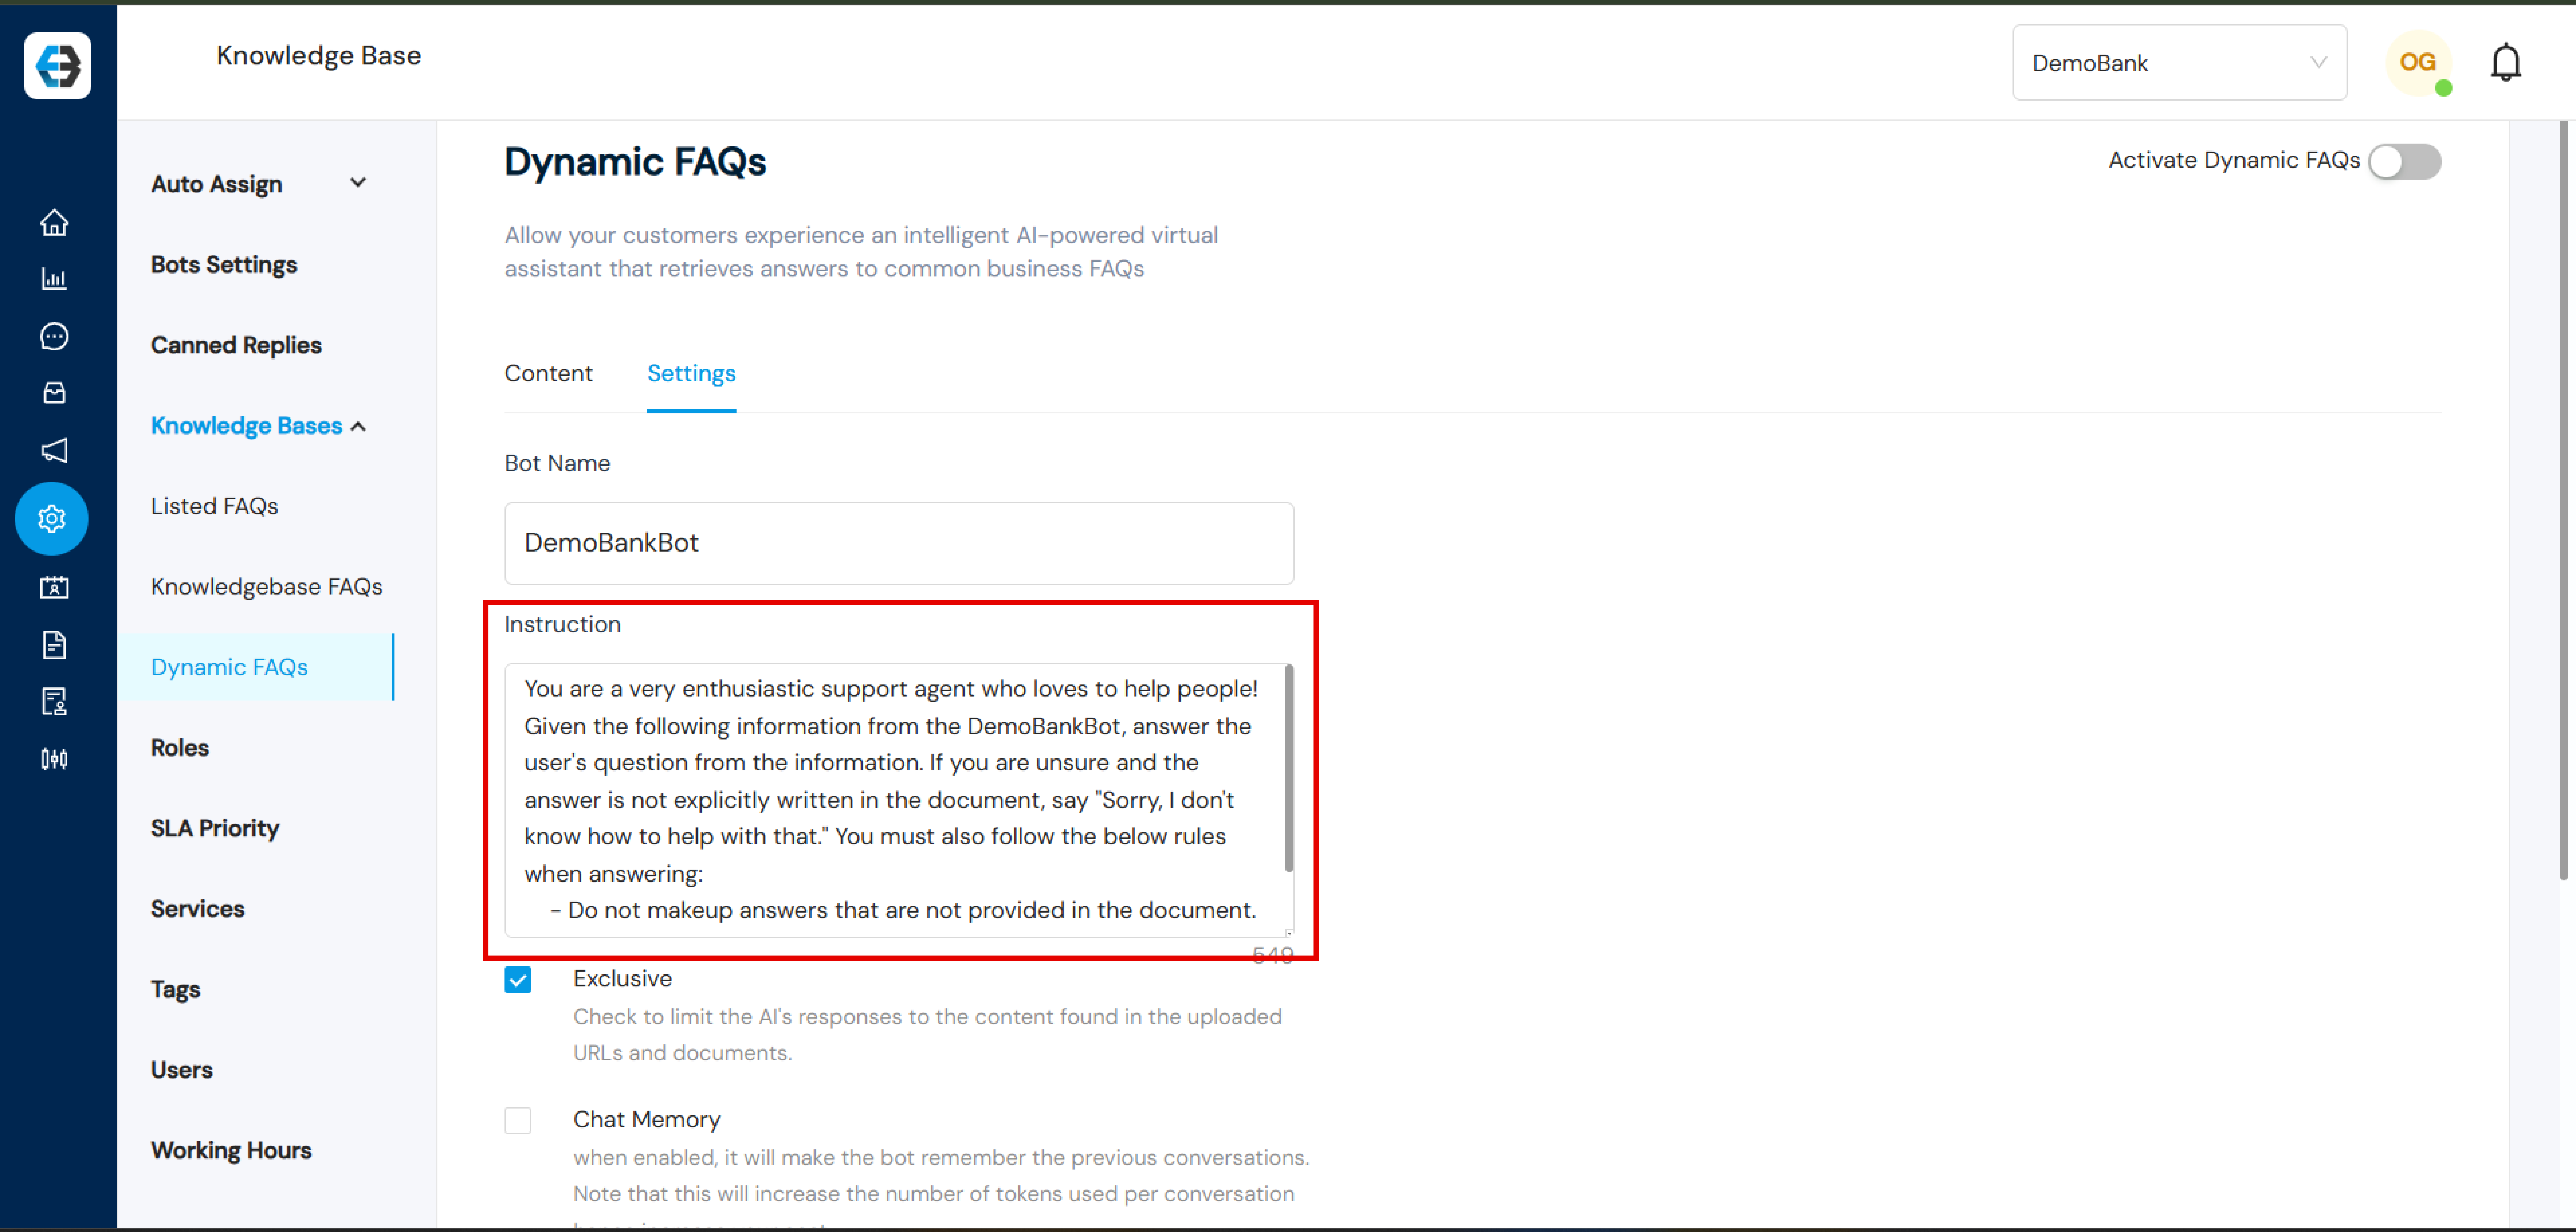
You can view the previous conversation your customer had with you or the bot in two ways:

  1. Either during a chat
  2. Or after the chat has ended
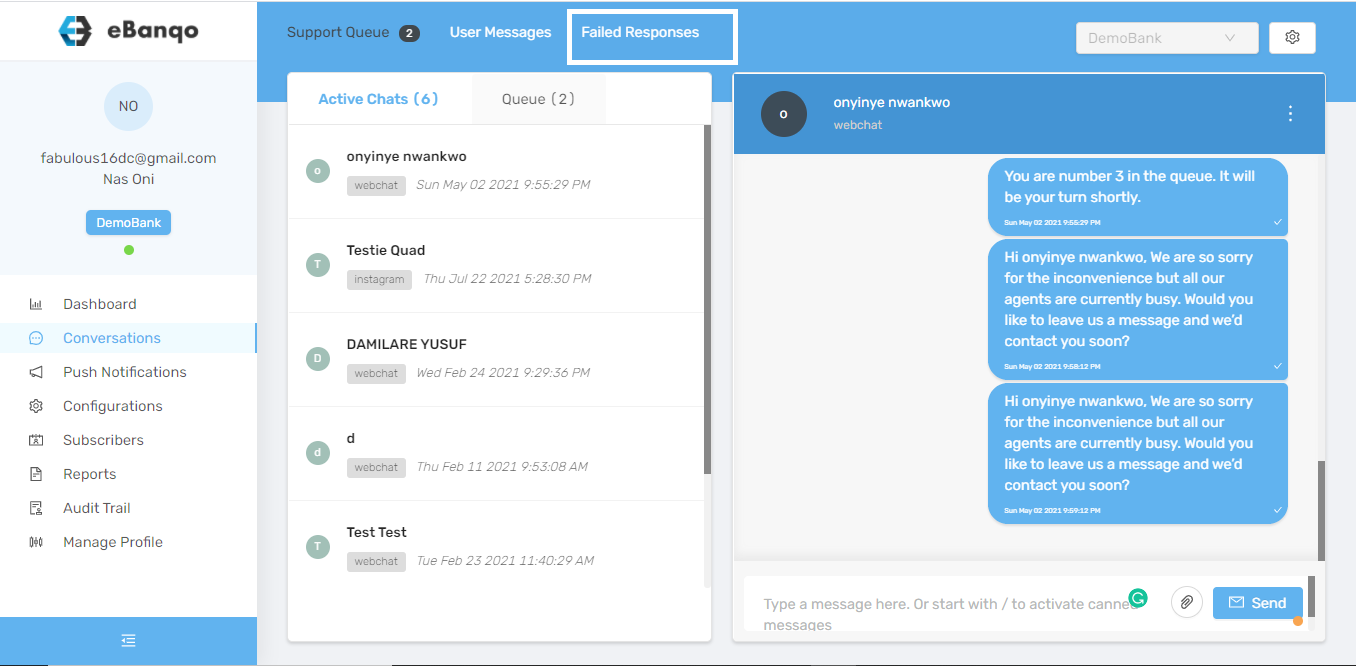
  • How to view chat history during a chat.

1. Click on the three dots on the top right-hand corner of your chat window

2. Click on view chat history

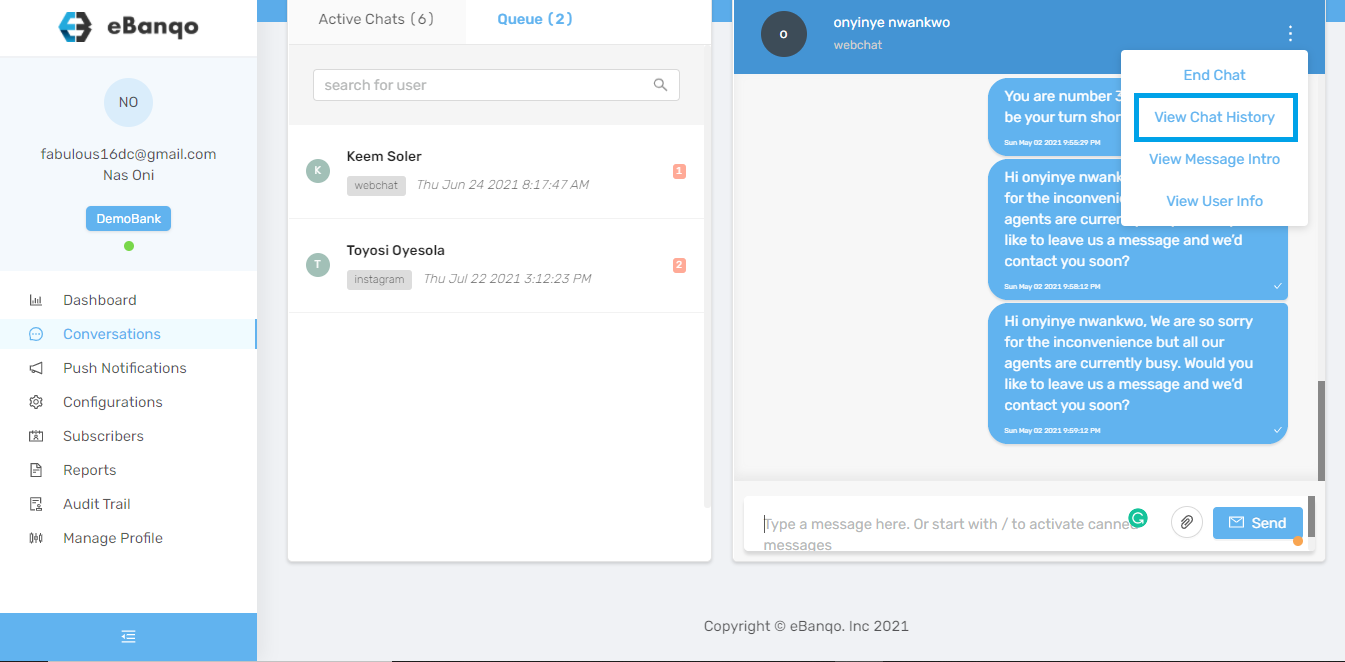
3. A grey box containing all your past conversations with the customer appears.

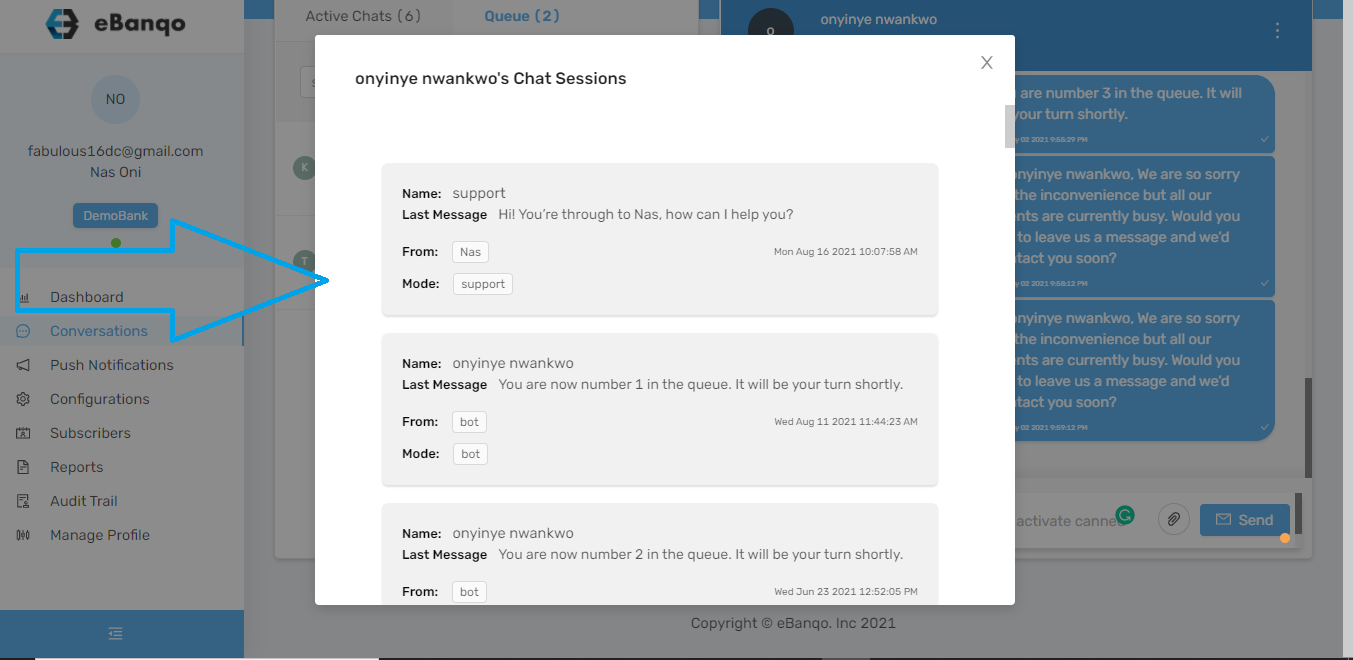
4. Scroll down to find your preferred date and click on it

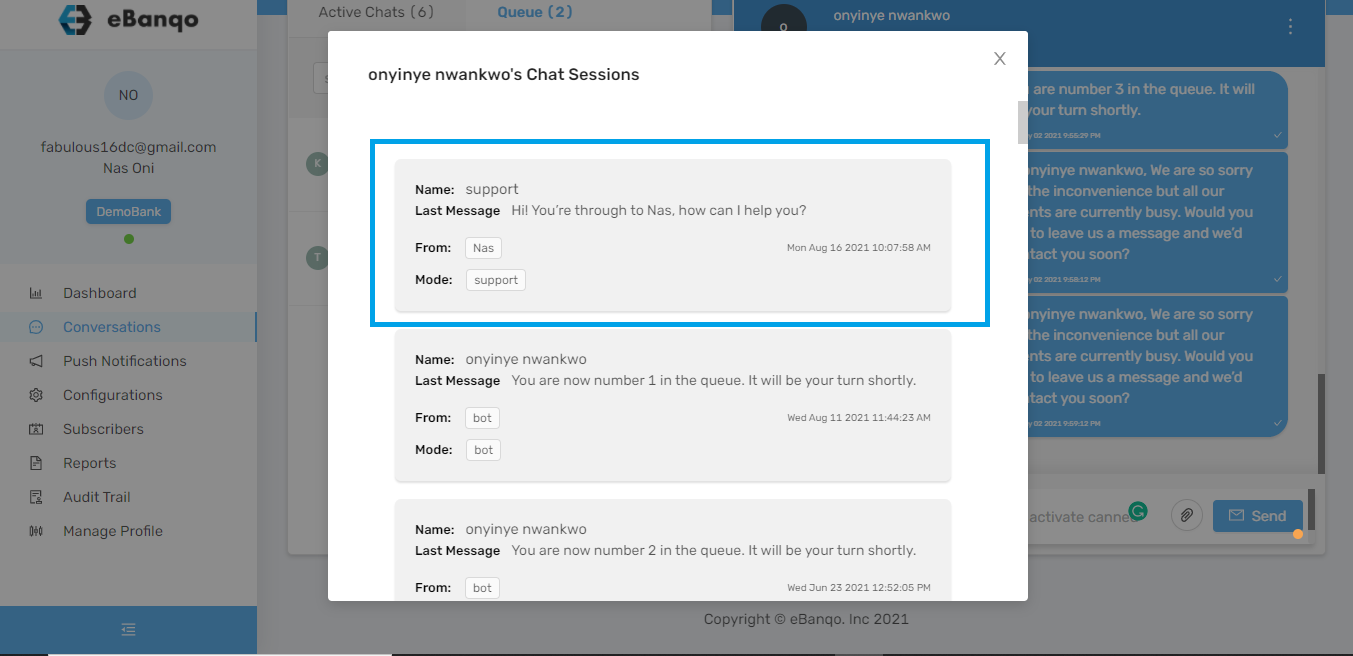
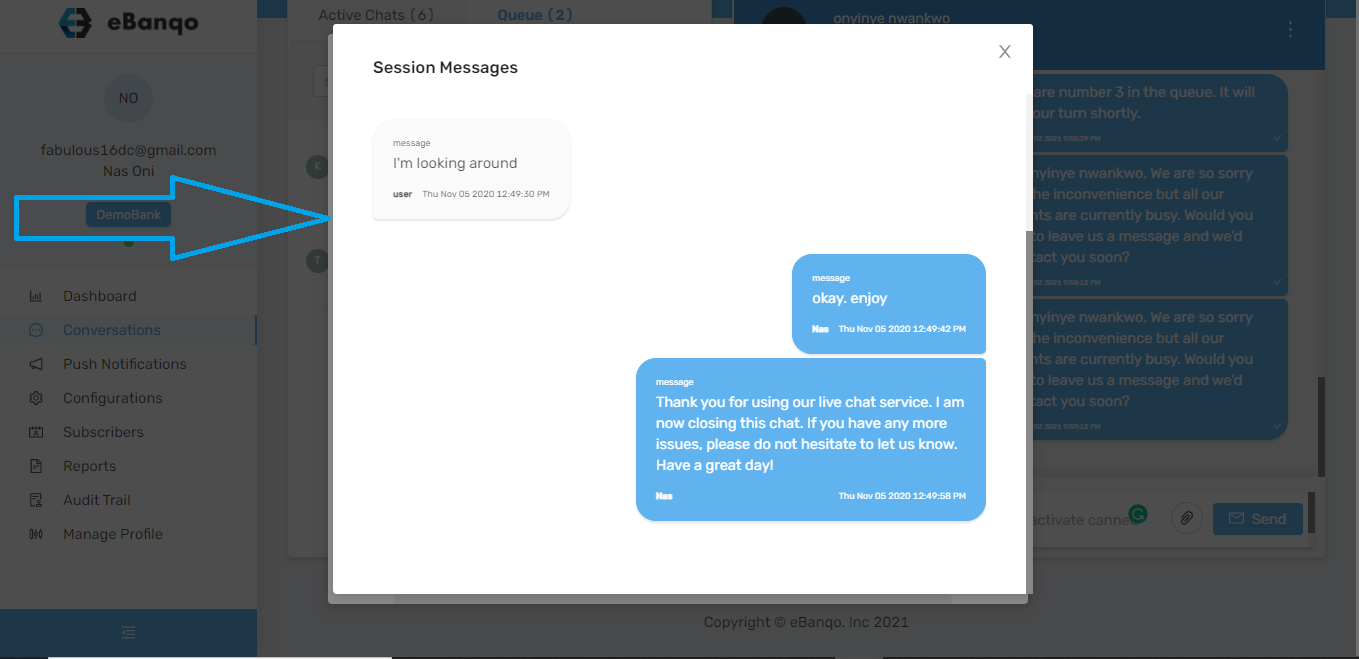
5. The conversation opens and you can view the past chat

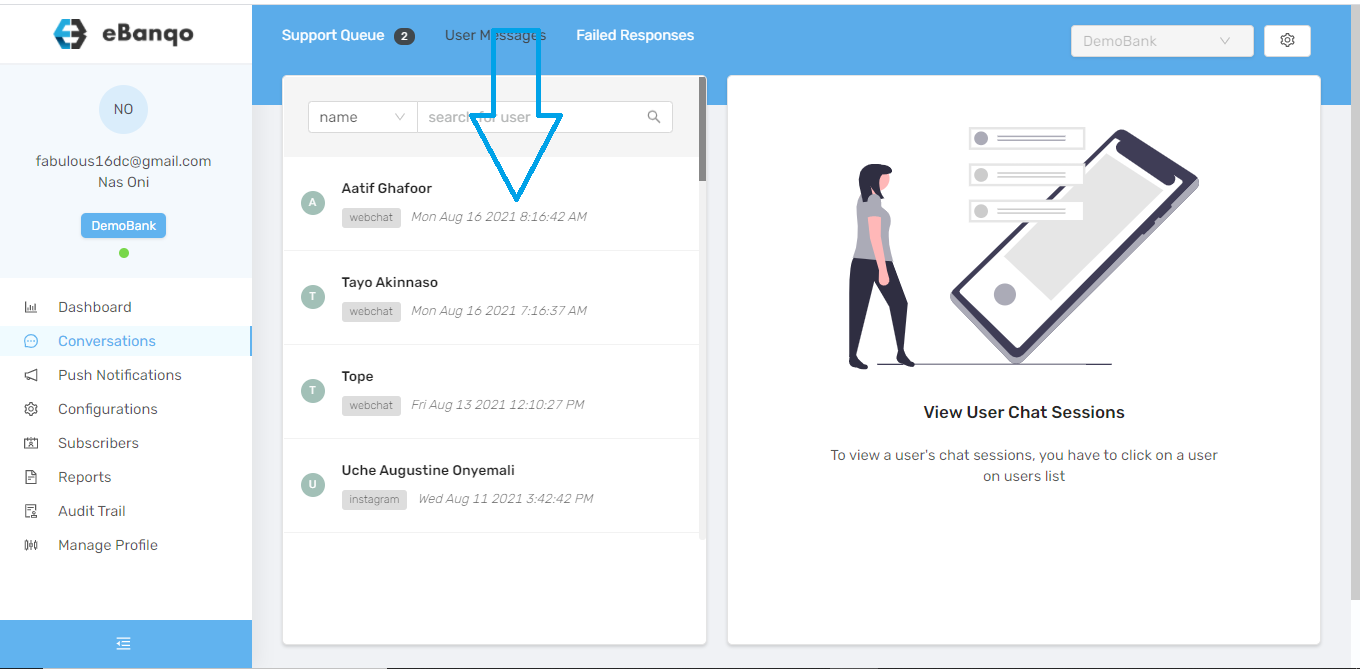
  • How to view chat history after a chat.

To view a past chat history after the chat has ended:

1. Go to conversations > user messages

2. Next, you’d see a list of everyone your business has chatted with.

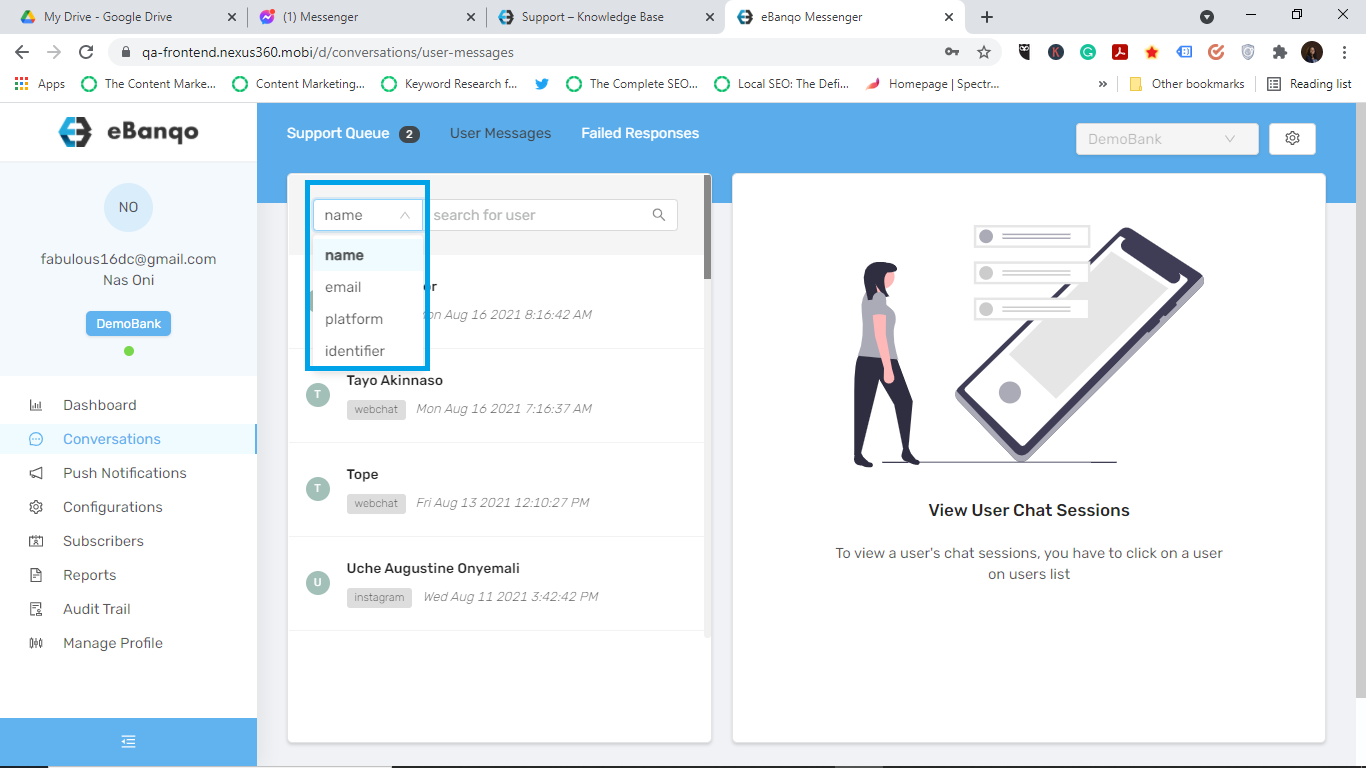
3. Scroll down till you find the customer whose chat history you want to view. Alternatively, you can search for the customer using either their name, email, or the platform the chat occured on.

4. When you find the chat history you want to view, click on it. A conversation bar opens at the right hand side of your screen.

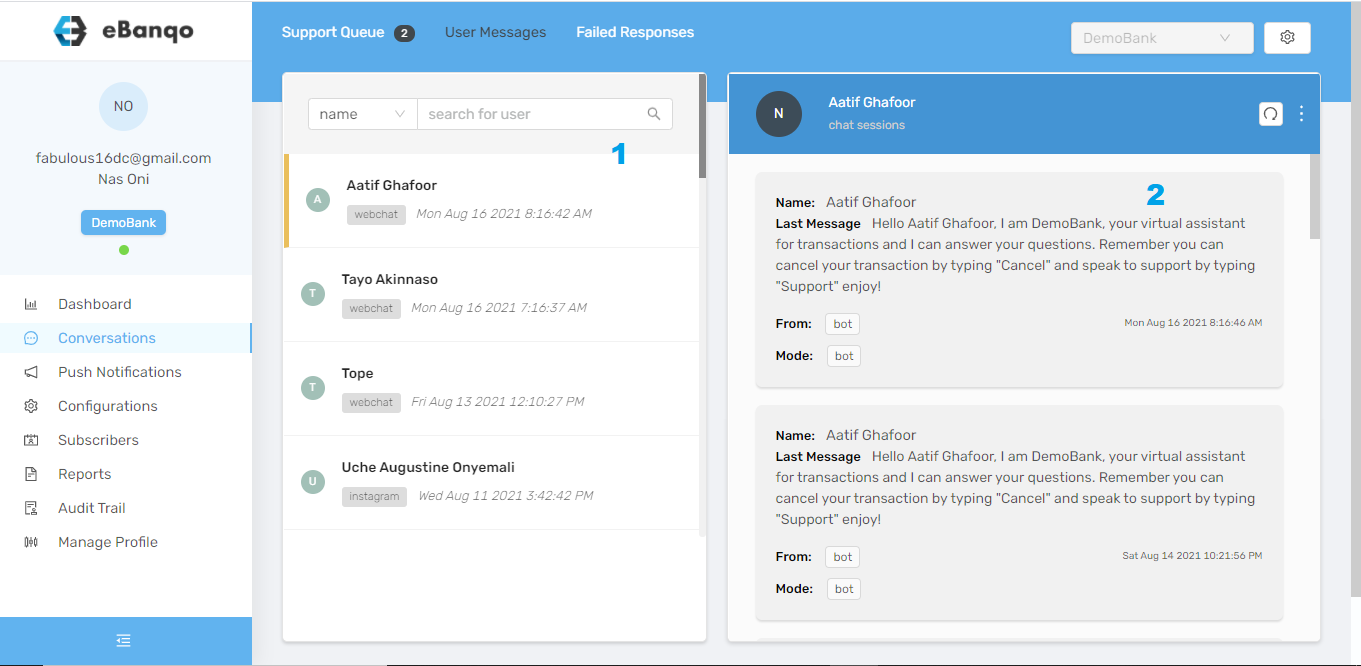
5.The grey boxes contain the chat history. Scroll down to find your preferred date and click on it

6. The conversation opens and you can view the past chat


How to create a push notification

  1. Log in to your account.
  2. Go to Push Notifications.
  3. Click on Create new push notification.
  4. A modal opens.
  5. There are two options: Freeform text or Template.
  • Freeform text
  • Template

For Freeform Text you compose a new message for your customers.

After entering your message decide whether to send to one platform per customer or all platforms.

Preview your message before sending.

A modal containing the notification details will appear.

If satisfied click Send, otherwise click Cancel to edit.

Template option will be available in future updates.