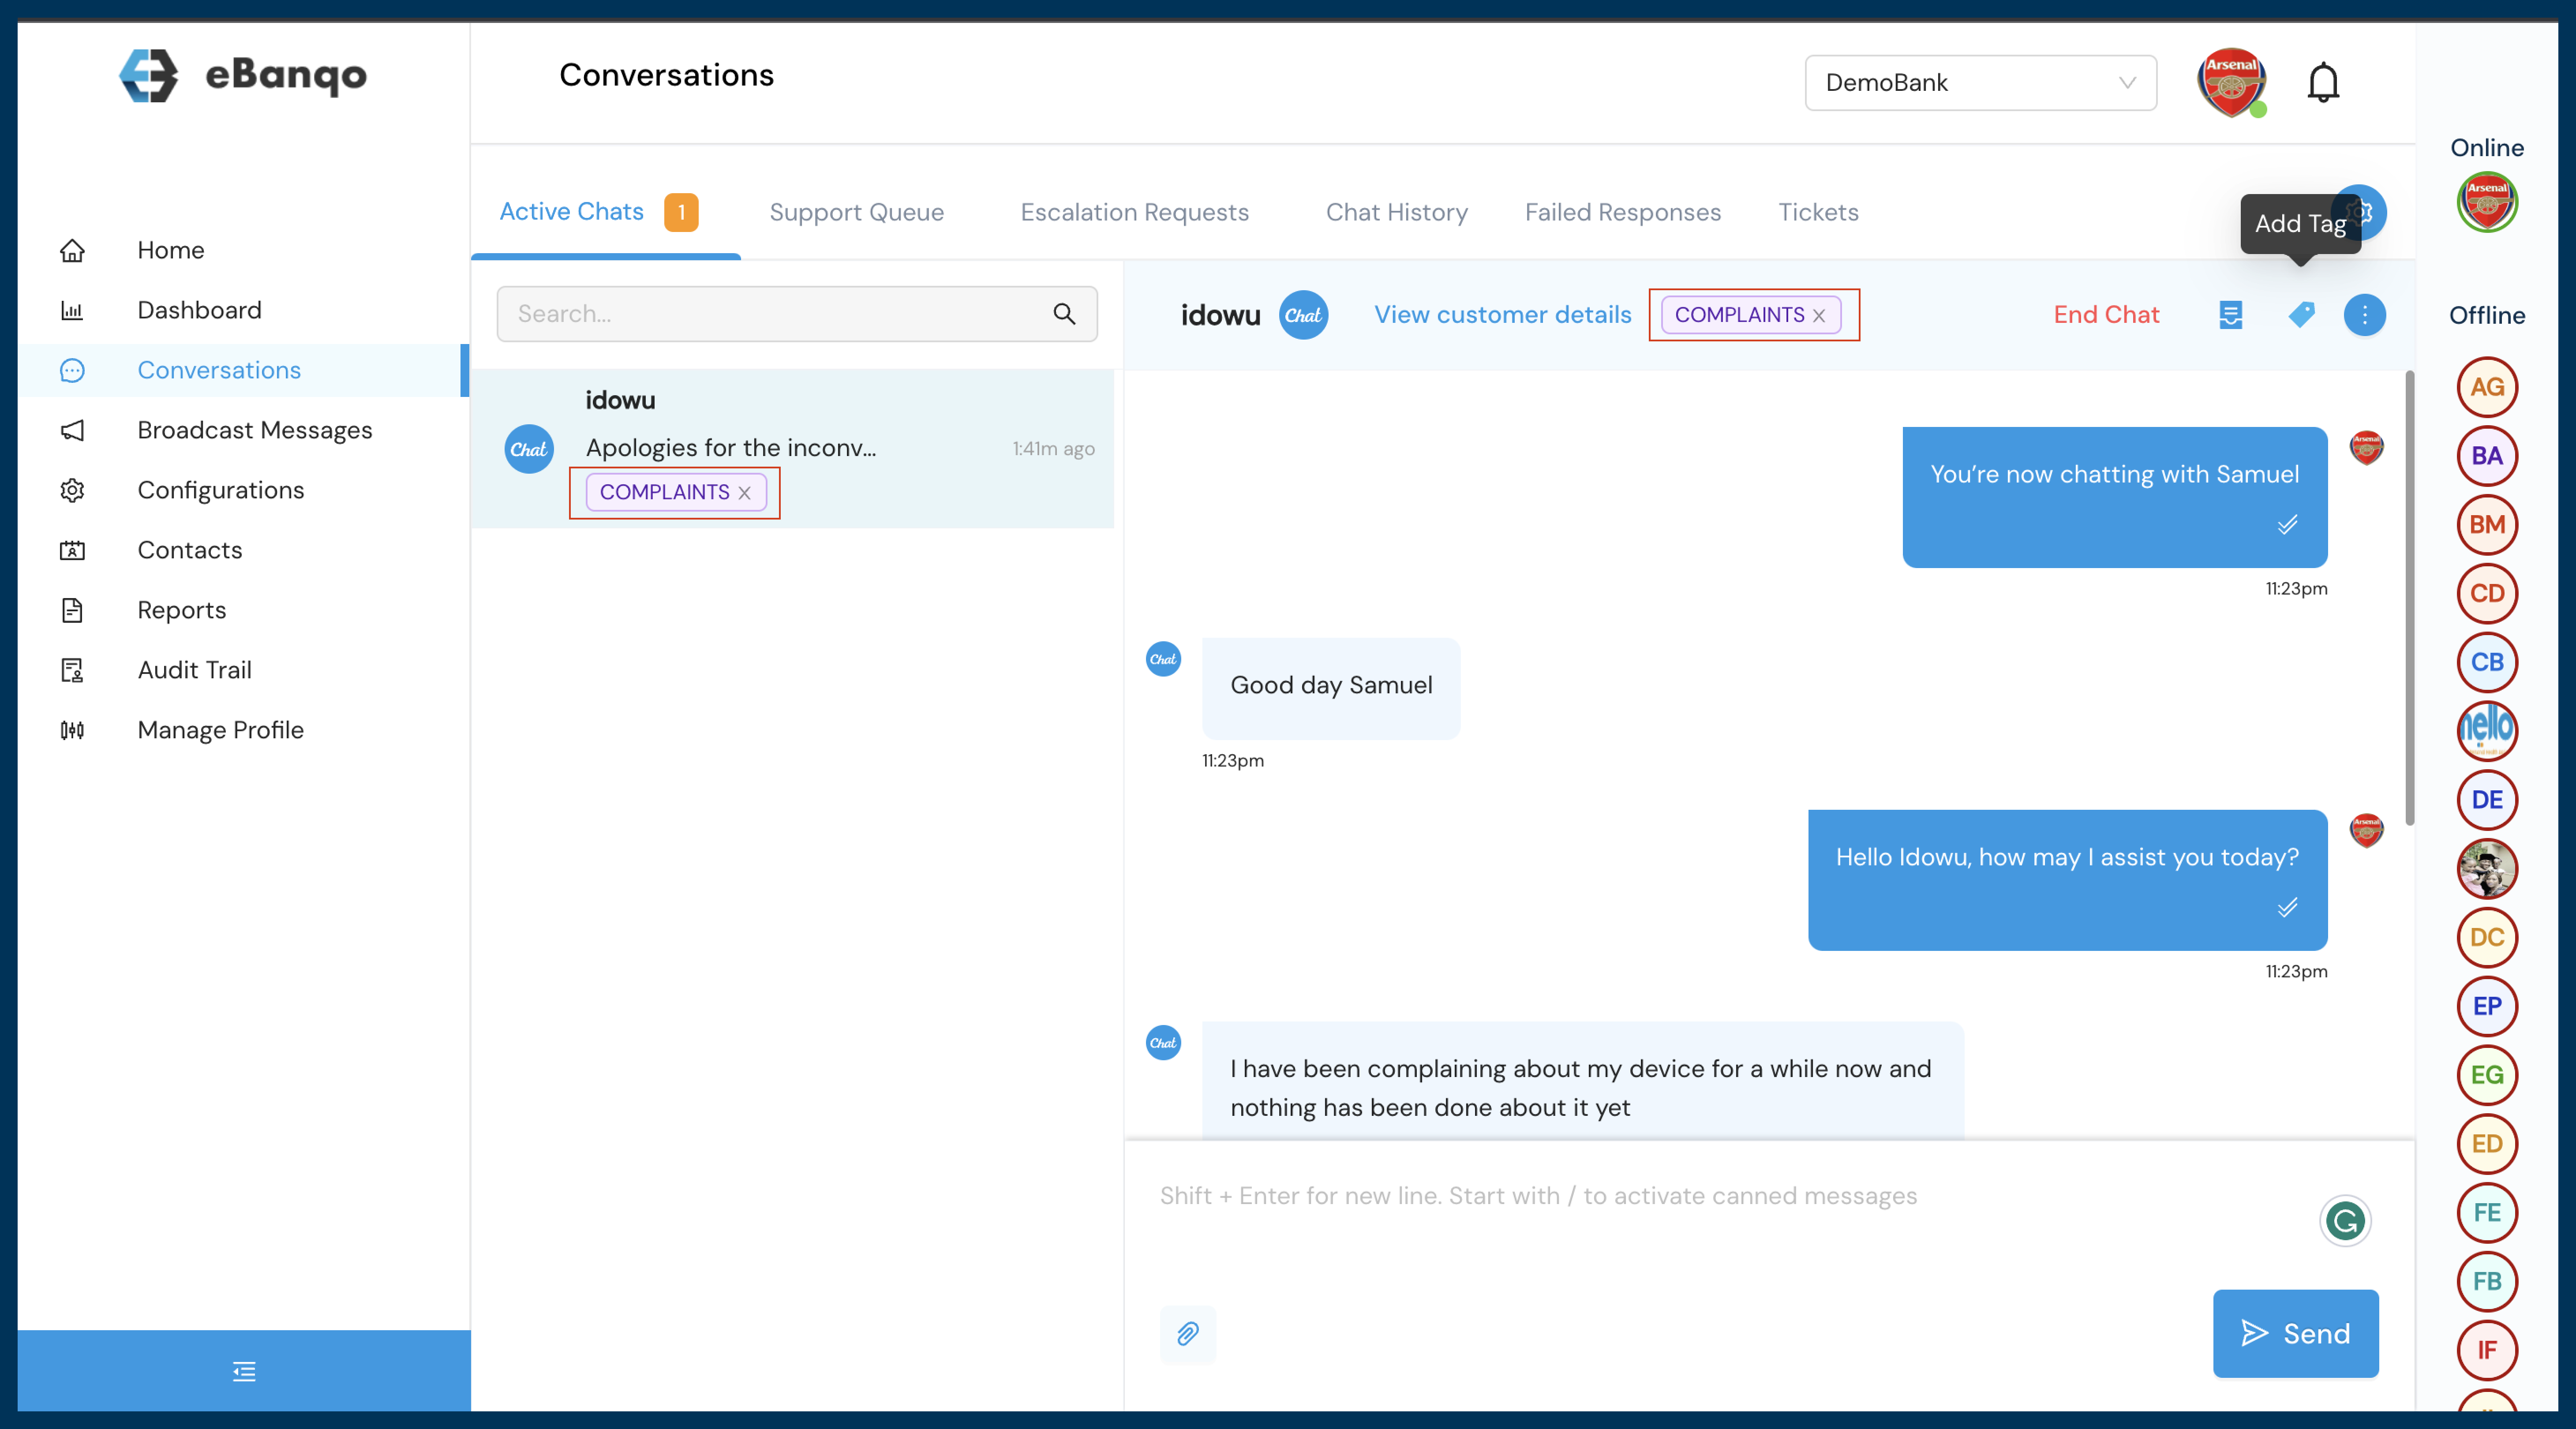
You can view the previous conversation your customer had with you or the bot in two ways:
Either during a chat
Or after the chat has ended
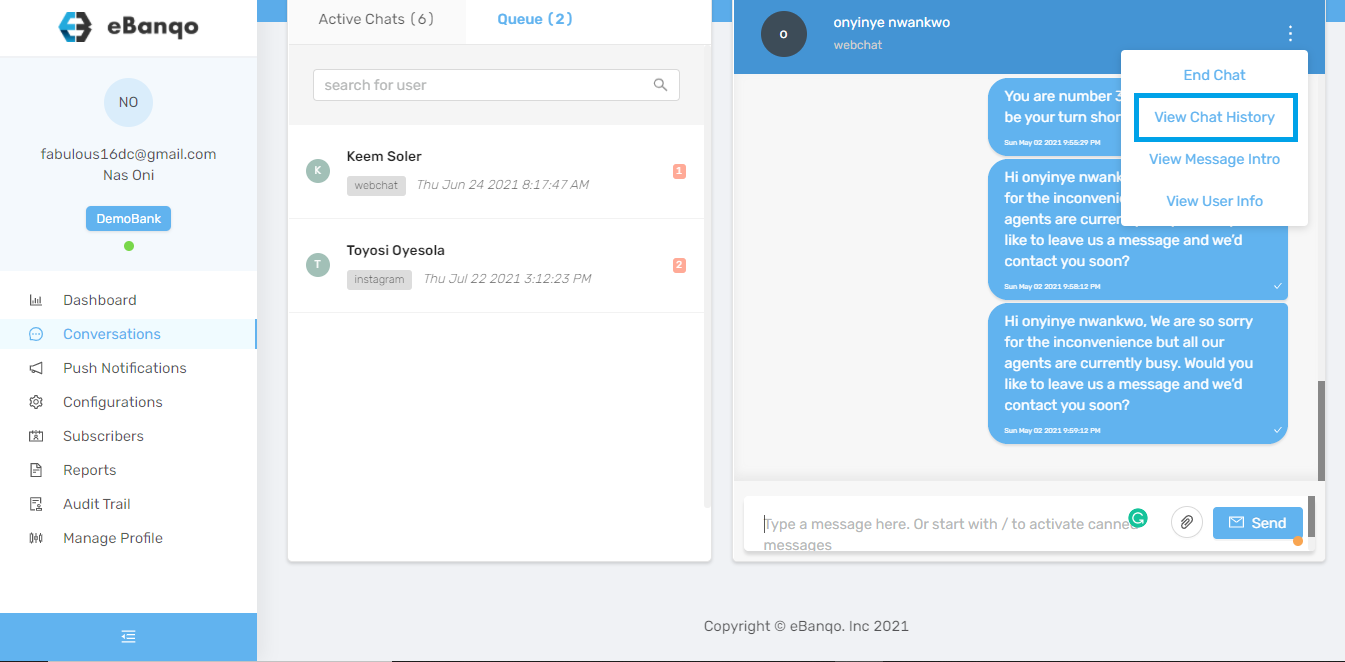
How to view chat history during a chat.
1. Click on the three dots on the top right-hand corner of your chat window
2. Click on View Chat History
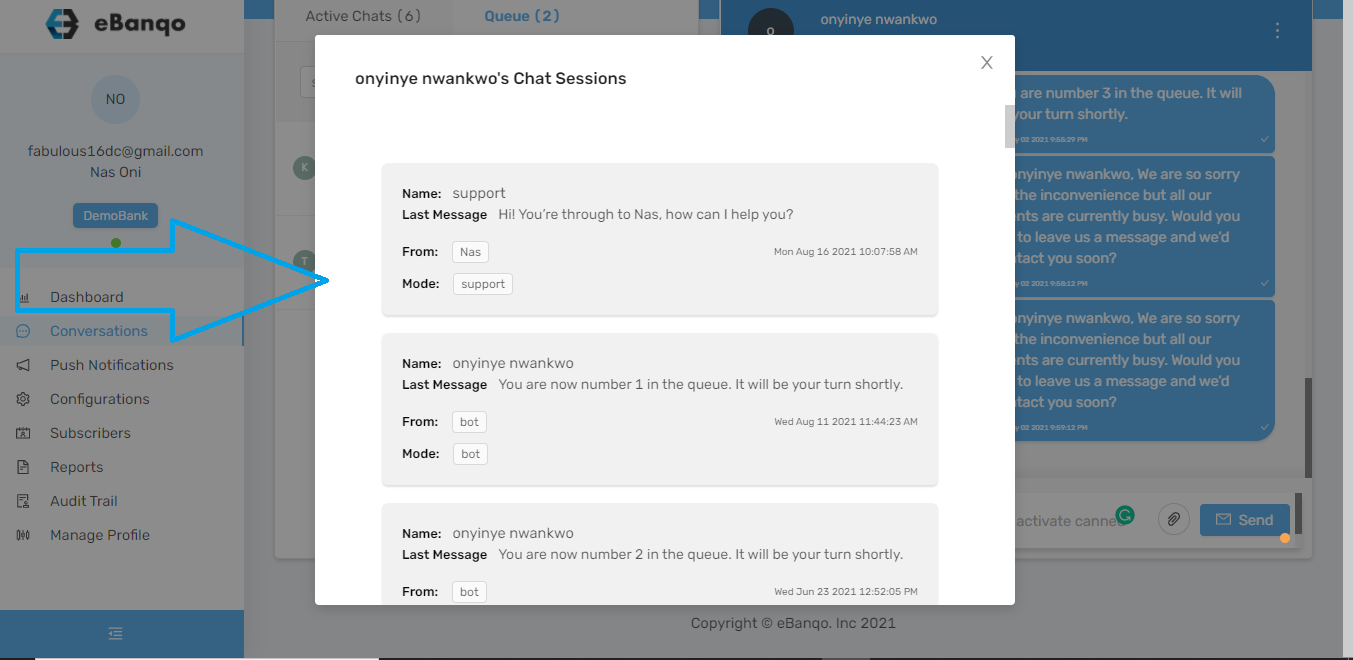
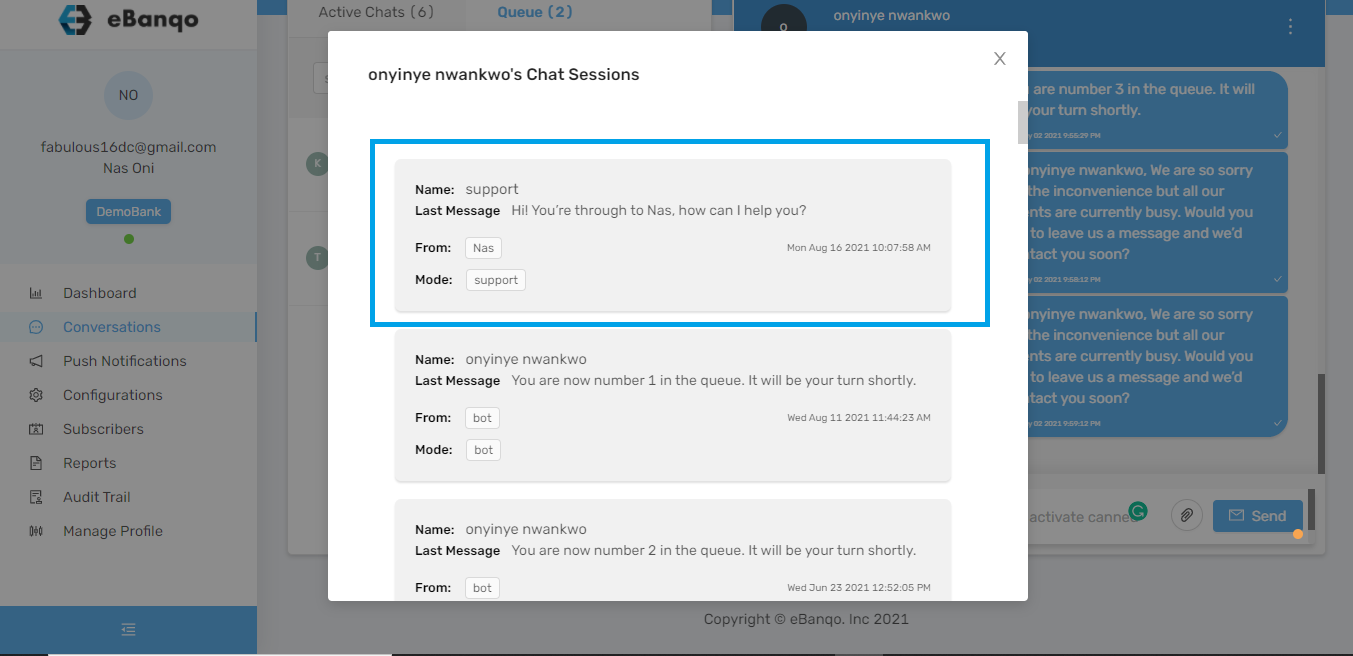
3. A grey box containing all your past conversations with the customer appears.
4. Scroll down to find your preferred date and click on it
5. The conversation opens and you can view the past chat
How to view chat history after a chat.
To view a past chat history after the chat has ended:
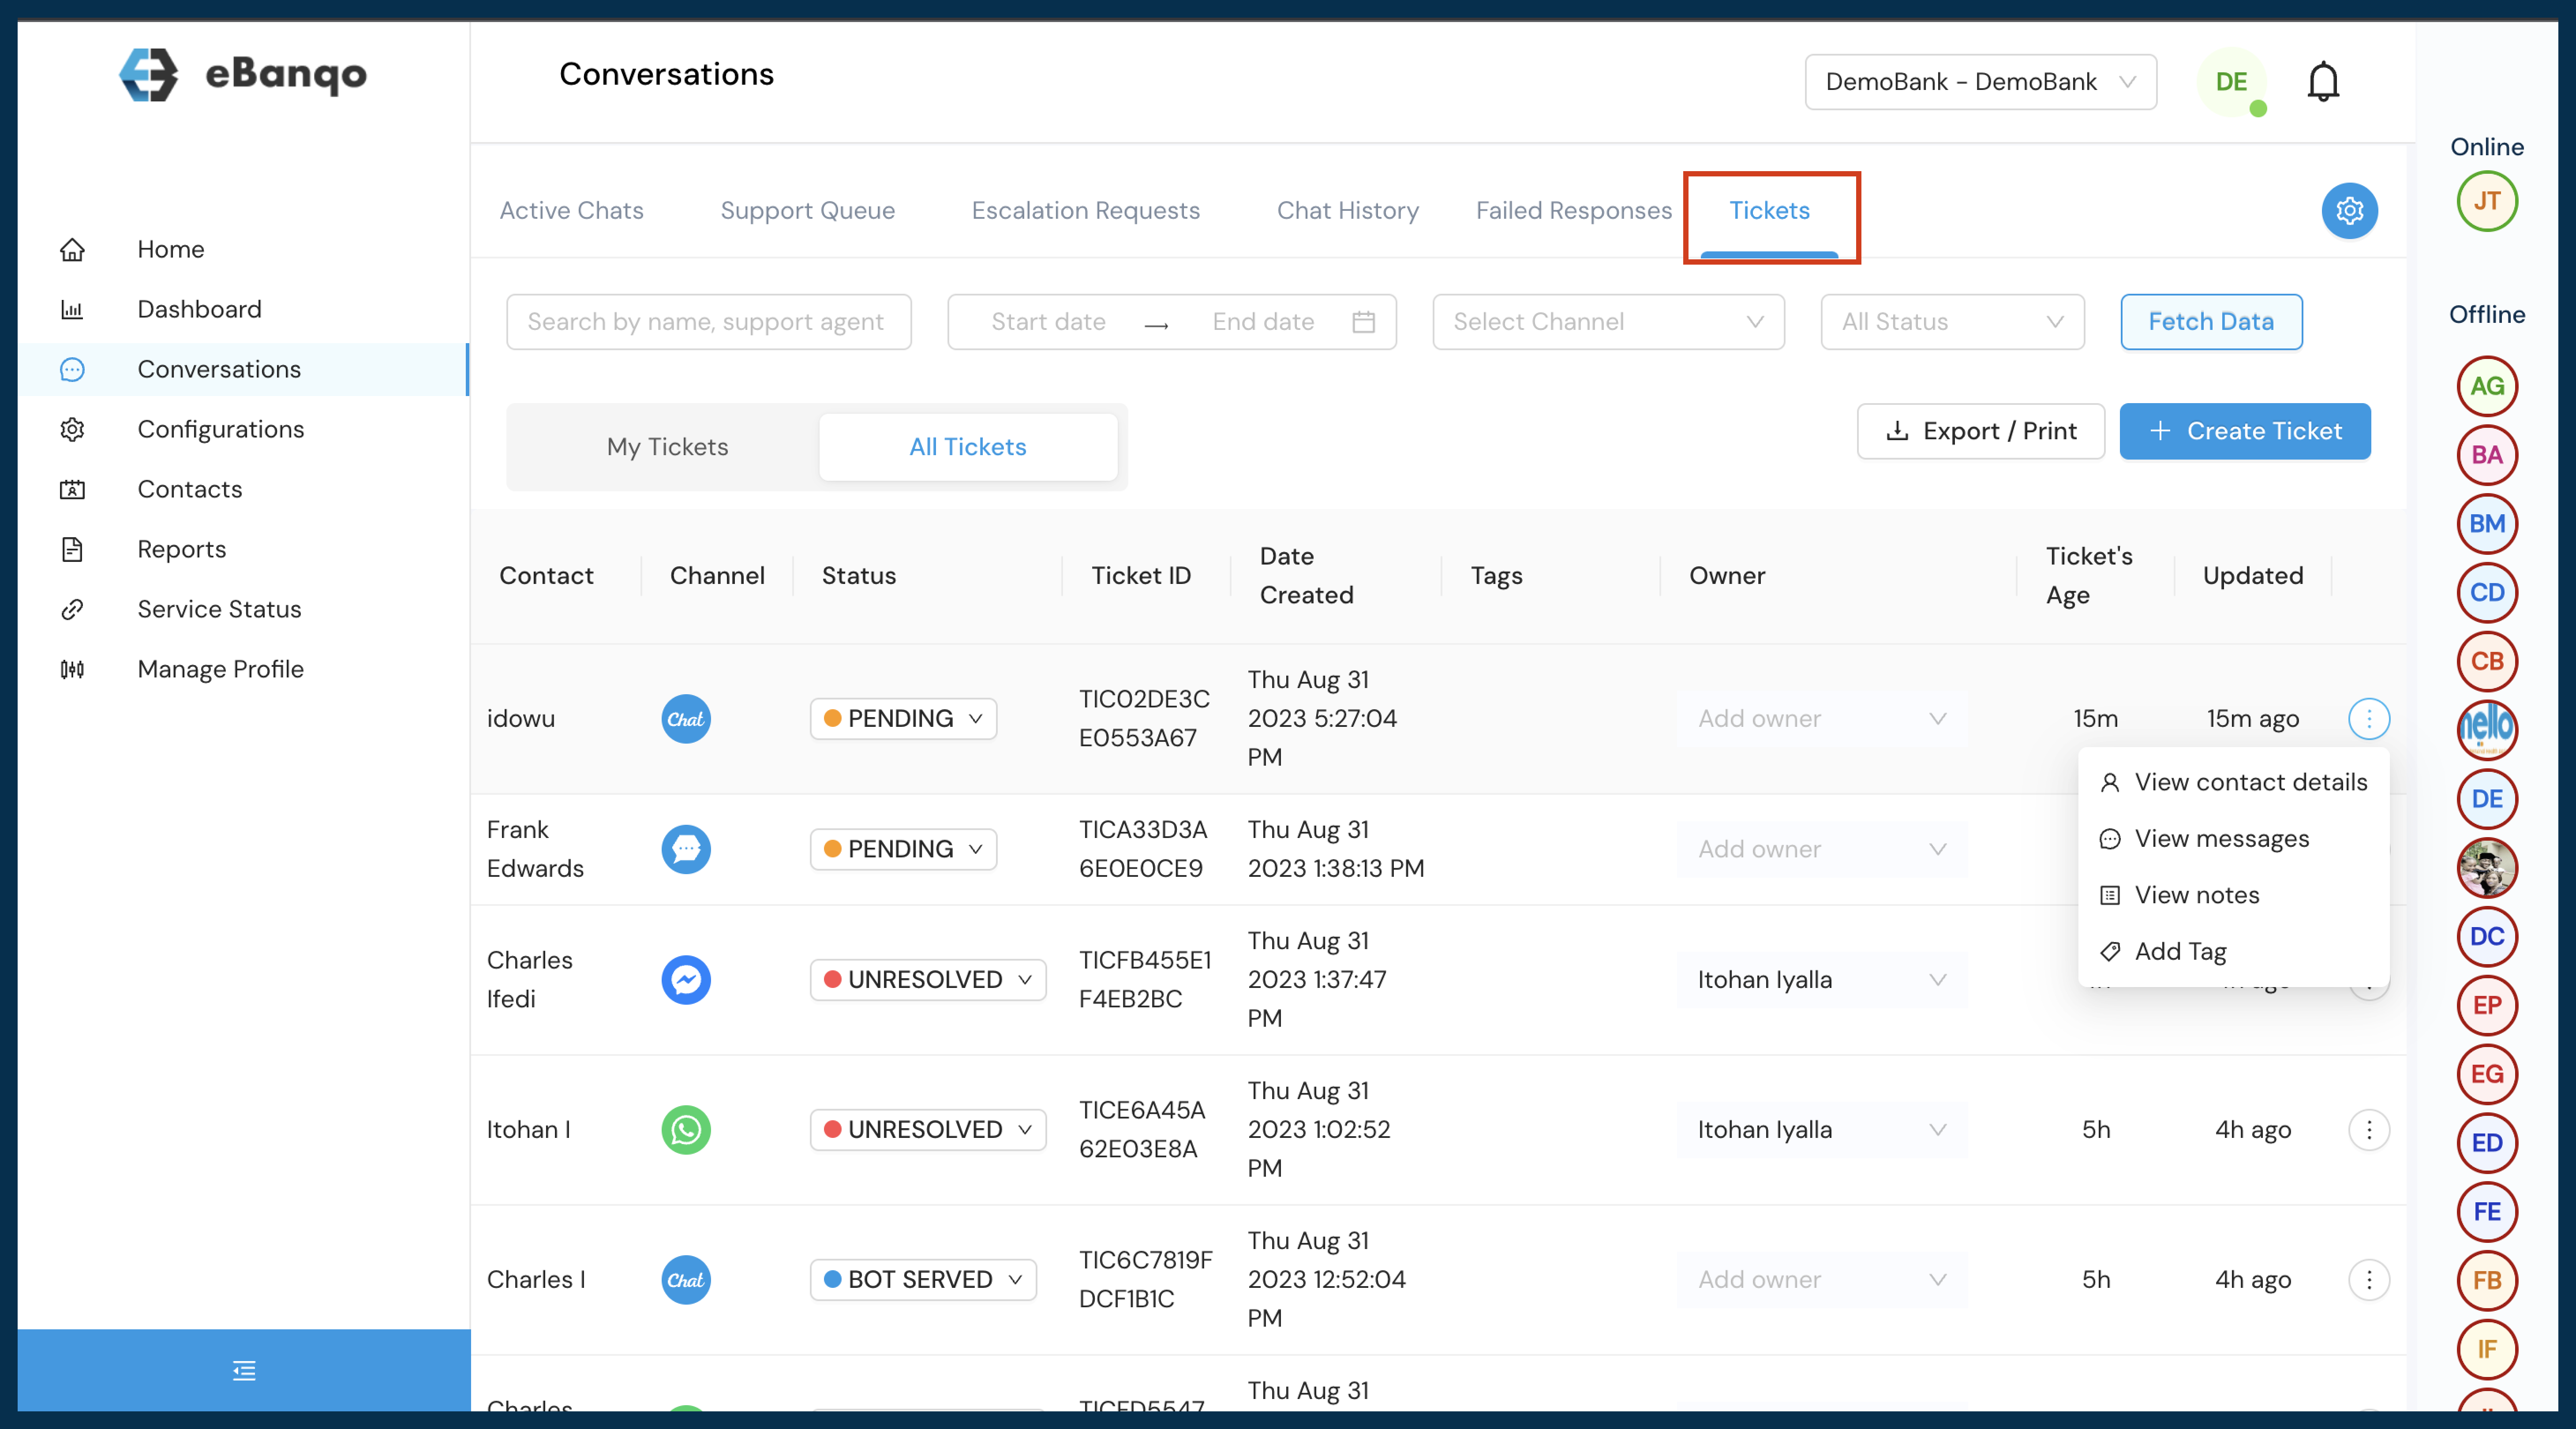
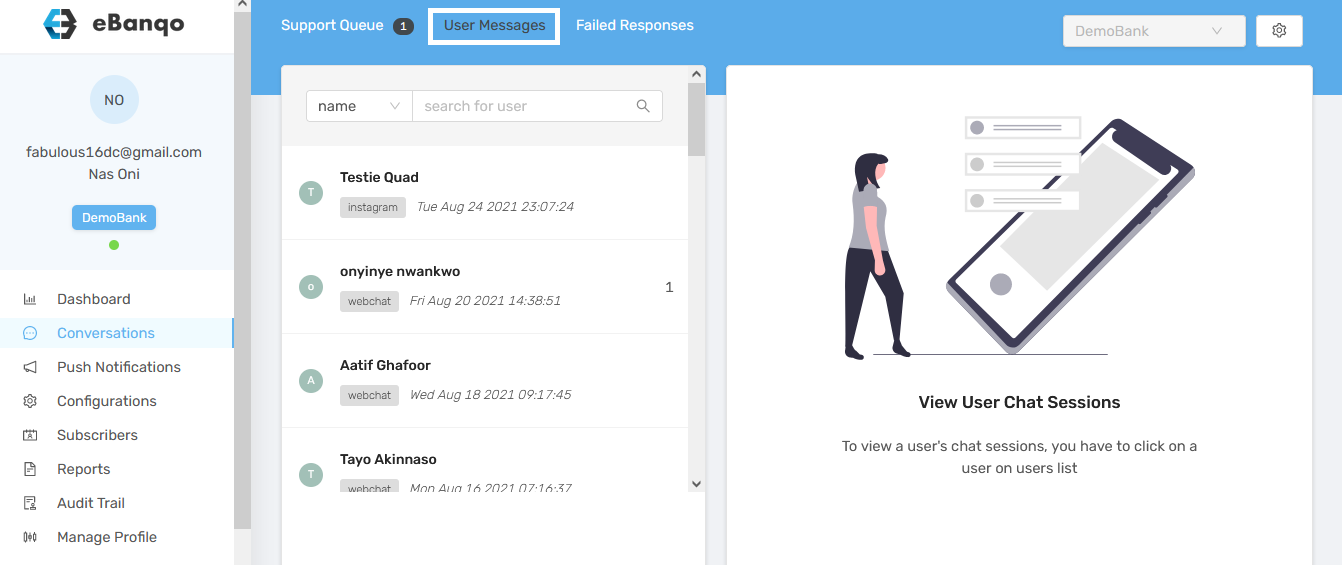
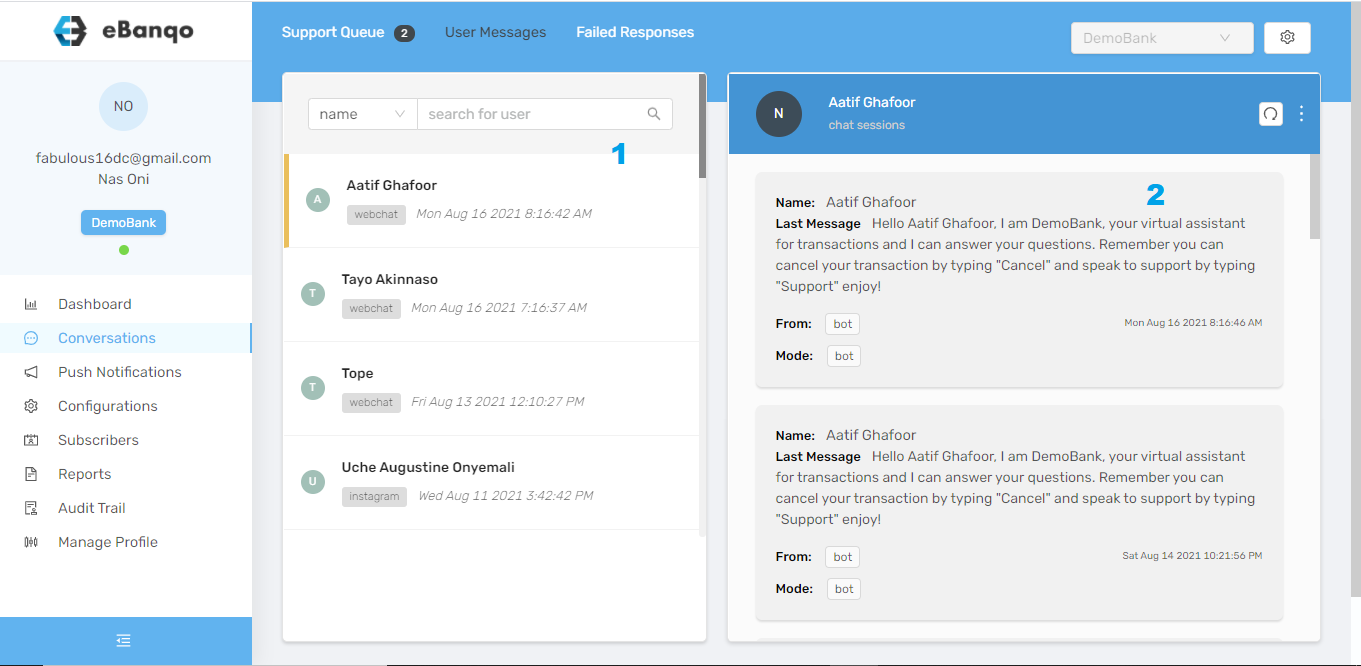
1. Go to Conversations > User Messages
2. Next, you’d see a list of everyone your business has chatted with.
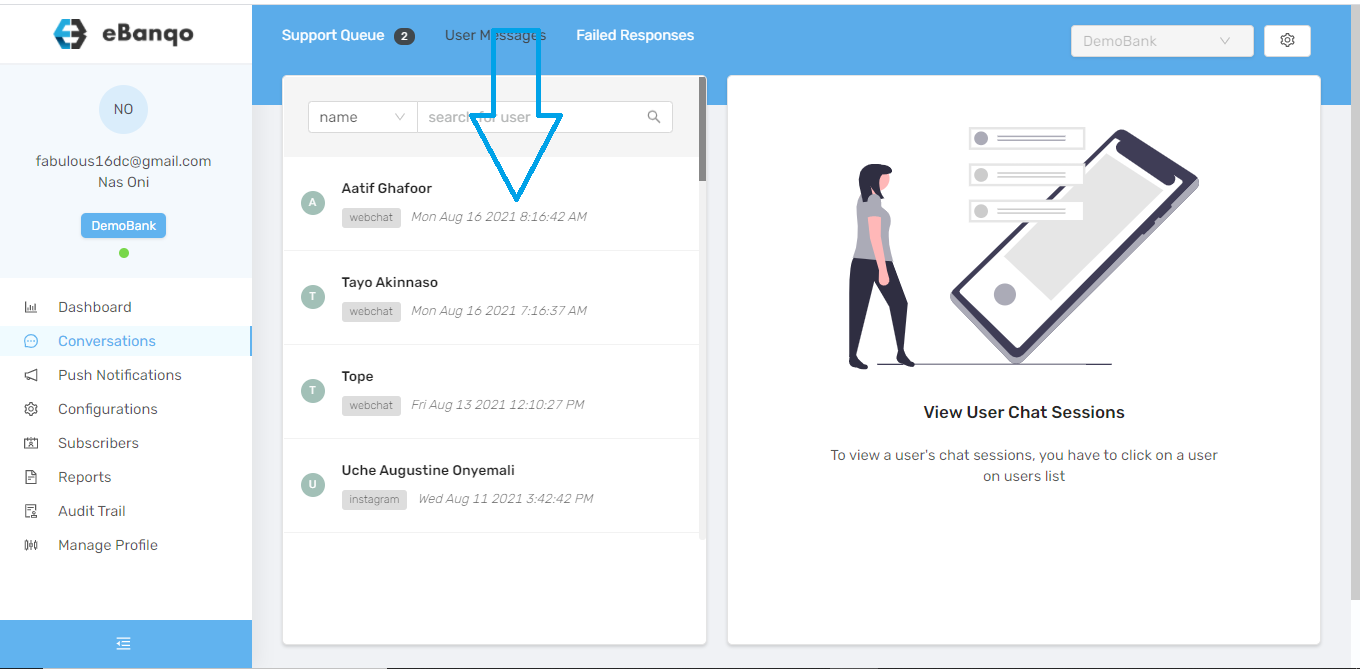
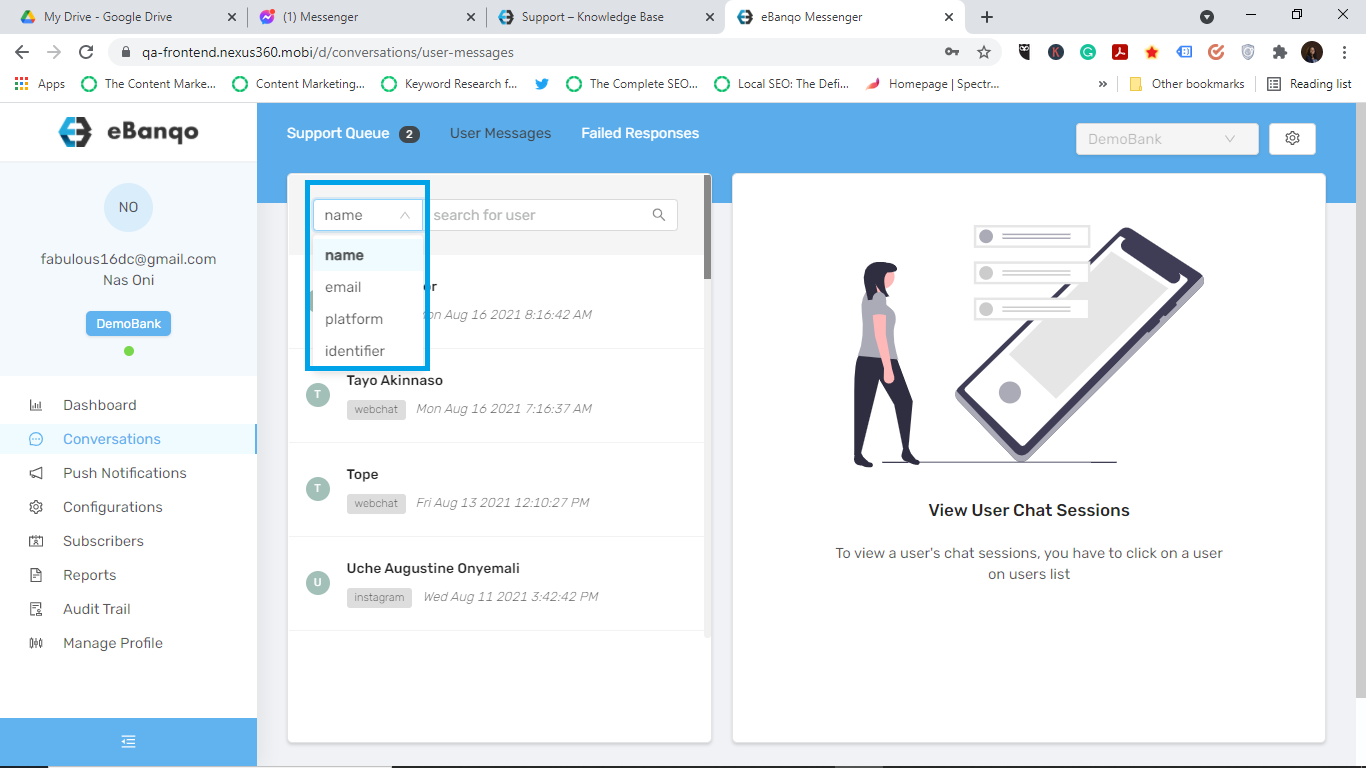
3. Scroll down until you find the customer whose chat history you want to view. Alternatively, you can search for the customer using either their name, email, or the platform the chat occurred on.
4. When you find the chat history you want to view, click on it. A conversation bar opens on the right-hand side of your screen.
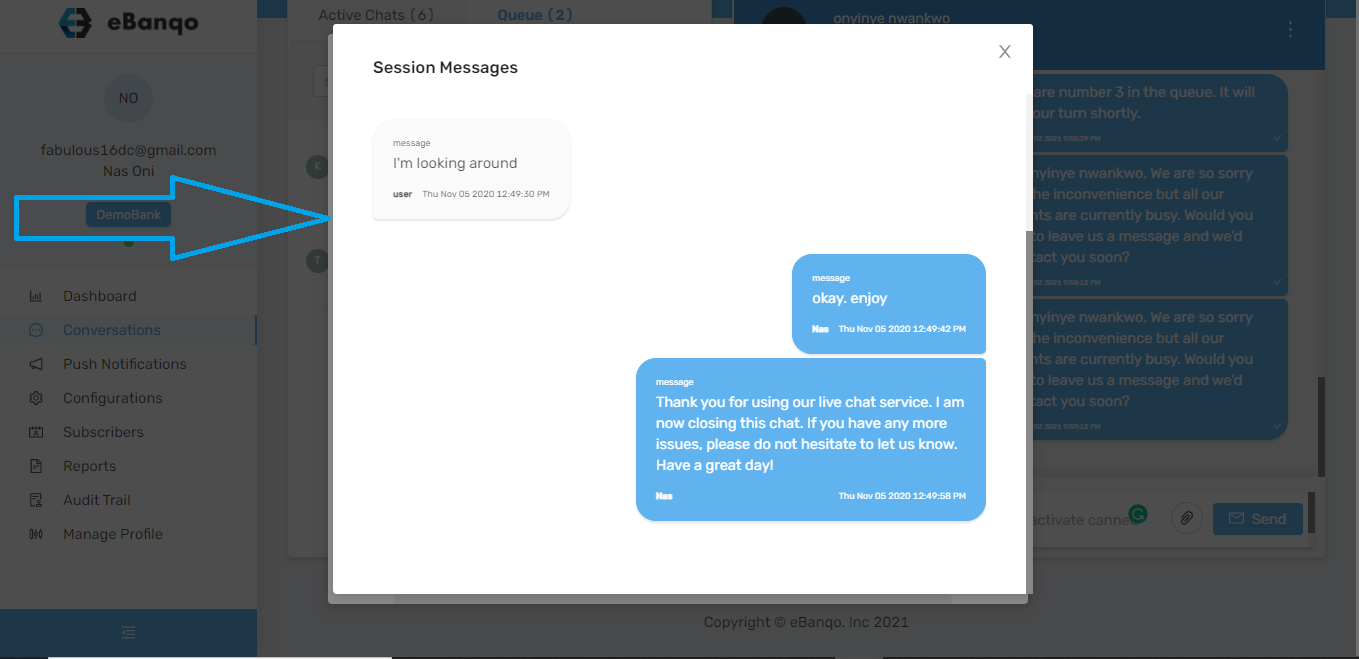
5. The grey boxes contain the chat history. Scroll down to find your preferred date and click on it.
6. The conversation opens and you can view the past chat.
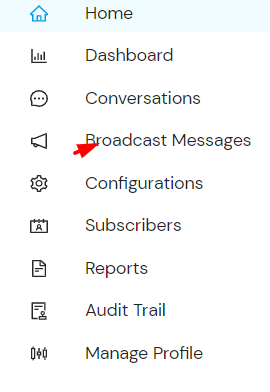
Users with permissions are allowed access to the Broadcast messages to initiate 2 Way Engagement with customers with use cases such as; promos, collection of feedback, distribution of Information, OTP Authentication, etc.
Types of Broadcast messages;
Template broadcast messages
Free Text broadcast messages
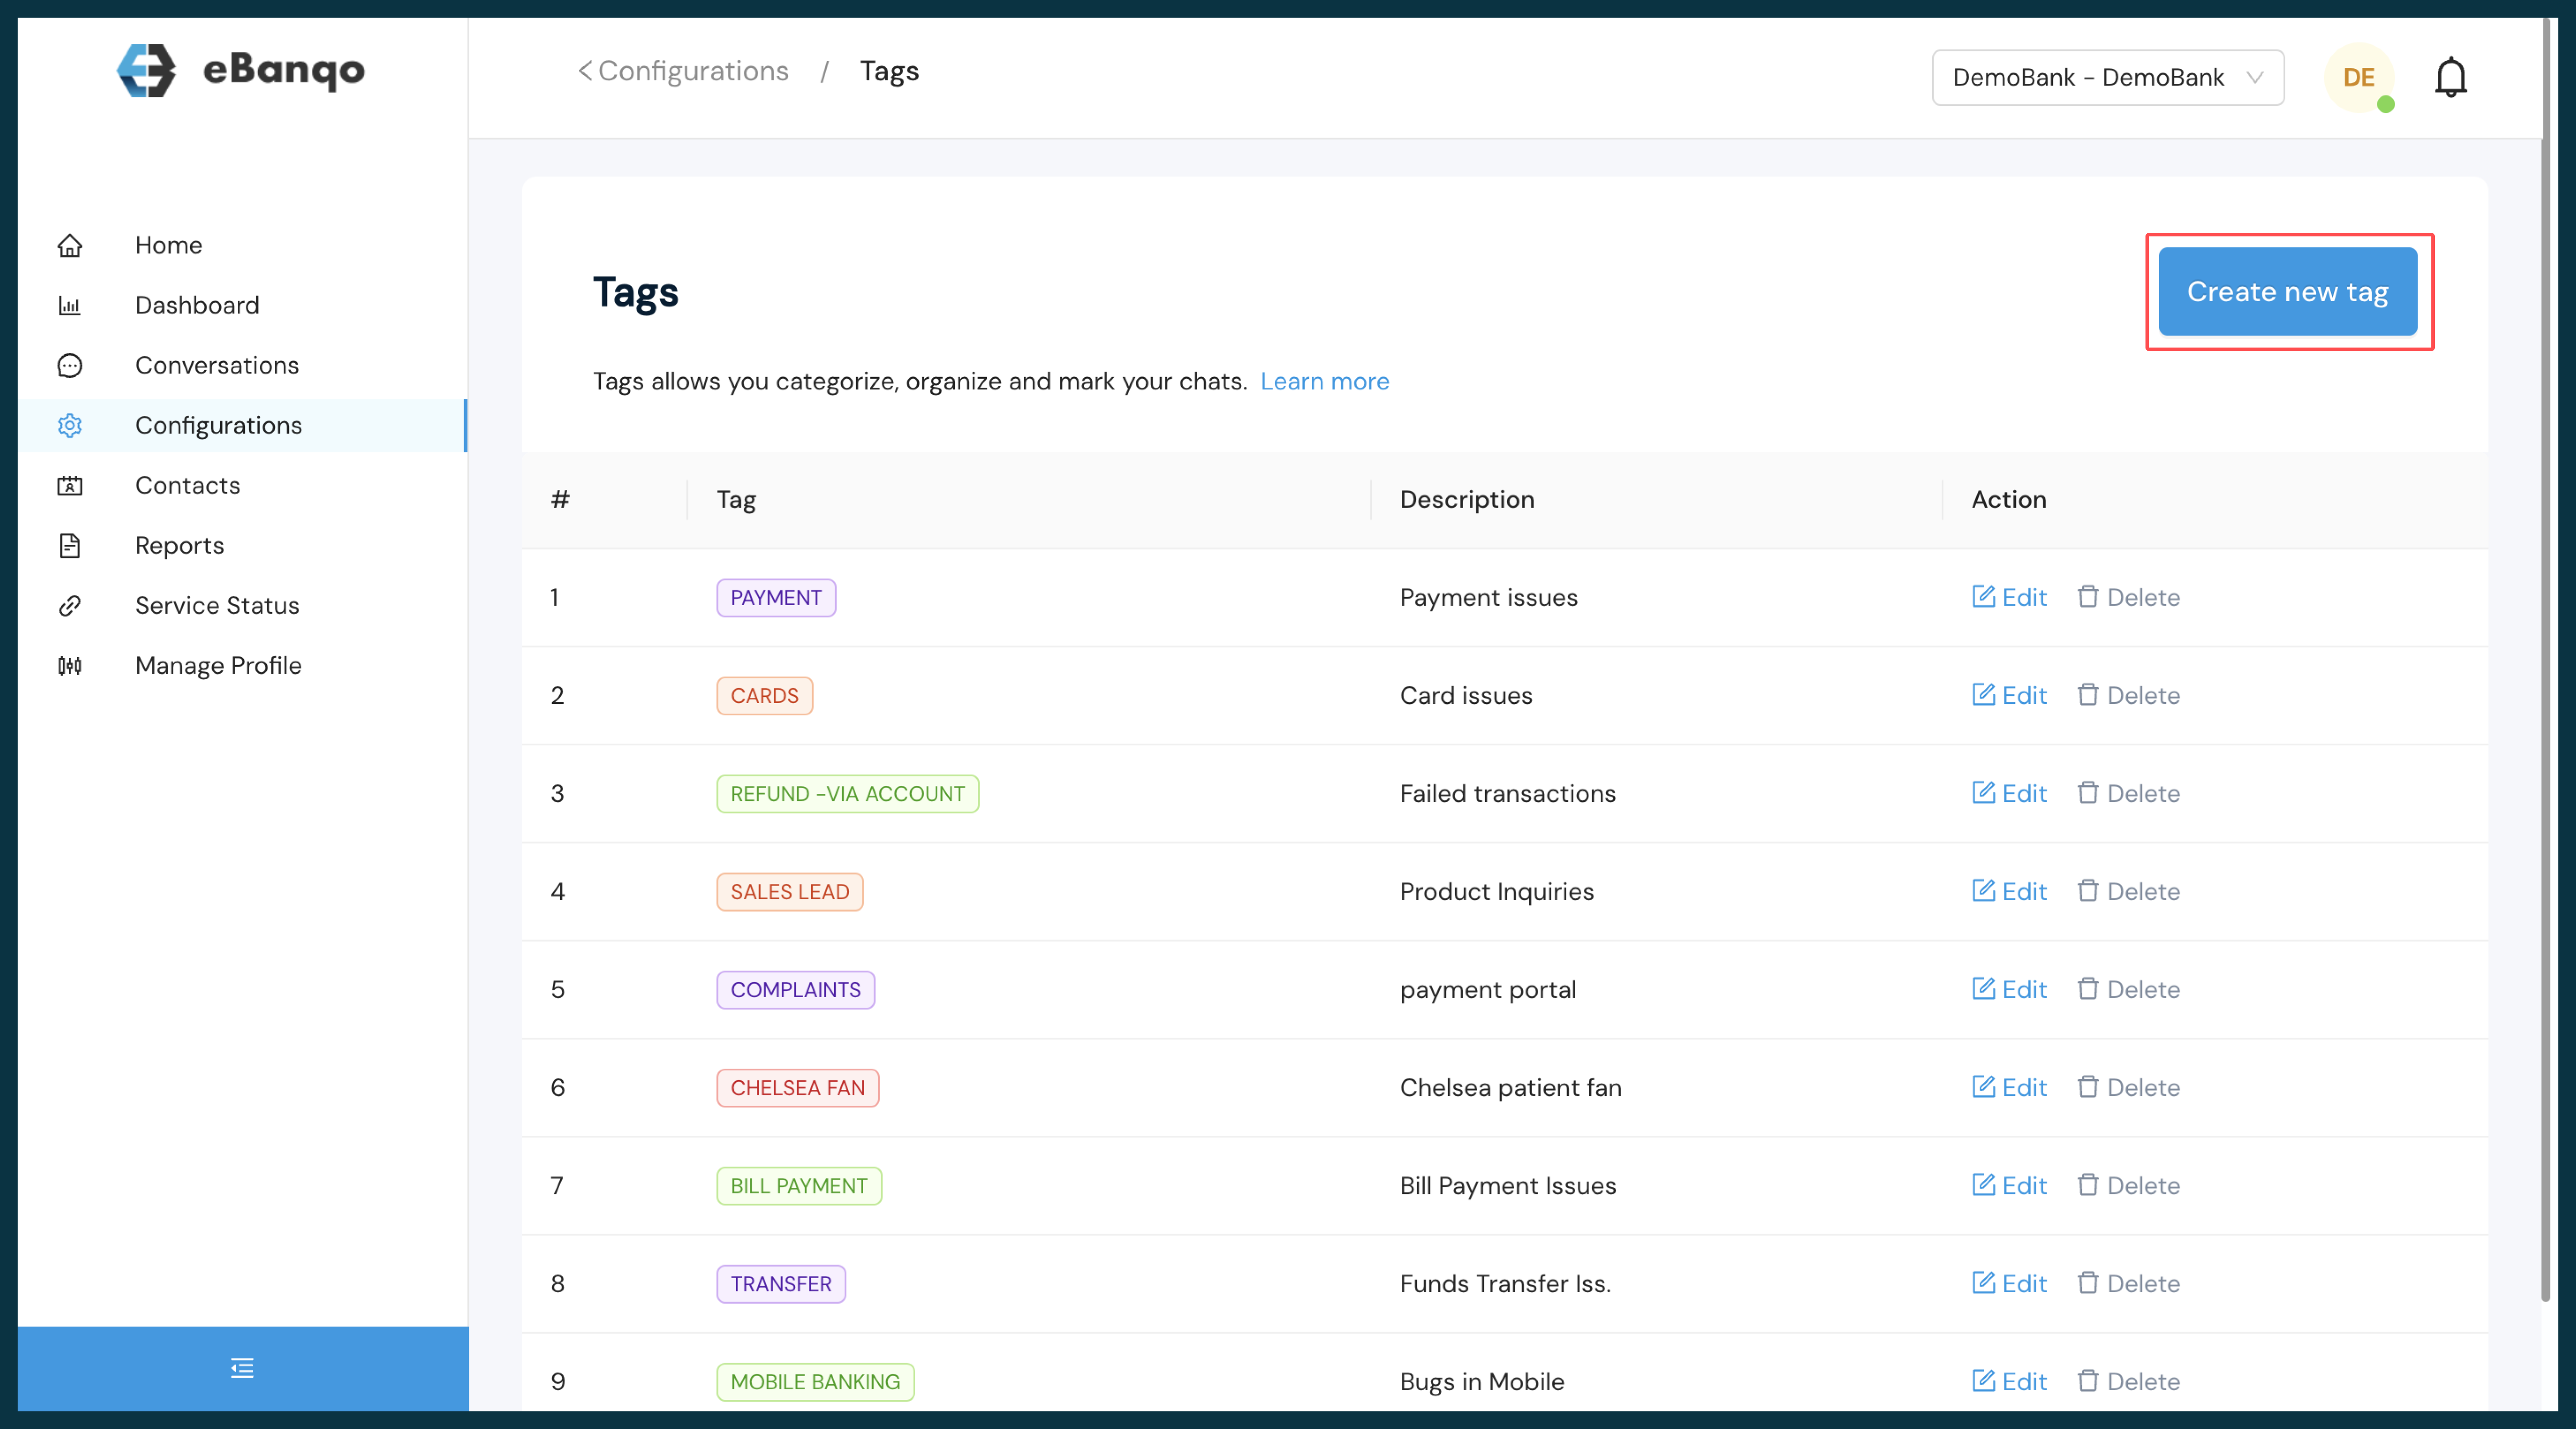
Creating Broadcast Message Templates
Before users can send a template broadcast message, you first create a template to send as a broadcast message to initiate 2 Way Engagement you will take the following steps;
Go to Broadcast messages on the side menu.
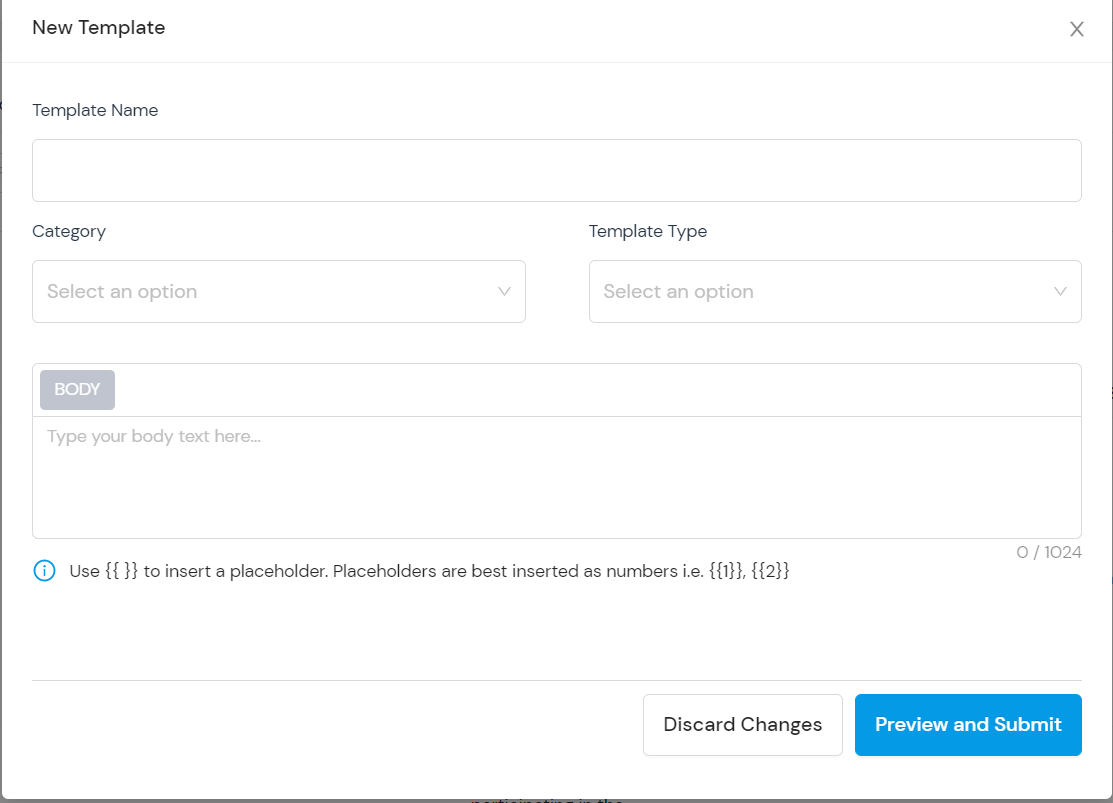
Select the Manage Templates and click on “add template”
Fill in the provided fields accordingly.
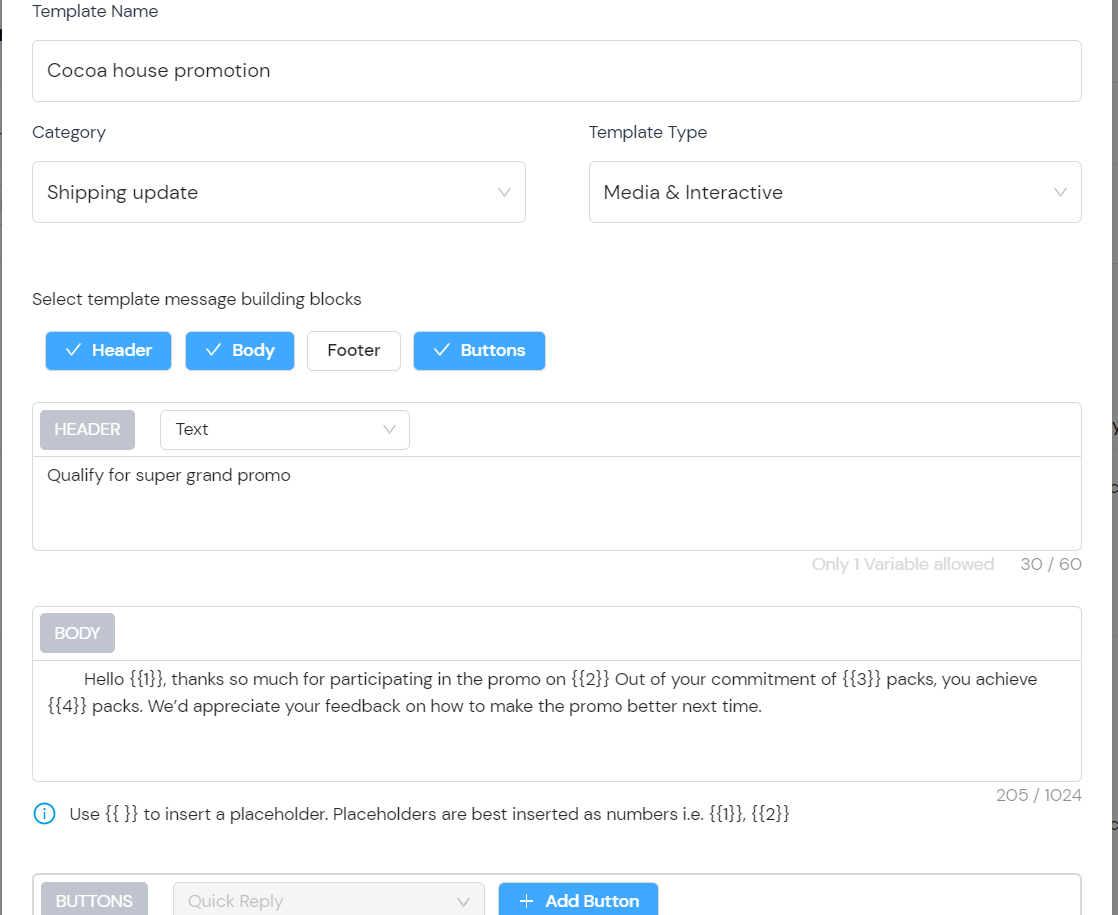
Select the template category from the drop-down options available.
Select the Template type from the drop-down e.g Standard(text only) and insert text then click on preview and submit.
Select the Template type from the drop-down e.g Media and Interactive and insert desired media with placeholders and interactions on the templates, then click on preview and Submit.
Send Broadcast Message (Free text)
To initiate 2-way engagement :
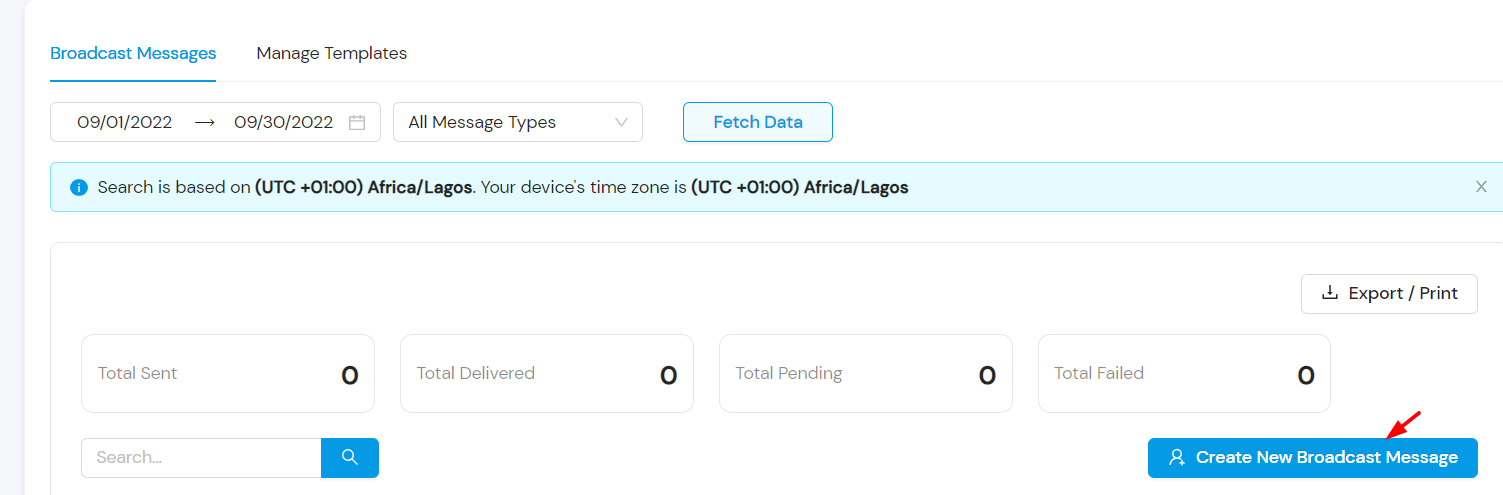
Go to Broadcast messages on the side menu.
Click on “Create Broadcast Message”
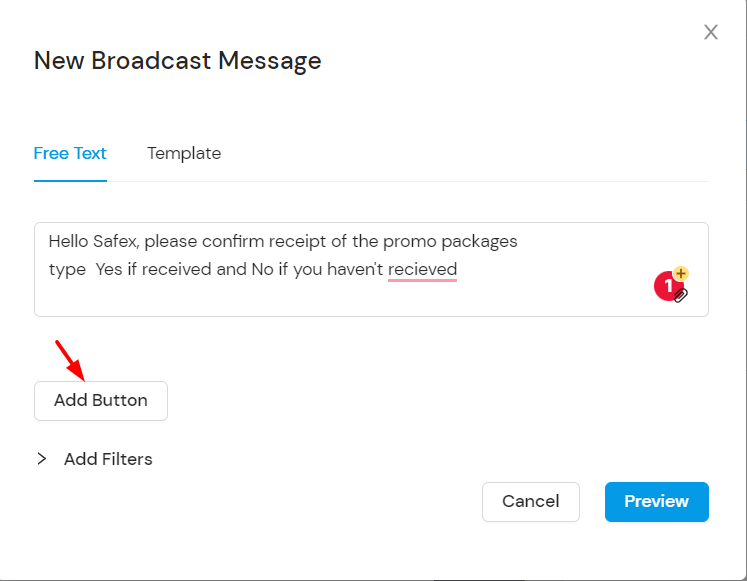
Select free text and insert the body of your message
You can add a button to the body of the broadcast message by clicking on “Add Button” and inserting the “button Payload”
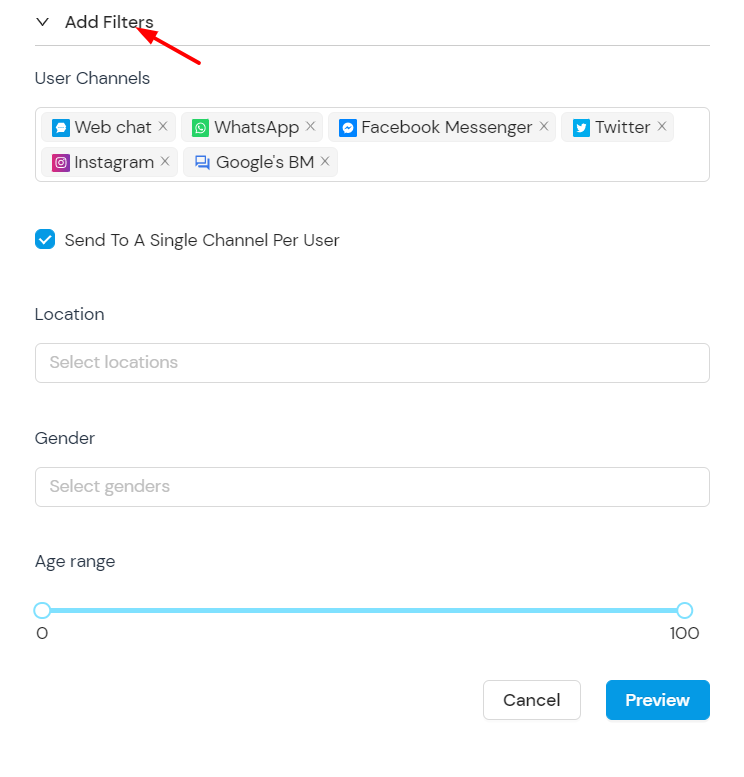
You can also “add Filters” to filter by channels, location, gender, and age.
Then click on preview and submit
Send Broadcast Message (Template)
To initiate 2-way engagement :
Go to Broadcast messages on the side menu.
Click on “Create Broadcast Message”
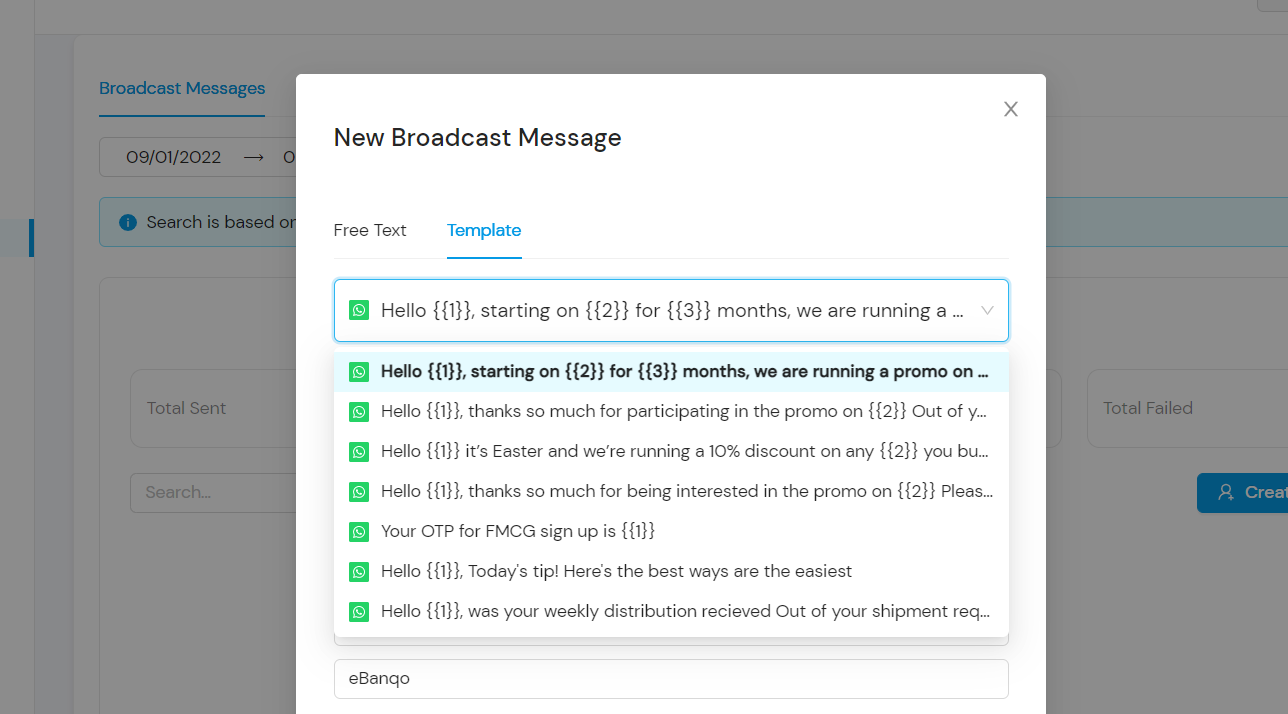
Select “template” and select template messages from the approved options
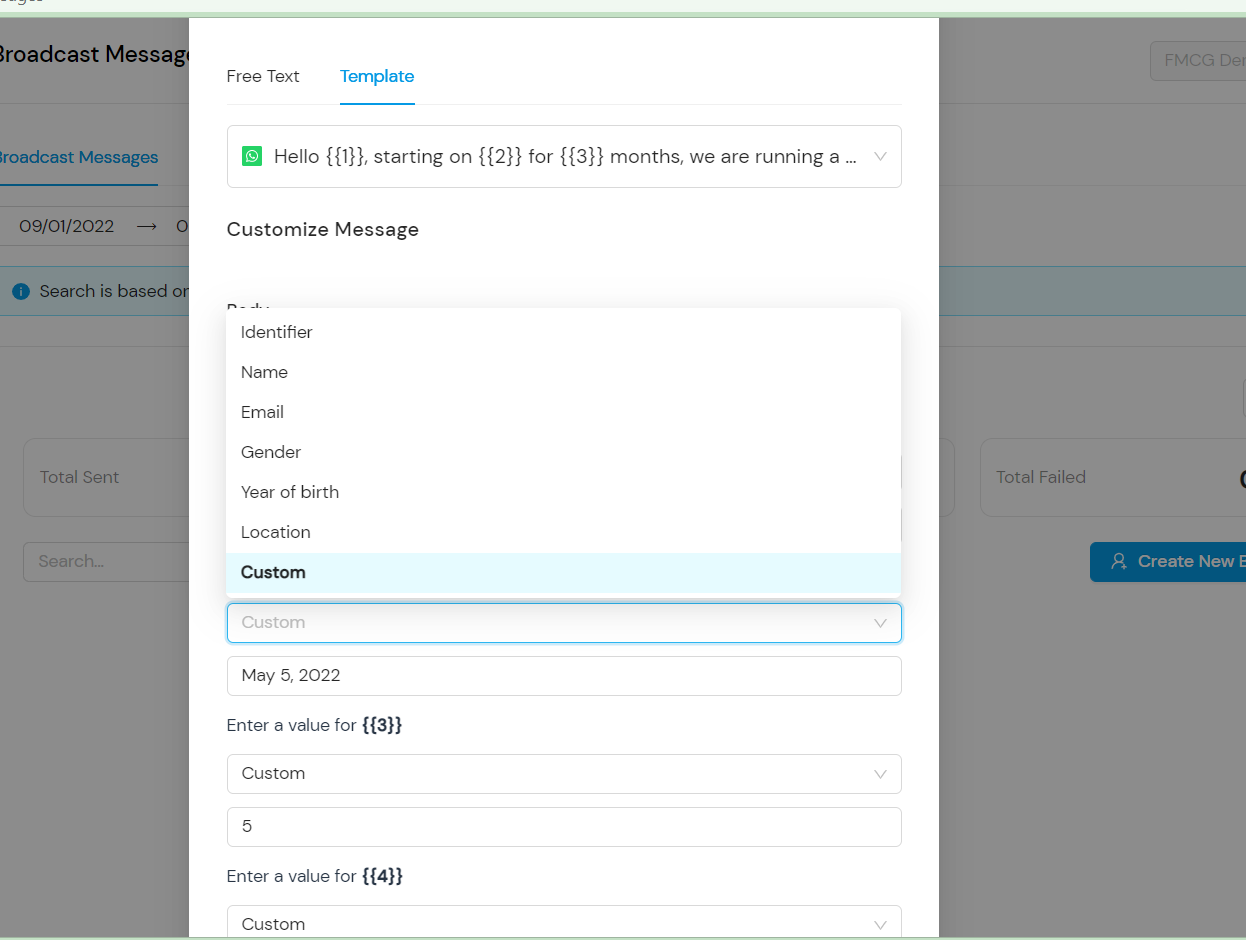
Insert custom placeholders for identifiers, names, etc.
You can also “add Filters” to filter by channels, location, gender, and age.
Then click on preview and submit.
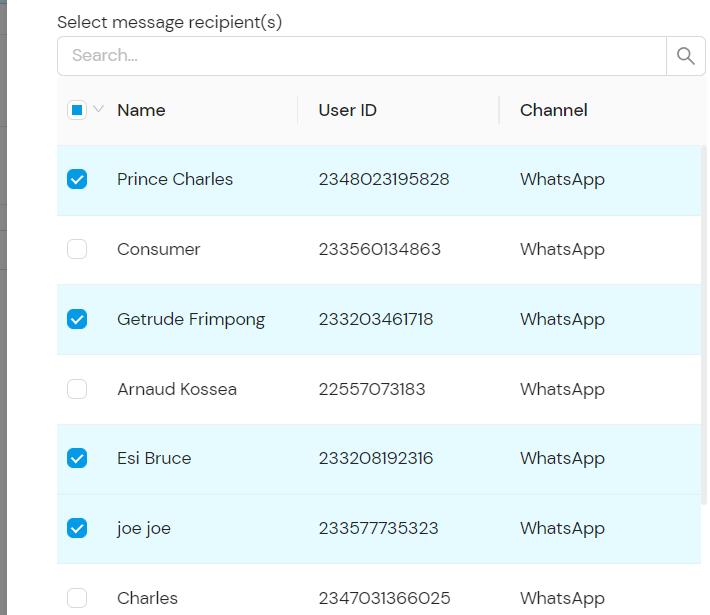
Select from the list of contacts who you want to be recipients of the Broadcast message.
Creating a well-structured knowledge base with Frequently Asked Questions (FAQs) on the eBanqo platform is an effective way to provide customers with quick answers and improve customer support efficiency. Follow this step-by-step guide to create FAQs for your Knowledge Base.
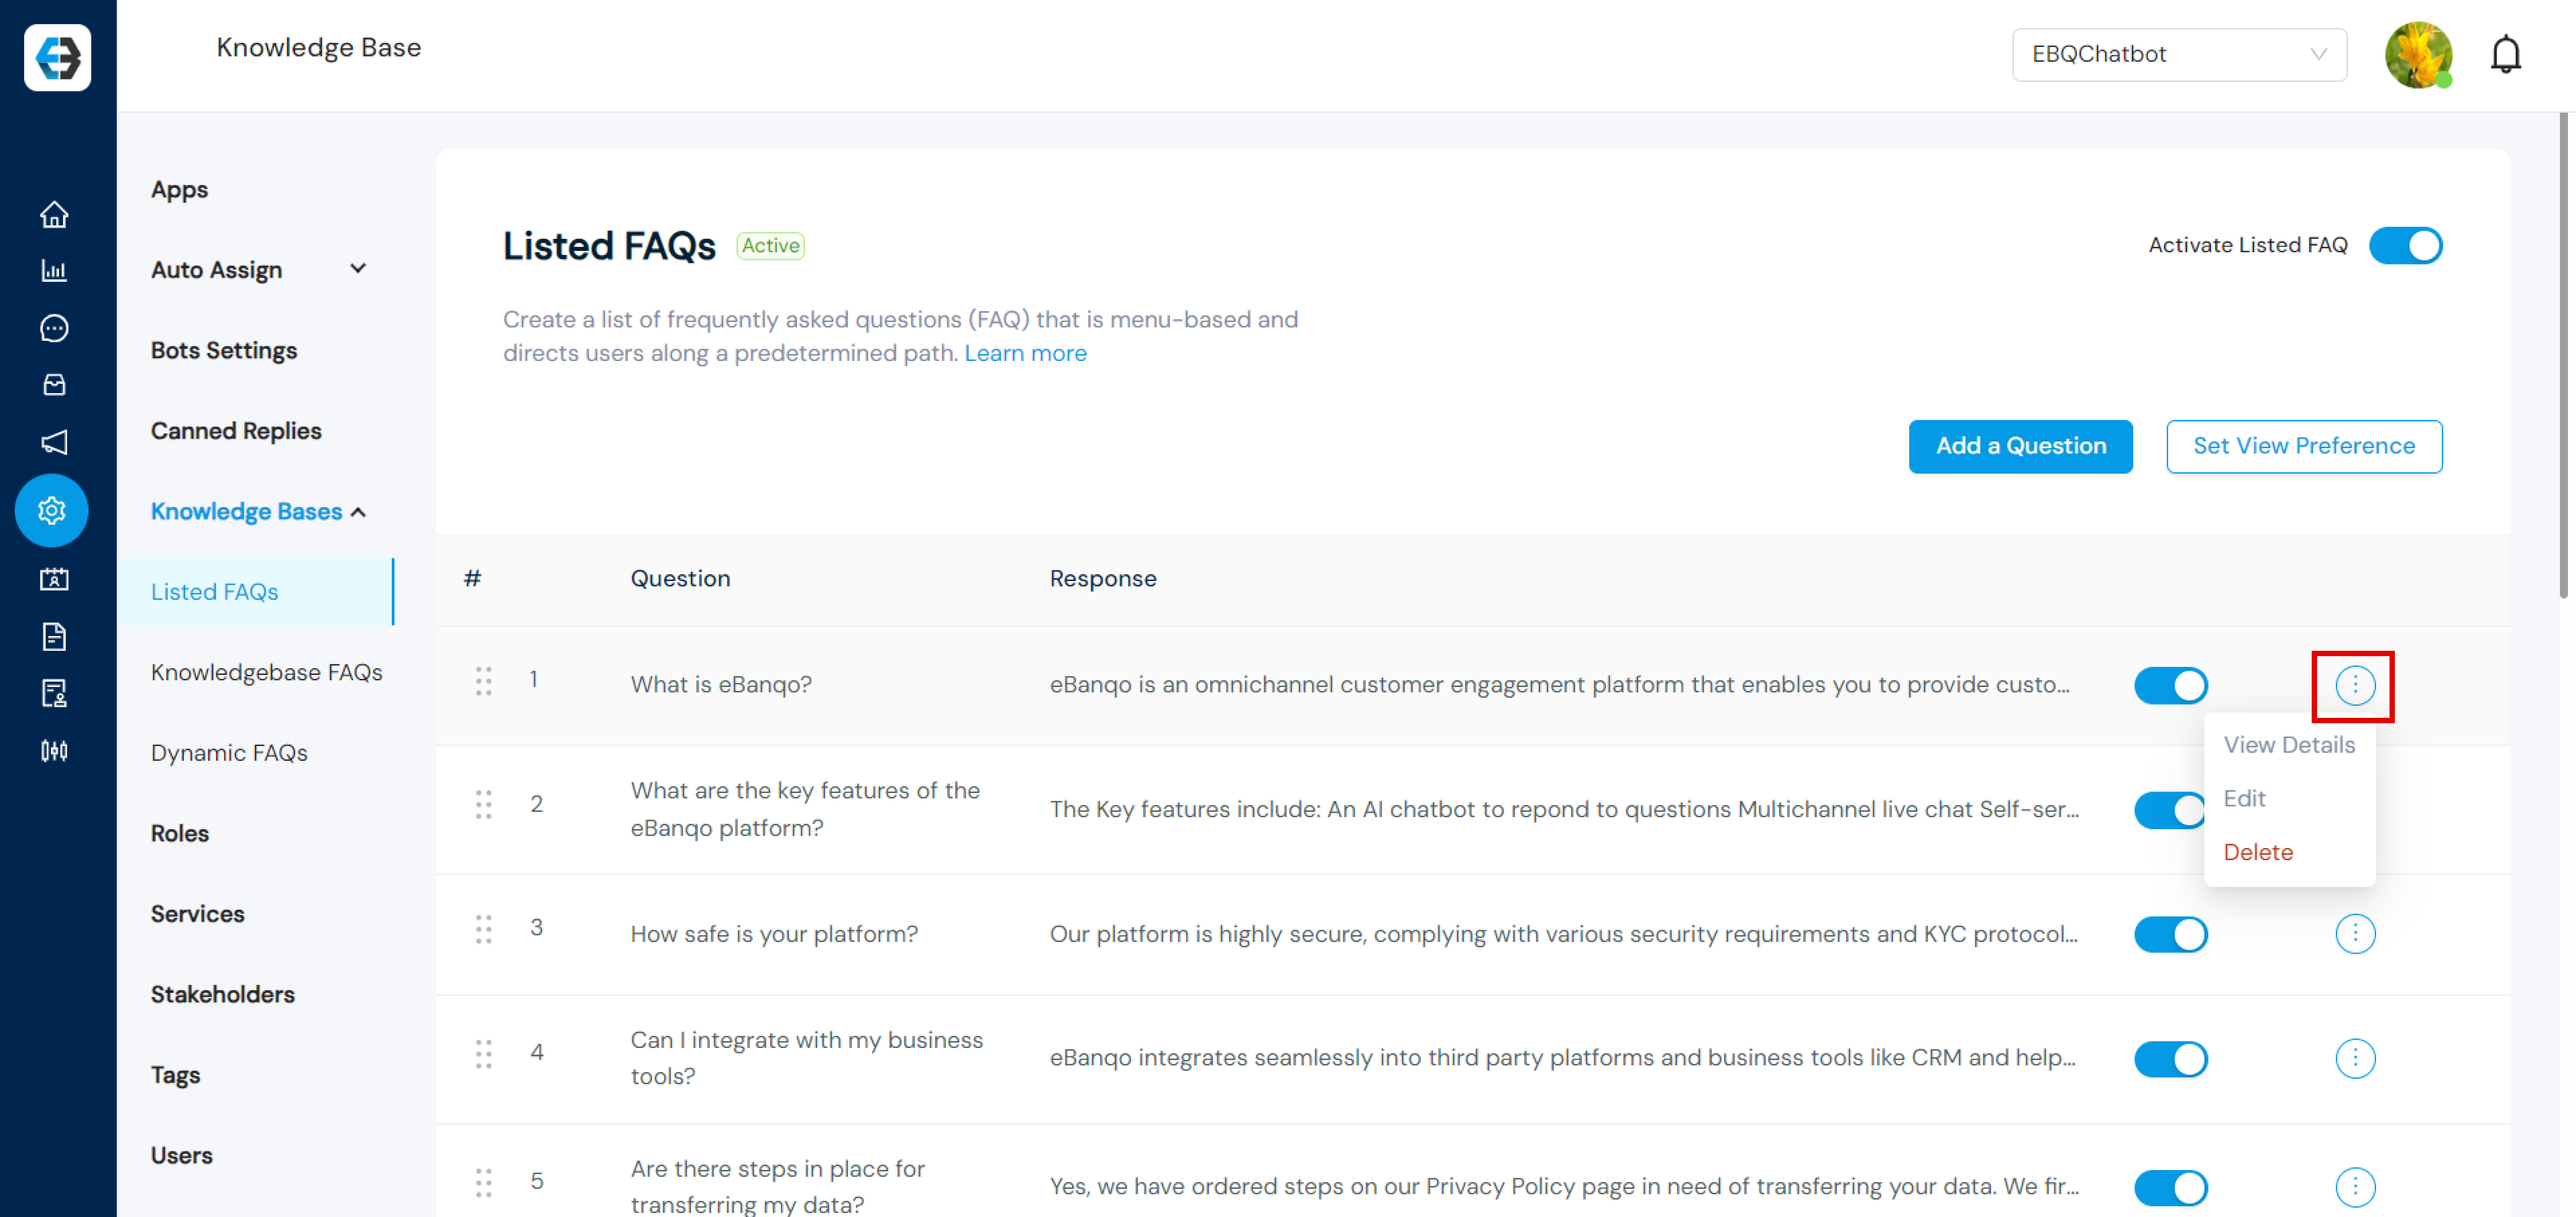
Listed FAQs – A menu-list based chatbot feature that guides users through predefined questions. Users select from menu options, and depending on what they click, the bot provides the defined response to that question.
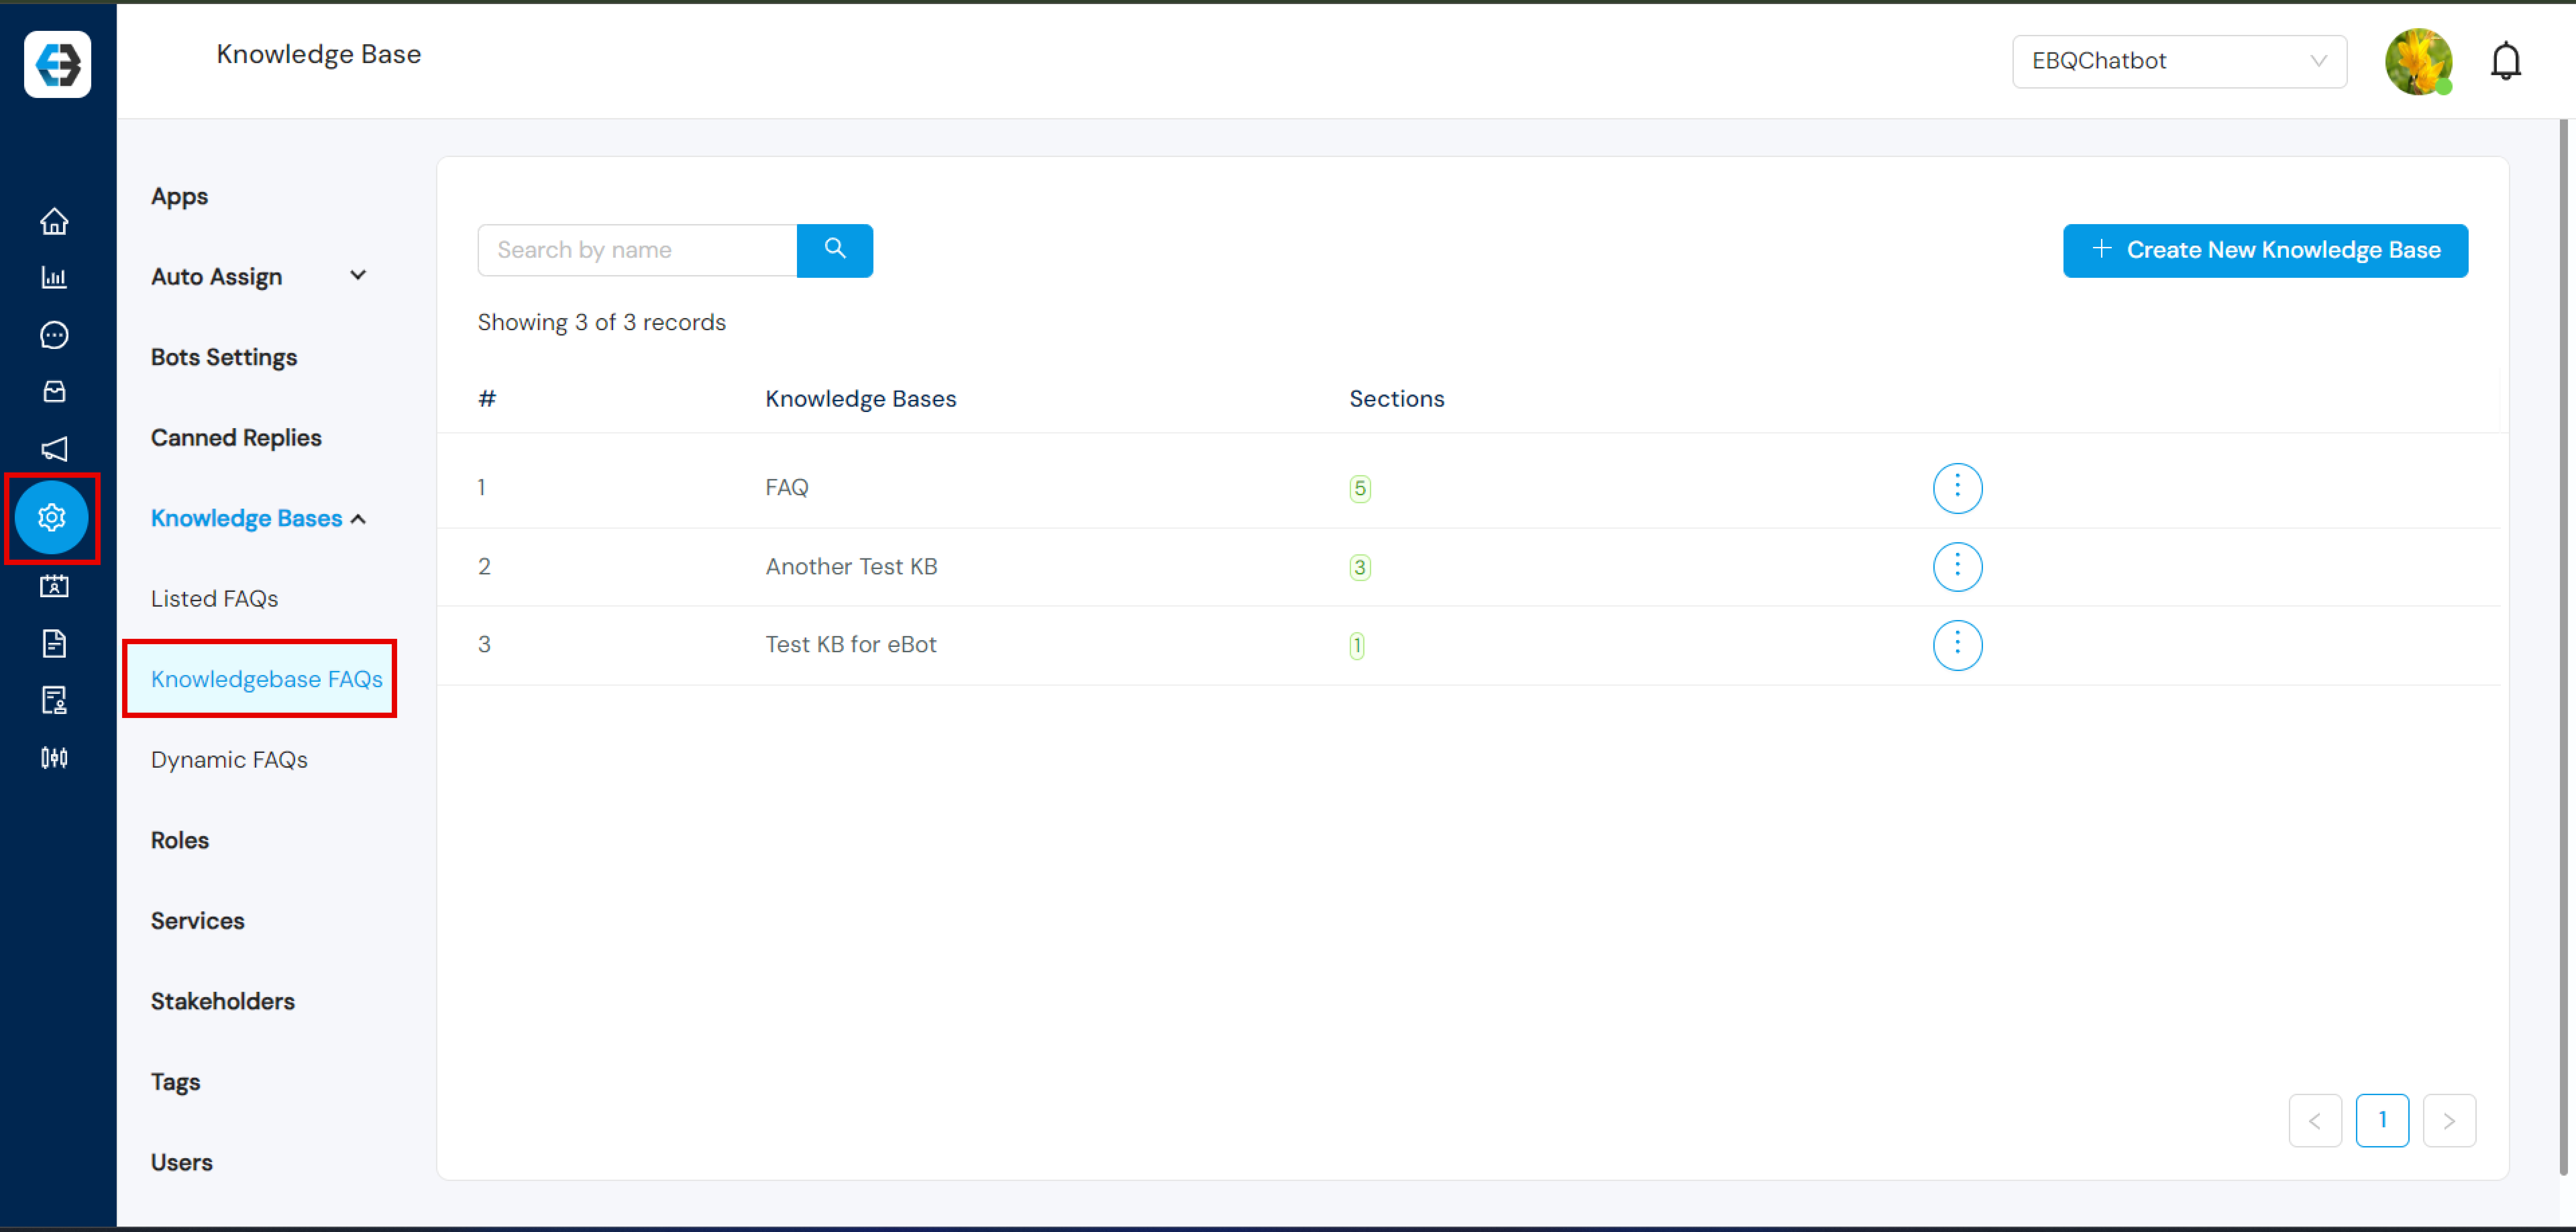
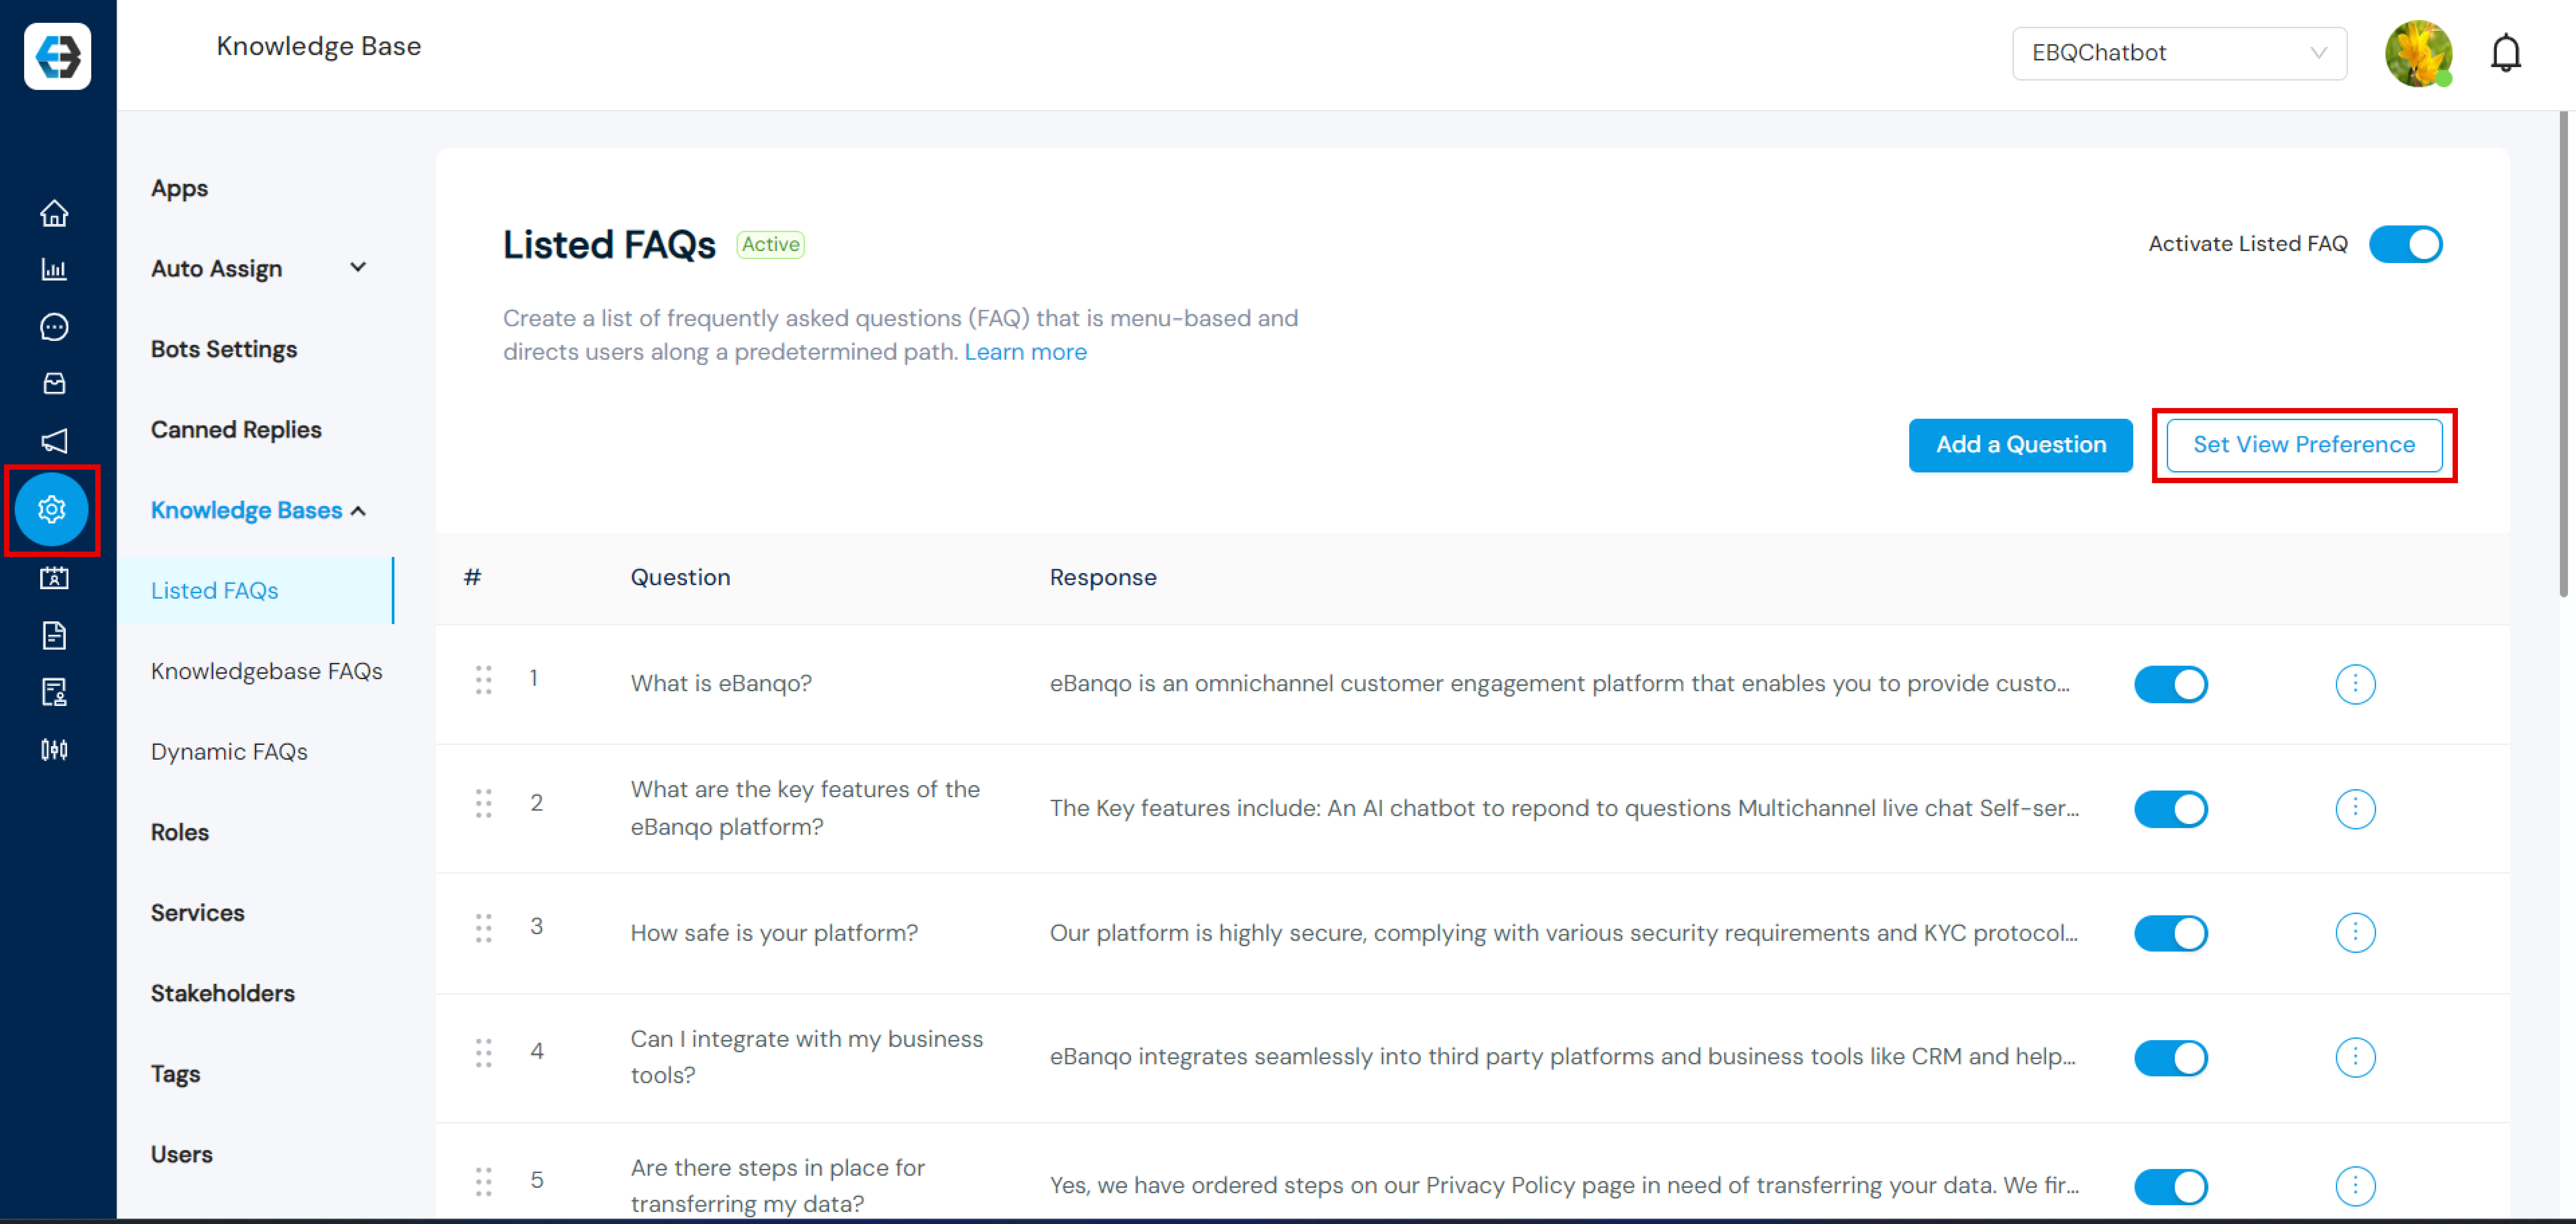
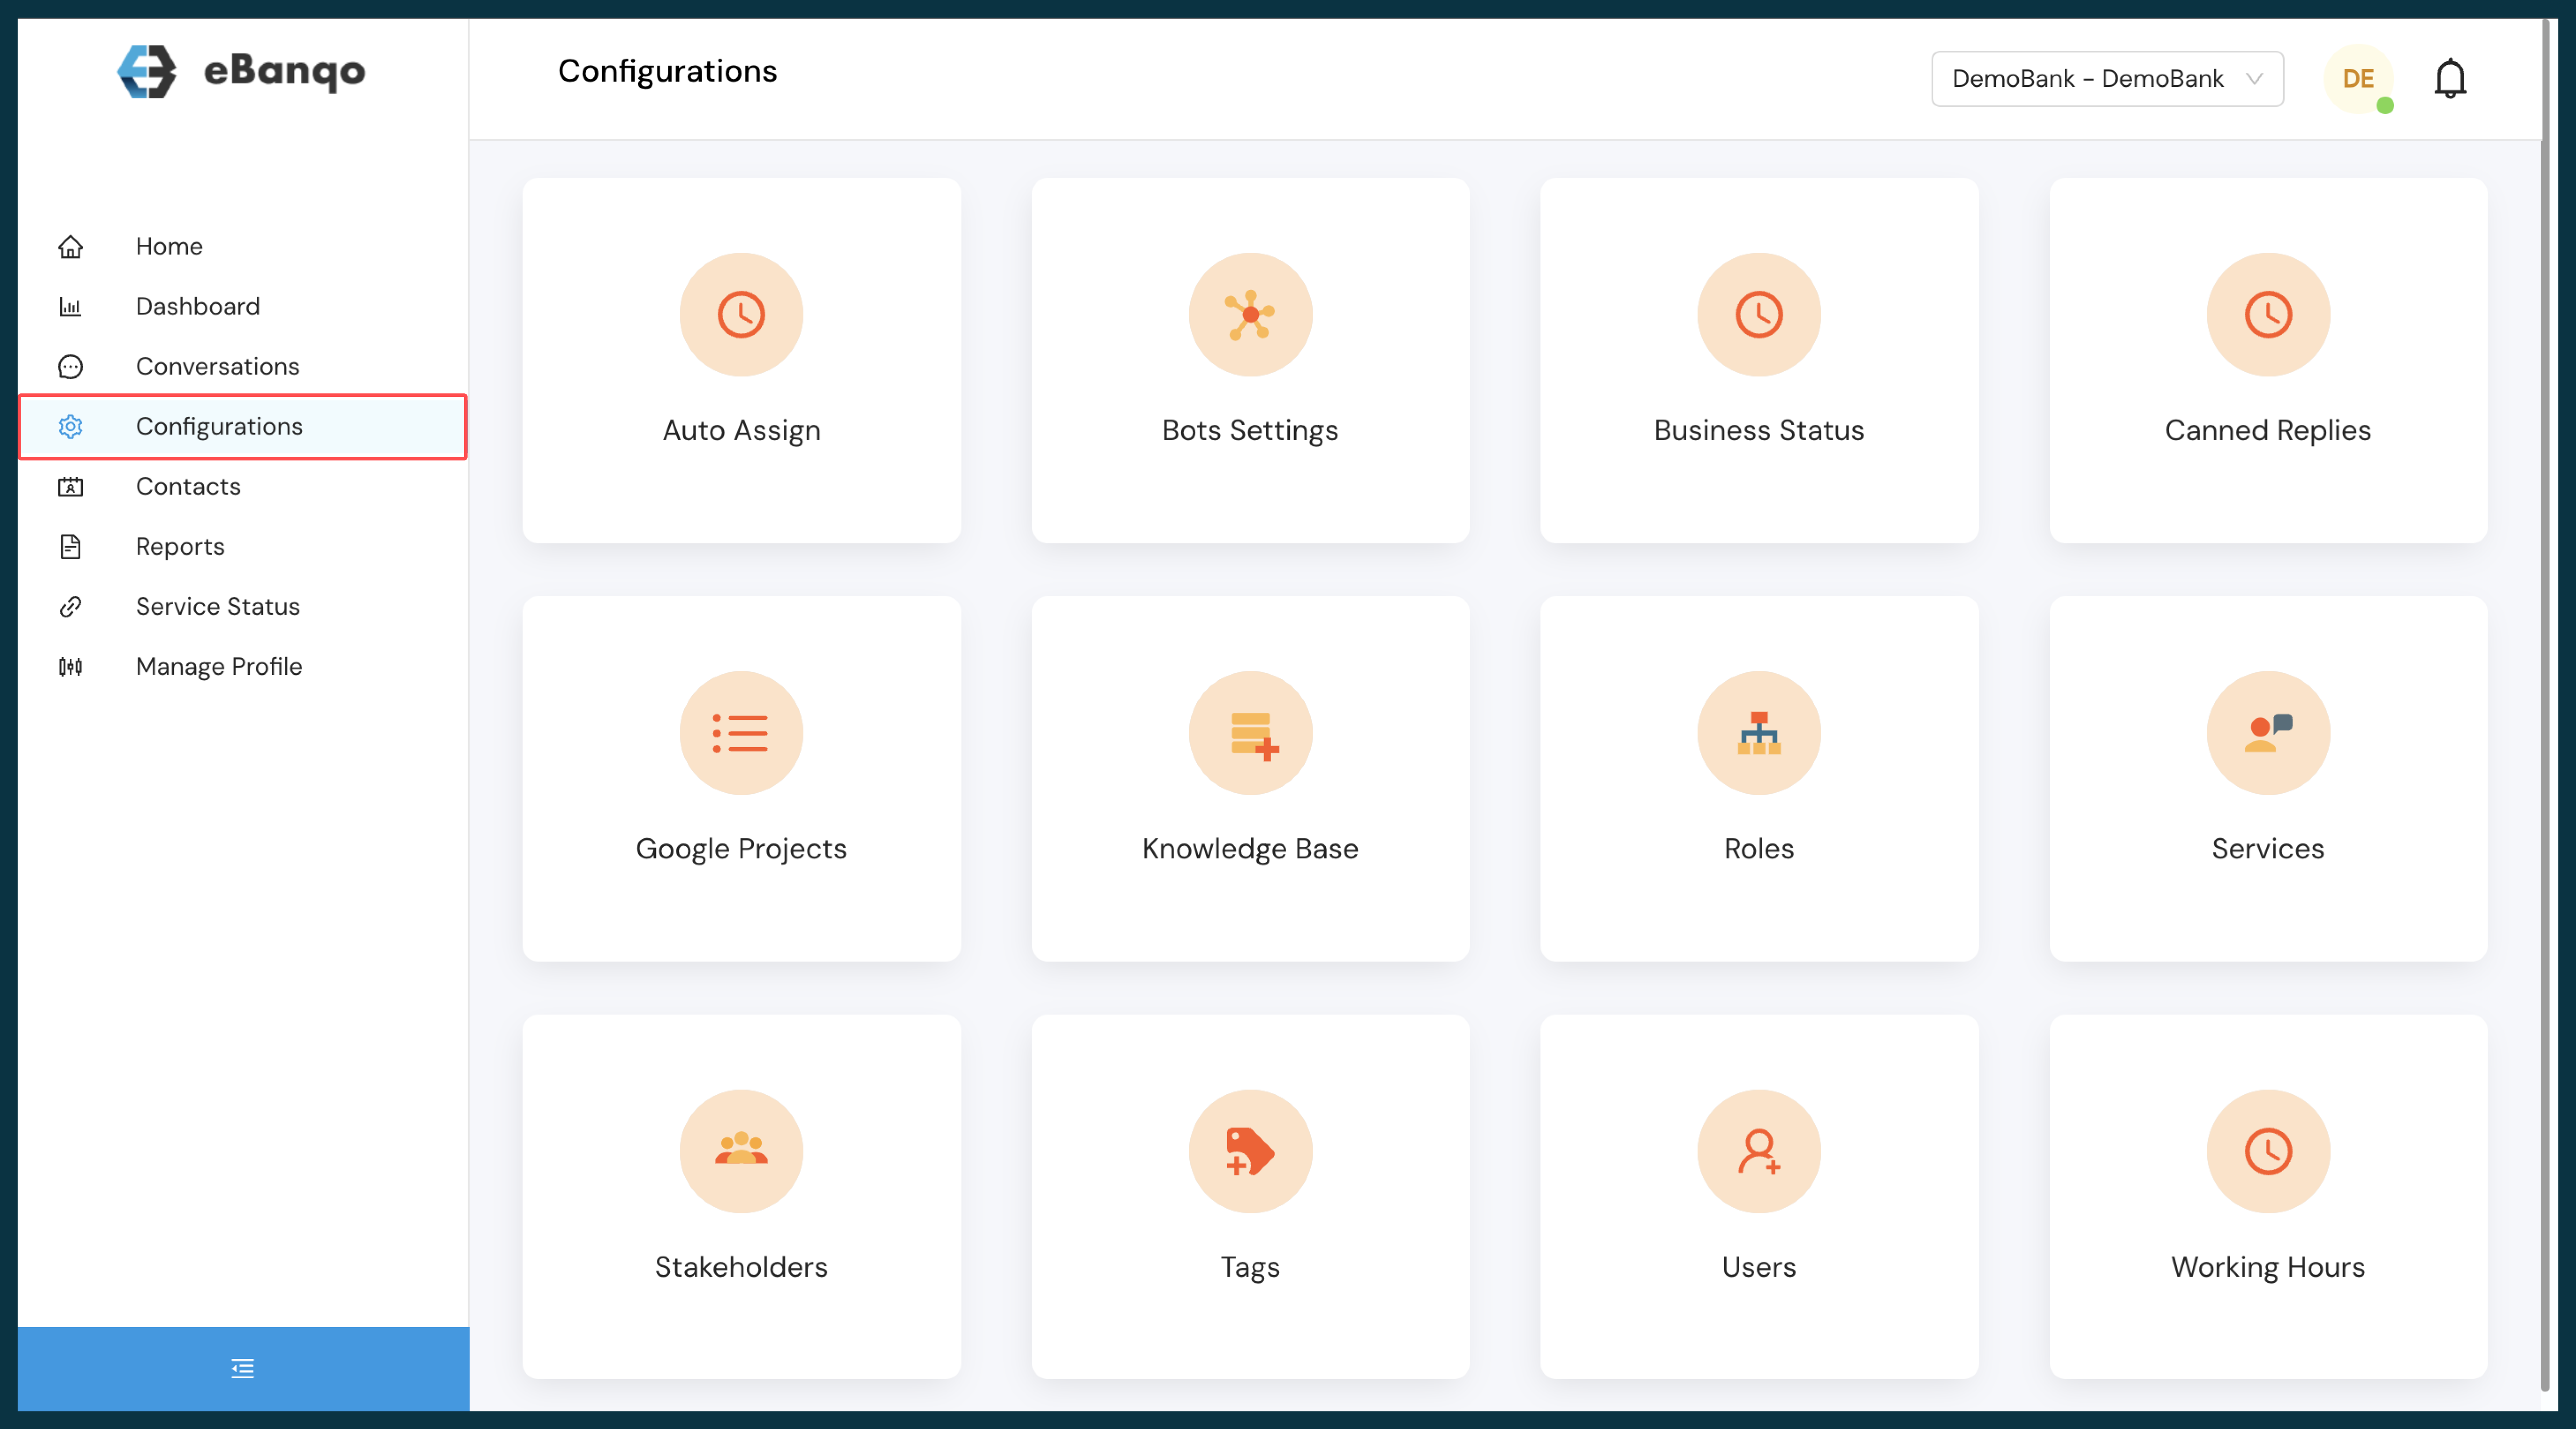
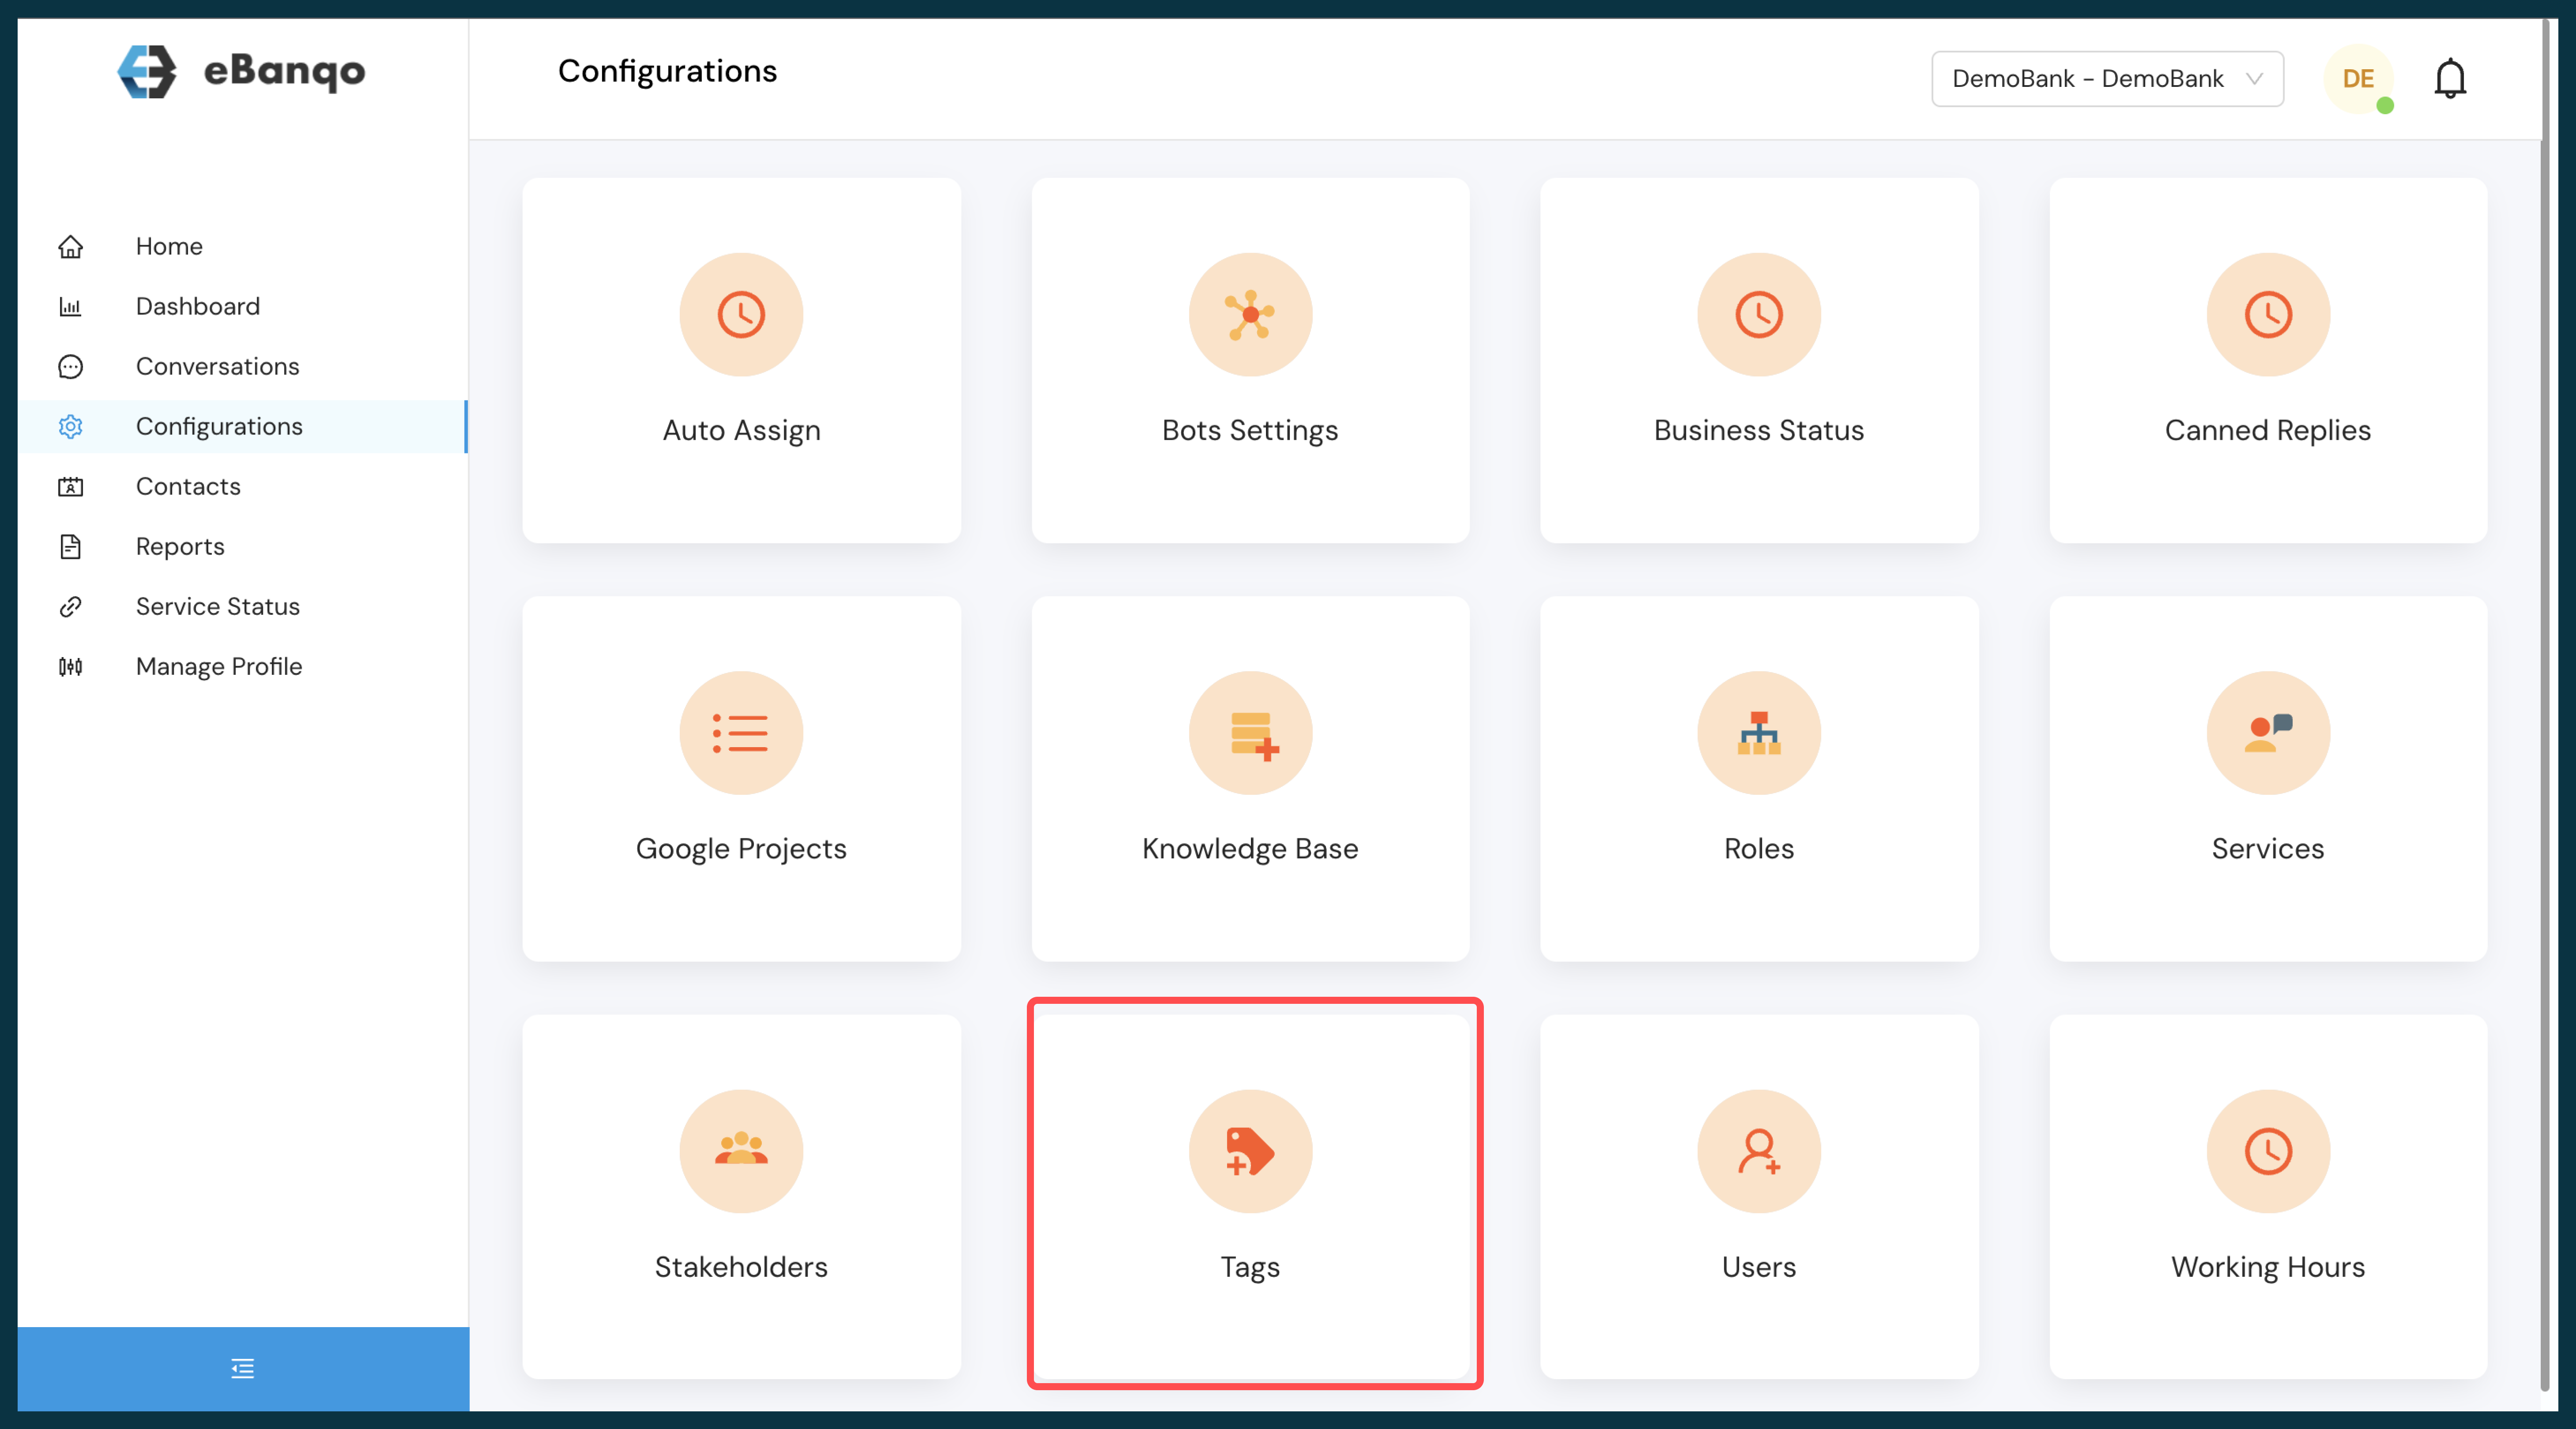
Step 1: Click on Configurations → Knowledge Bases and select Listed FAQs.
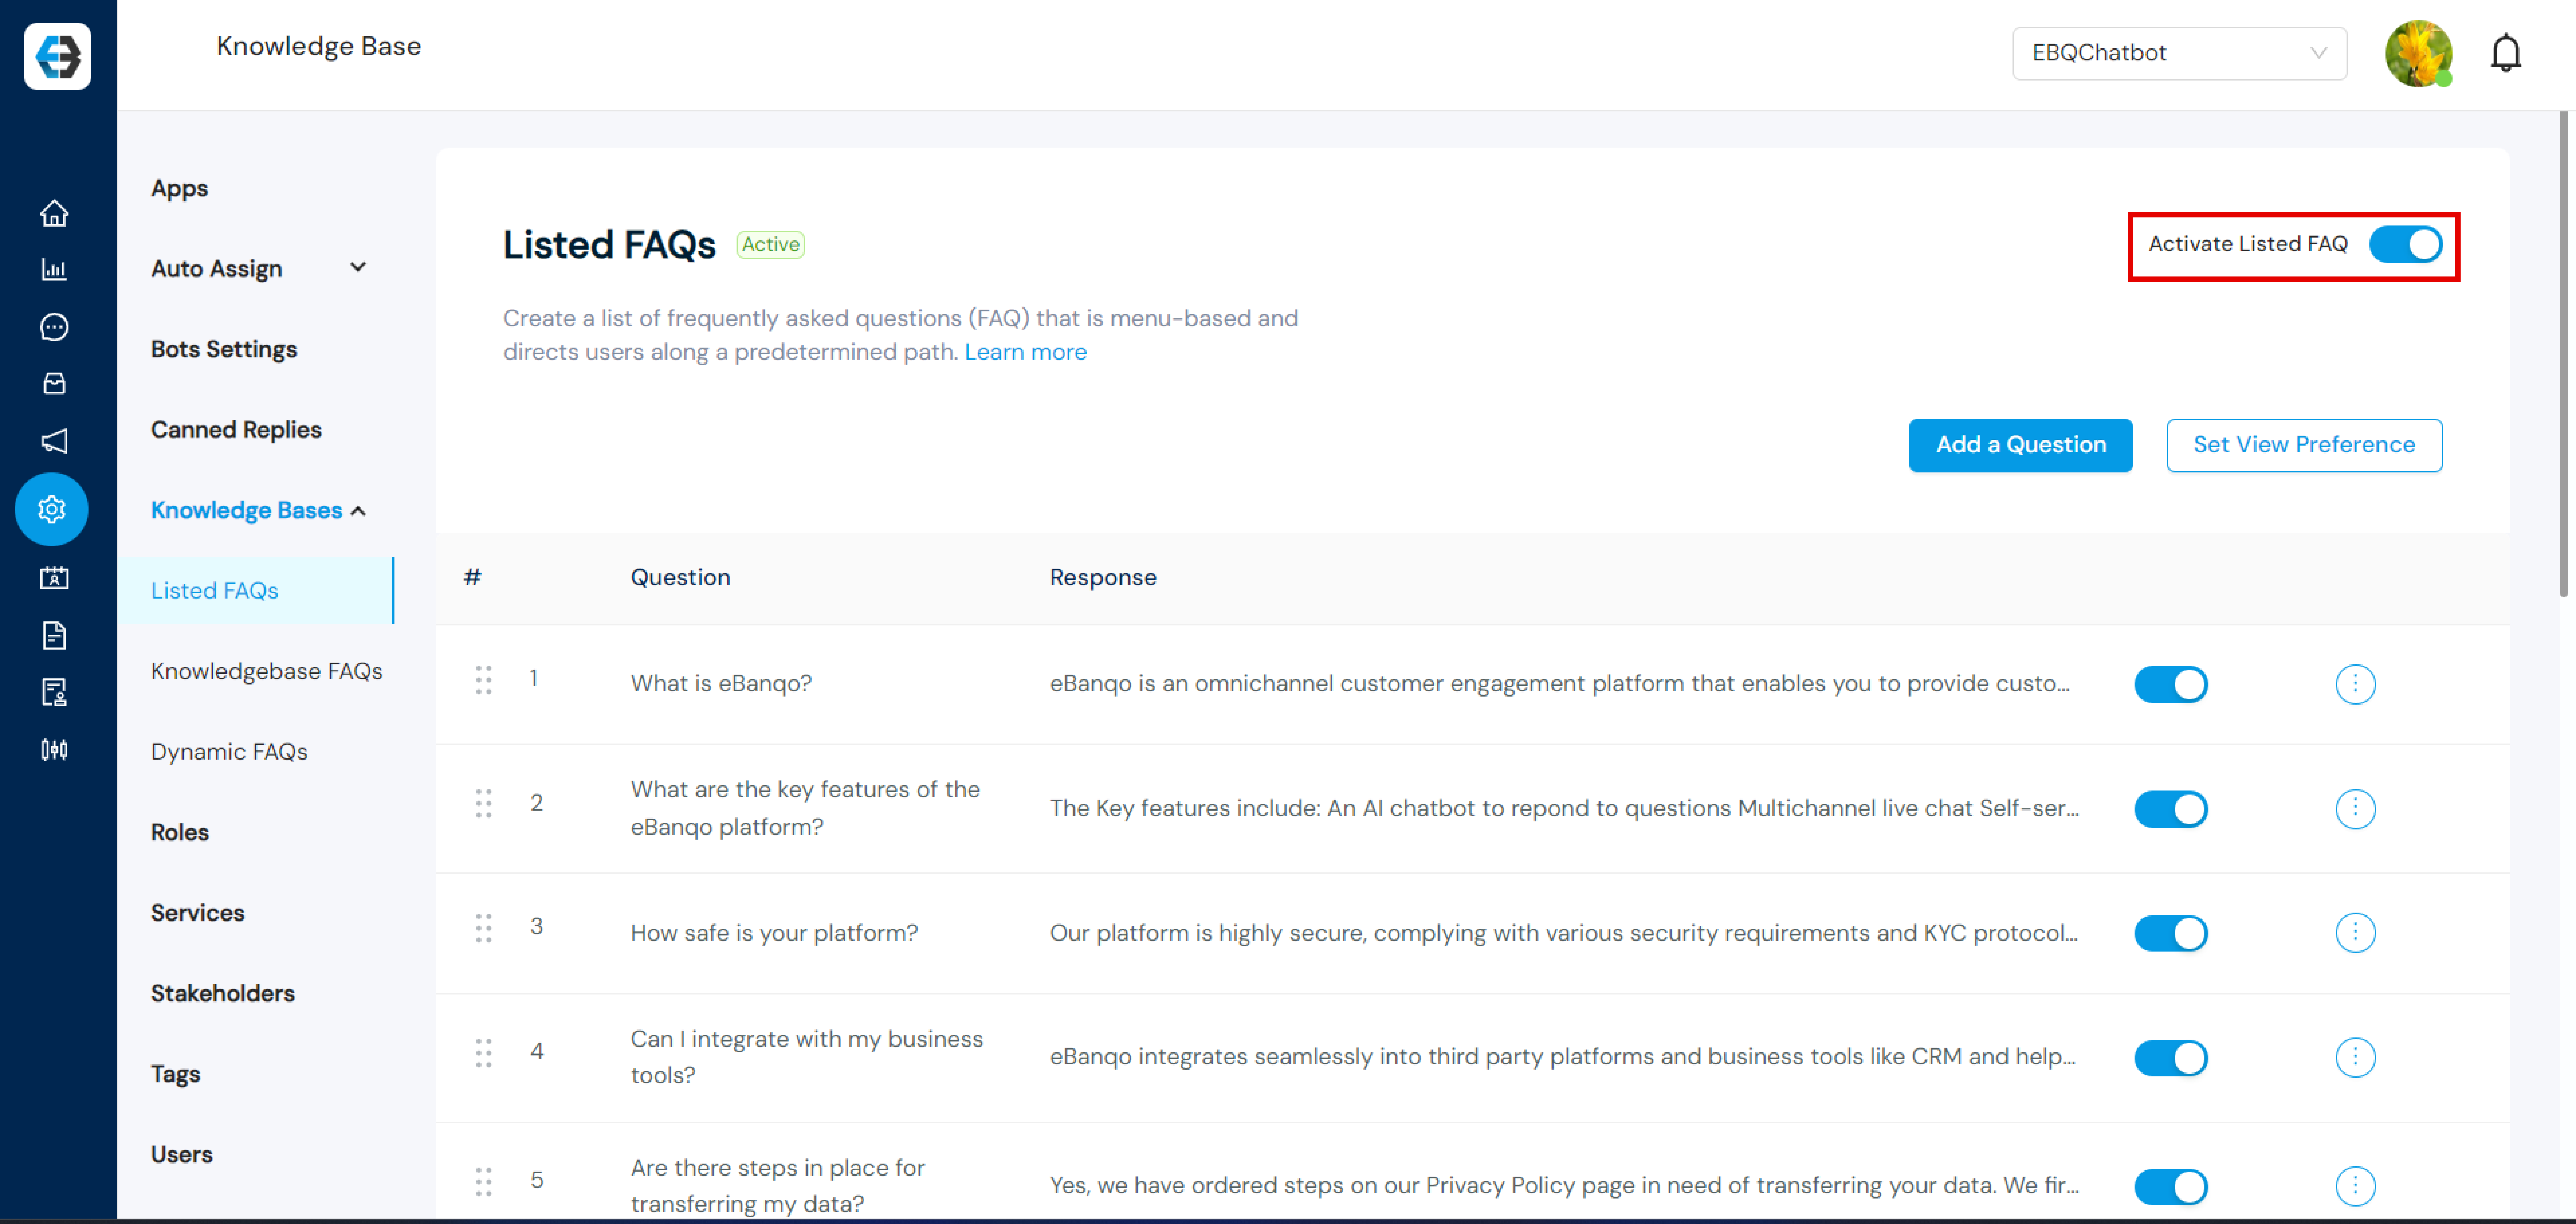
Step 2: Activate Listed FAQs
Select Listed FAQs and toggle the option to activate it.
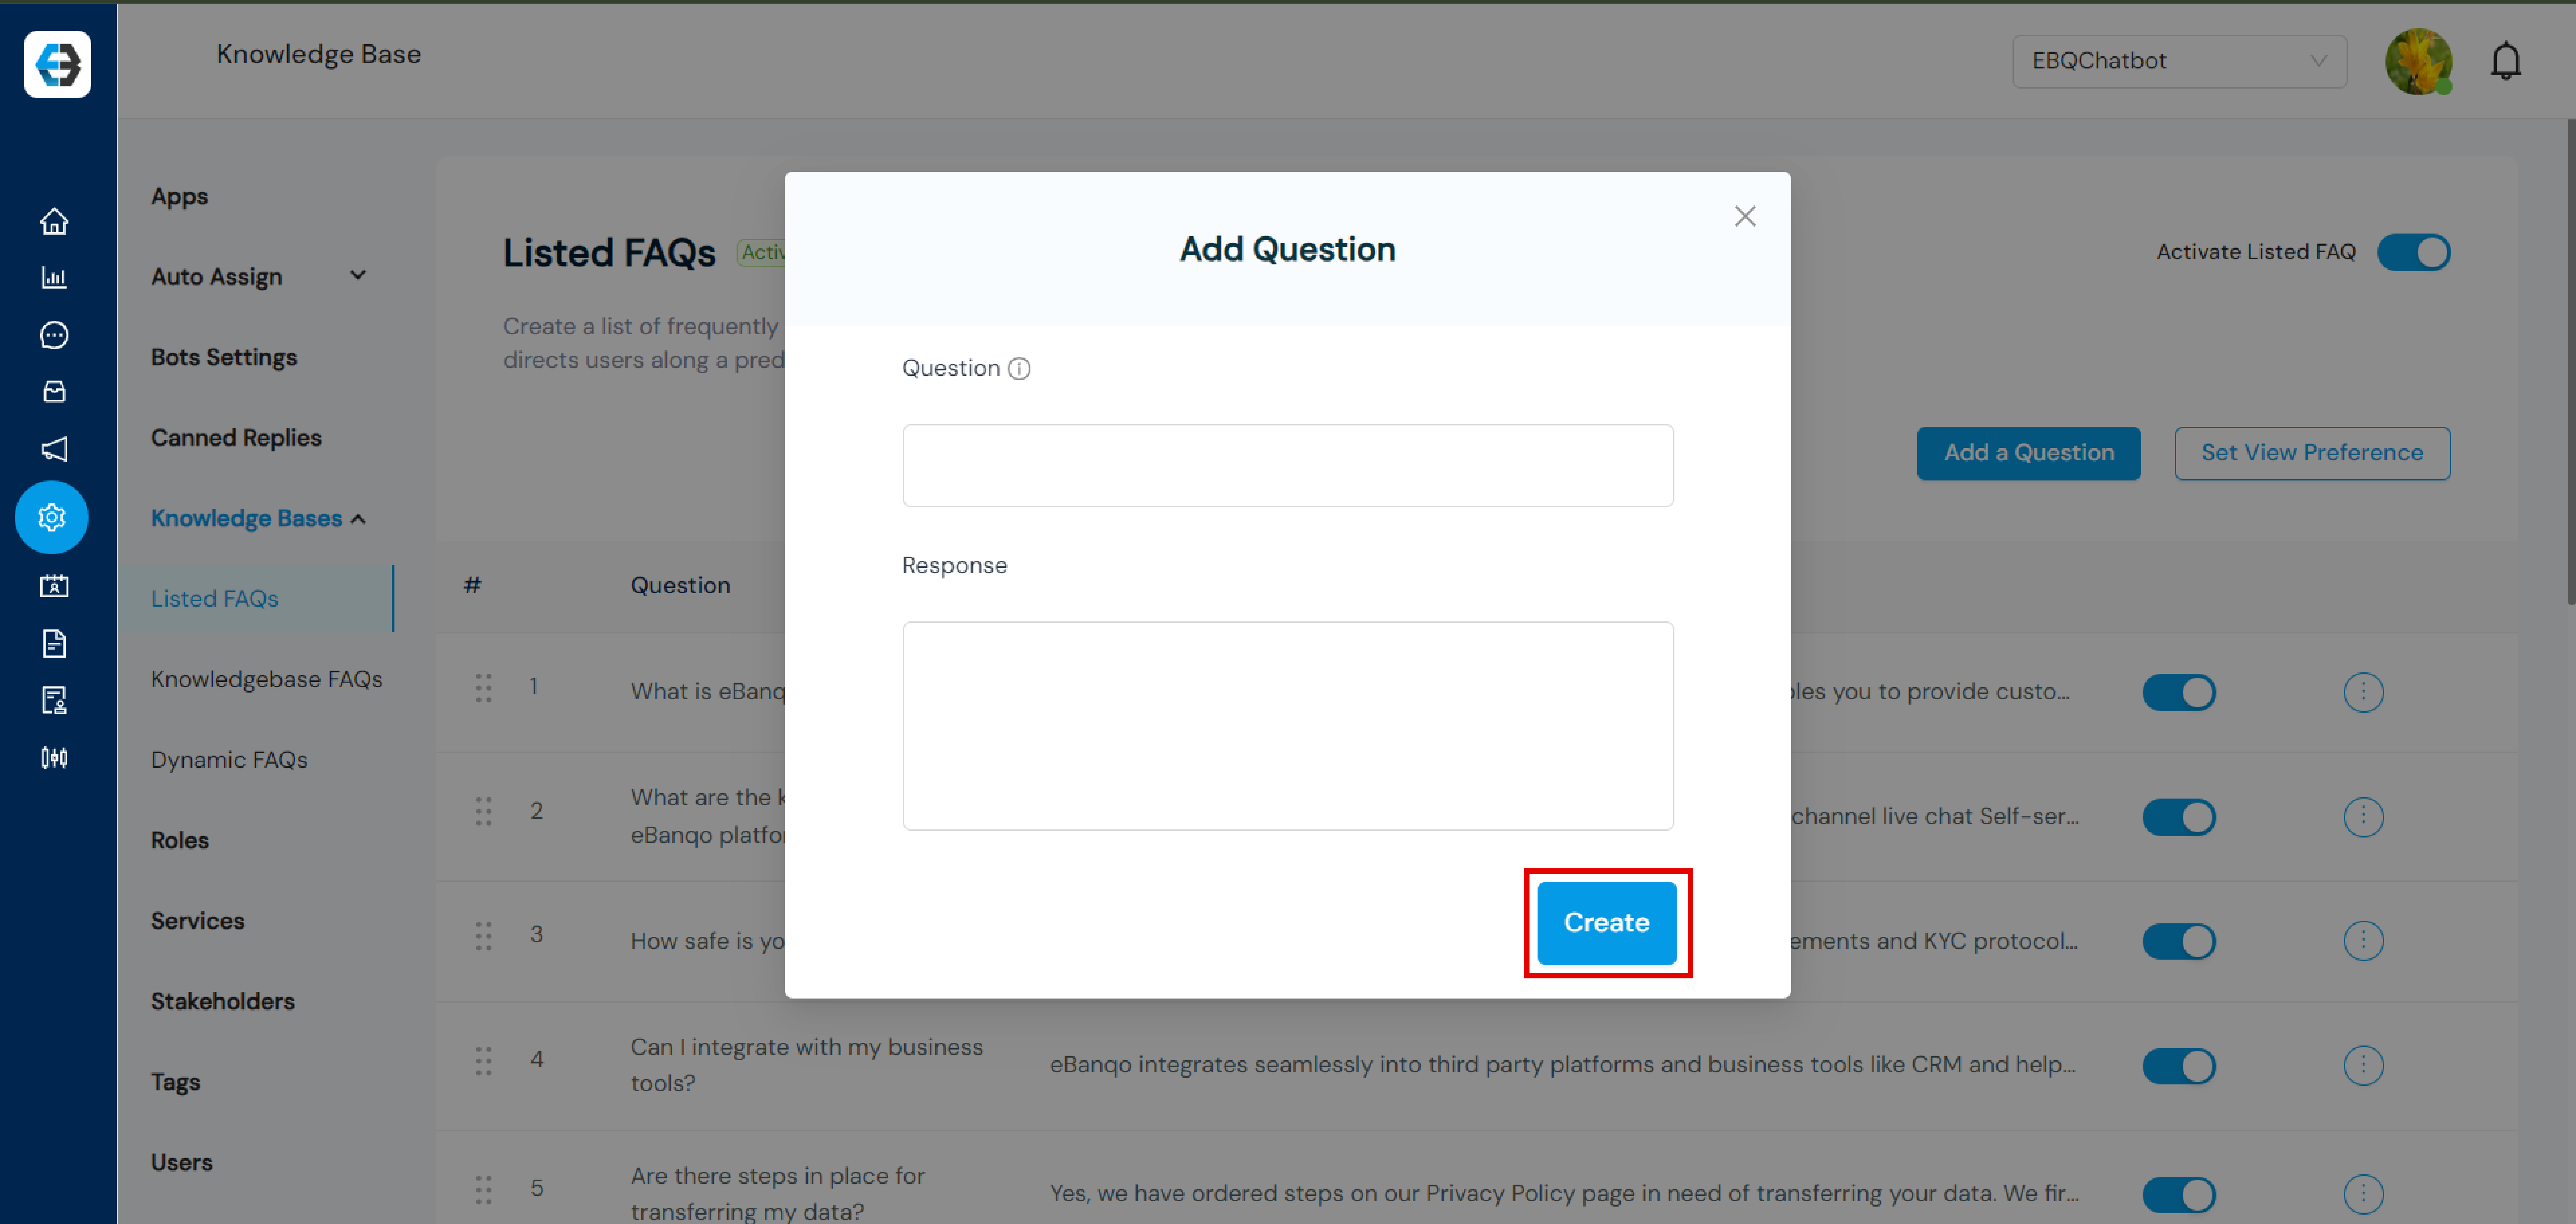
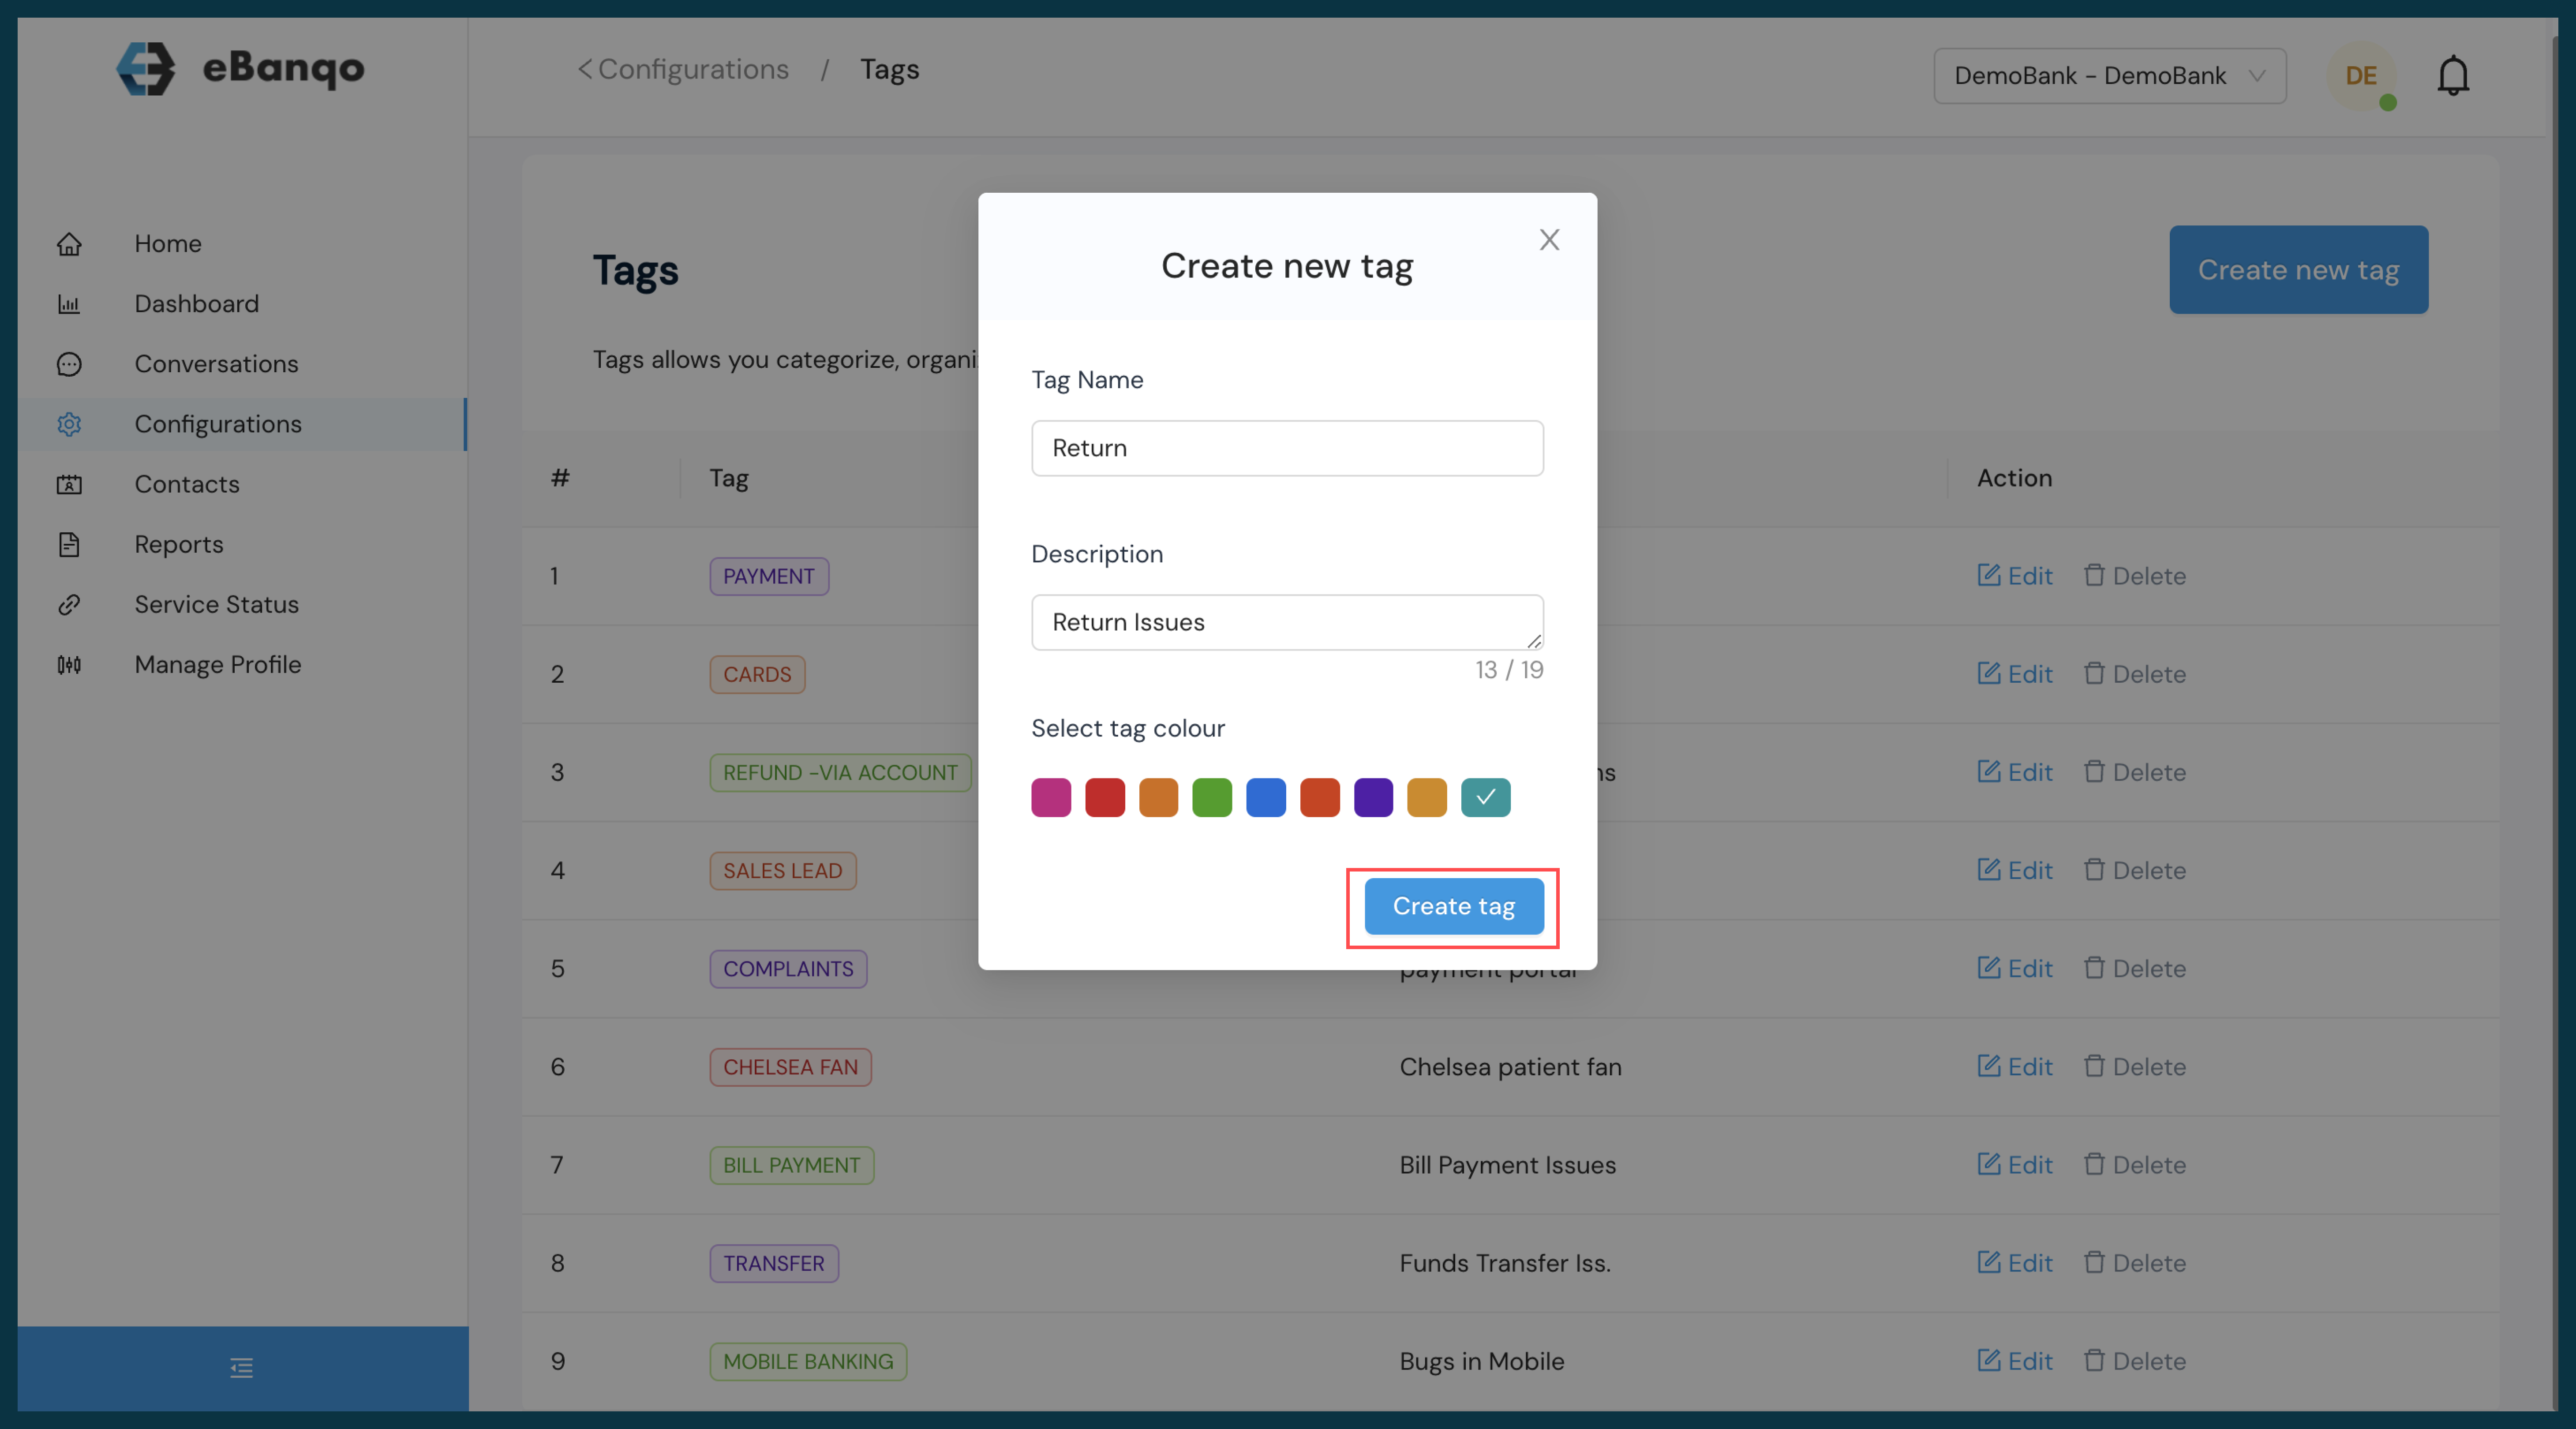
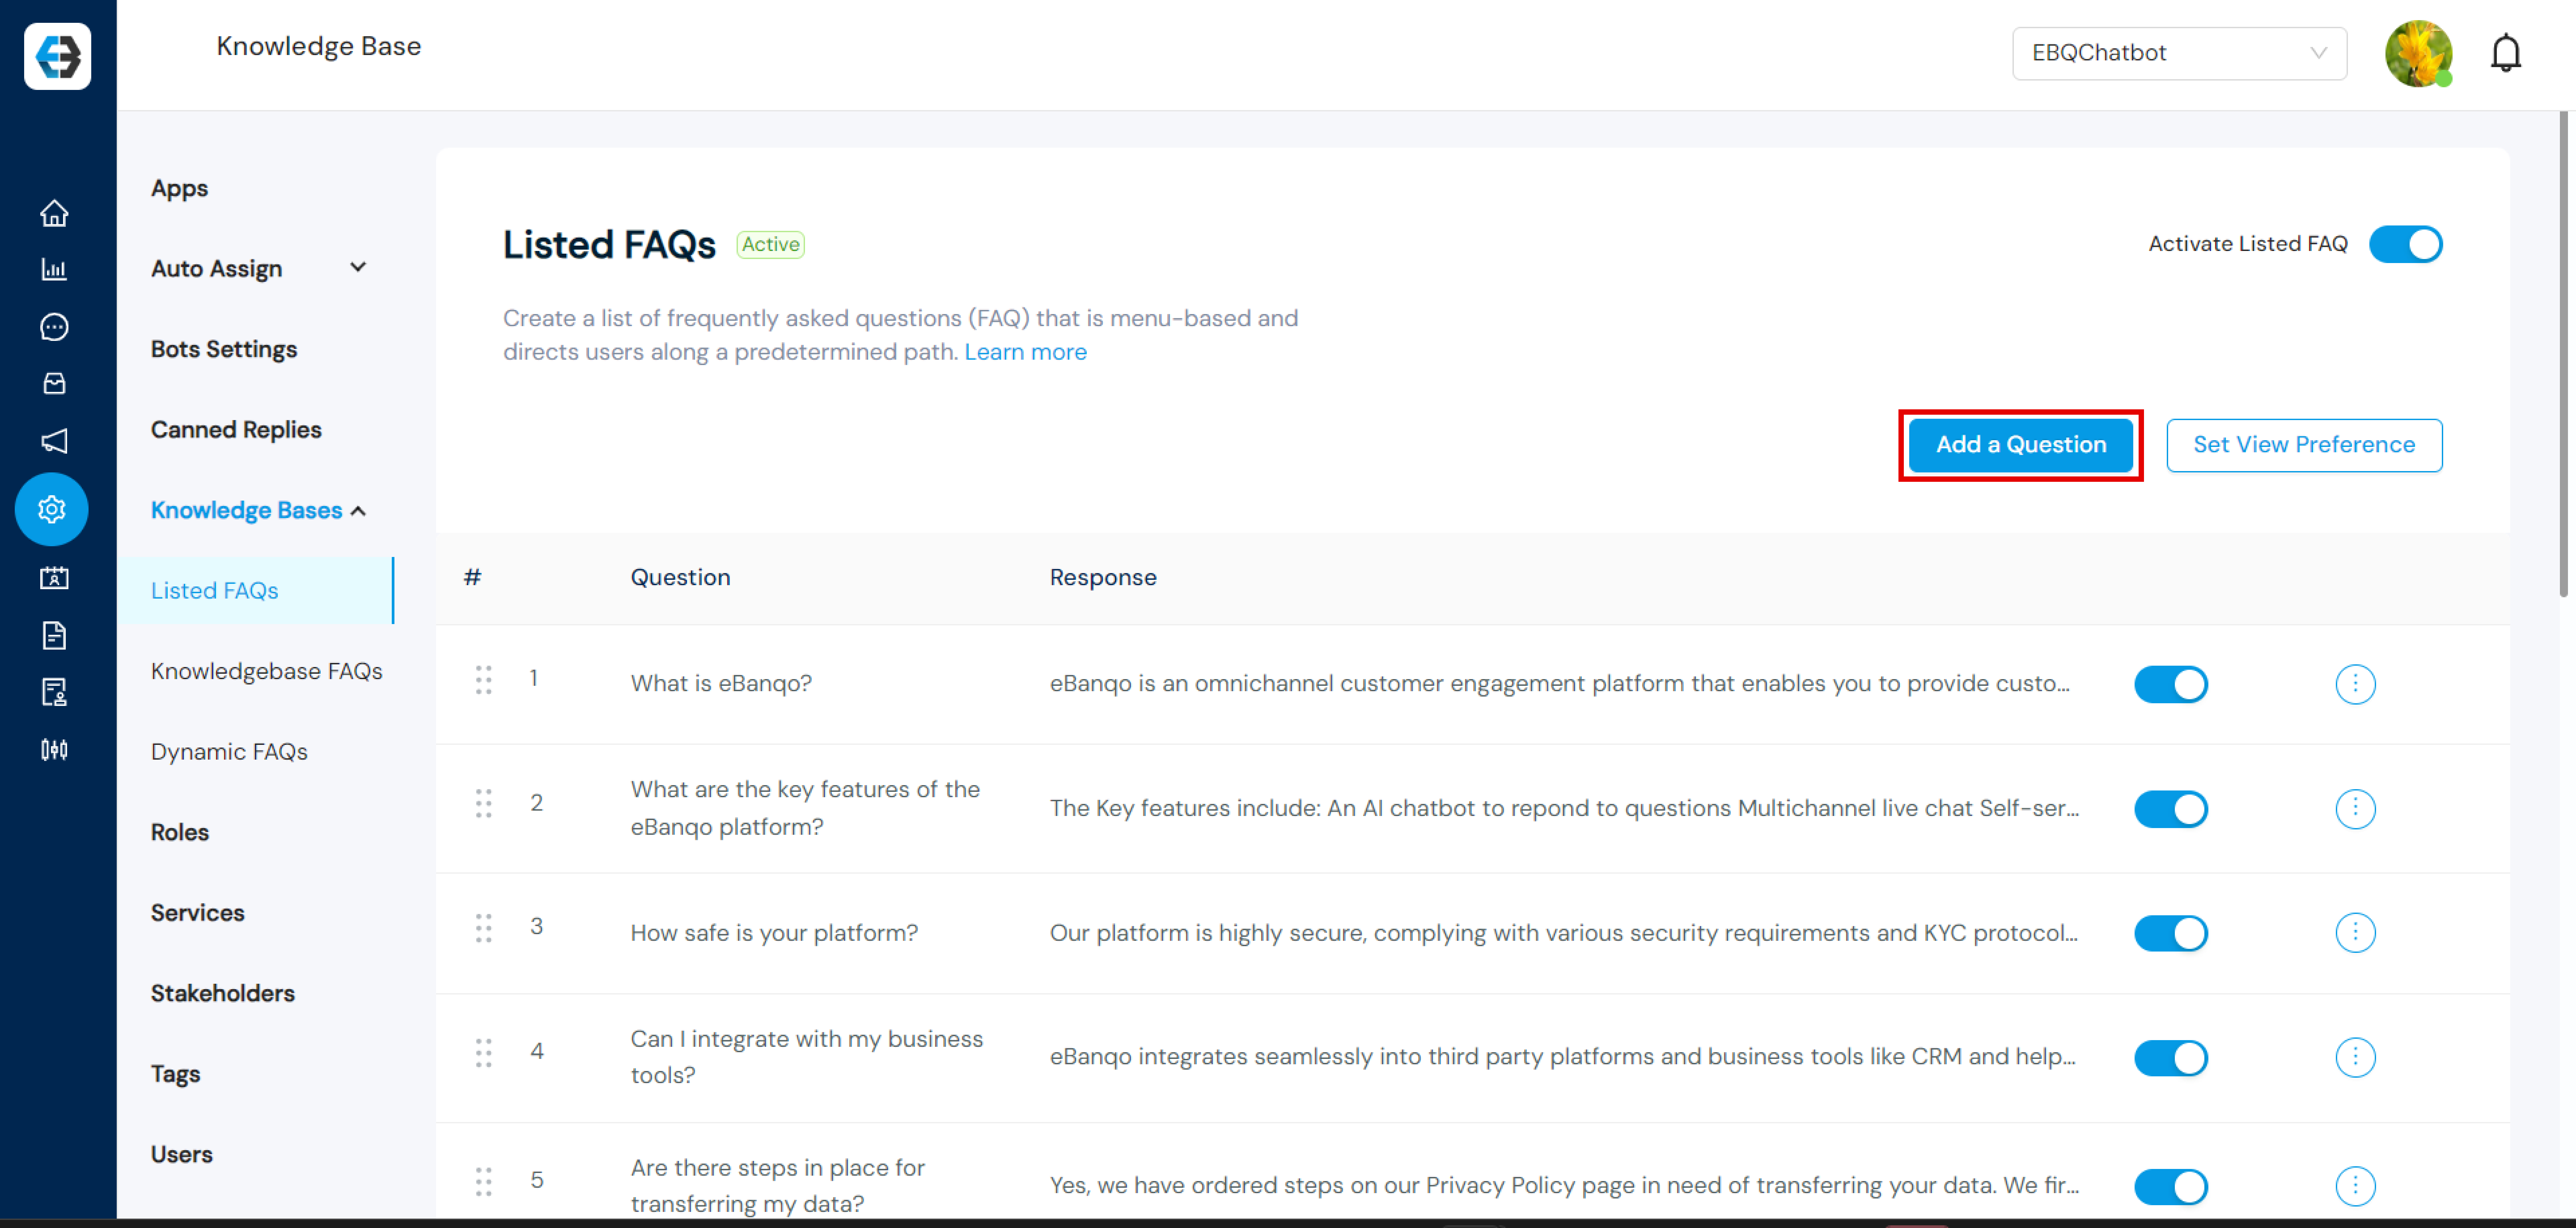
Step 3: Fill in the Question and Response
Enter your question in the Question field and the corresponding answer in the Response field. Once done, click Create to add the FAQ. Repeat the process to add more FAQs.
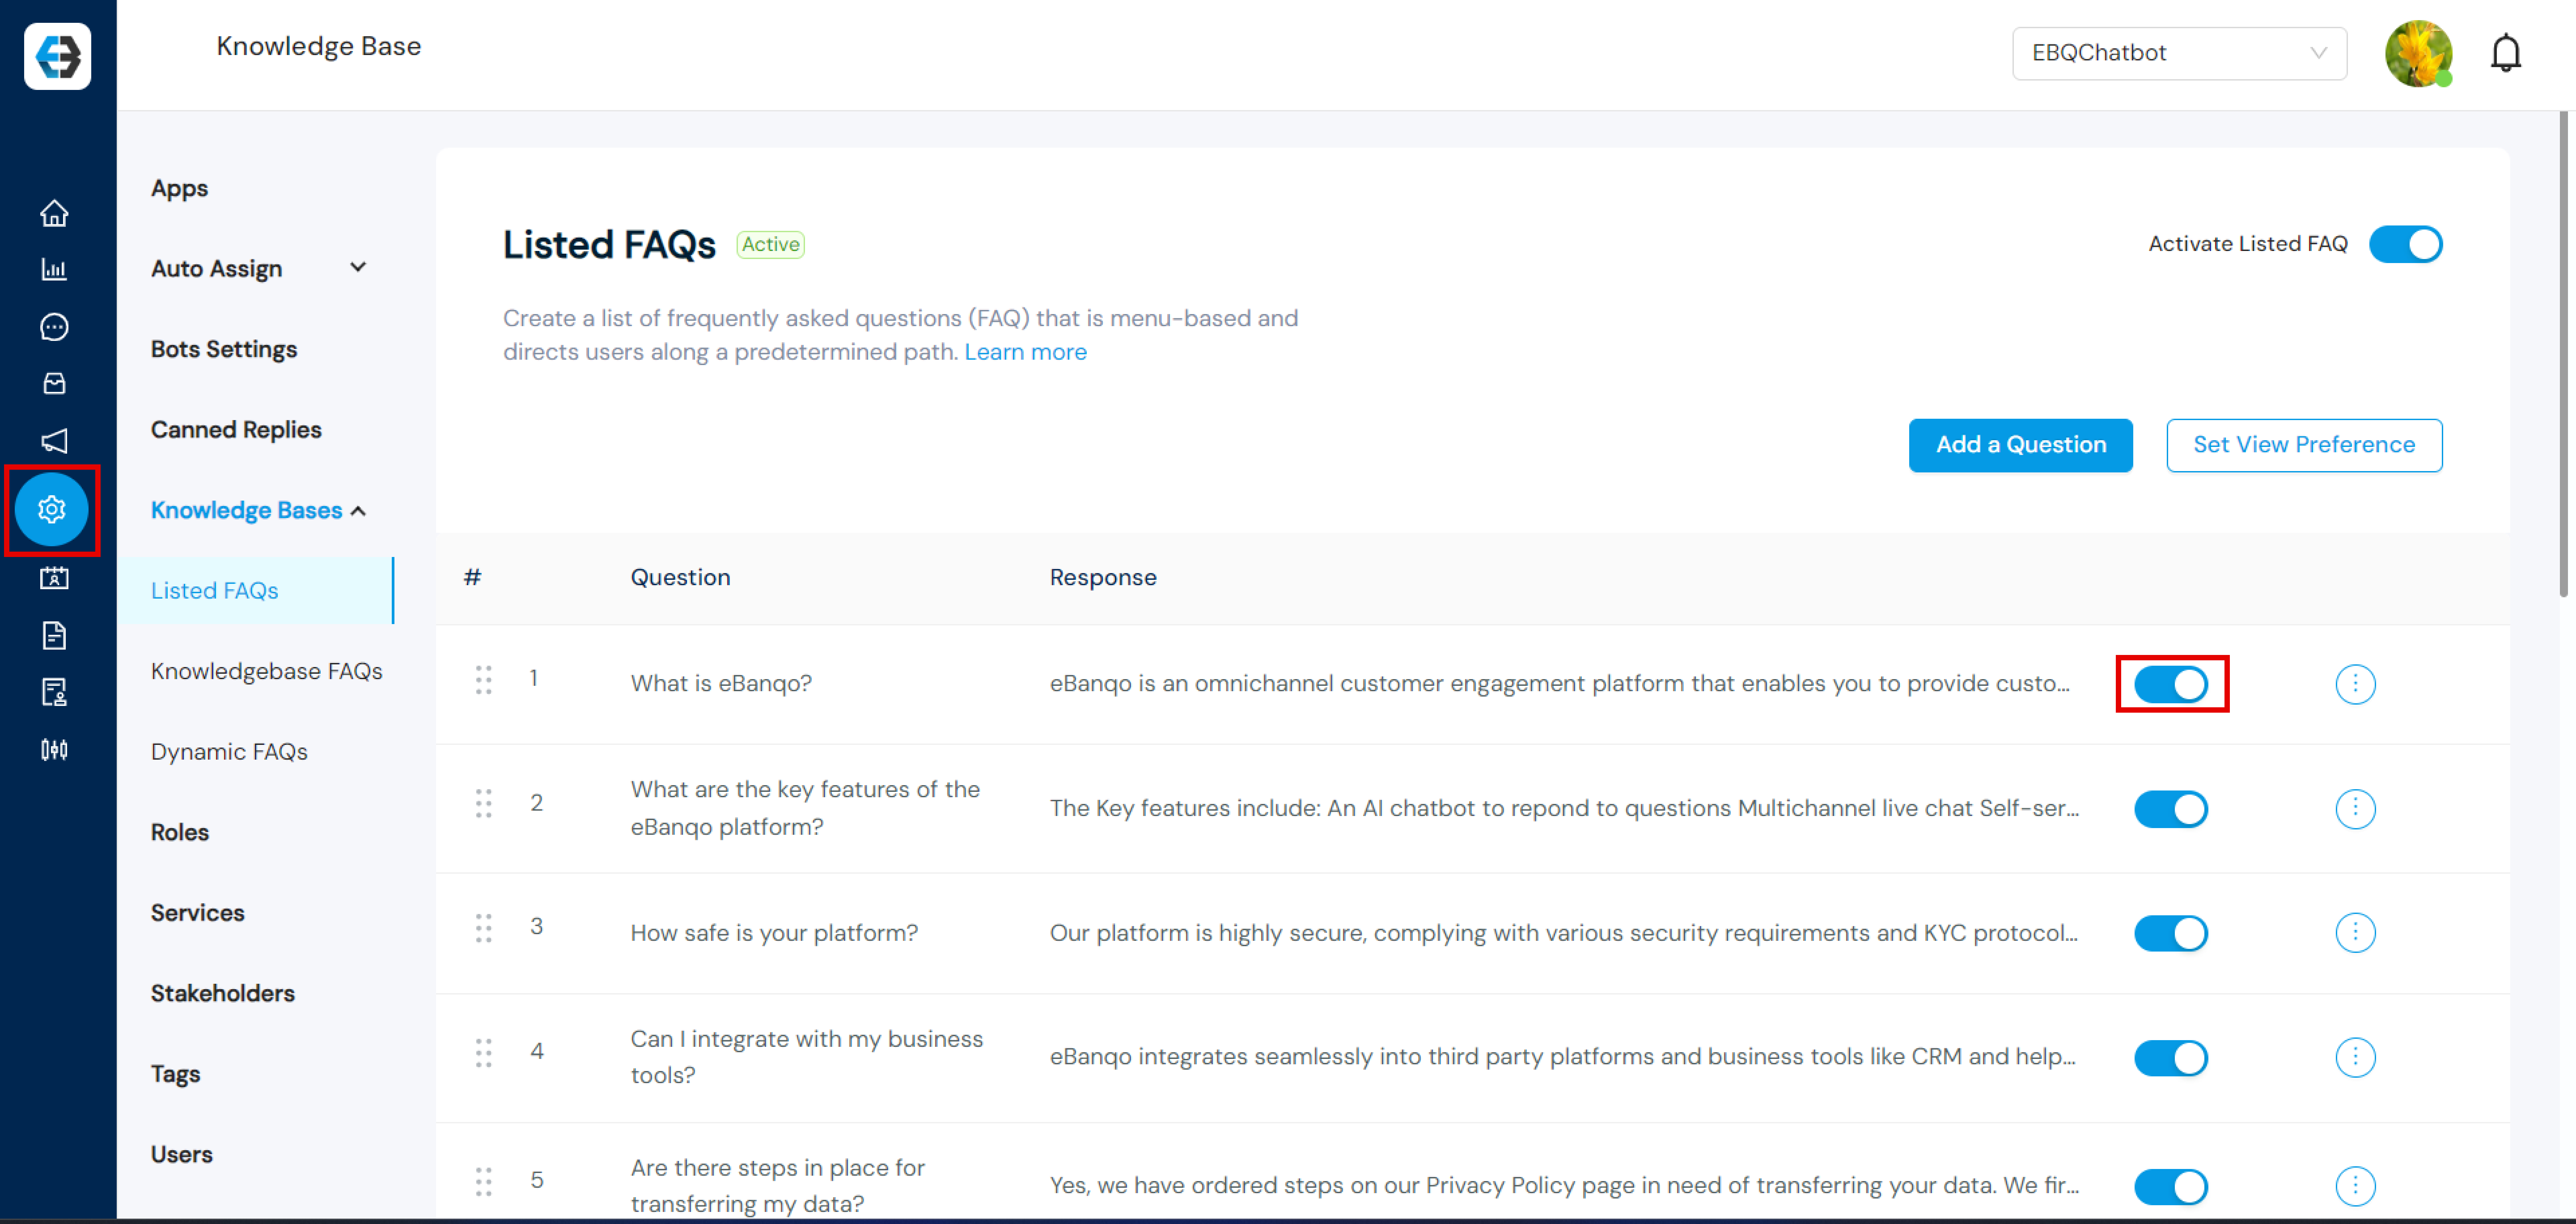
Step 4: Select FAQs for Display
Use the toggle button next to each FAQ to select which ones you want to display to your customers. Note: You can select up to 12 FAQs.
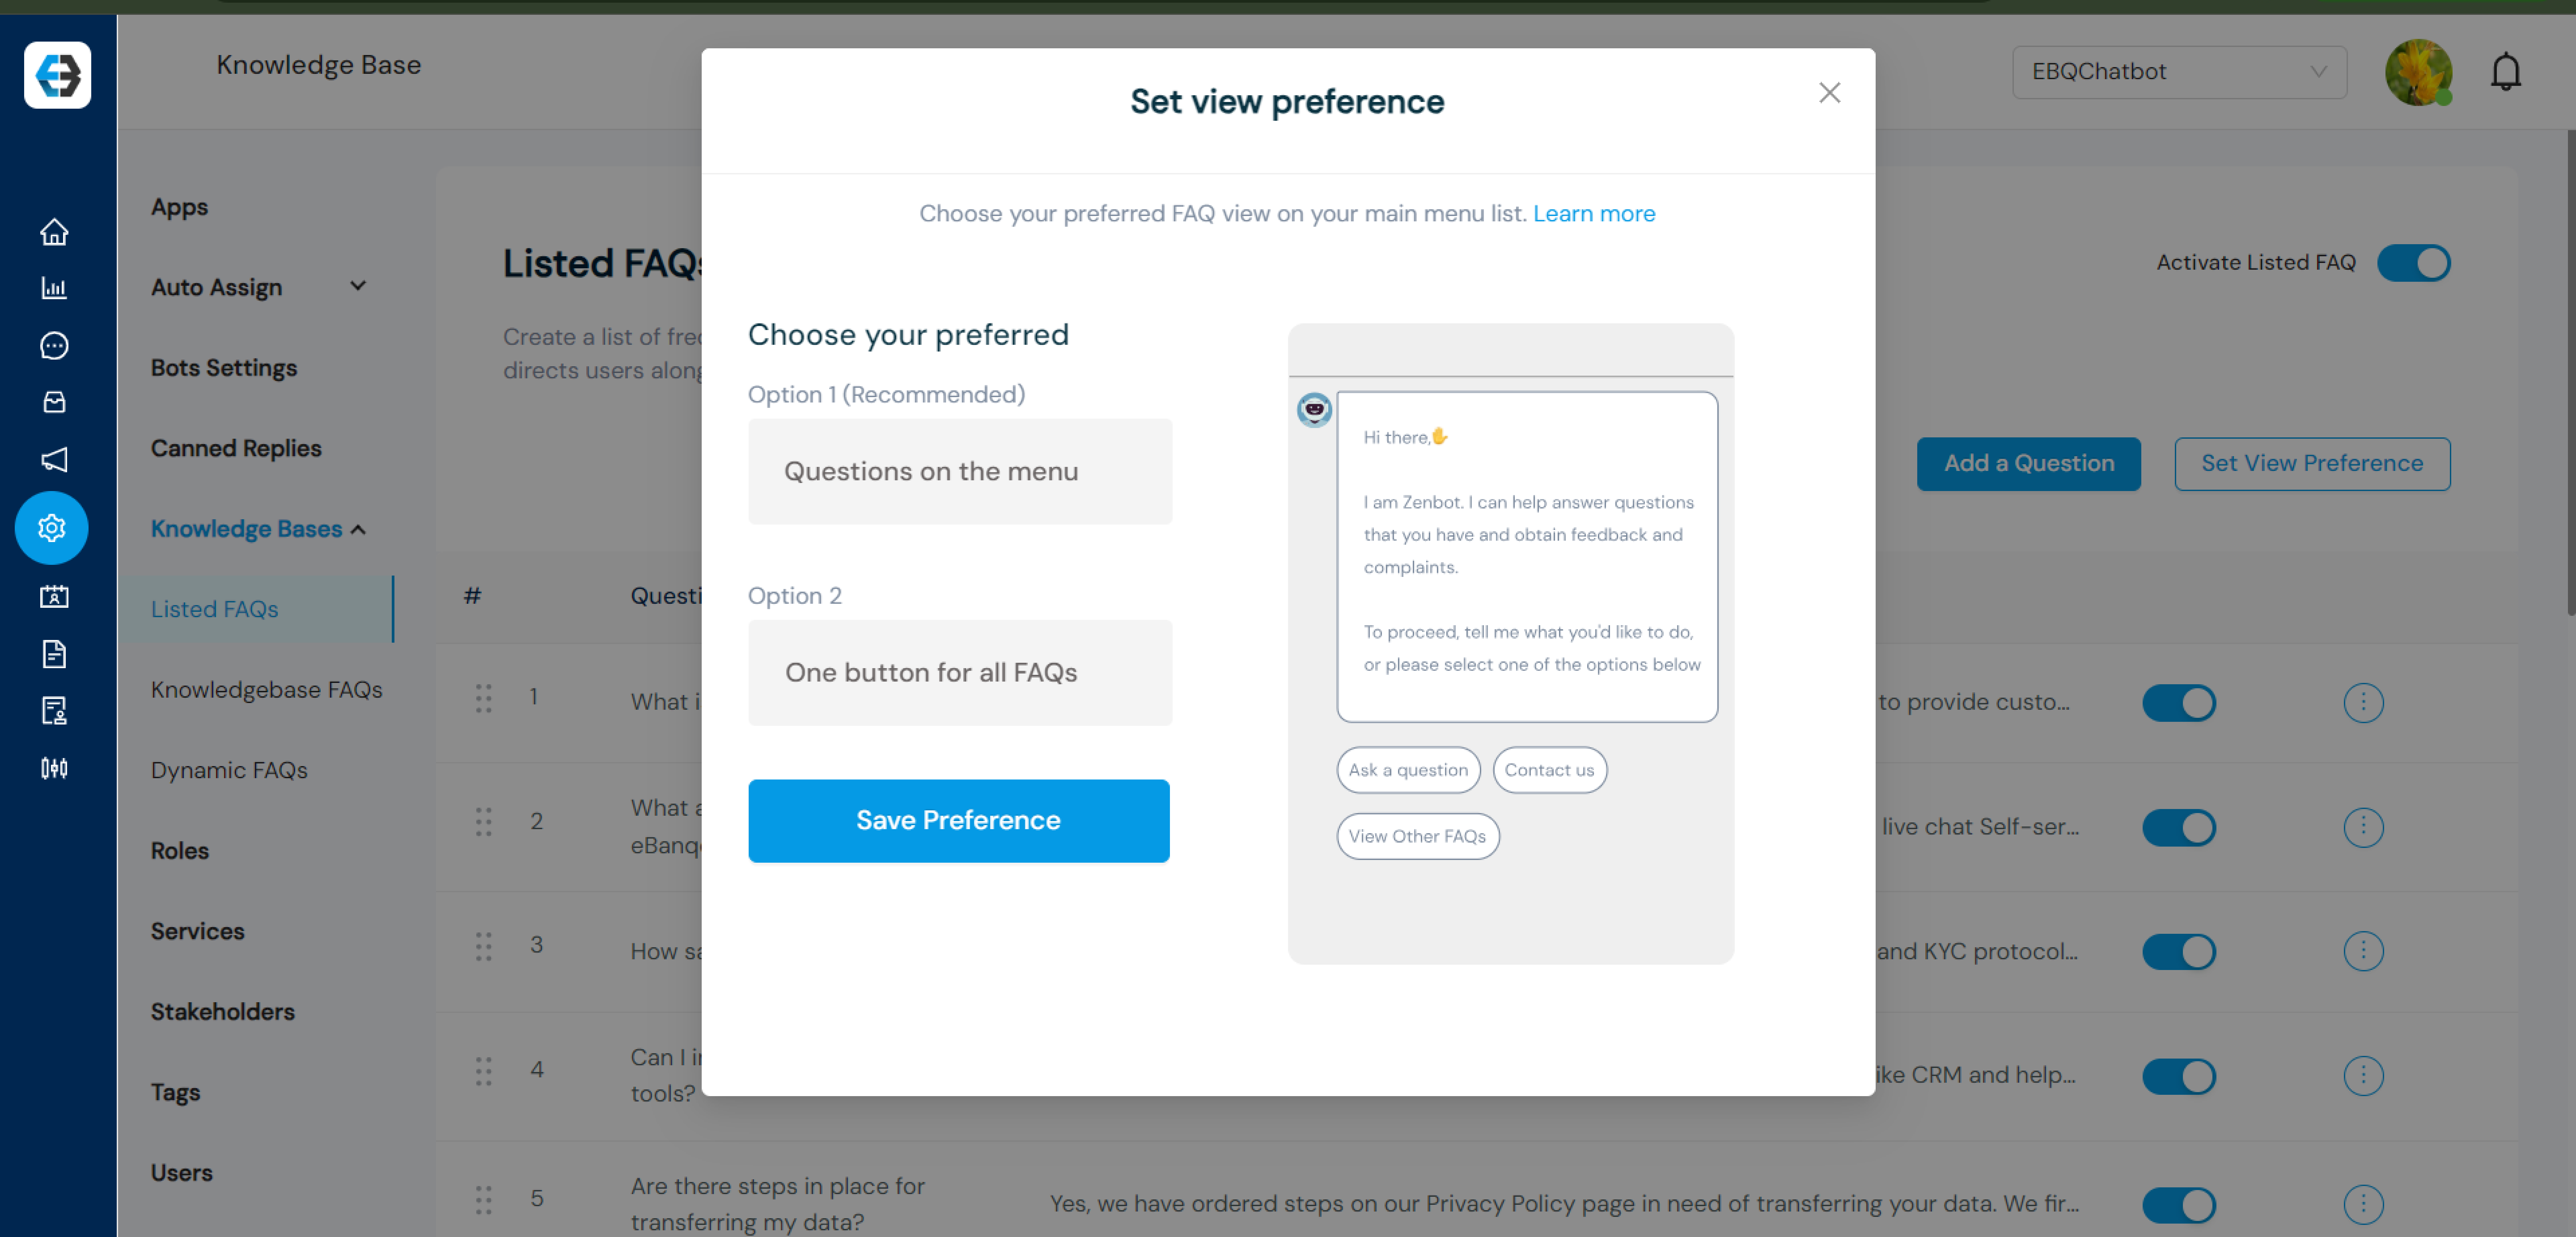
Step 5: Set View Preference
Click on Set View Preference to choose how your FAQs will be displayed.
Step 6: Choose a View Option
You can choose between:
Questions on Menu
One Button for All FAQs
A preview will appear on the right side of the screen. Click Save Preference when satisfied.
Step 7: Activate Listed FAQs
Toggle the activation switch to enable Listed FAQs.
Dynamic FAQs is eBanqo’s advanced FAQ Bot powered by cutting-edge generative AI, similar to ChatGPT. It is designed to provide accurate, detailed, and contextual responses to customer inquiries by leveraging multiple data sources. This innovative tool enhances customer support by ensuring queries are answered comprehensively and efficiently.
Getting Started
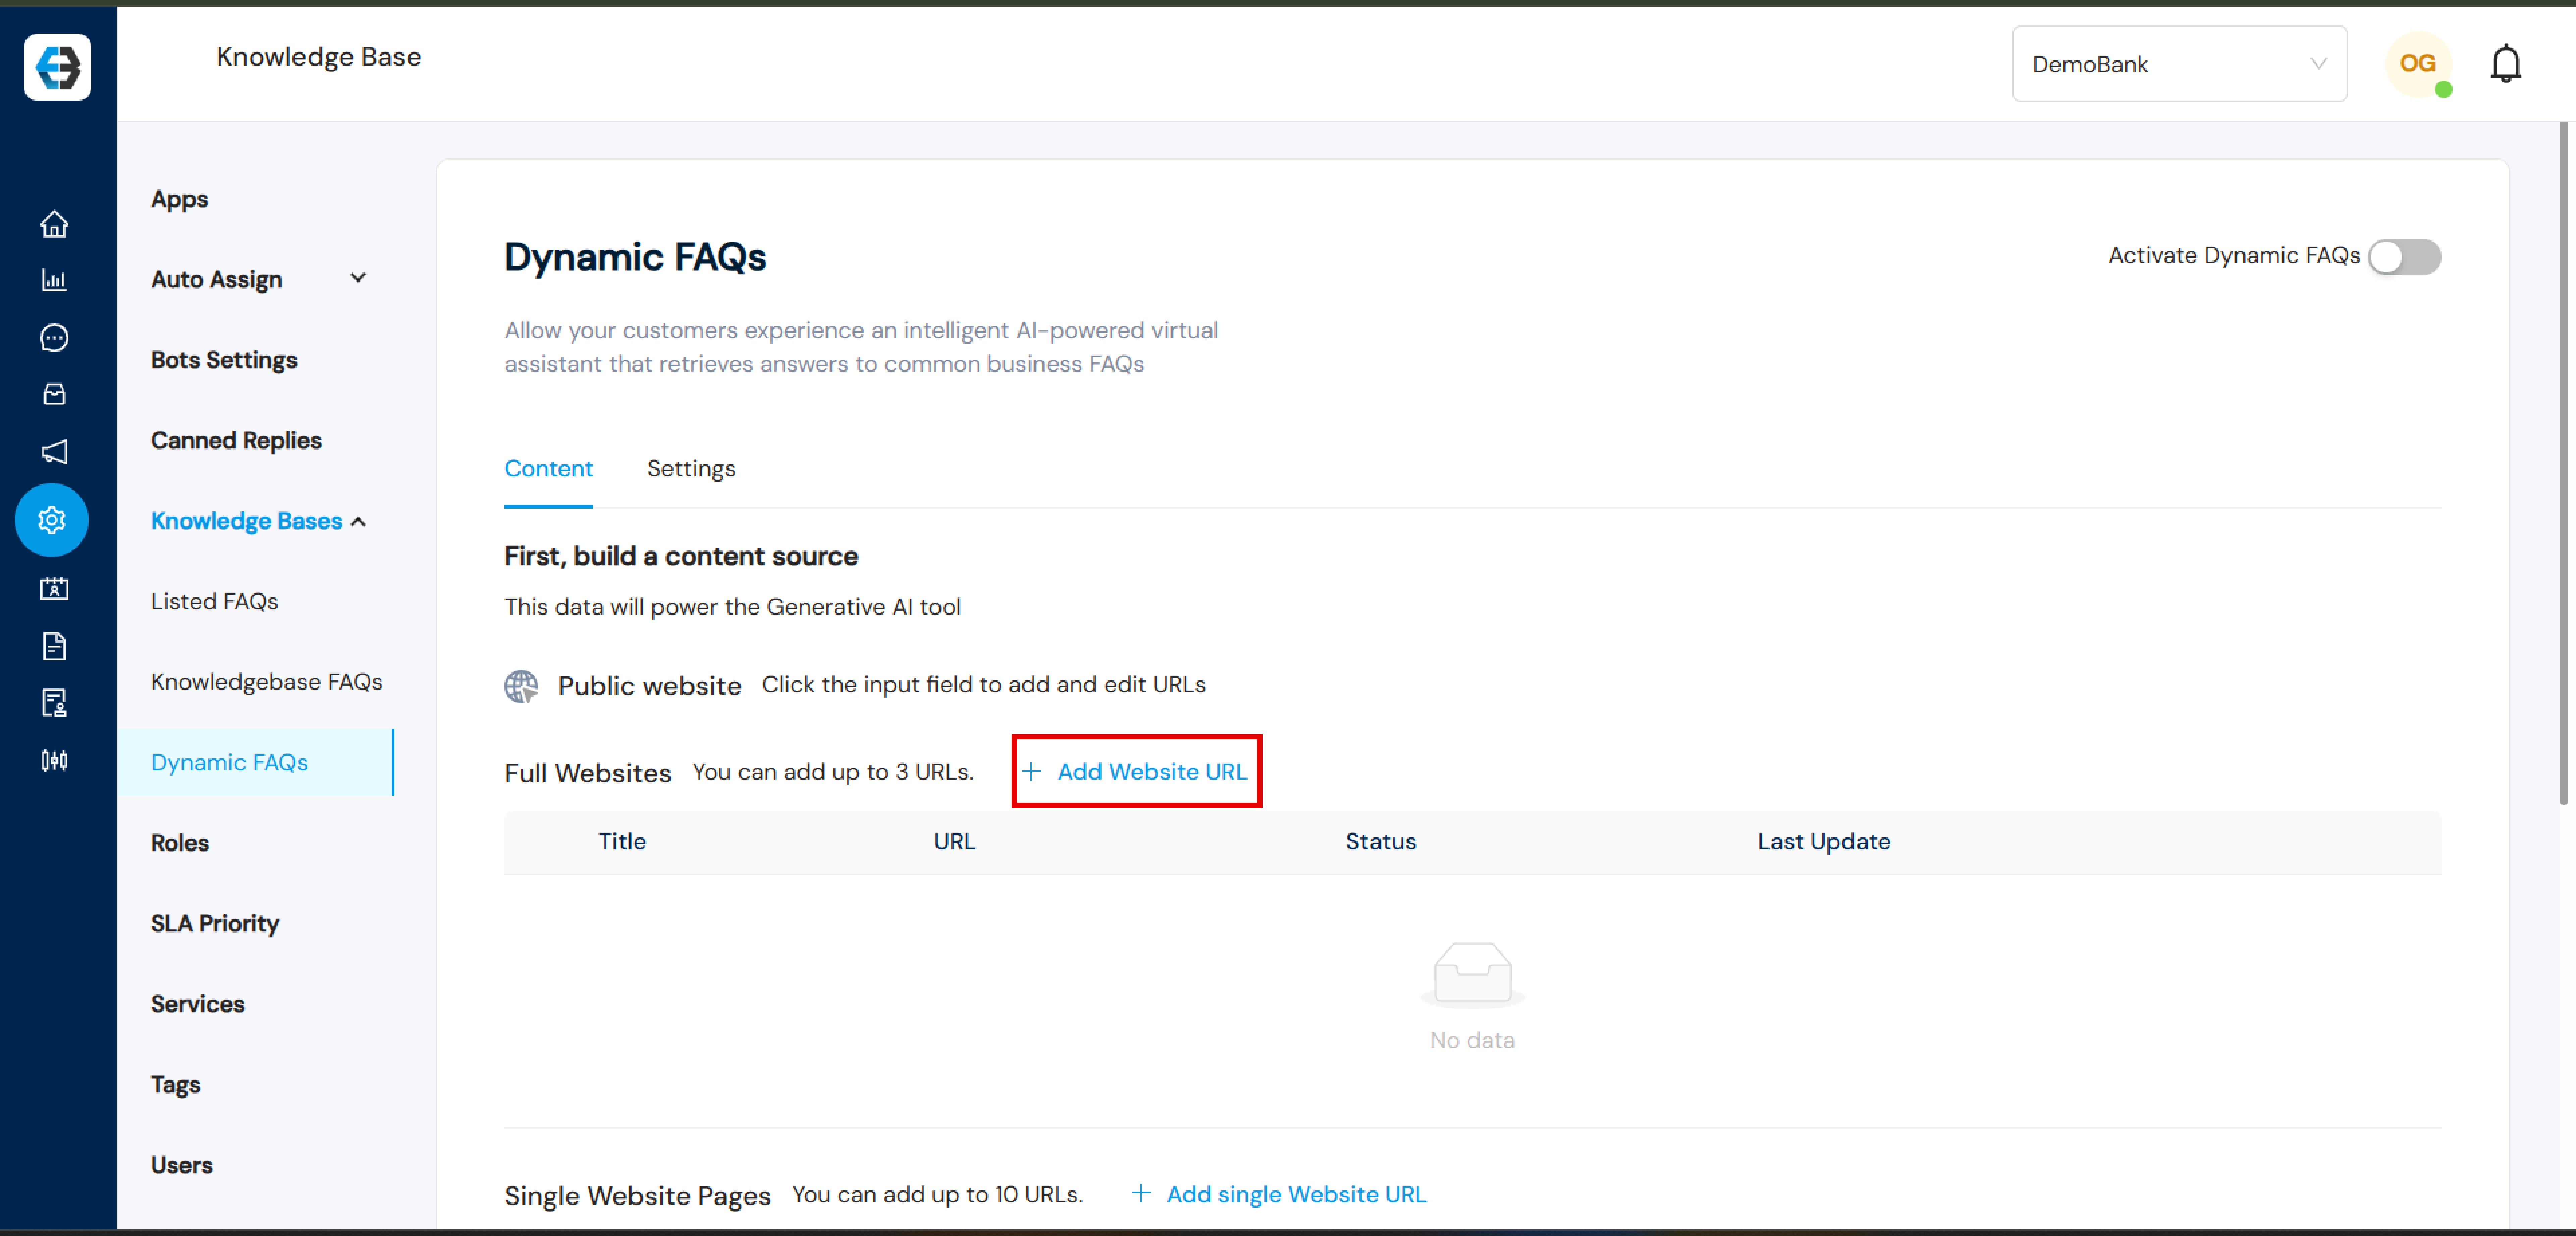
Identify Data Sources Dynamic FAQs connect with various information repositories to gather content and generate answers. Supported sources include Website URLs/Webpage: Extract relevant information directly from your organization’s web pages.
Full Website: For a Full Website, one can add up to 3 website URLs by clicking:
“Add Website URL”, enter the details, and click Save.
Sitemap File: To include a sitemap file, click on “Or click here to upload sitemap file”.
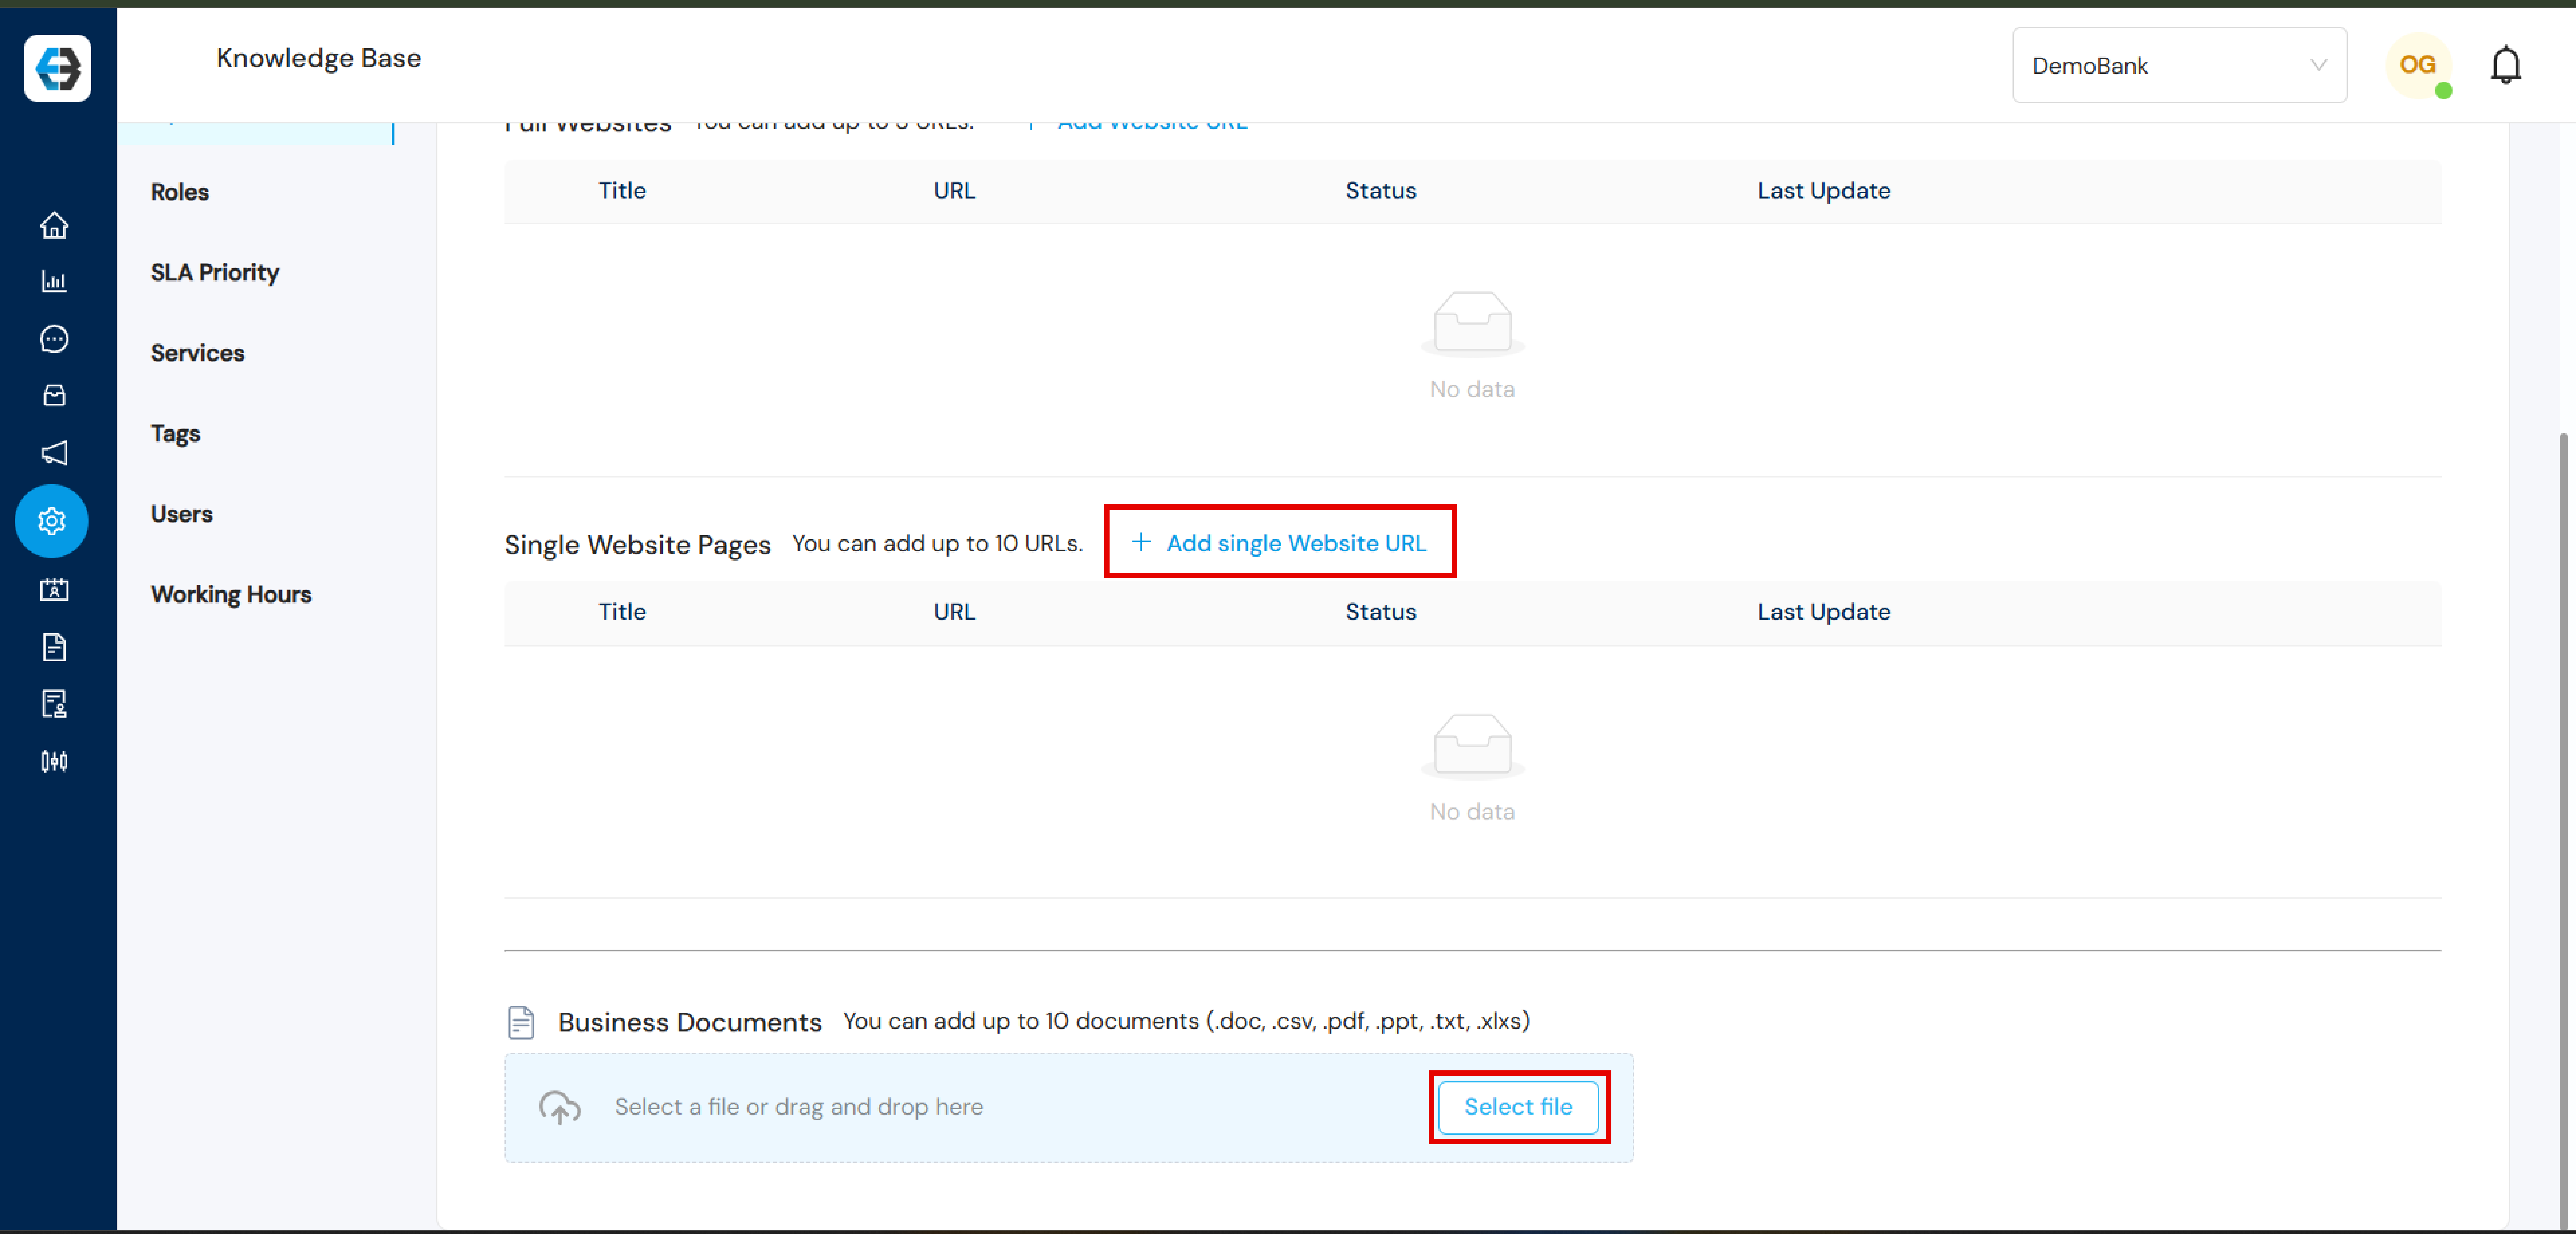
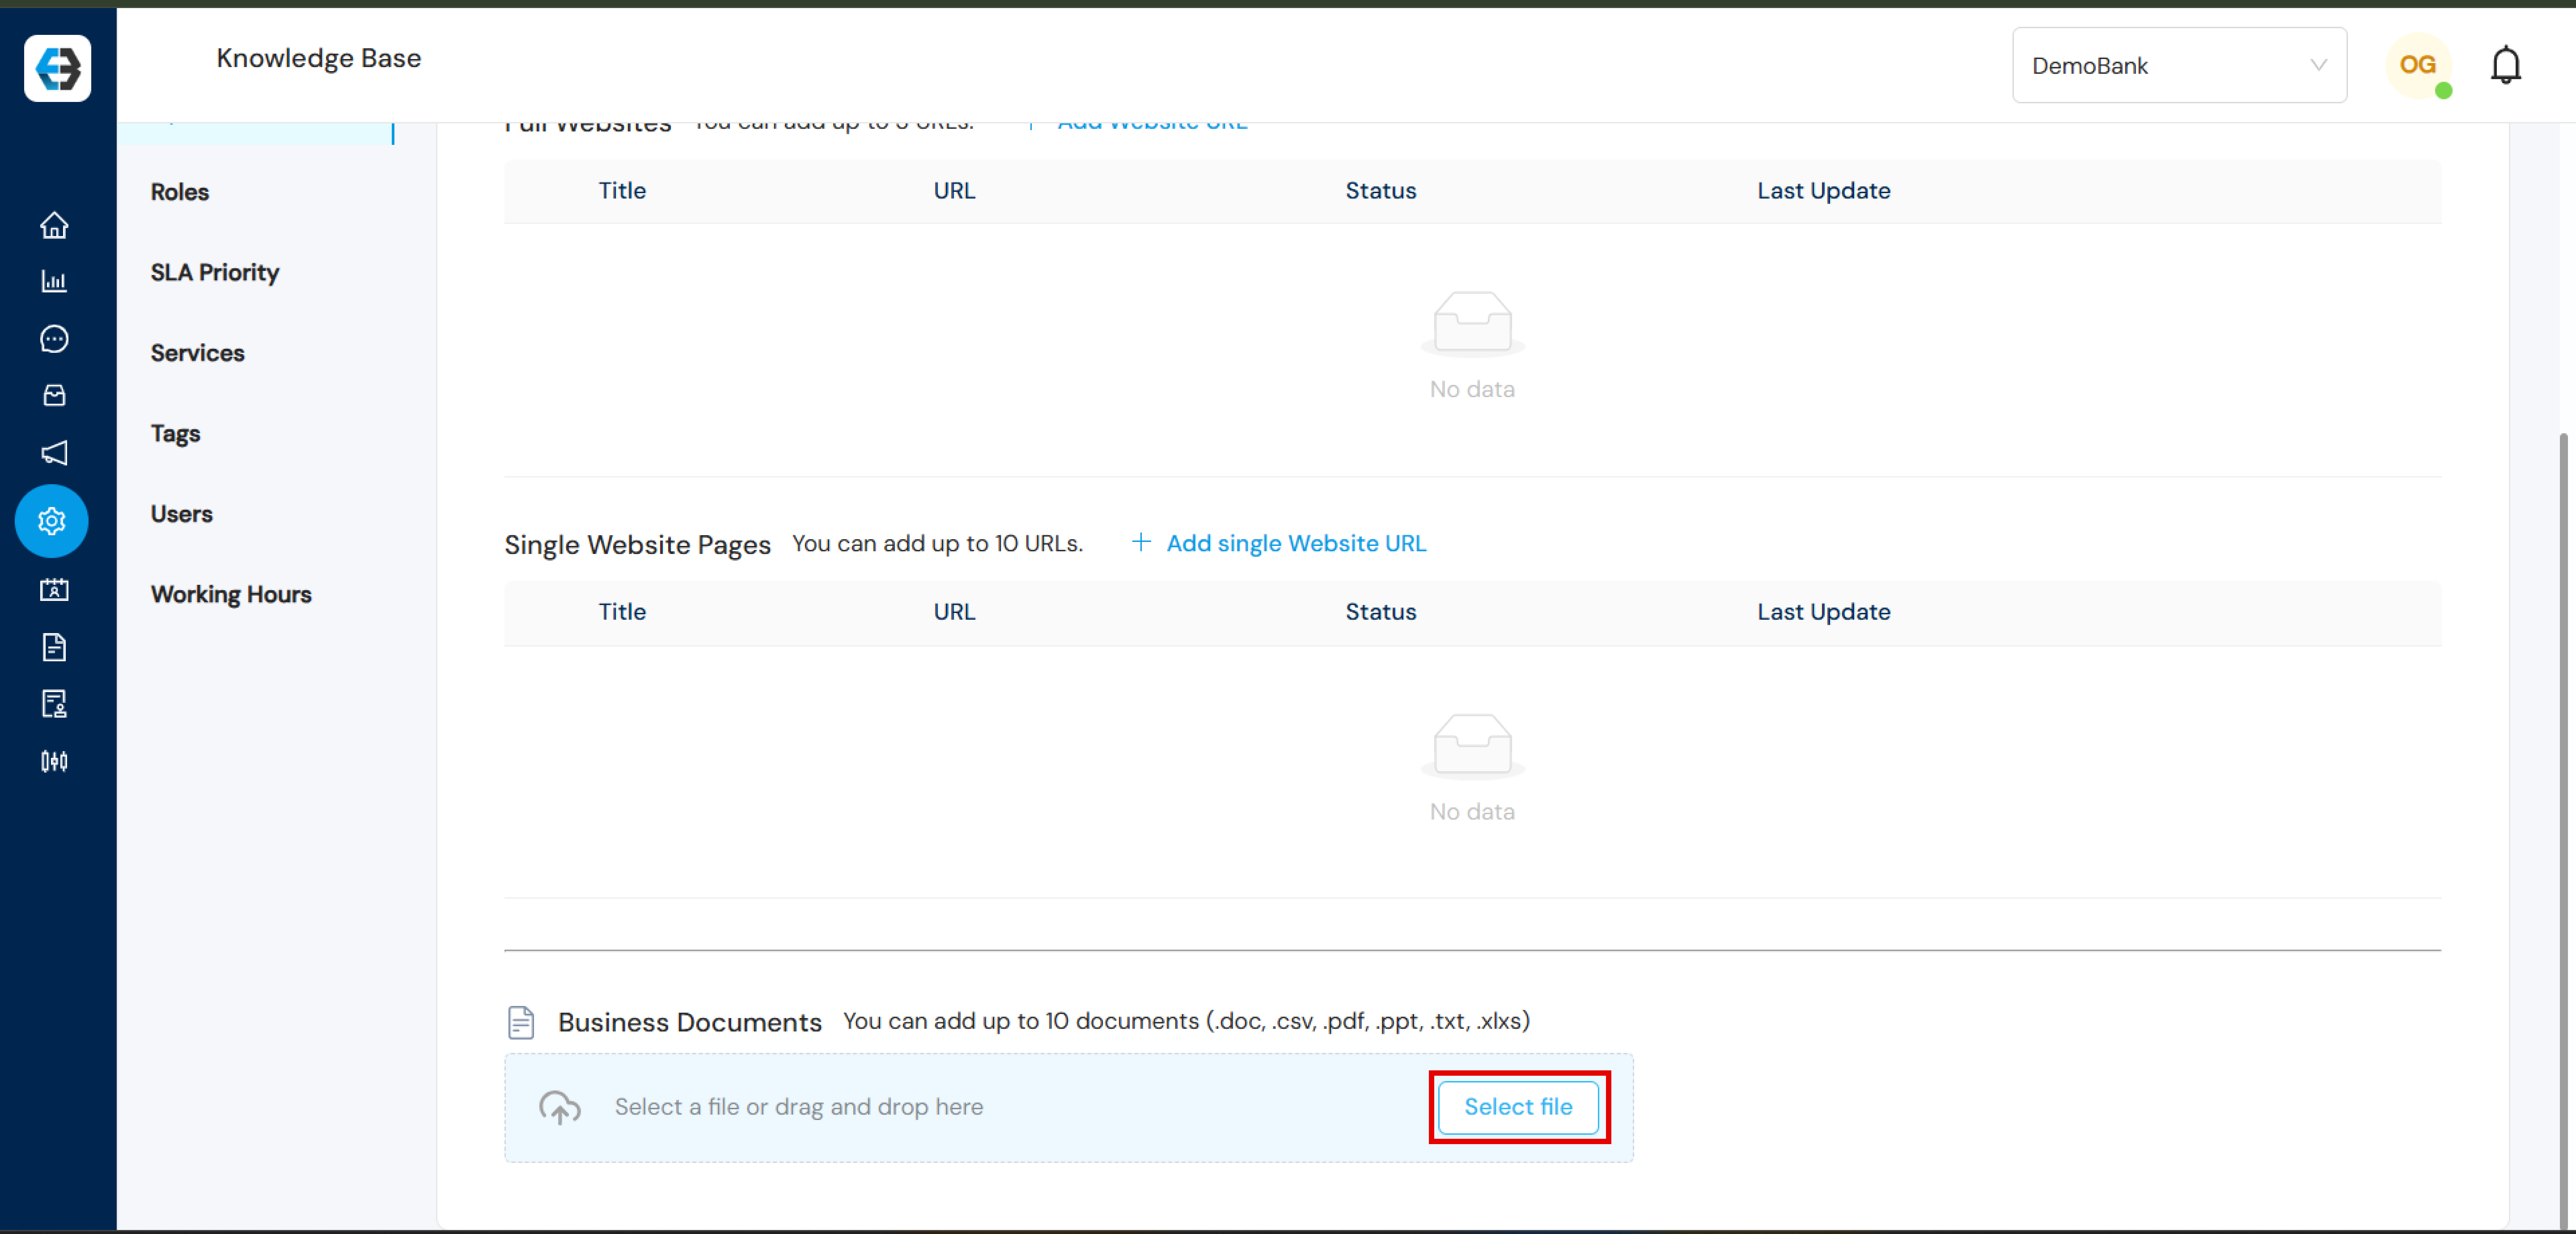
Single Web Pages: Here you can add up to 10 individual URLs. Use the “Add Single Website URL” option to include specific pages.
Documents: Leverages internal documentation like product guides, FAQs, and manuals, i.e. you can add up to 10 documents (.doc, .csv, .pdf, .ppt, .txt, .xlxs). To select a file or drag and drop a file, click on “Select file”.
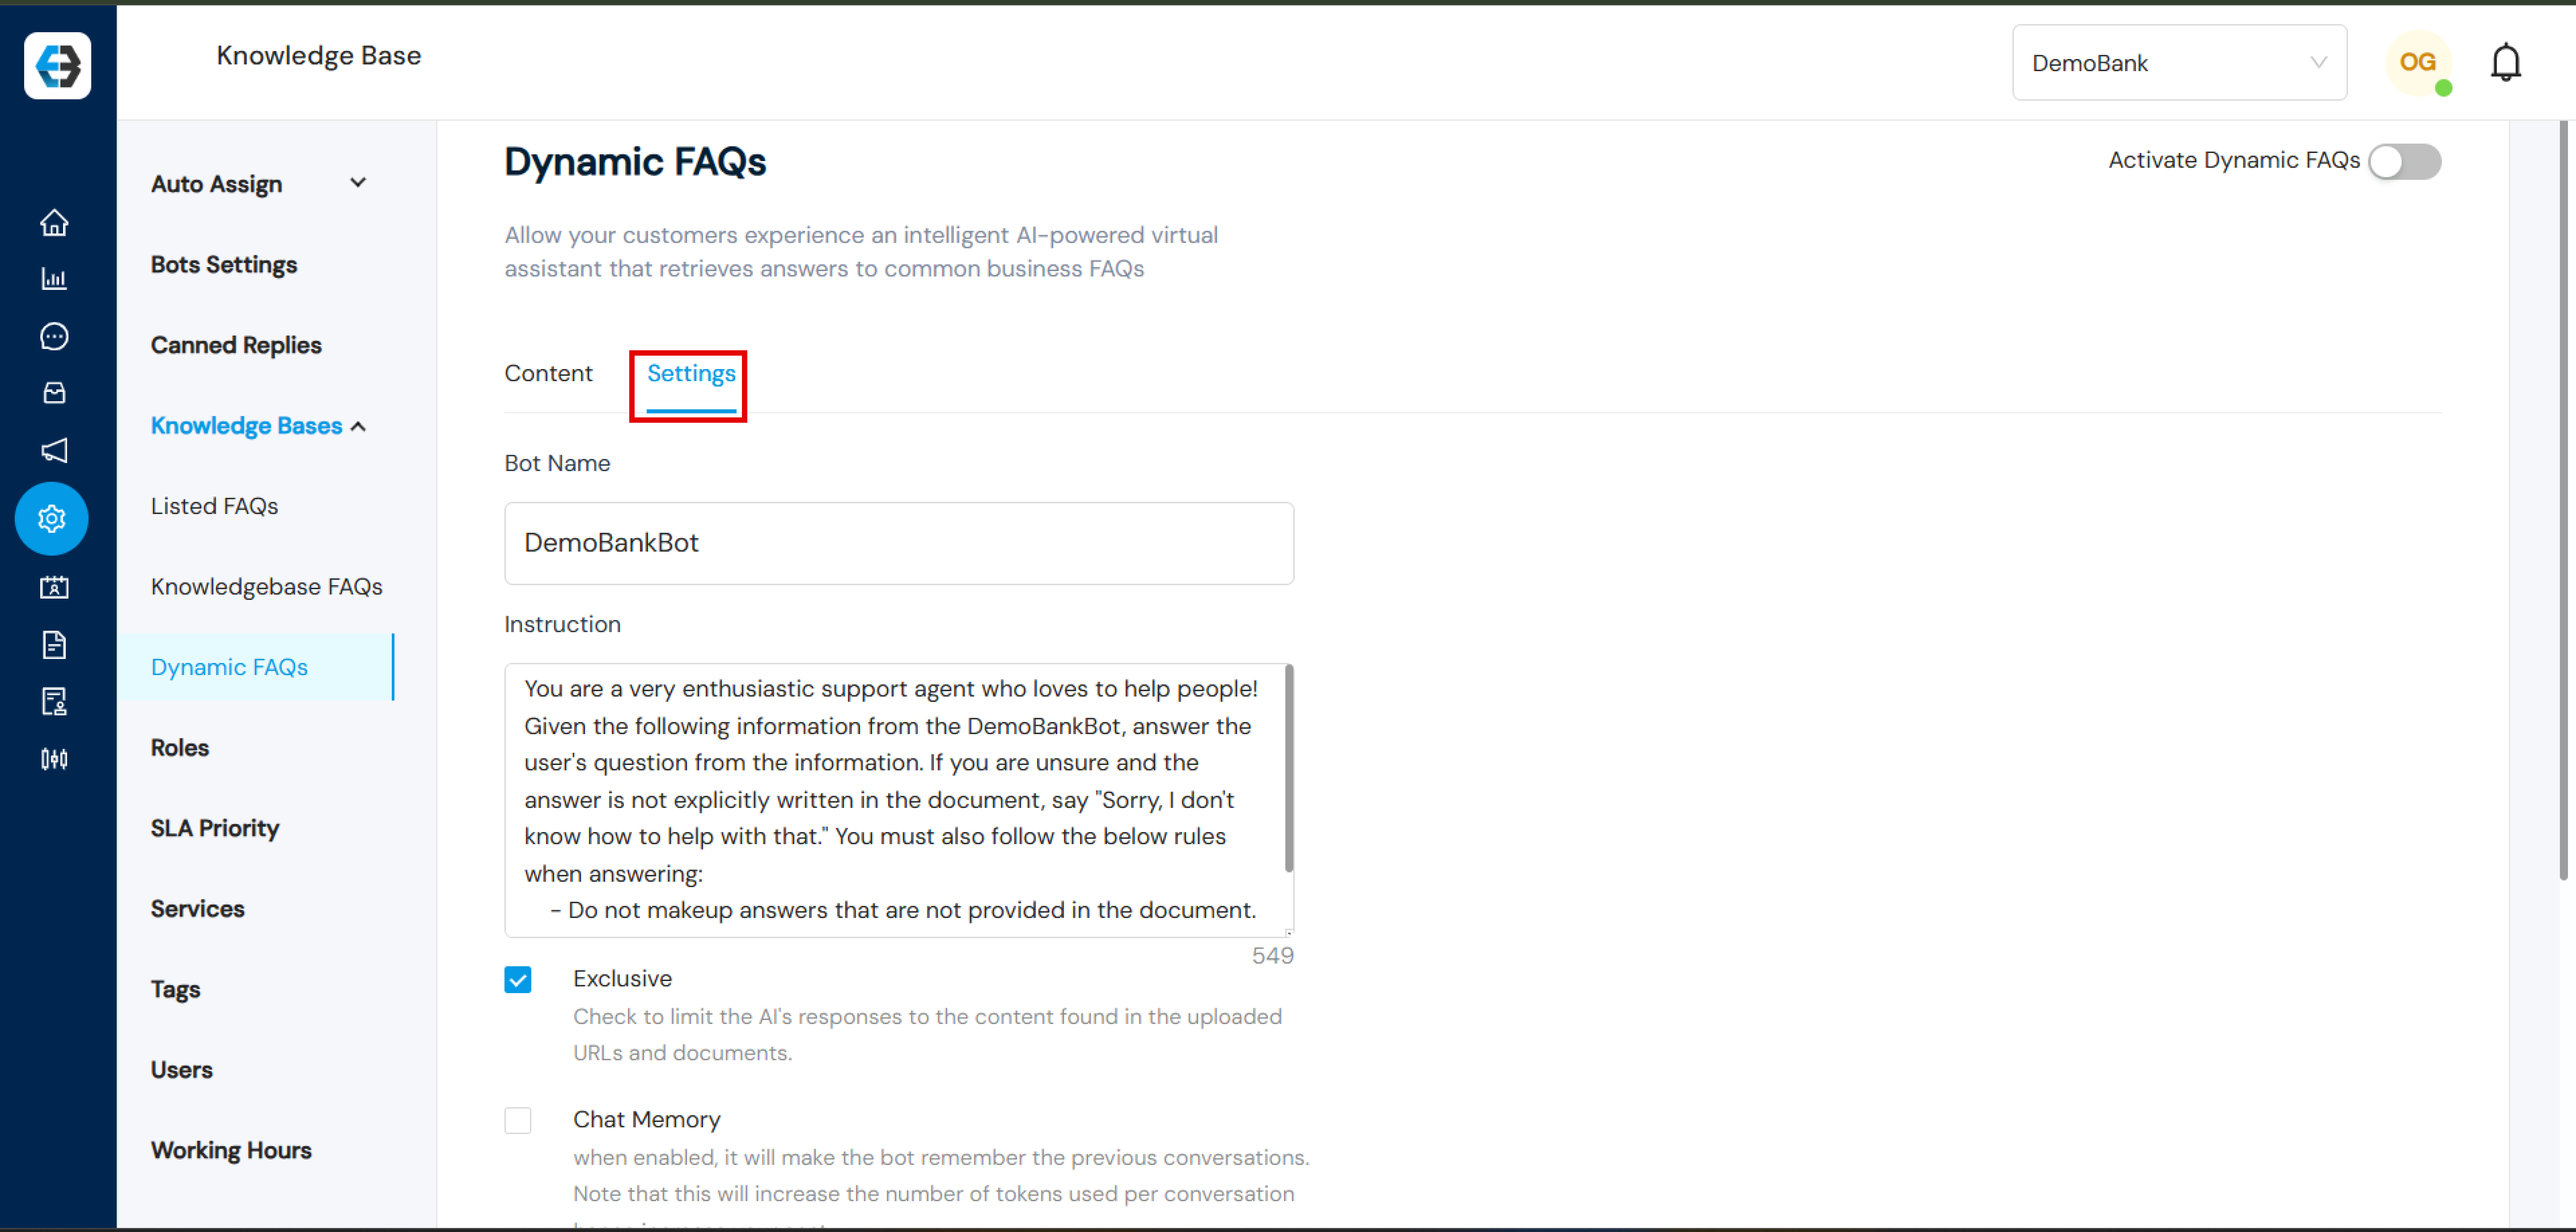
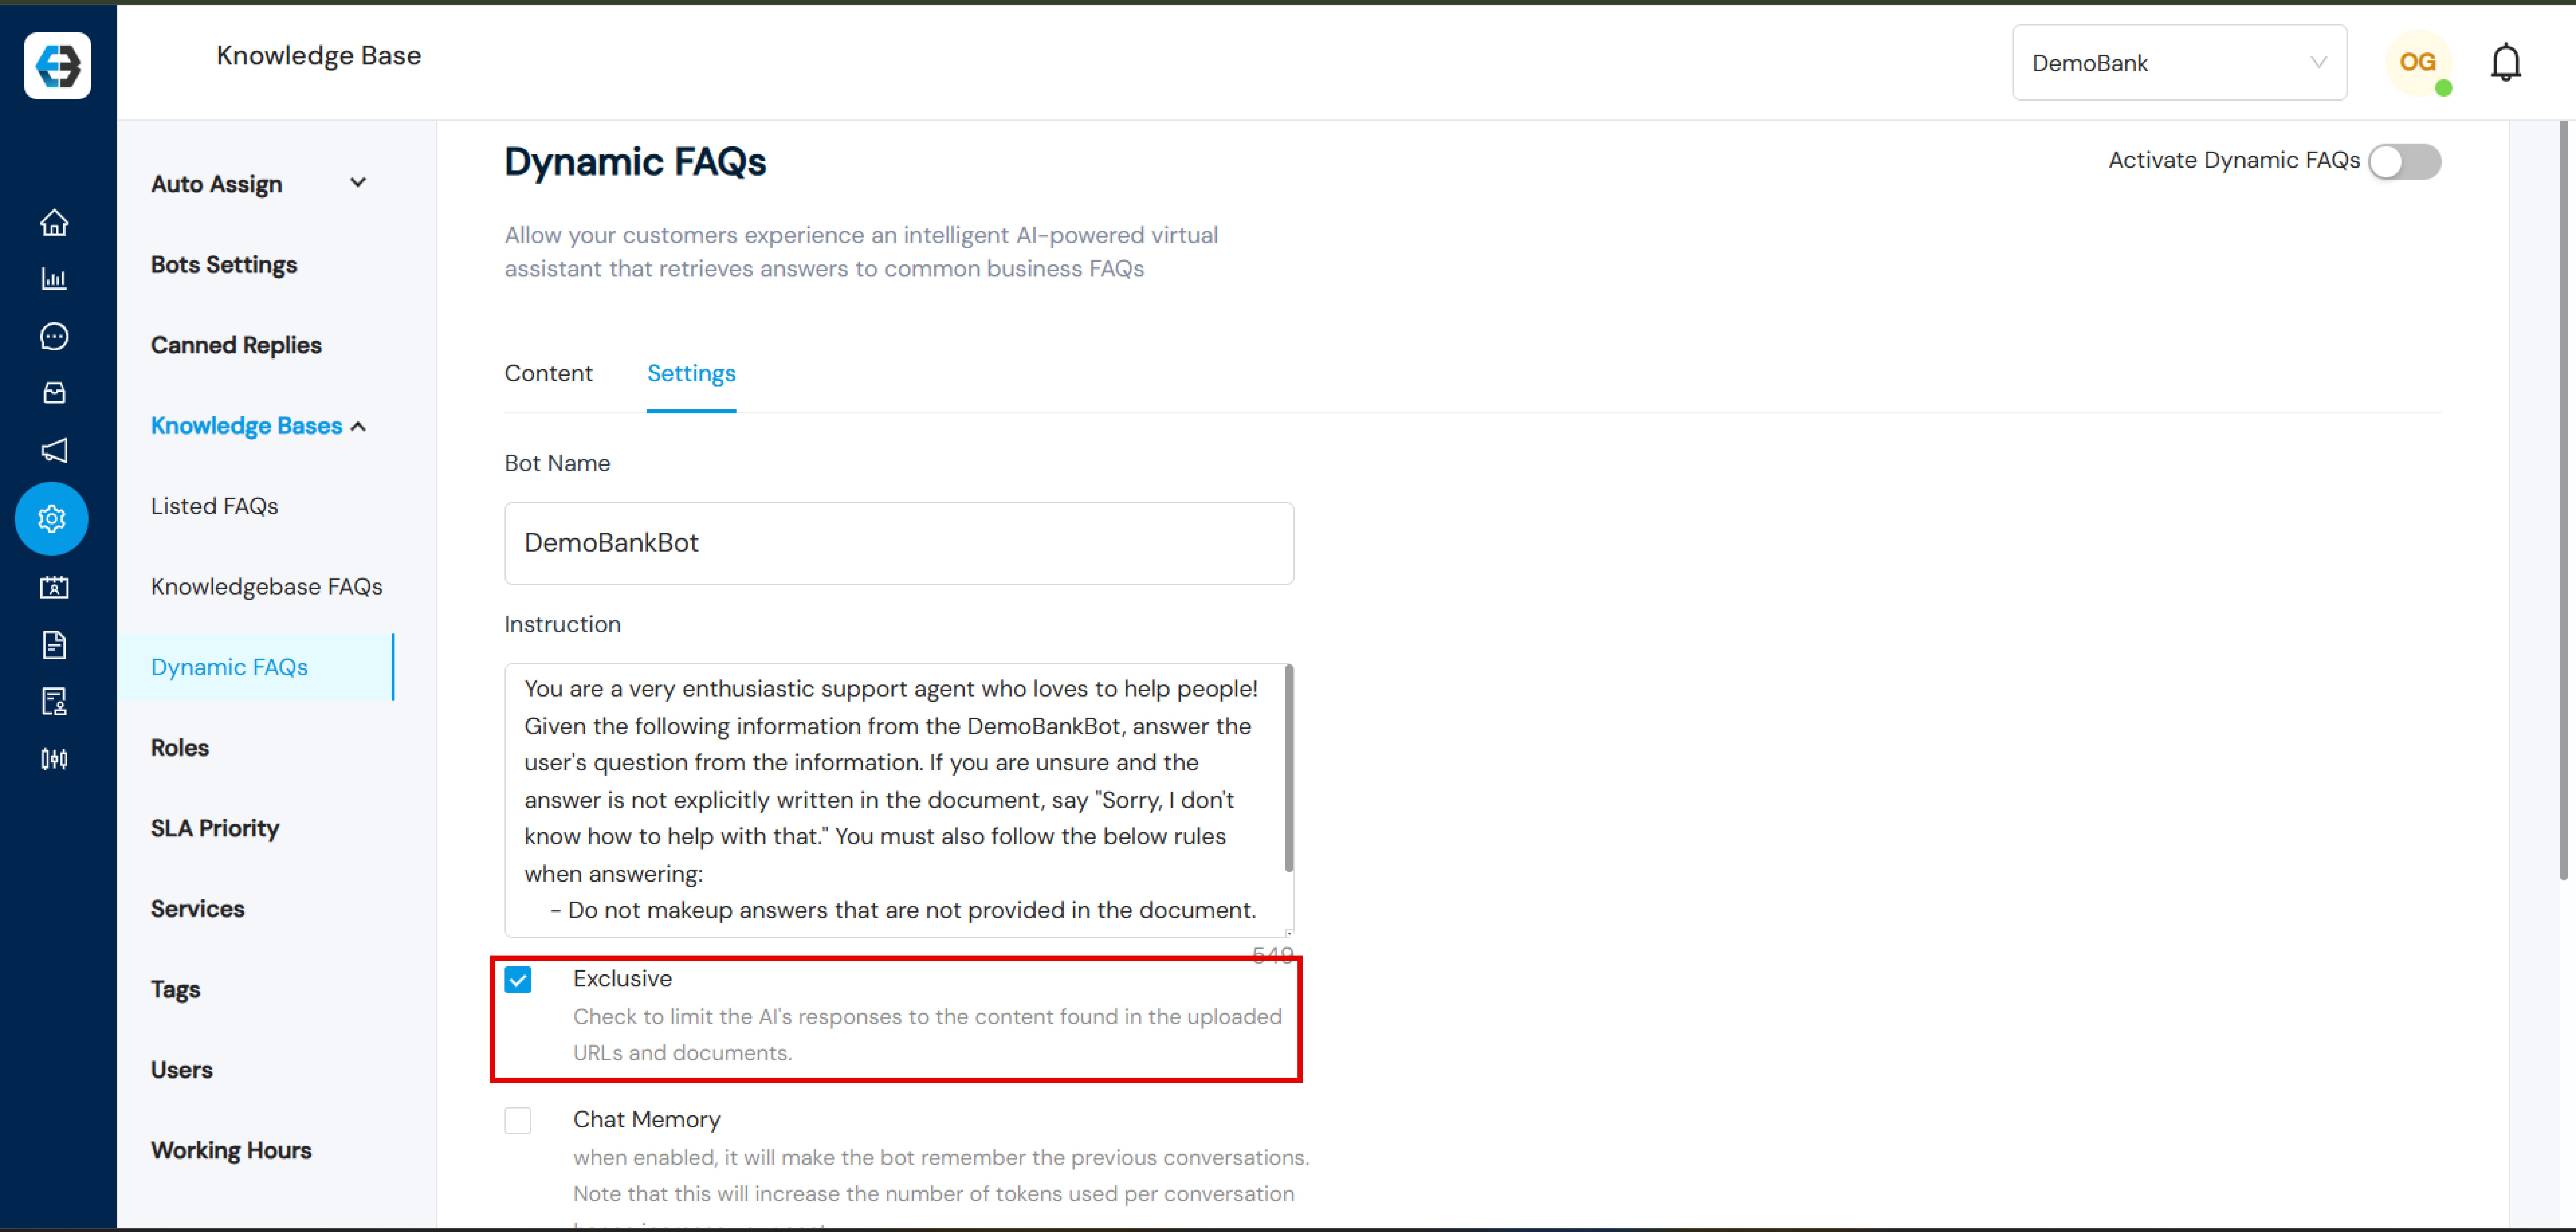
Setting your Dynamic FAQs
Select Settings
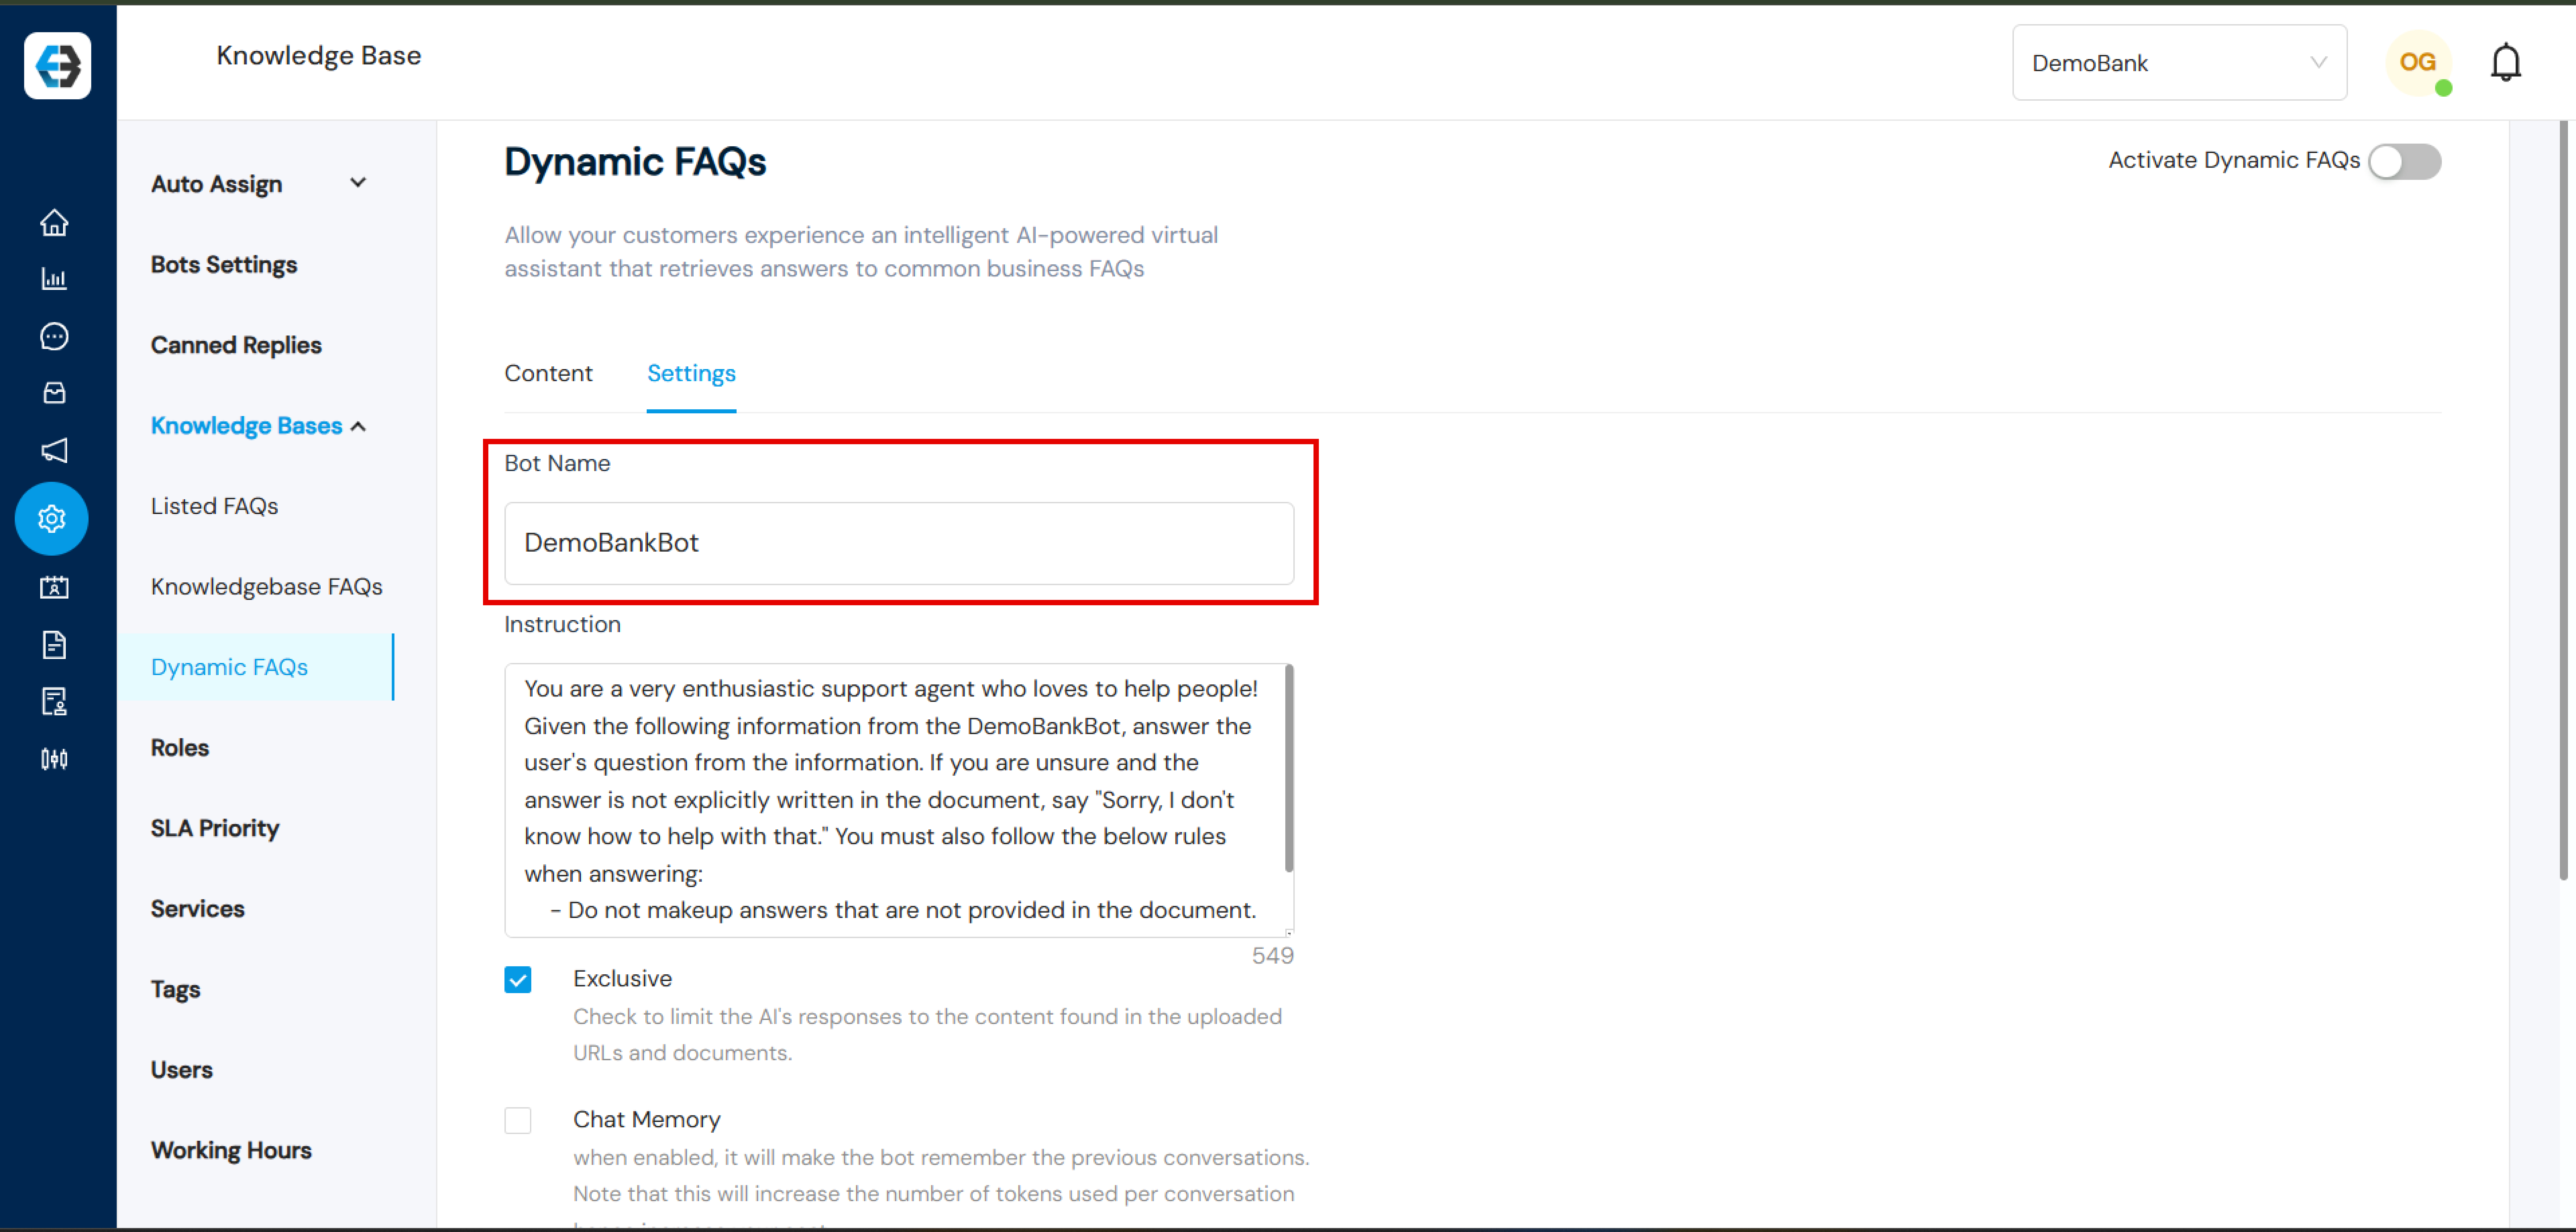
2. Bot Name: Add your Bot name
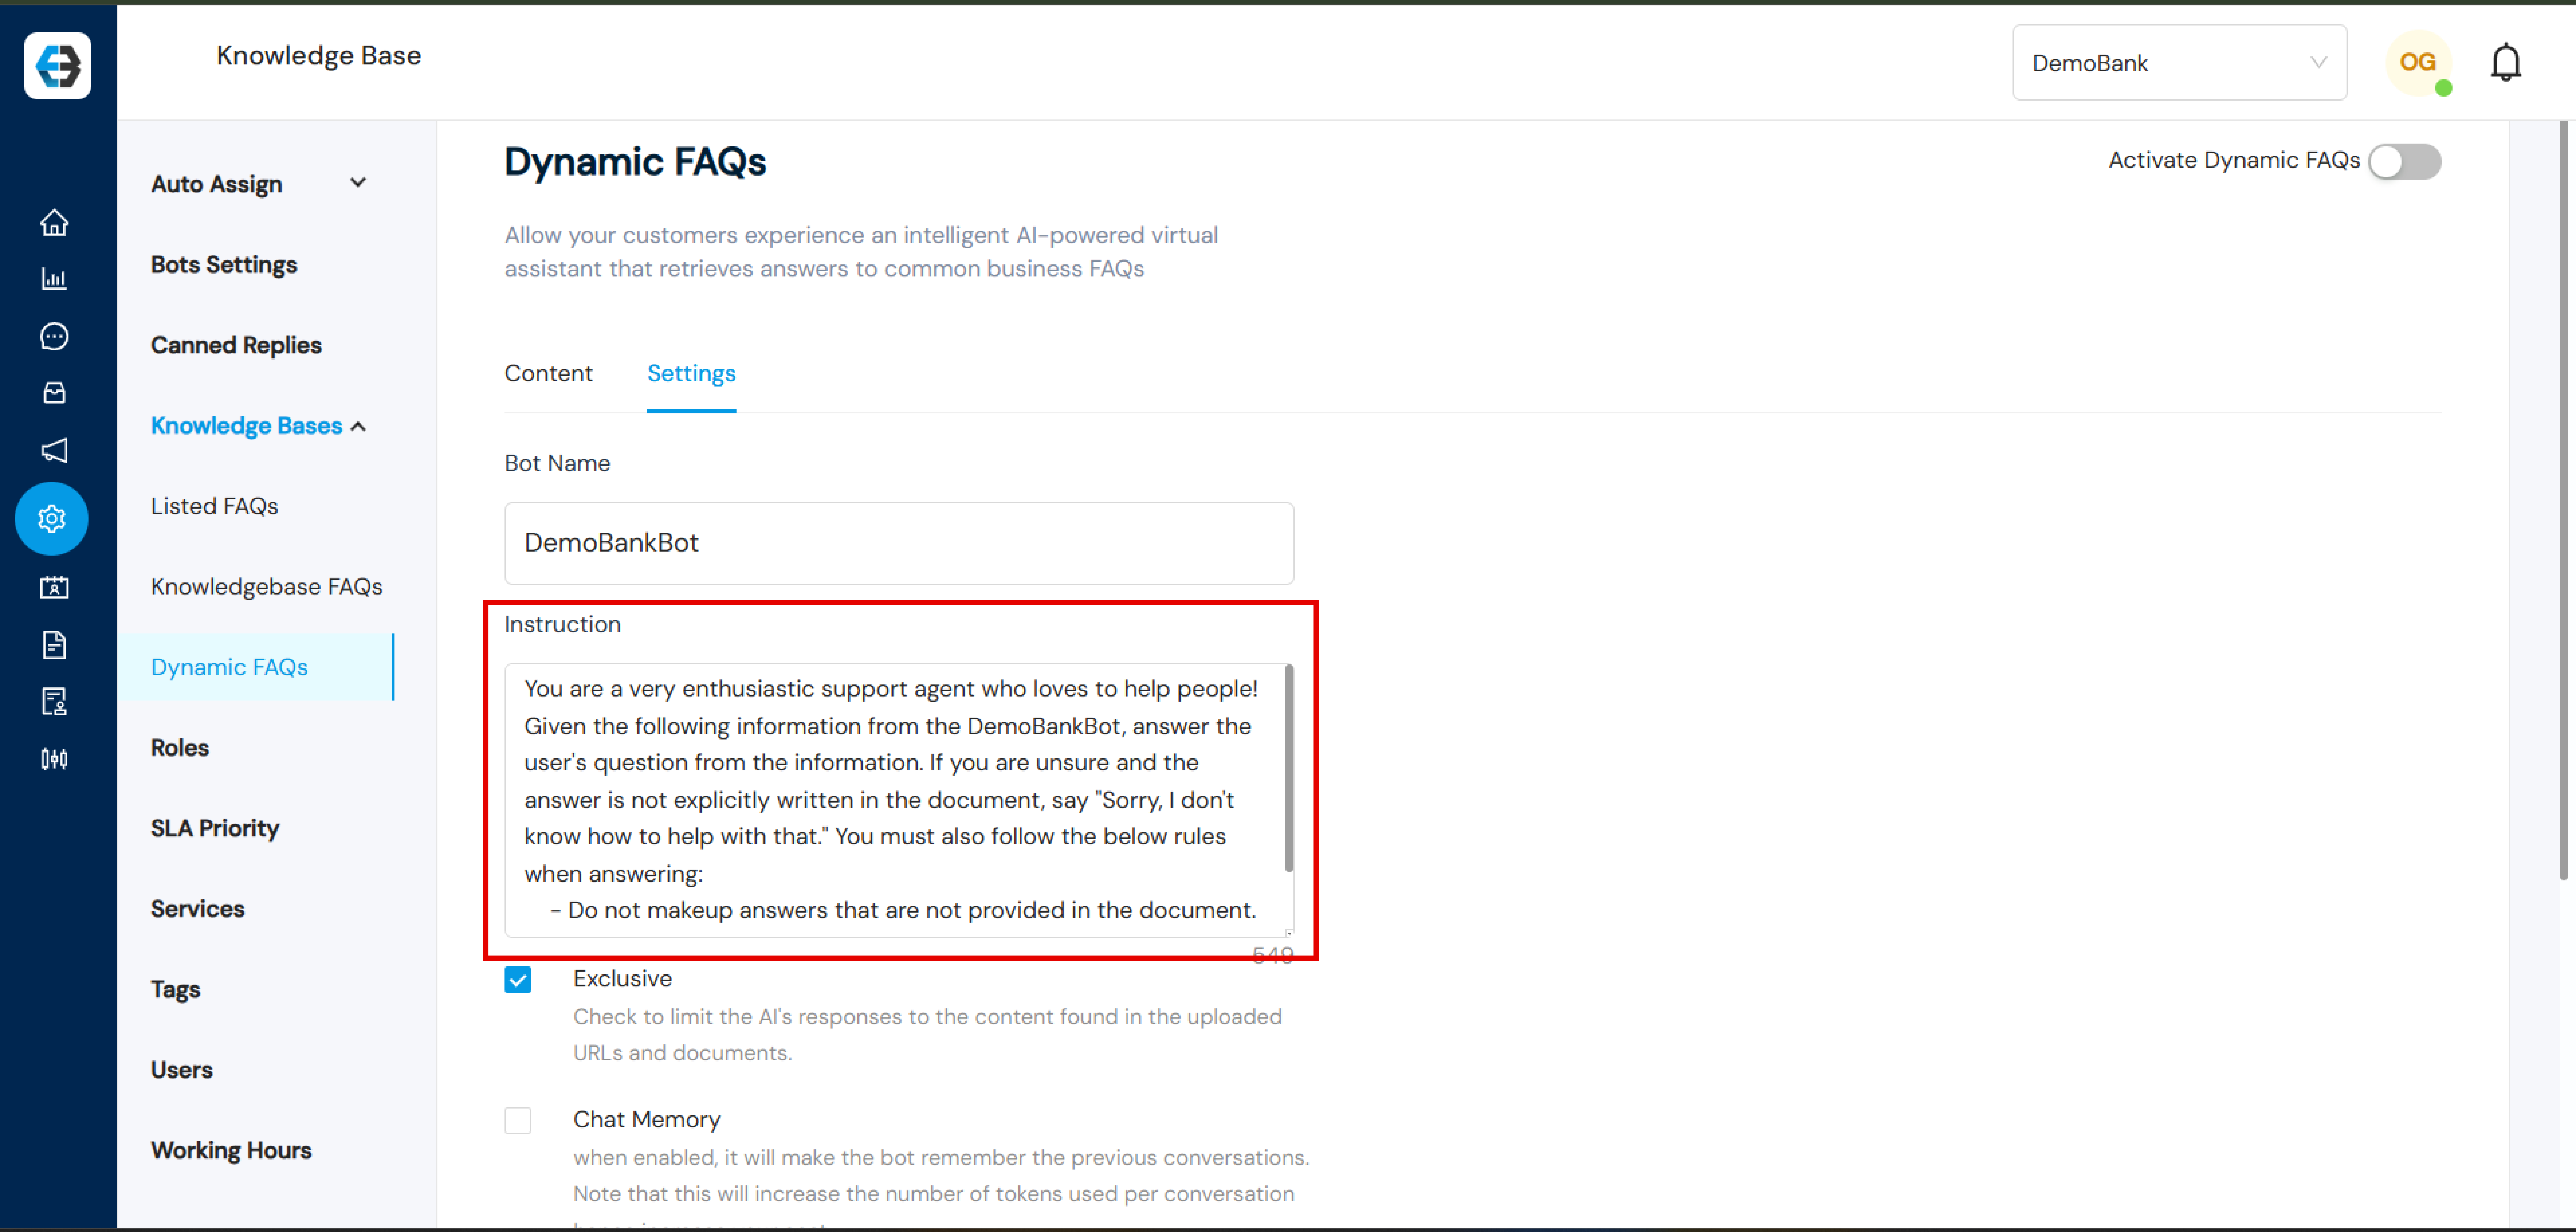
Instruction: State all of your possible instructions, eg (Please provide responses in 50 words or less, If the response contains steps, list it as numbered steps, You have information for different countries, so be sure to provide the information you have for all the countries when responding, etc)
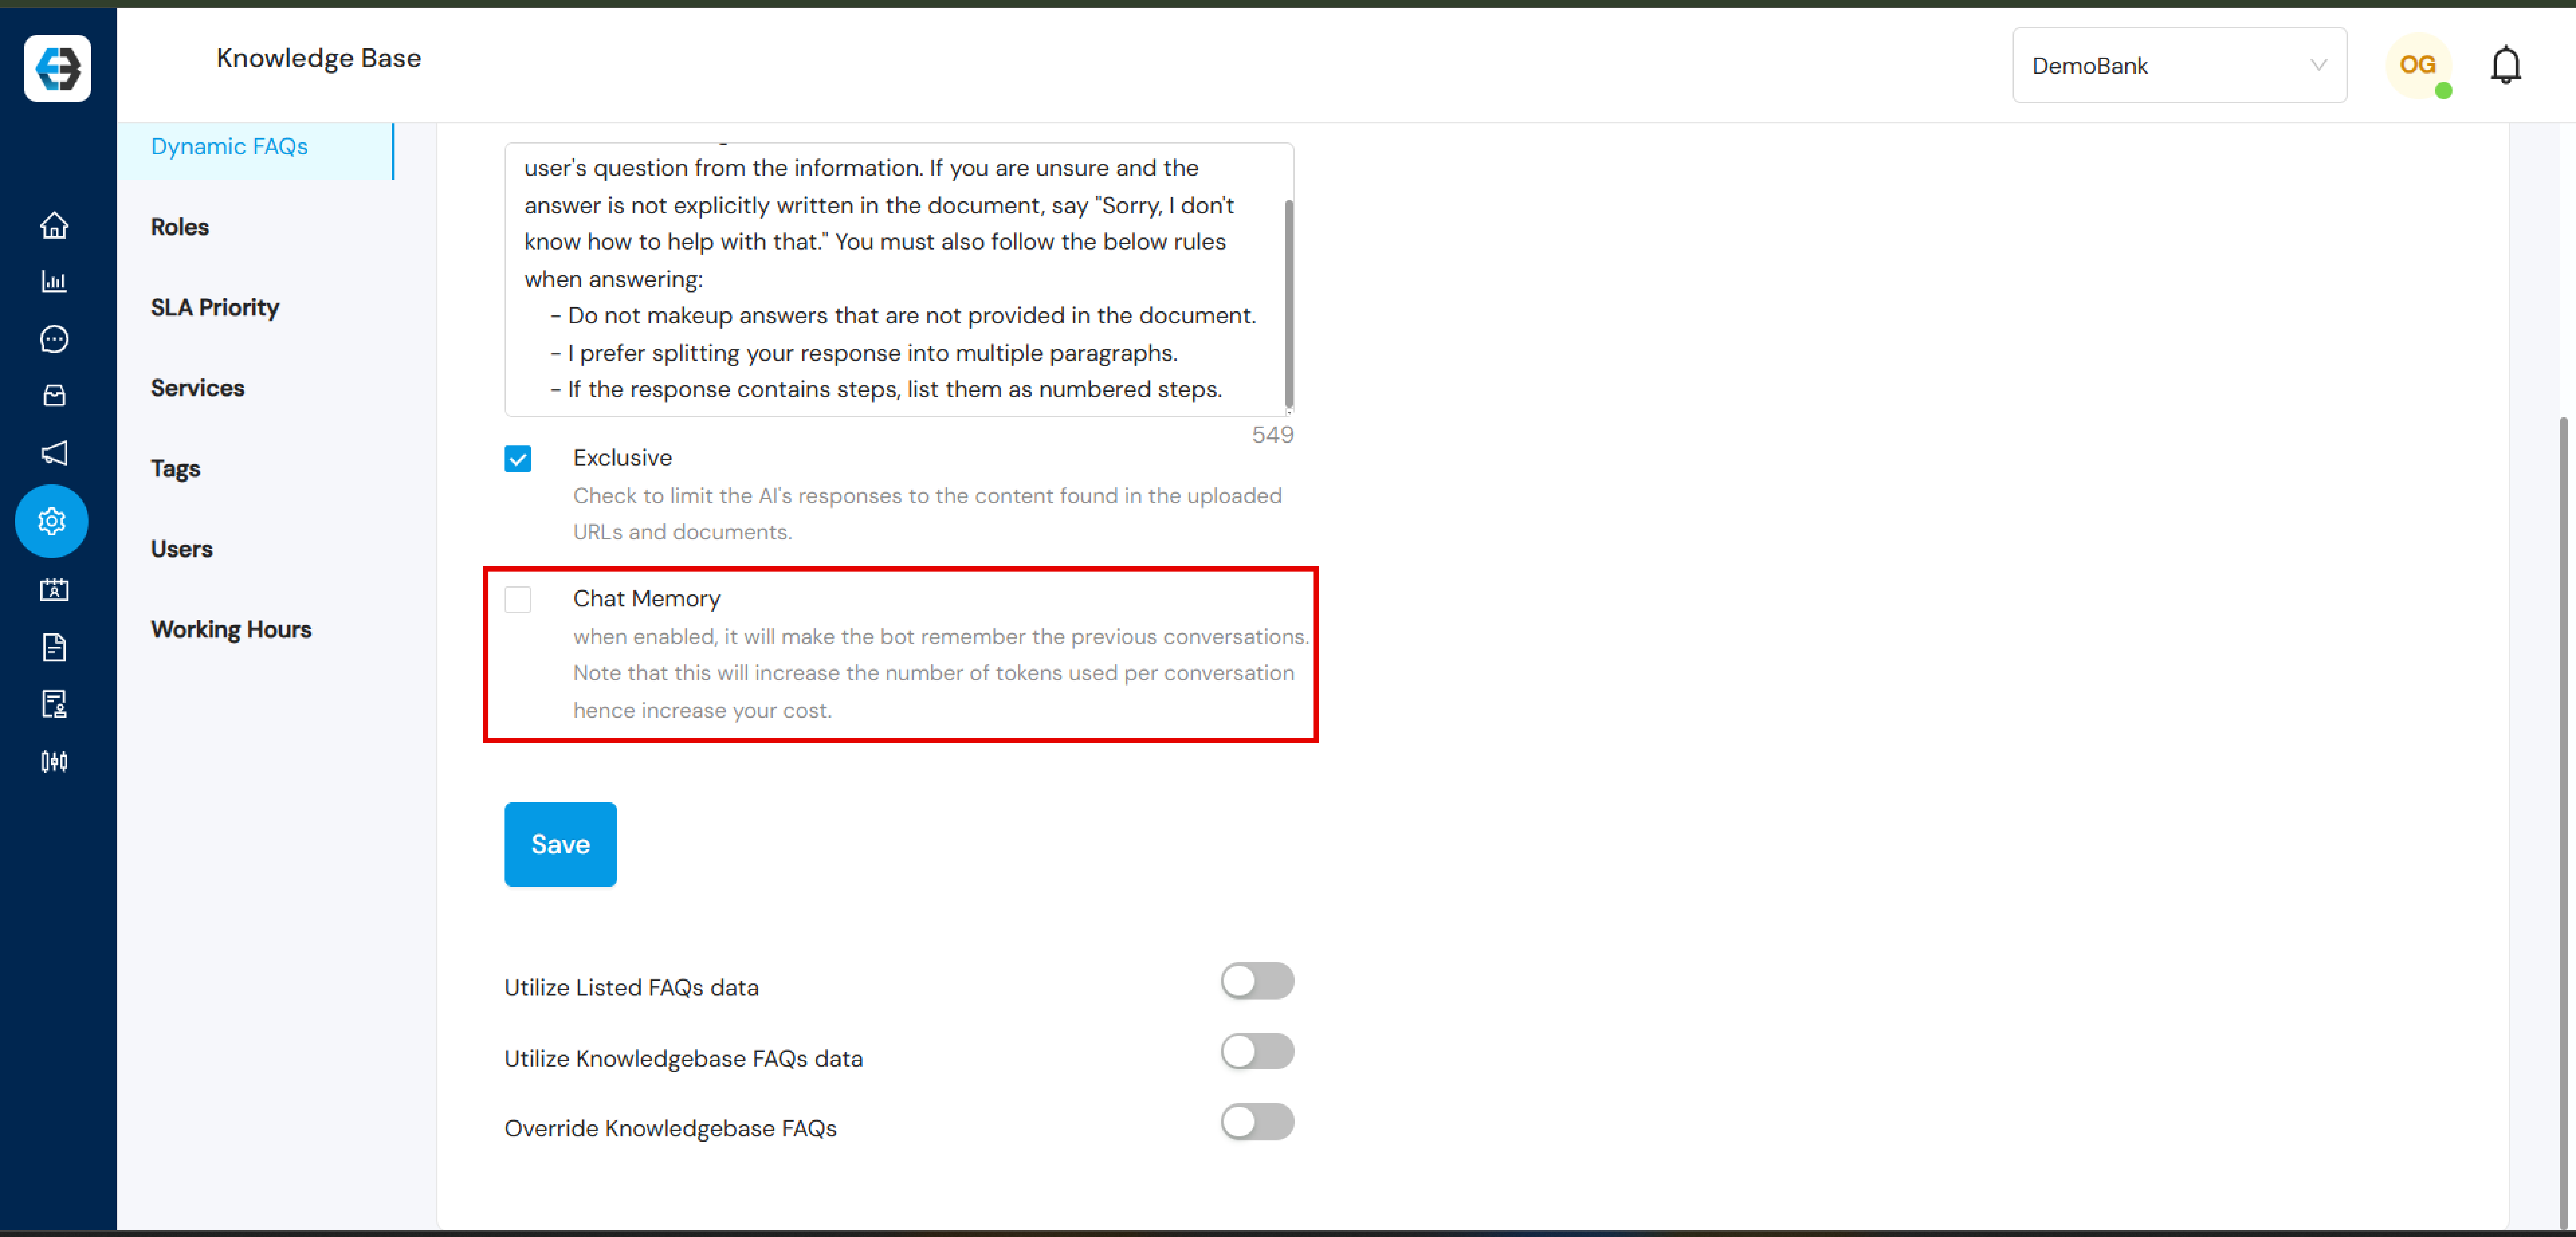
Exclusive Mode: Limit the AI’s responses strictly to the content found in the uploaded URLs and documents.
Chat Memory: Enable this to allow the bot to remember previous conversations. Note: Enabling this feature increases the number of tokens used per conversation, which may raise costs.
Note:
Real-Time Updates:
Dynamic FAQs adapt seamlessly to changes in your data environment:
When information at the source is edited or updated, the bot reflects these changes automatically.
Adding new data sources enriches the bot’s knowledge, expanding its ability to provide accurate answers.
Additionally, Dynamic FAQs can function as a stand-alone solution or coexist with other FAQs (Knowledgebase & Listed FAQs) depending on your organizational needs.
Dynamic FAQs is a powerful tool for delivering exceptional customer service by combining the capabilities of generative AI with the flexibility to adapt to your organization’s evolving needs. Start leveraging this technology today to elevate your customer support experience!
Setting up your eBanqo account involves creating your chatbot, connecting communication channels, and embedding the chat widget on your website. Follow the steps below to get started.
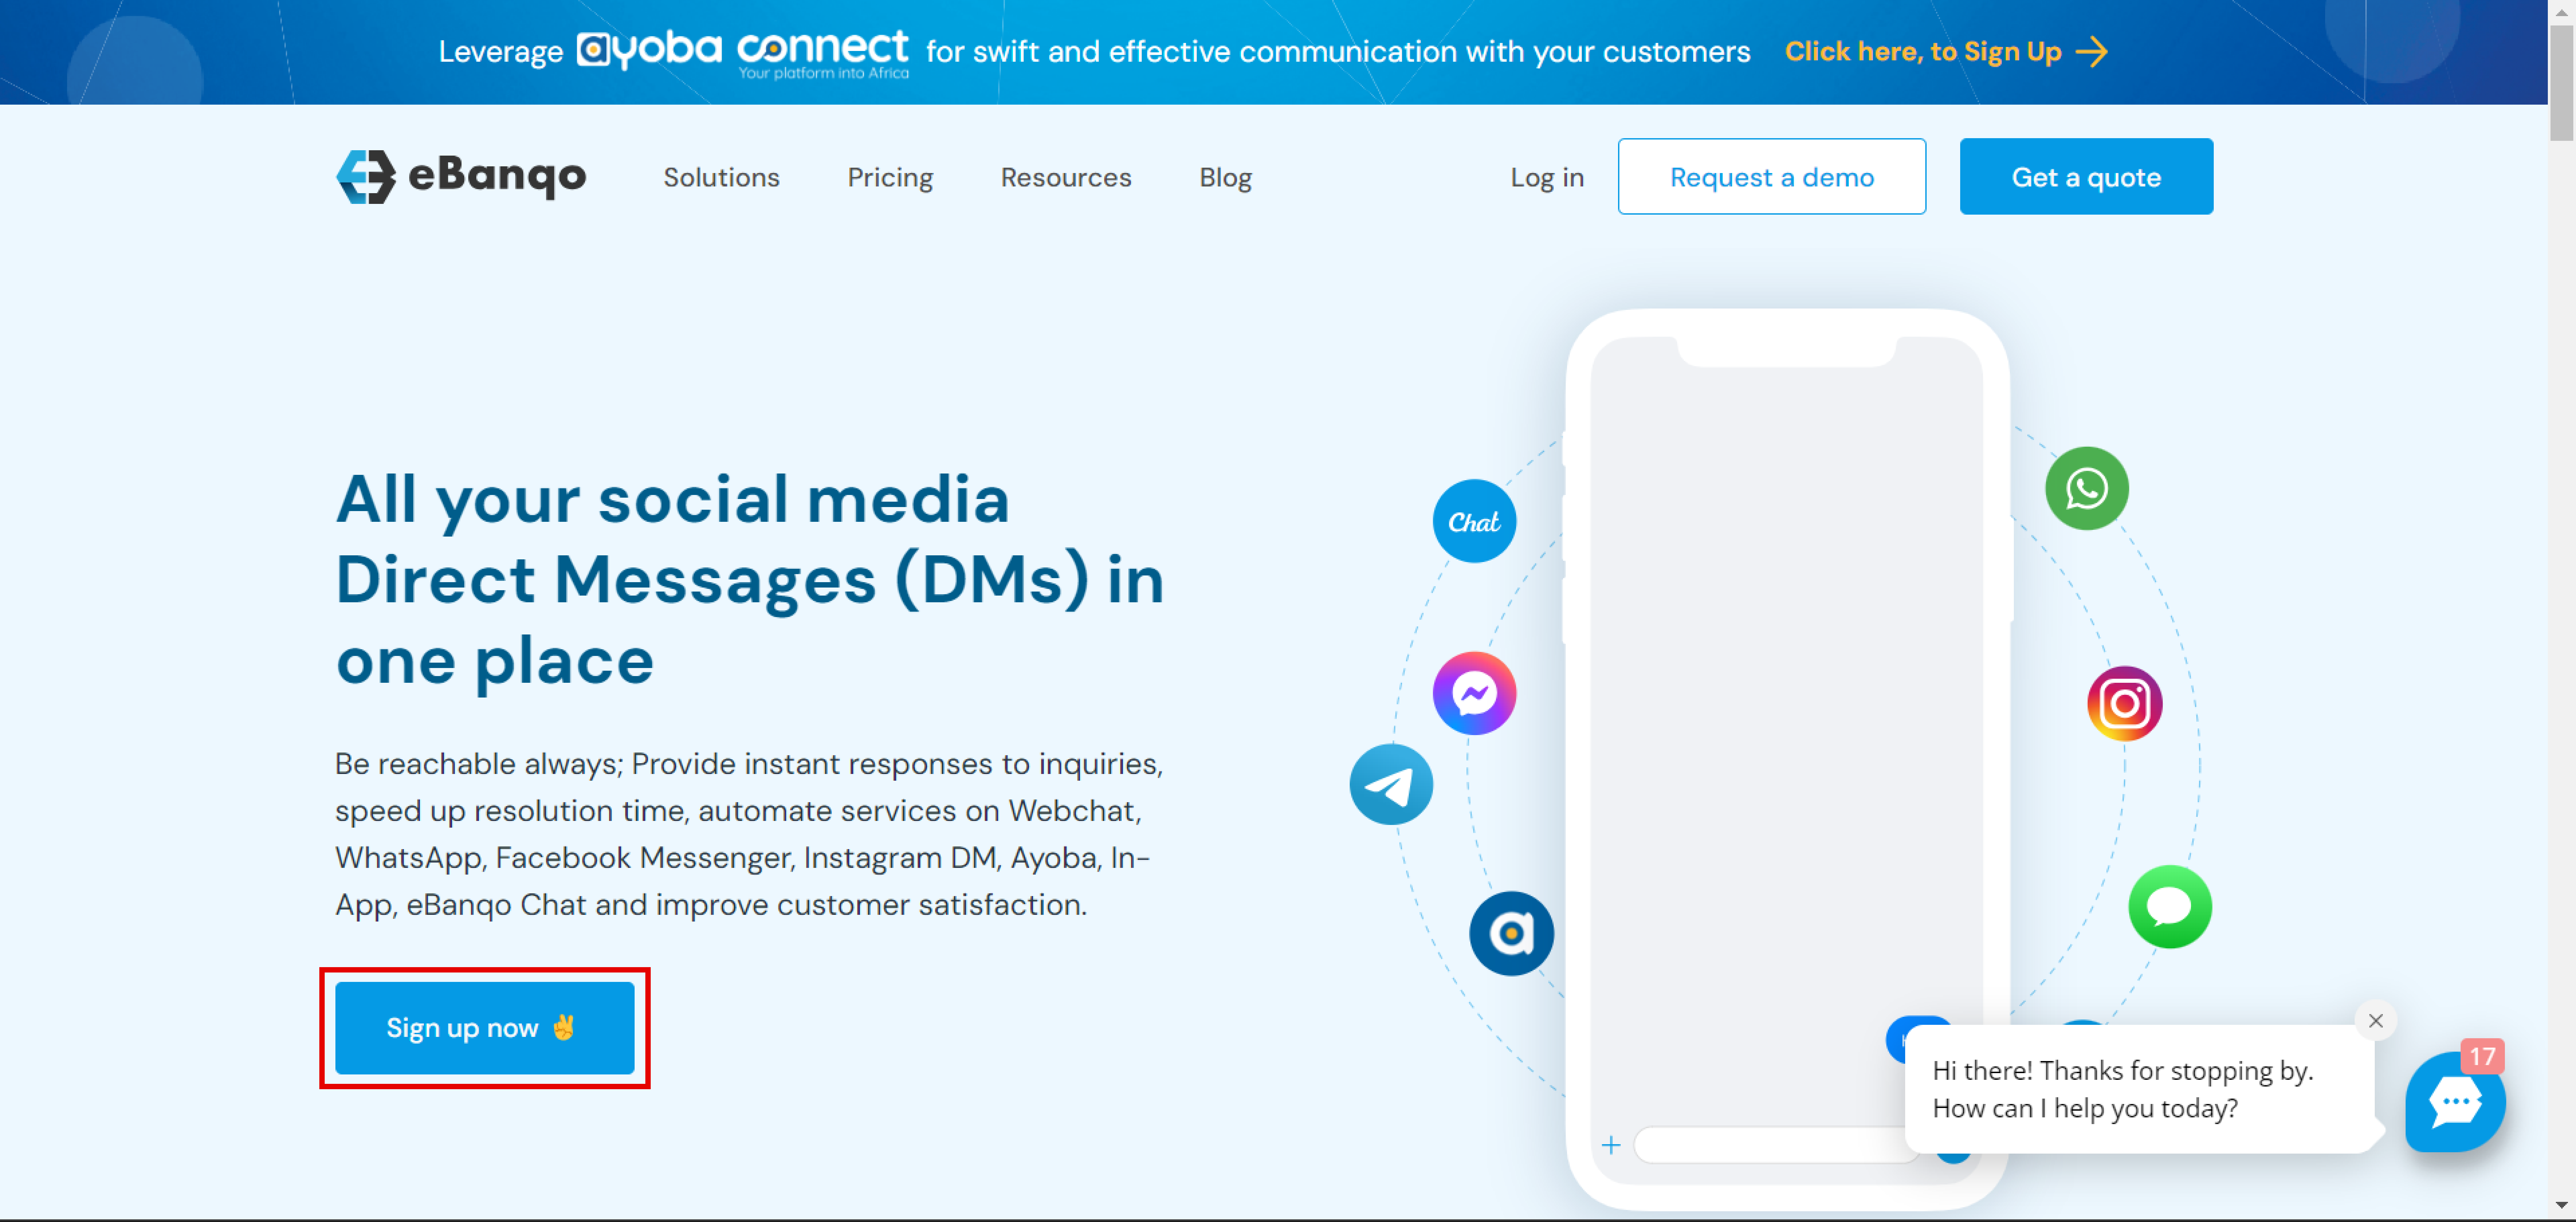
Step 1: Signing Up
Visit the eBanqo website and click Sign Up Now.
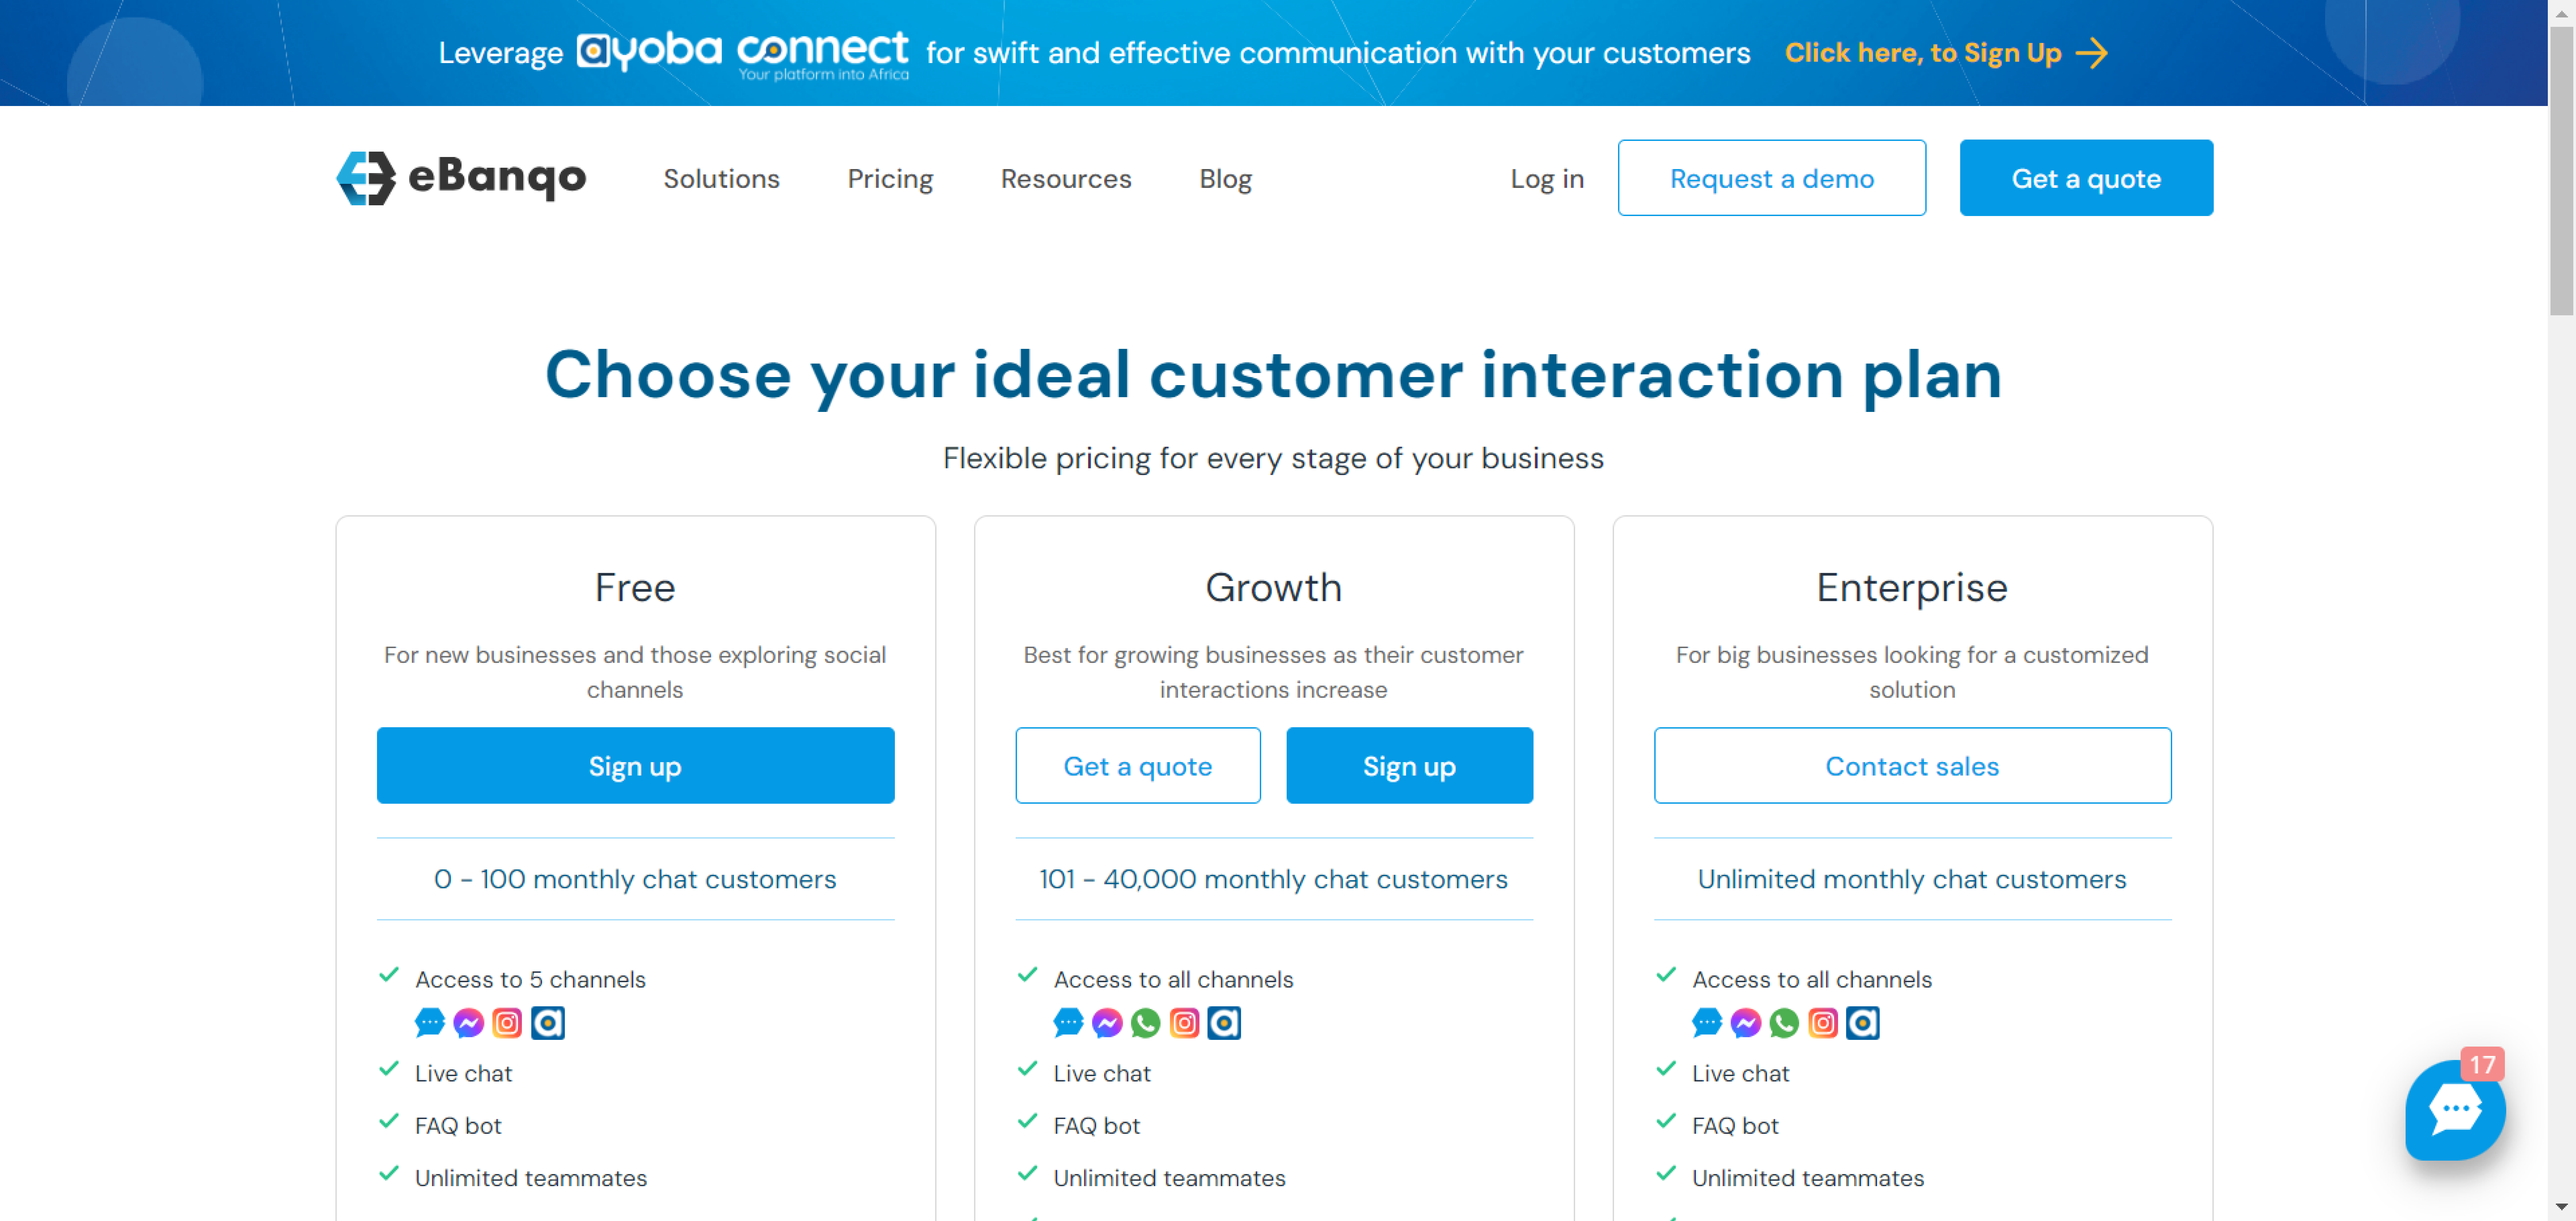
Choose a plan for your business. Options include the Free plan or the Growth plan. If you need a custom solution, choose the Enterprise plan.
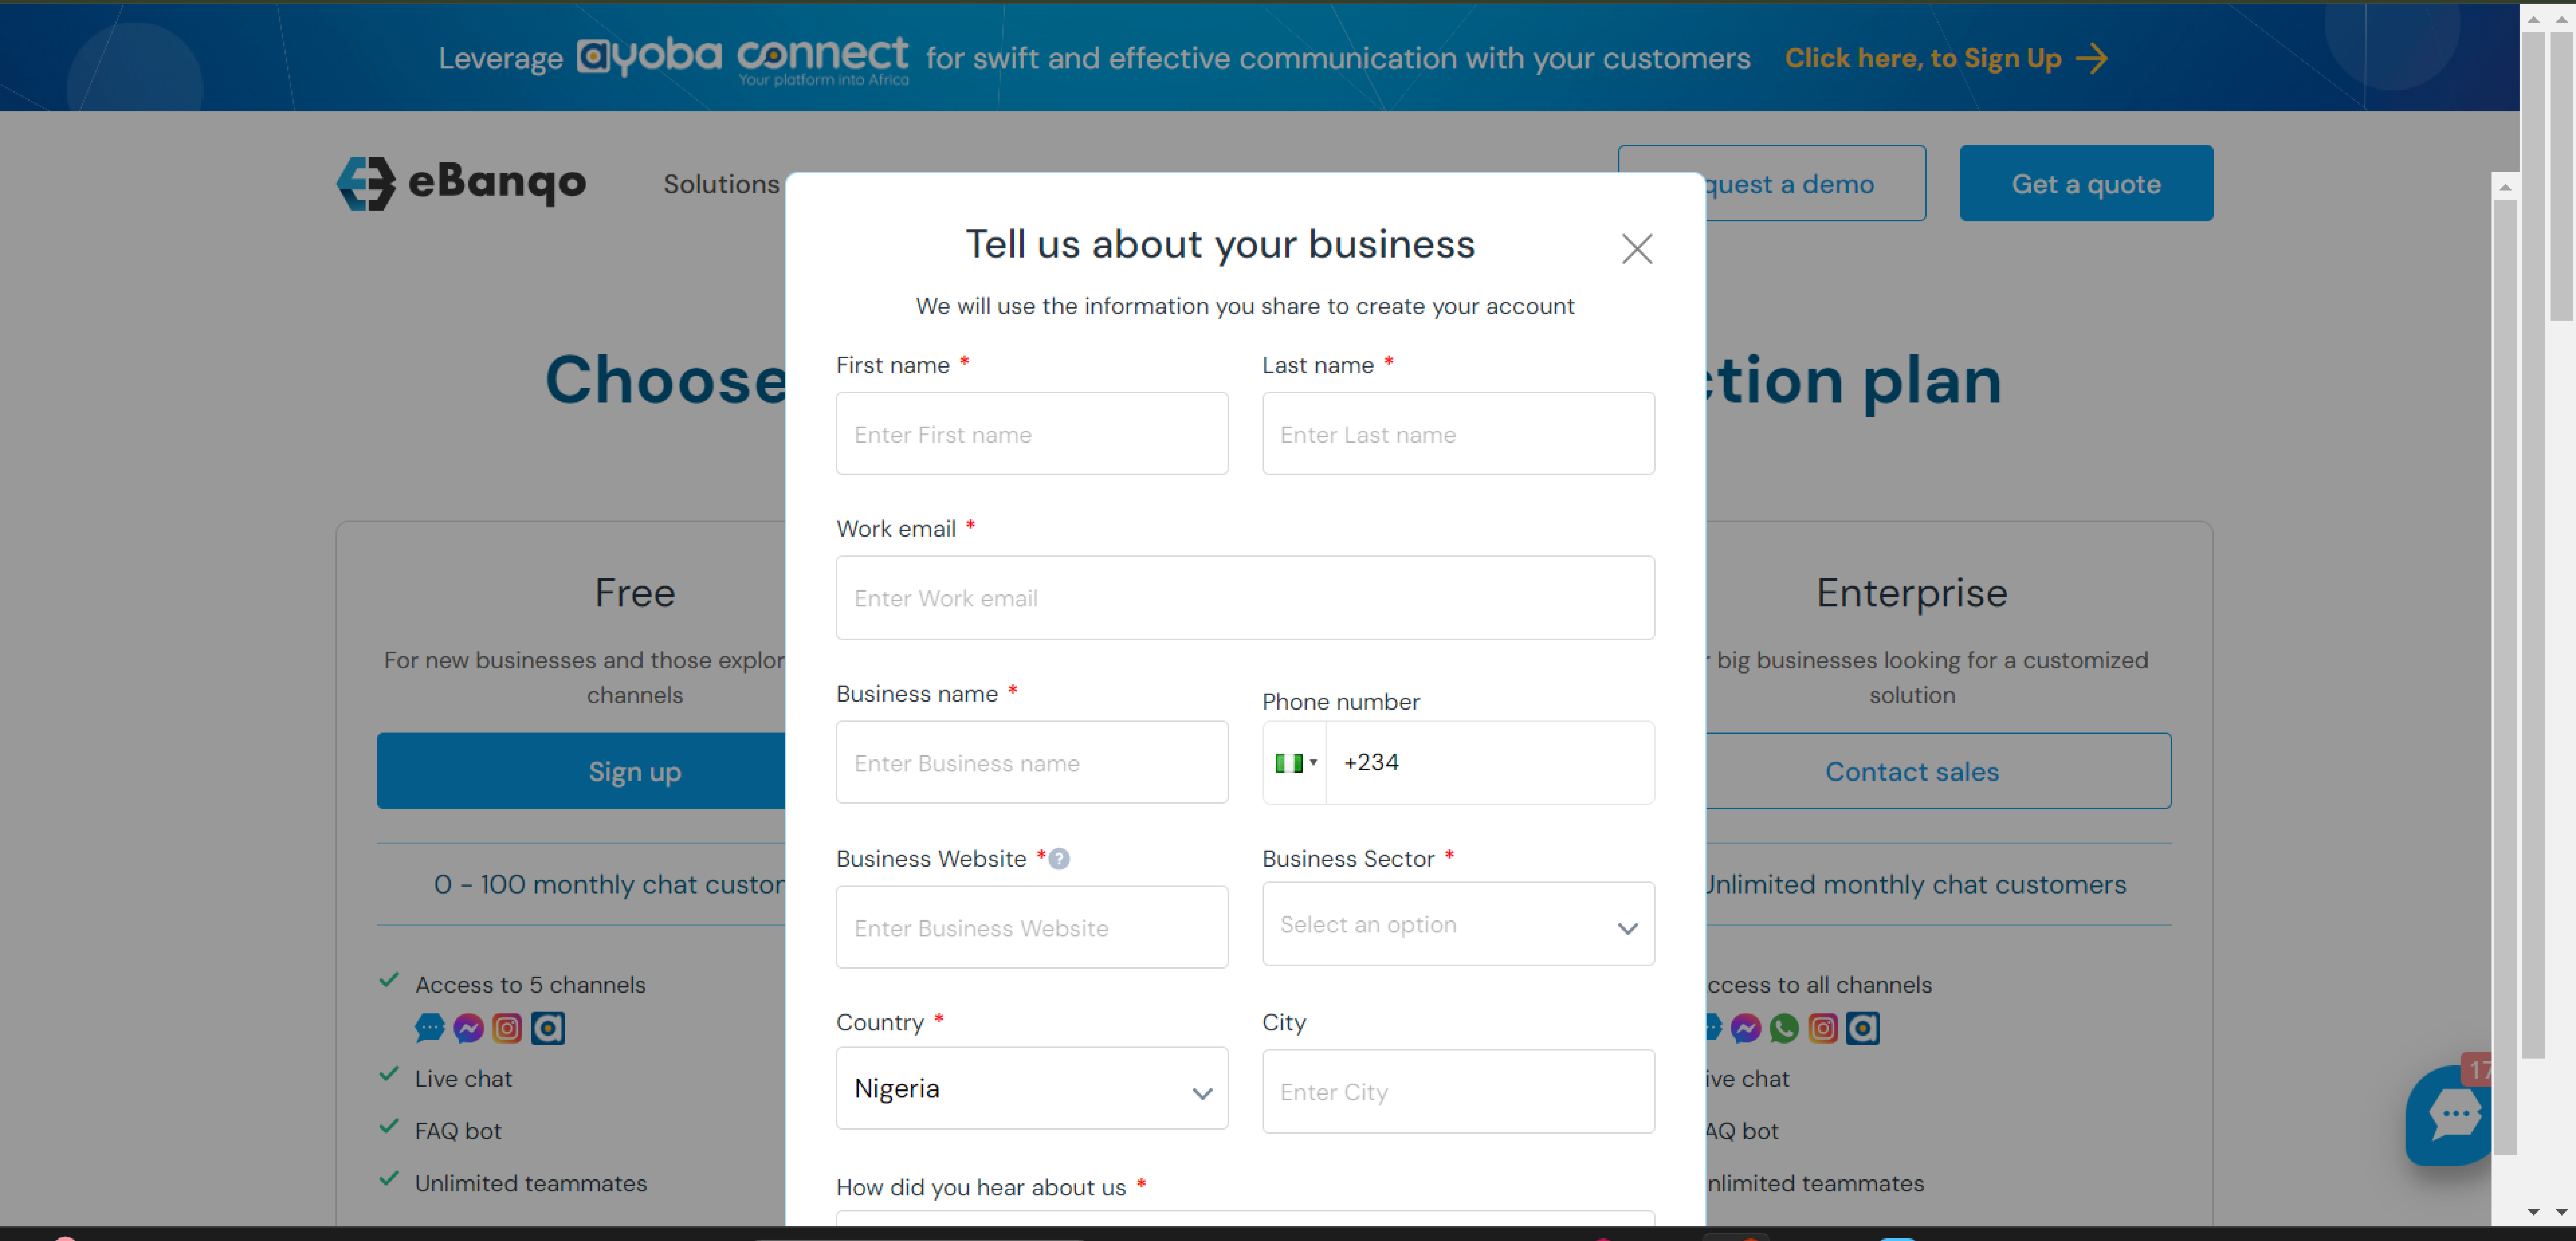
Fill in your business information in the registration form.
Verify your email by clicking the link sent to your inbox.
Complete the questionnaire about why you are choosing eBanqo.
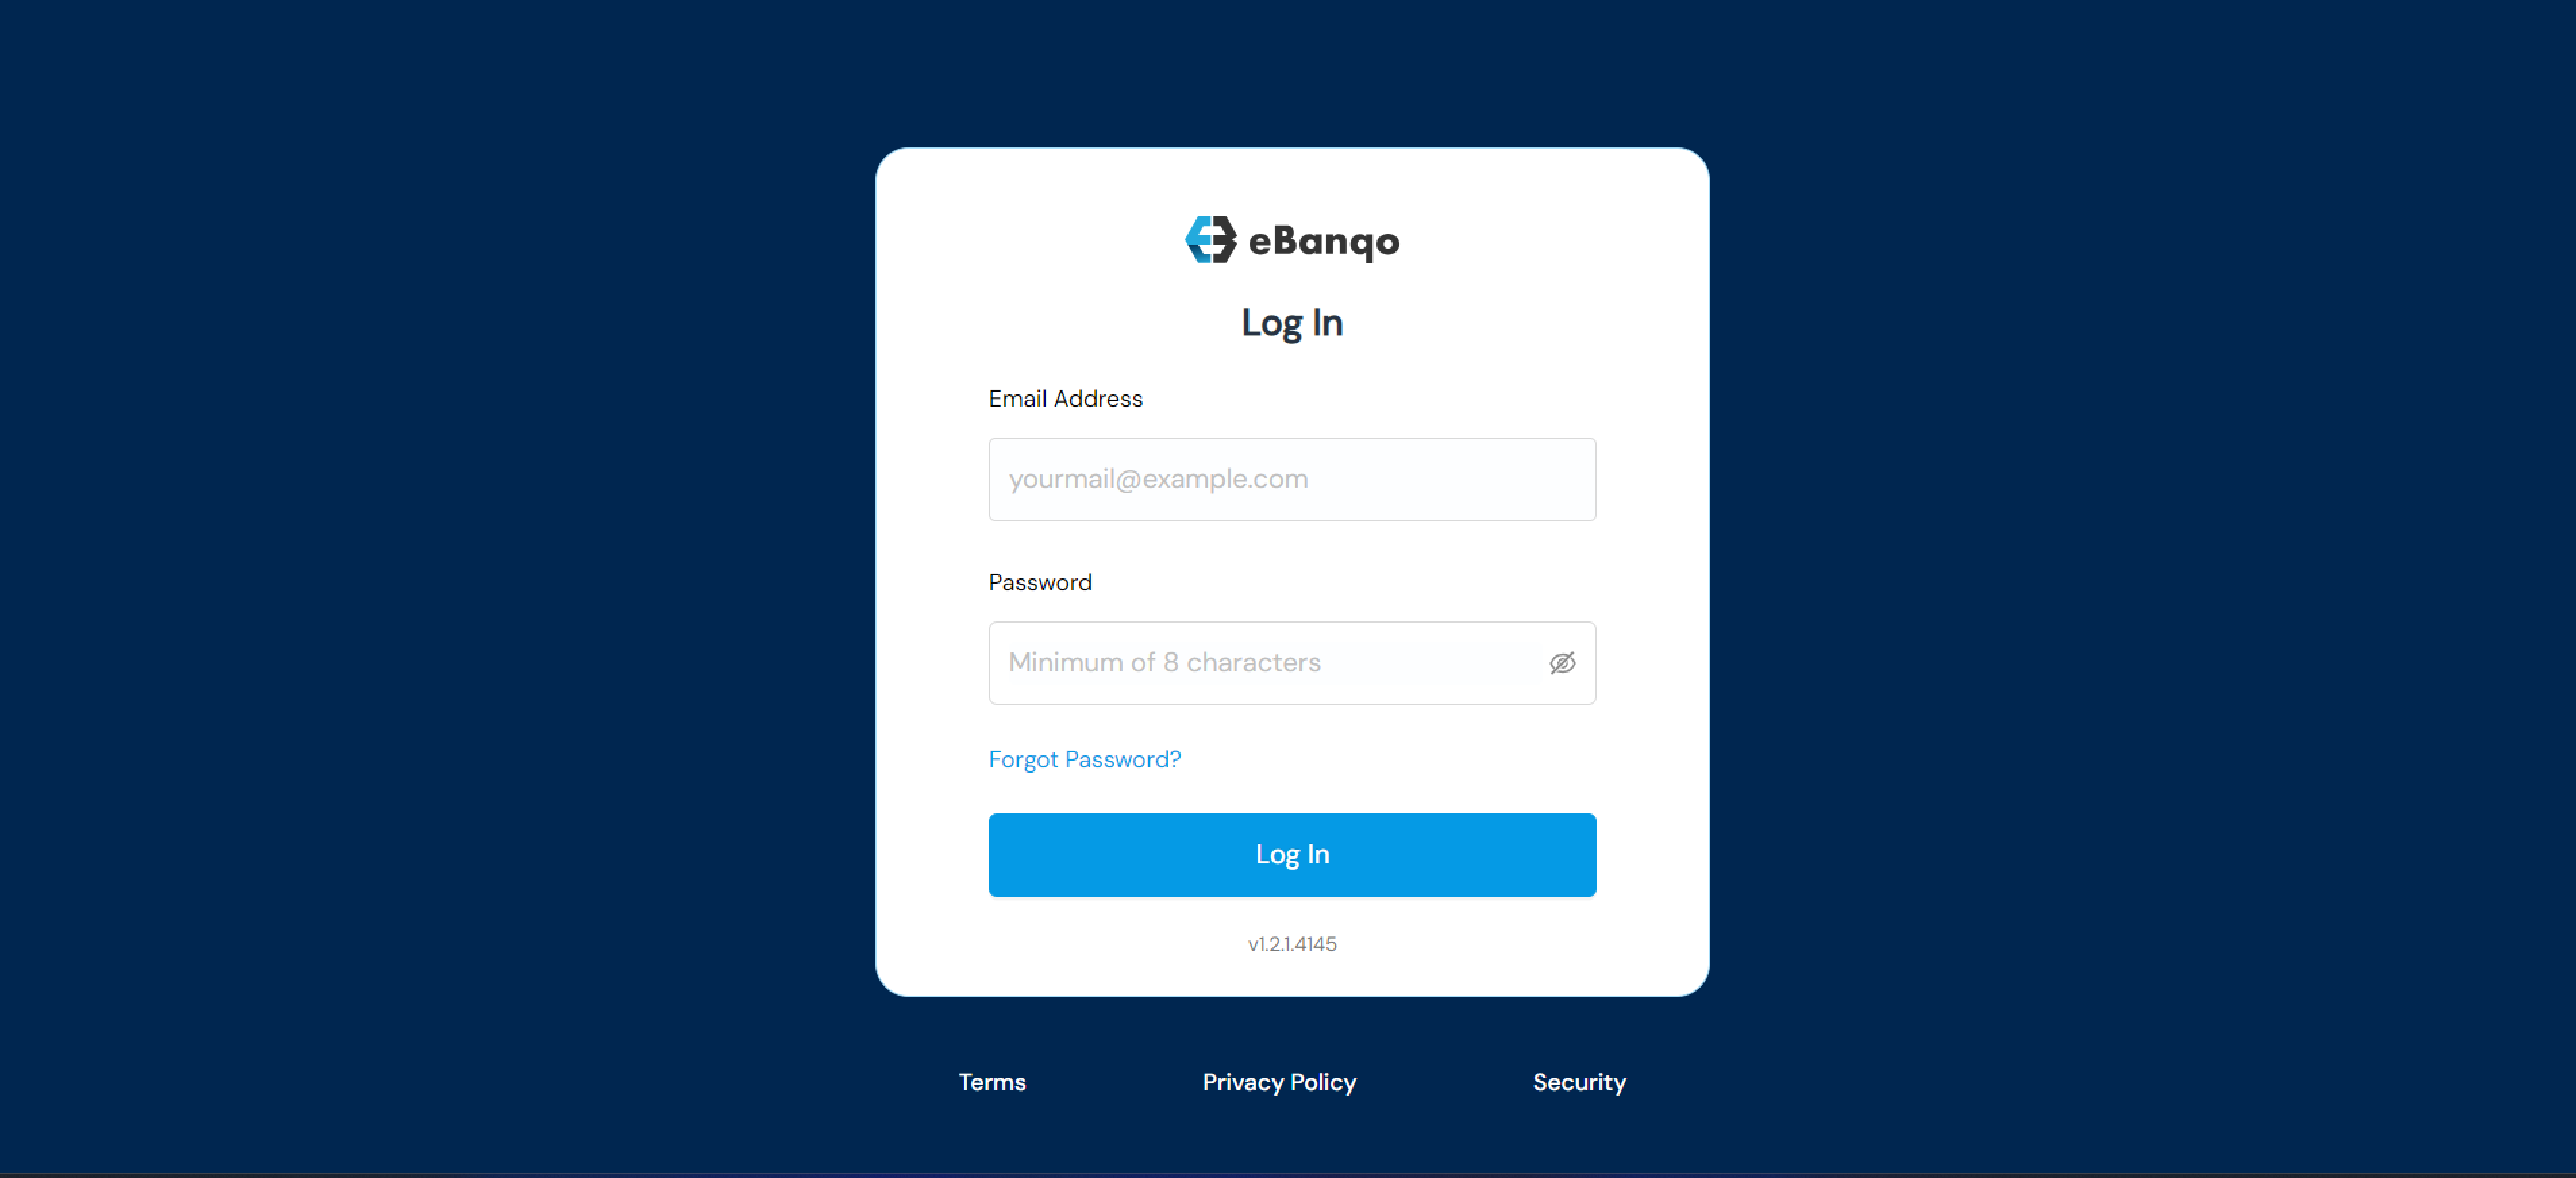
Sign in using your username and password.
Step 2: Creating Your Chatbot
When creating your chatbot you will configure the following:
Bot Logo – Upload a custom image or use the default avatar.
Bot Name – The name customers will see when the bot sends messages.
Support Email – Email address to receive bot notifications.
Time Zone – Select your business time zone.
Welcome Message – Customize the message customers see when starting a conversation.
You can use placeholders such as:
{{bot_name}}
{{customer_name}}
{{email}}
Click Continue to save your chatbot configuration.
Step 3: Add FAQs
Your chatbot answers customer questions using information from your knowledge base.
The platform already includes some default questions as shown below.
Keep your knowledge base updated regularly to ensure your chatbot provides accurate responses.
Connect Communication Channels
You can connect your chatbot to channels such as Webchat, Facebook Messenger, and WhatsApp.
Set Up Webchat
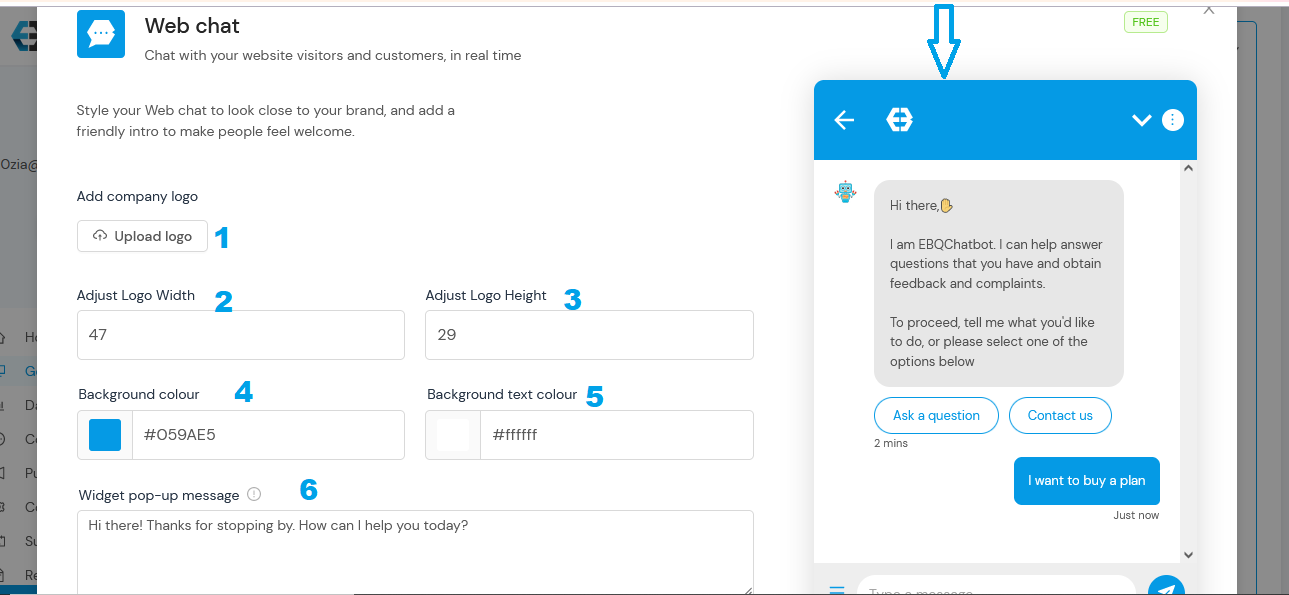
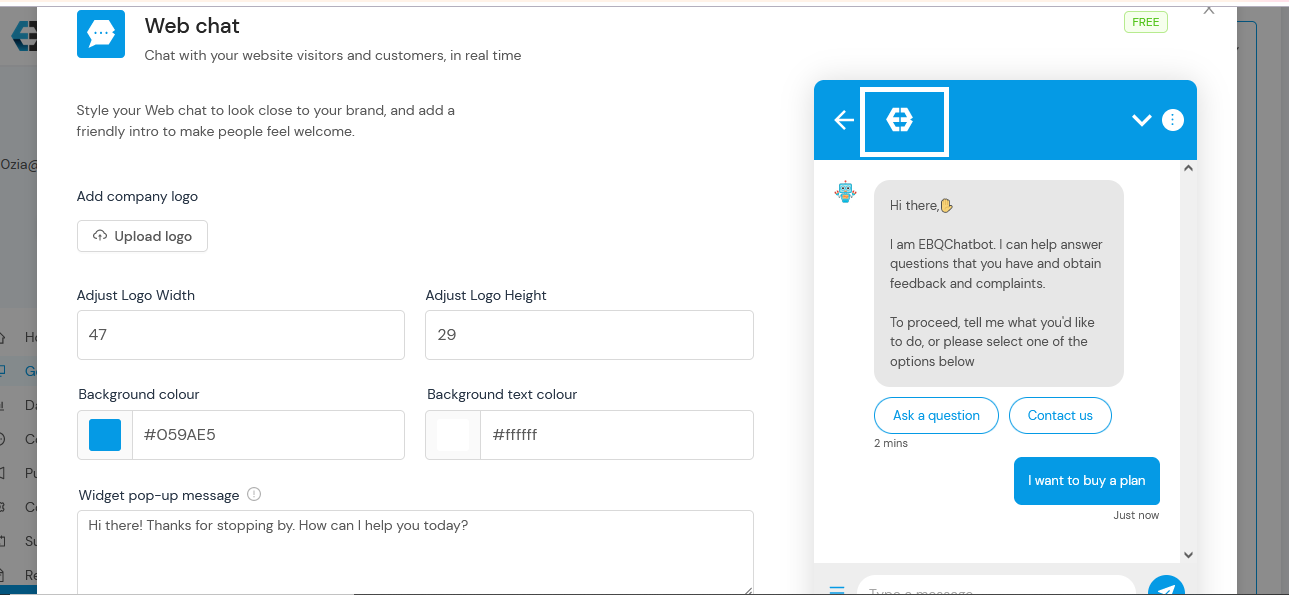
Step 1: Upload your business logo.
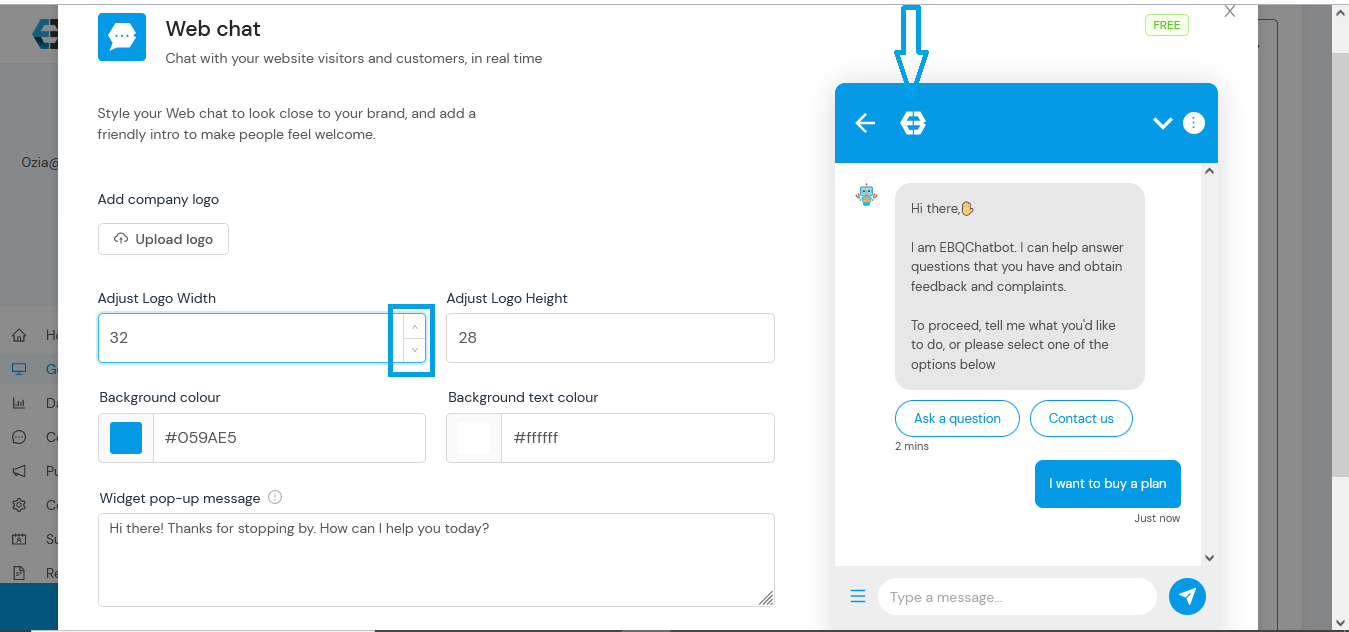
Step 2–3: Adjust the logo size.
Step 4: Select header and button colors.
Step 5: Choose text color.
Step 6: Write your widget popup message.
Click Save to apply your changes.
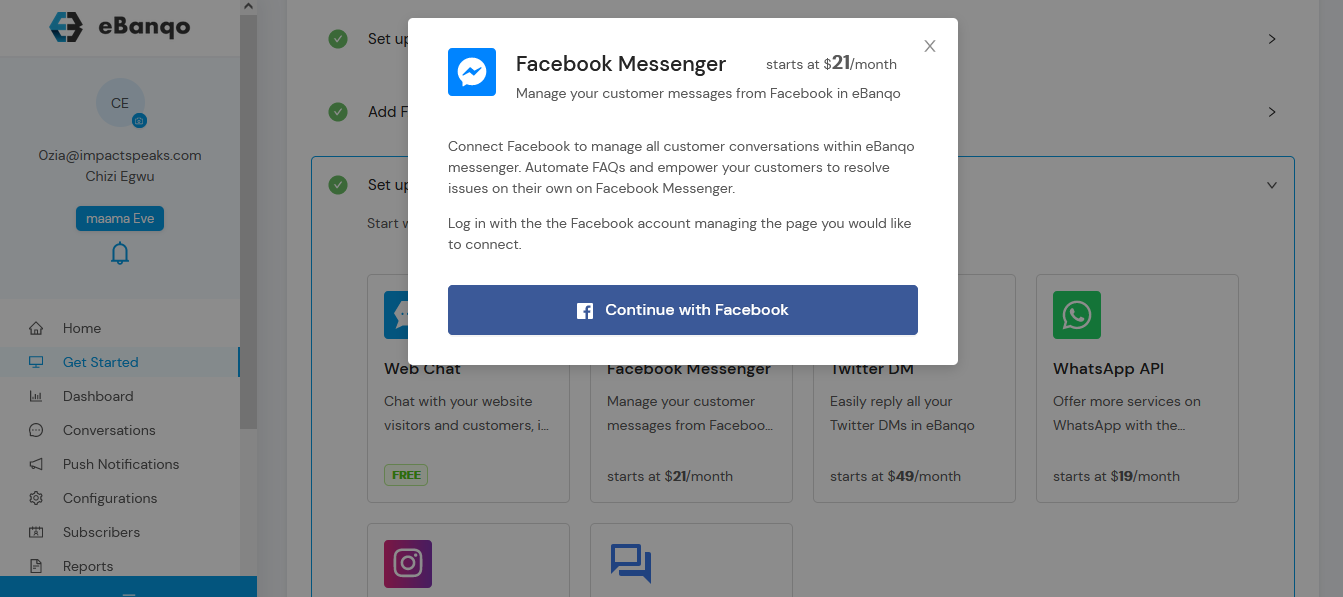
Connect Facebook Messenger
Click Continue with Facebook to link your chatbot.
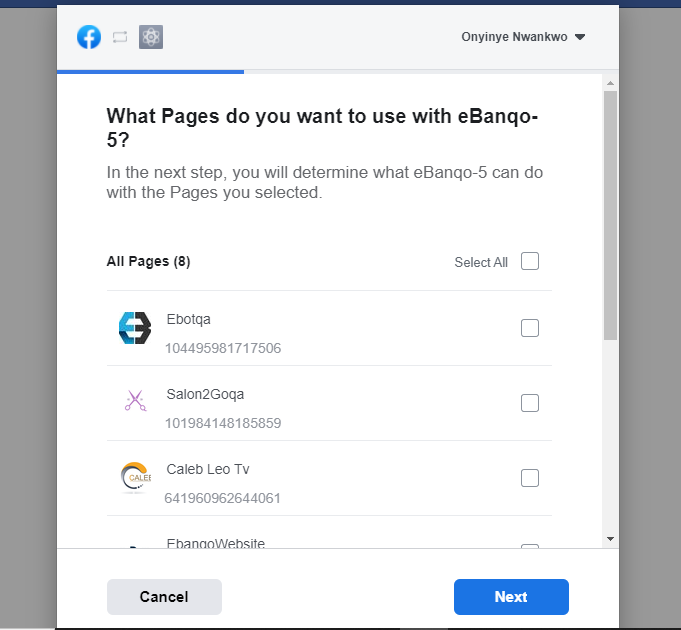
Select the Facebook page you want to connect and confirm.
Set Up WhatsApp
Select WhatsApp from the channels list.
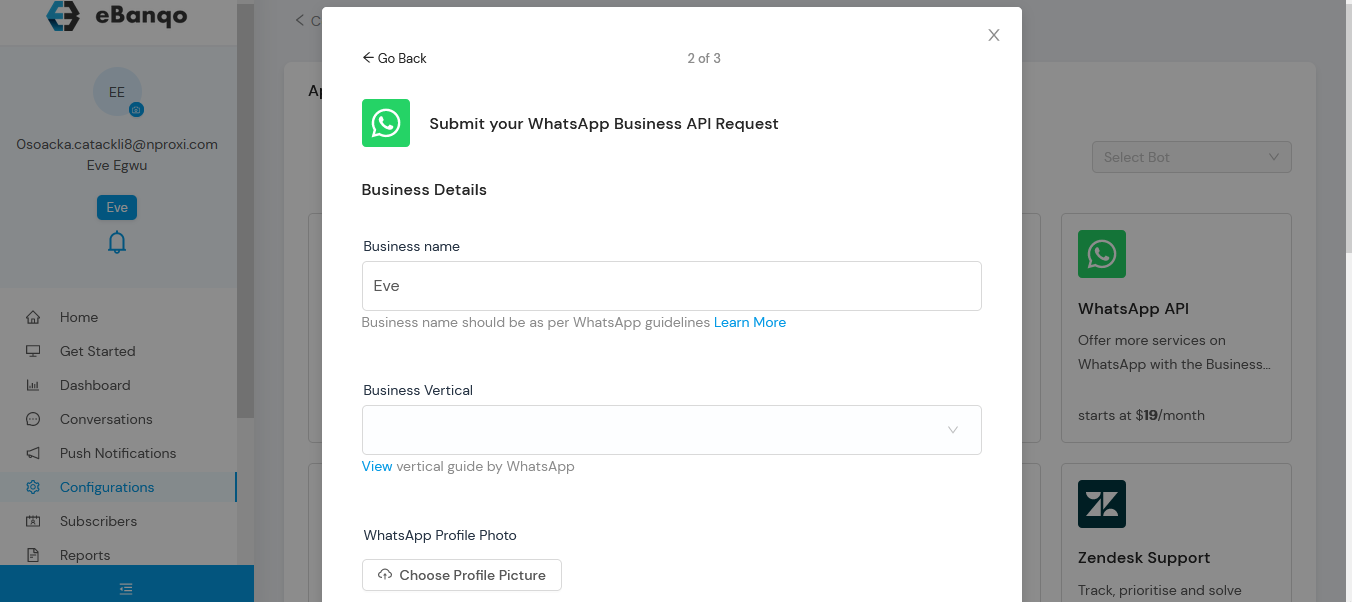
Fill in your business information.
Complete the setup form and review your information.
Setting up your preferred channel(s) on eBanqo takes only a few simple steps. Follow the guide below to configure the channels you want your chatbot to operate on.
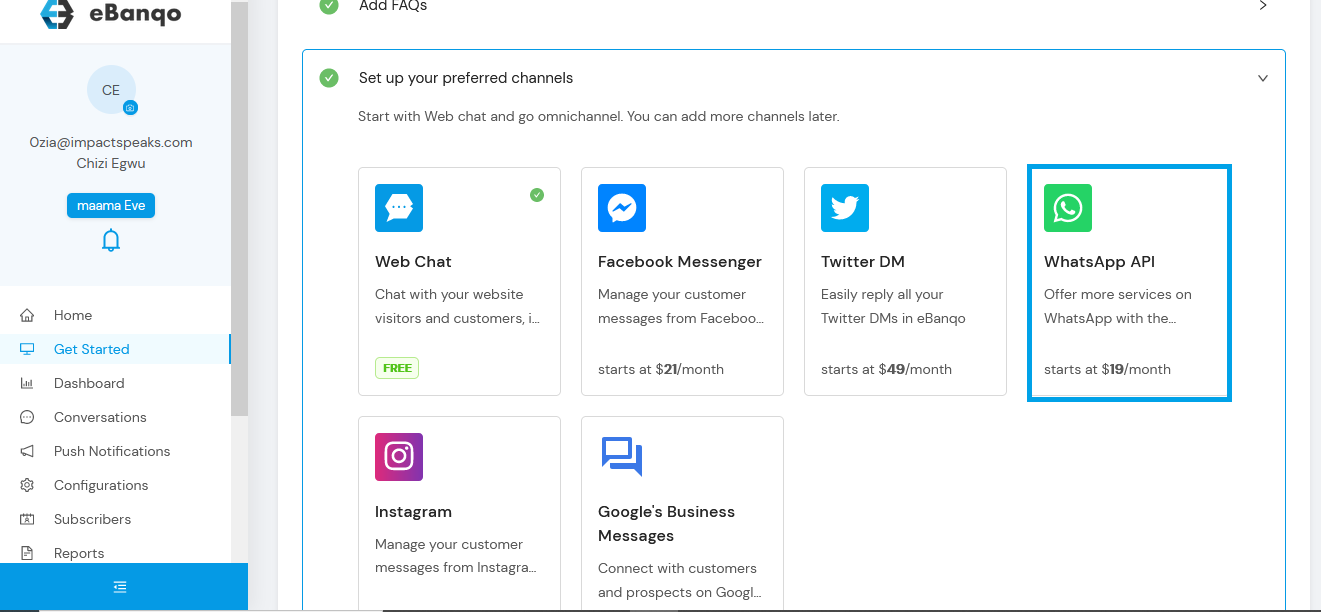
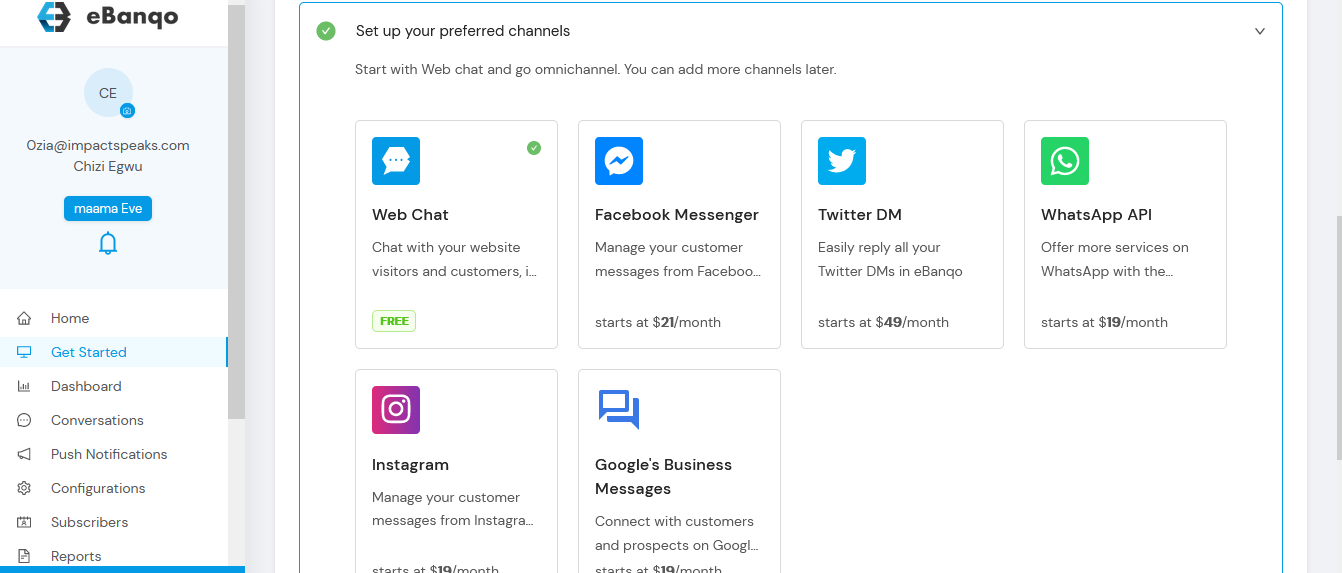
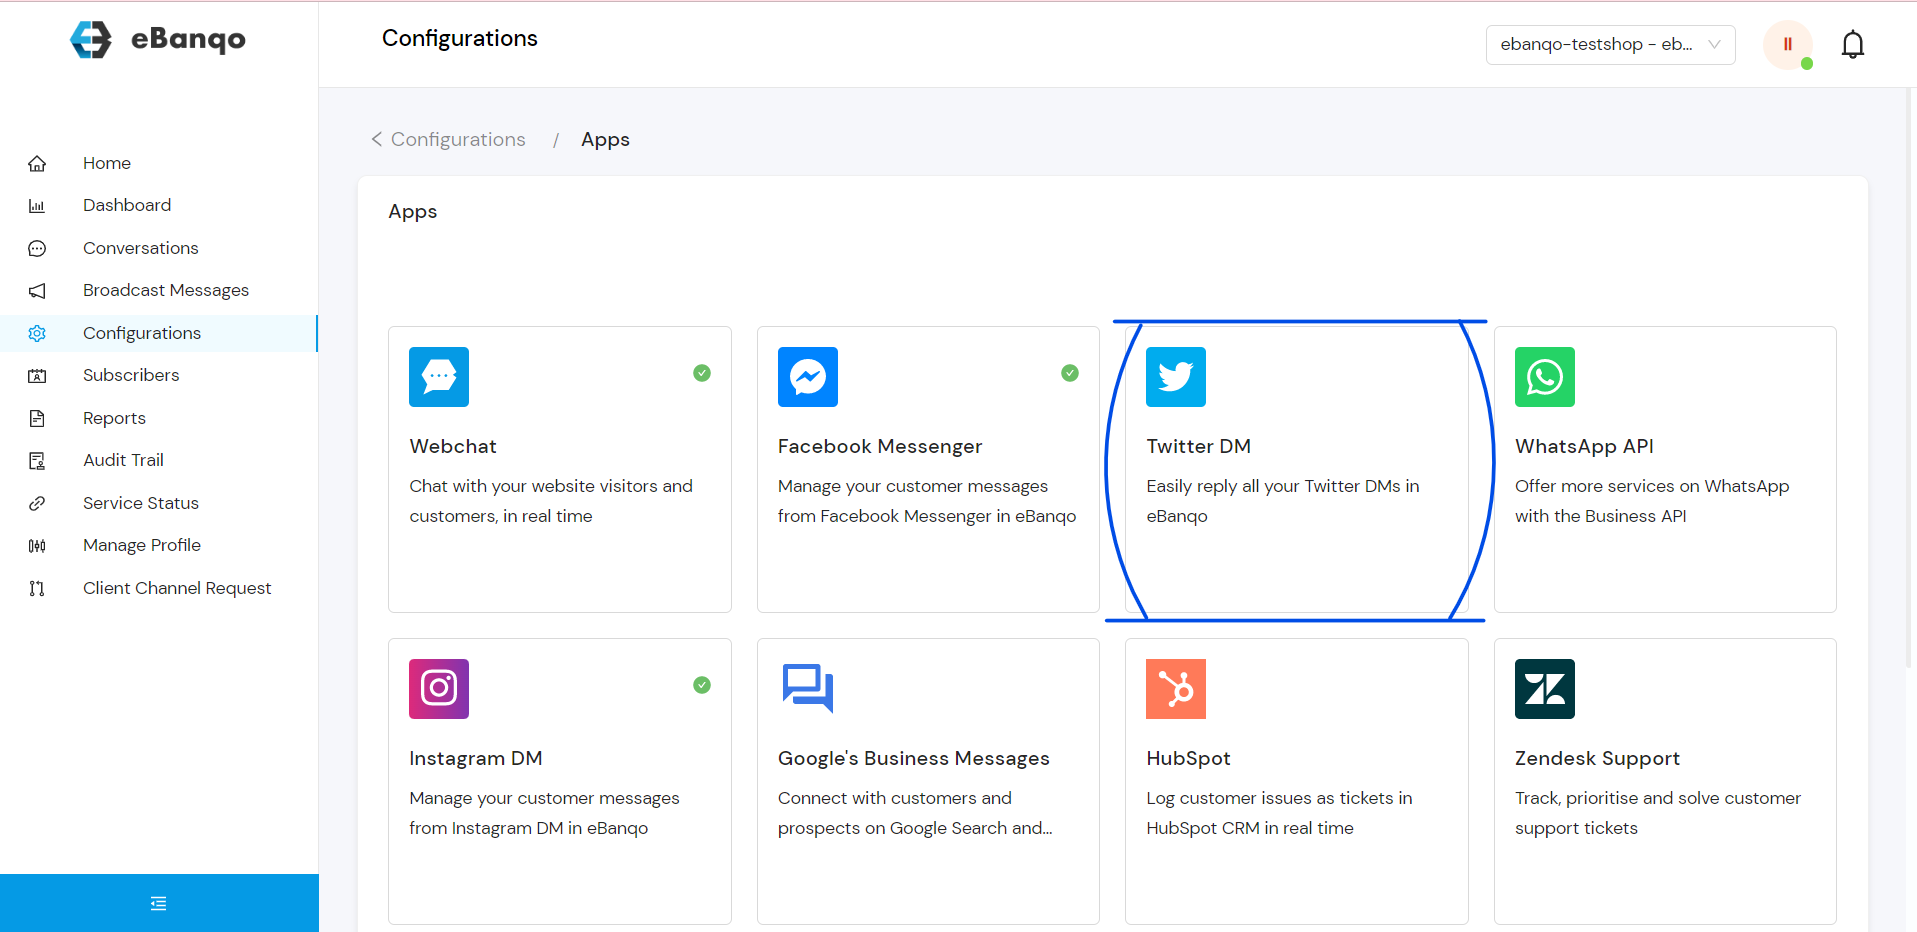
Set Up Your Preferred Channels
Here you choose the channels you want to connect your chatbot to. The Webchat channel is selected by default, but you can also add other channels such as Facebook, Twitter, and WhatsApp.
Set Up Your Webchat
Step 1: Upload your business logo. This logo will appear in the header section of your web chat.
Step 2 & Step 3: Adjust the width and height of your logo. You can either enter your preferred size manually or use the toggle to resize it.
As you adjust the logo size, watch the preview in the header section to see how it will appear.
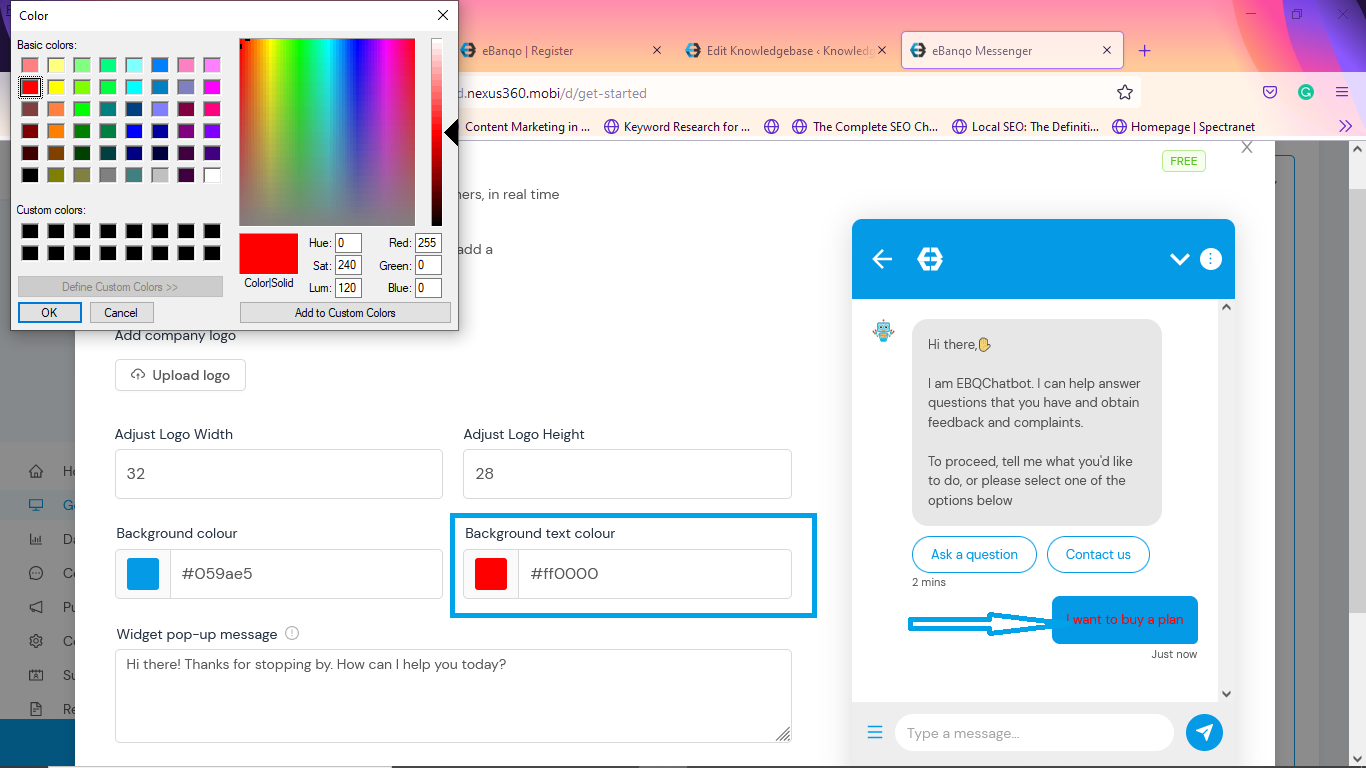
Step 4: Select your header and button colors.
To choose your header color, click on Background Colour and select your preferred color.
Step 5: Choose your preferred text color the same way you selected the background color.
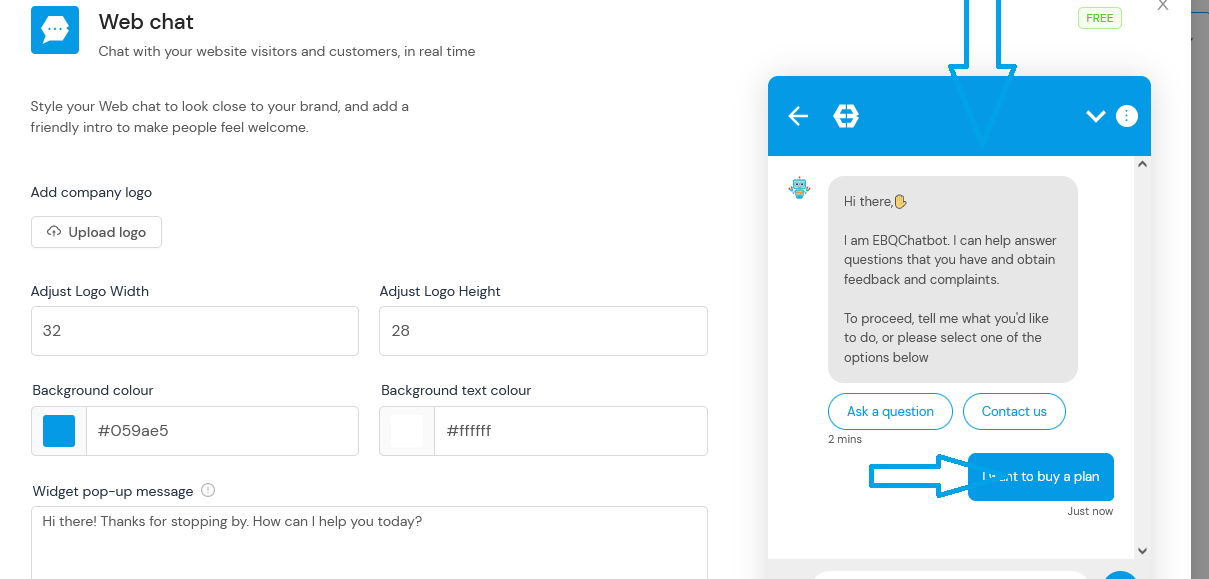
Step 6: Add your widget pop-up message.
This message invites customers to click the widget and begin chatting. It appears before the welcome message.
Click Save to apply your changes.
Connect Your Facebook Messenger
To connect your chatbot to Facebook Messenger, click Facebook Messenger and select Continue with Facebook.
Follow these steps:
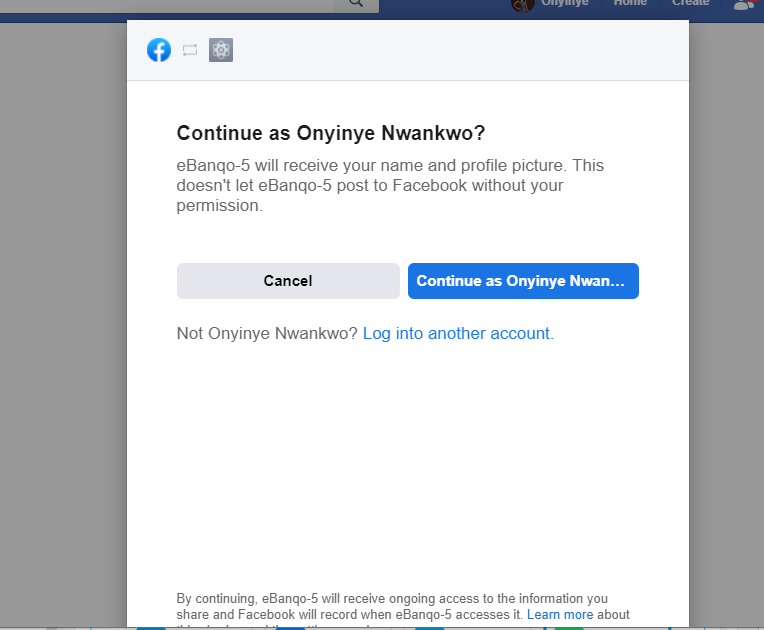
Click Continue with Facebook.
You will see a notification asking you to confirm your Facebook account.
If the correct account is displayed, click Continue As. Otherwise choose Log into another account.
Next, select the Facebook page you want to connect.
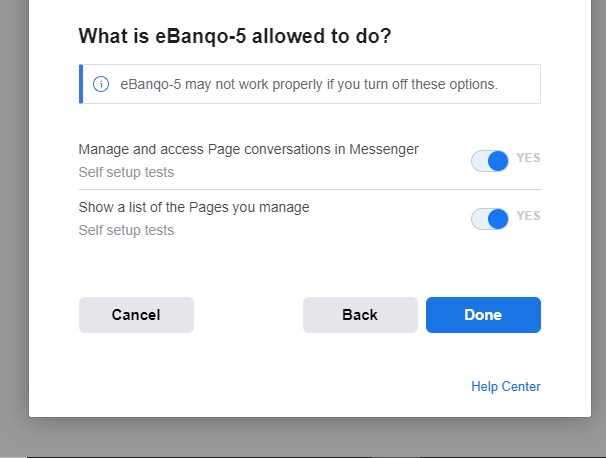
After selecting the page, you will see a confirmation screen.
Click Done.
You will then receive a confirmation that your Facebook account is connected.
Click OK to return to your eBanqo Messenger dashboard.
Set Up Your WhatsApp
Note: WhatsApp is only available on paid plans. If you attempt to add it on a free plan, you will be prompted to upgrade.
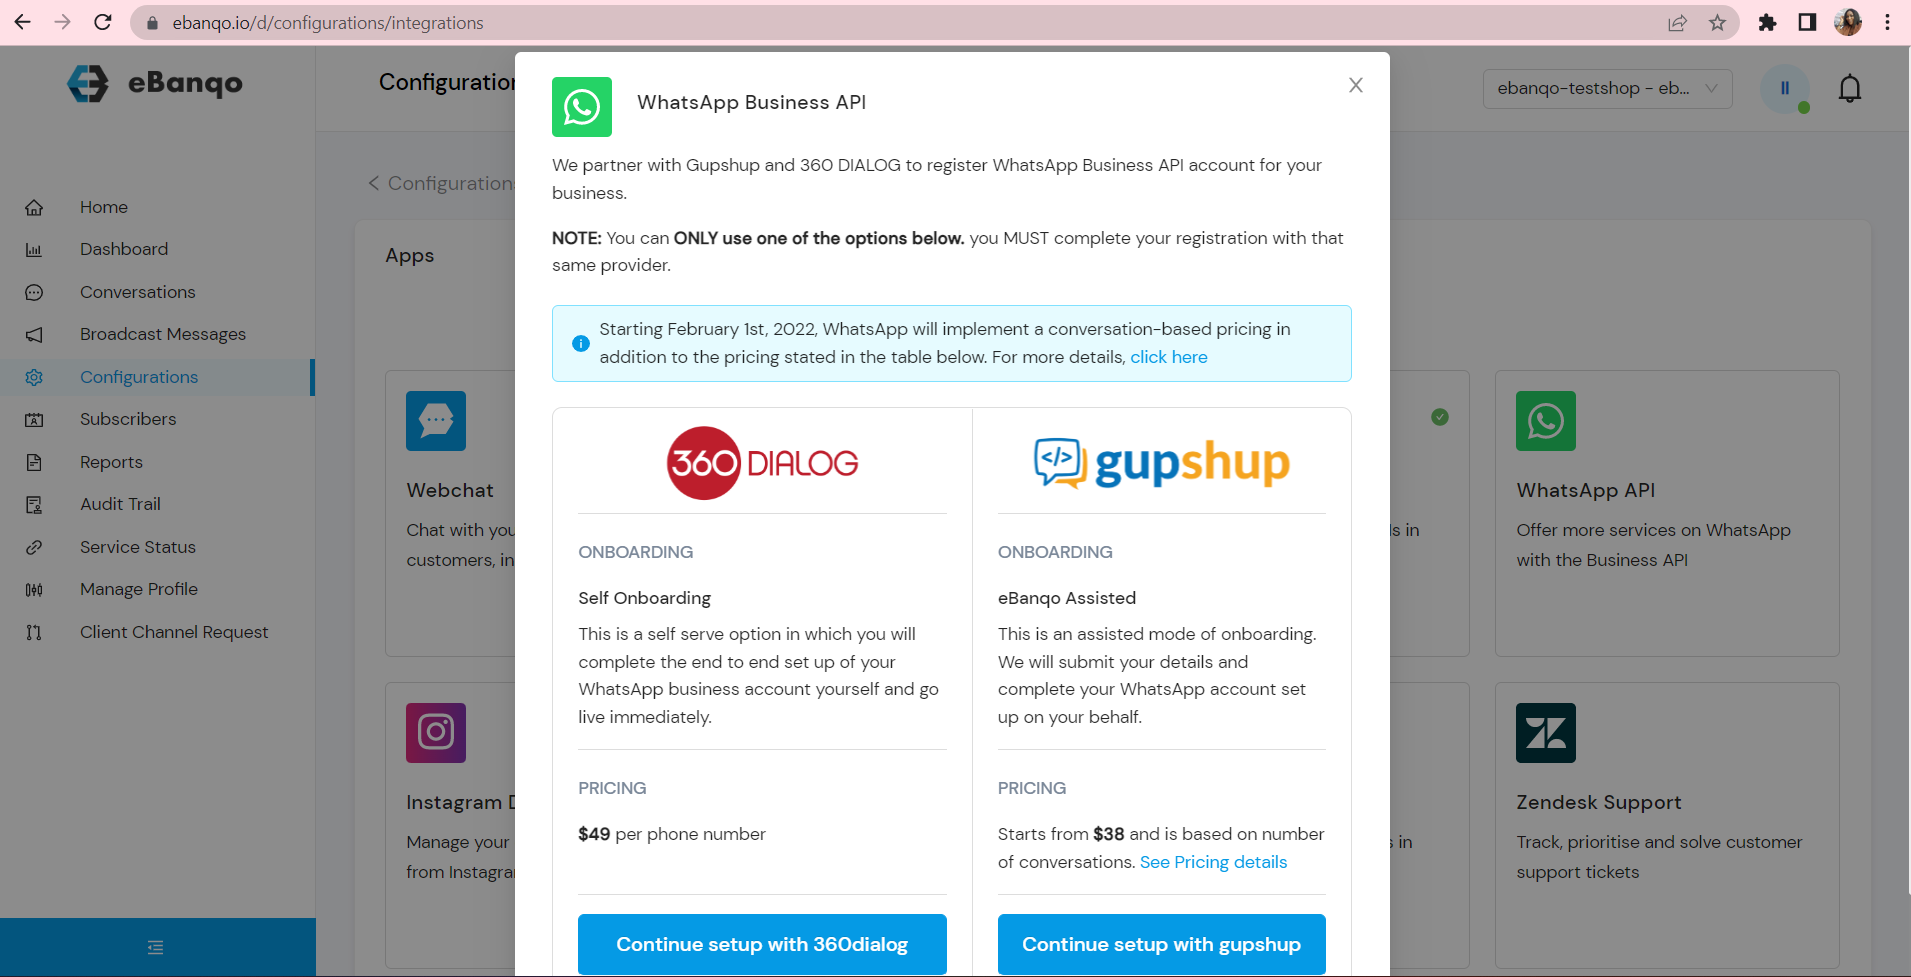
Select WhatsApp from the available channels.
You will see two integration options: 360dialog or Gupshup.
If using Gupshup, continue with the setup form and provide your business details.
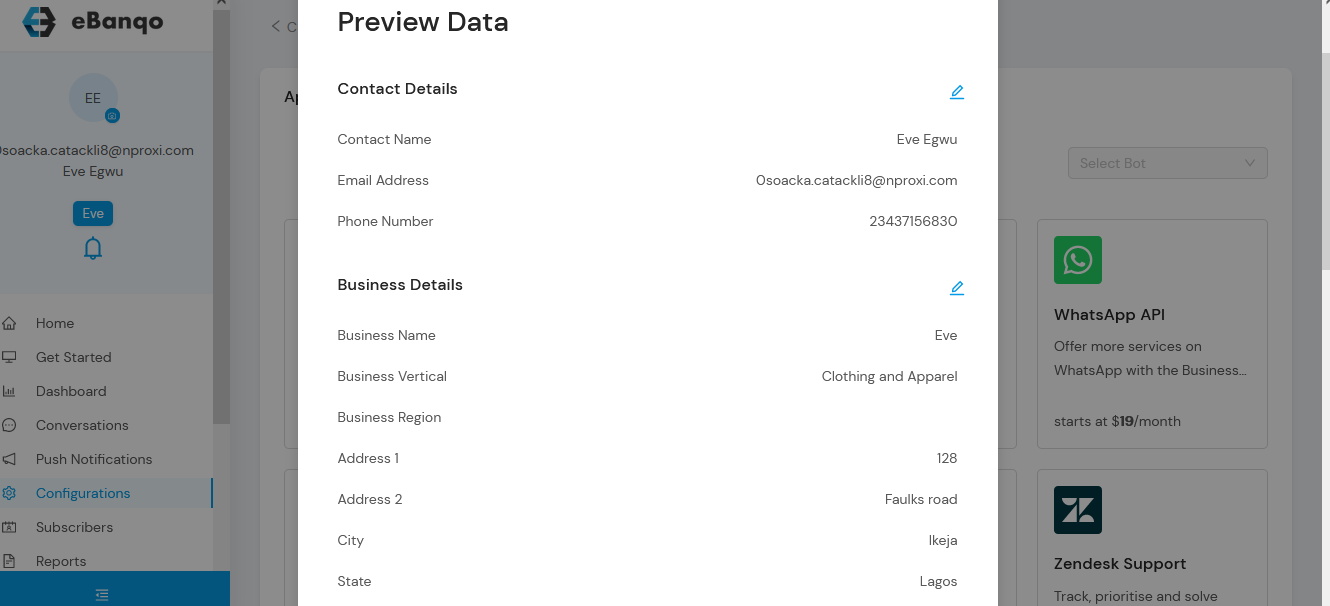
The form is pre-filled with your signup information. You can edit the details if necessary.
Complete the next pages of the form and review the information before submission.
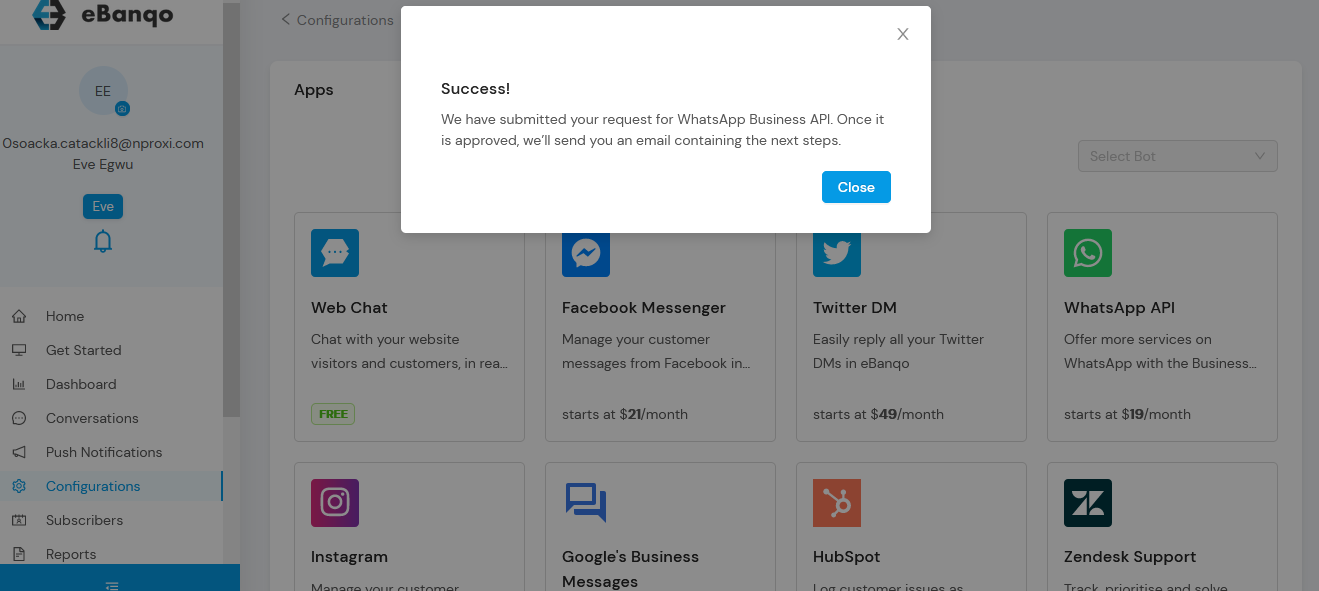
After submission, you will receive confirmation once WhatsApp approves the request.
Set Up Your Twitter
Note: Twitter integration is available on upgraded plans.
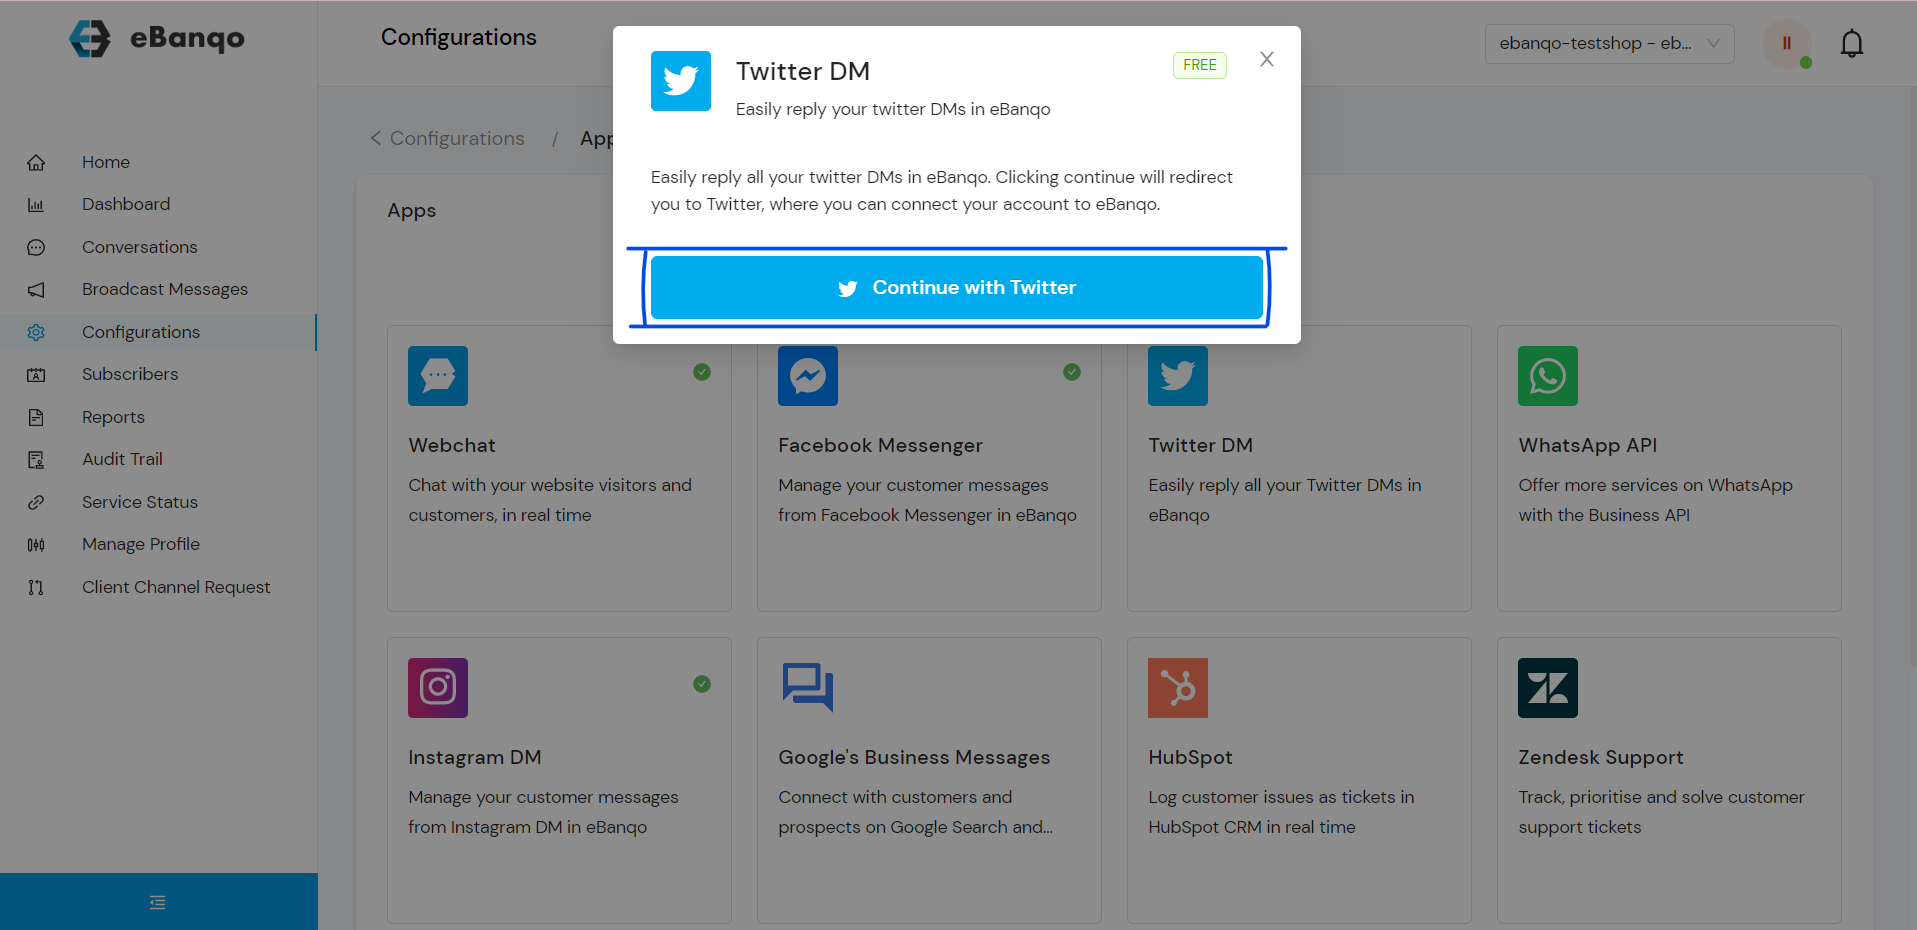
Select Twitter from the channels list.
Click Continue with Twitter.
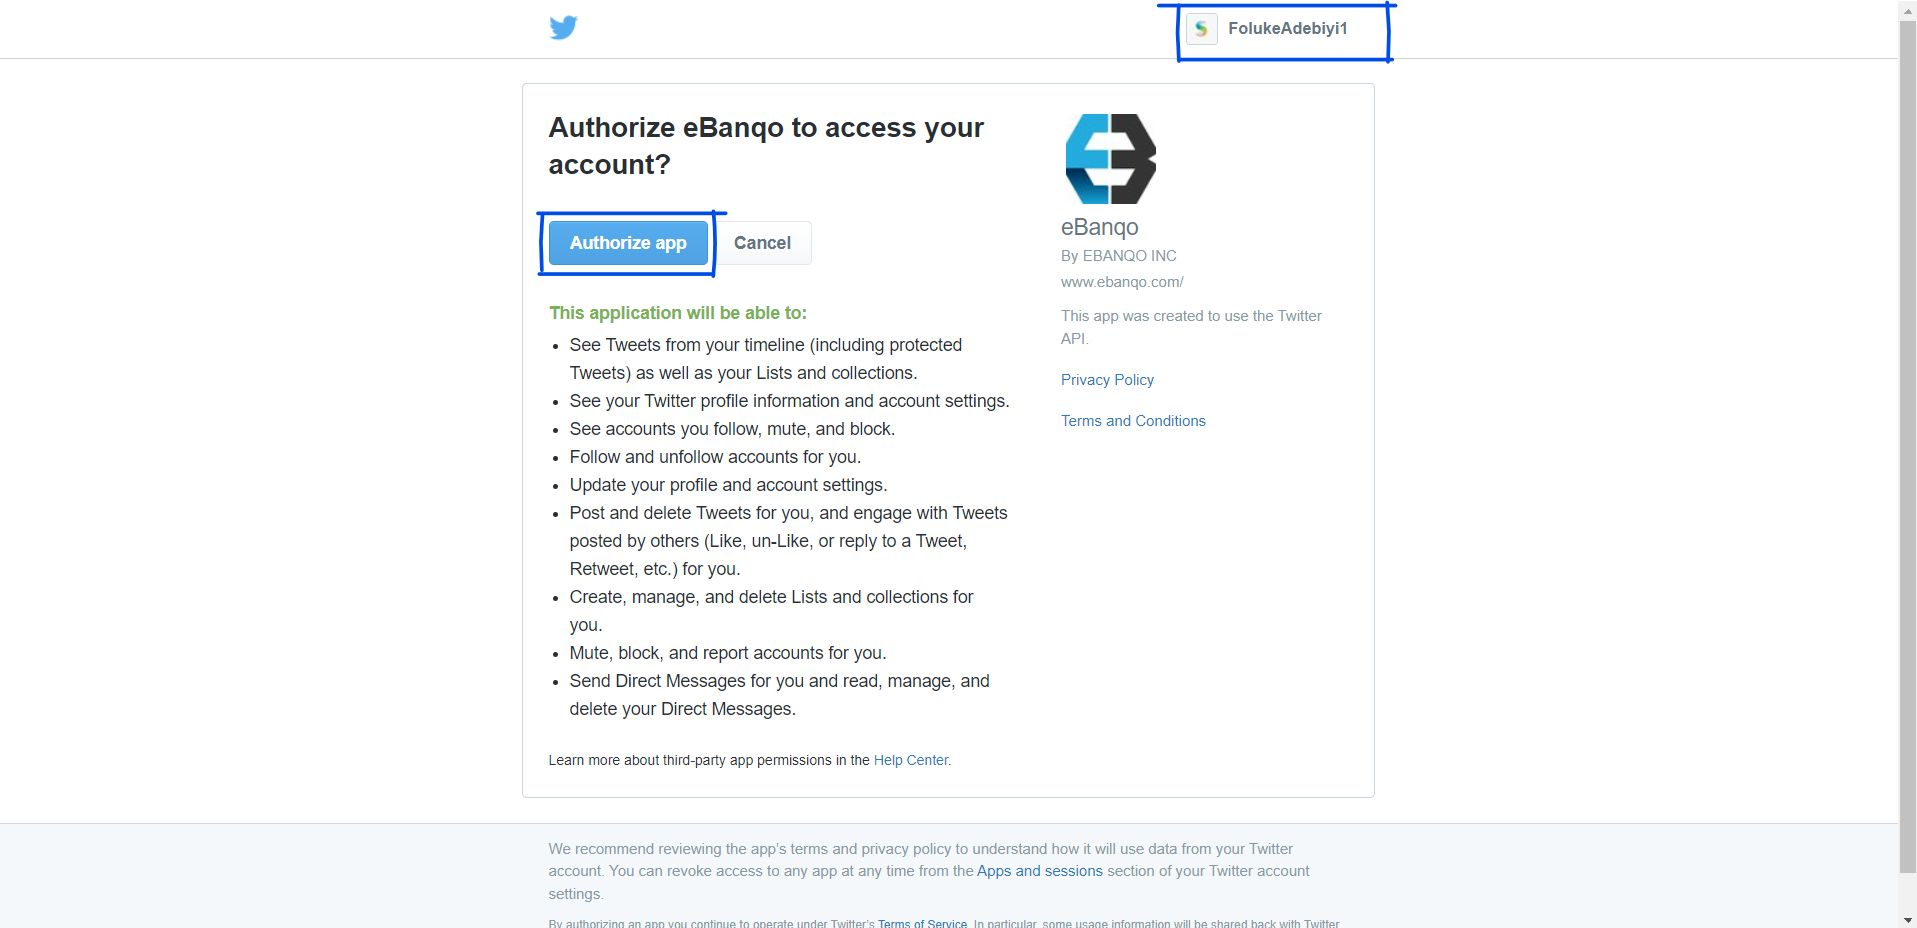
Select Authorize App to connect your Twitter account.
Once connected, you will see a success notification confirming that your Twitter account is linked.
Creating new users on the eBanqo platform allows you to manage who has access to your business dashboard and assign roles accordingly. Follow the step-by-step guide below to create users for your team.
Step 1: Log in to Your Admin Account
Visit the eBanqo portal and log in using your admin credentials.
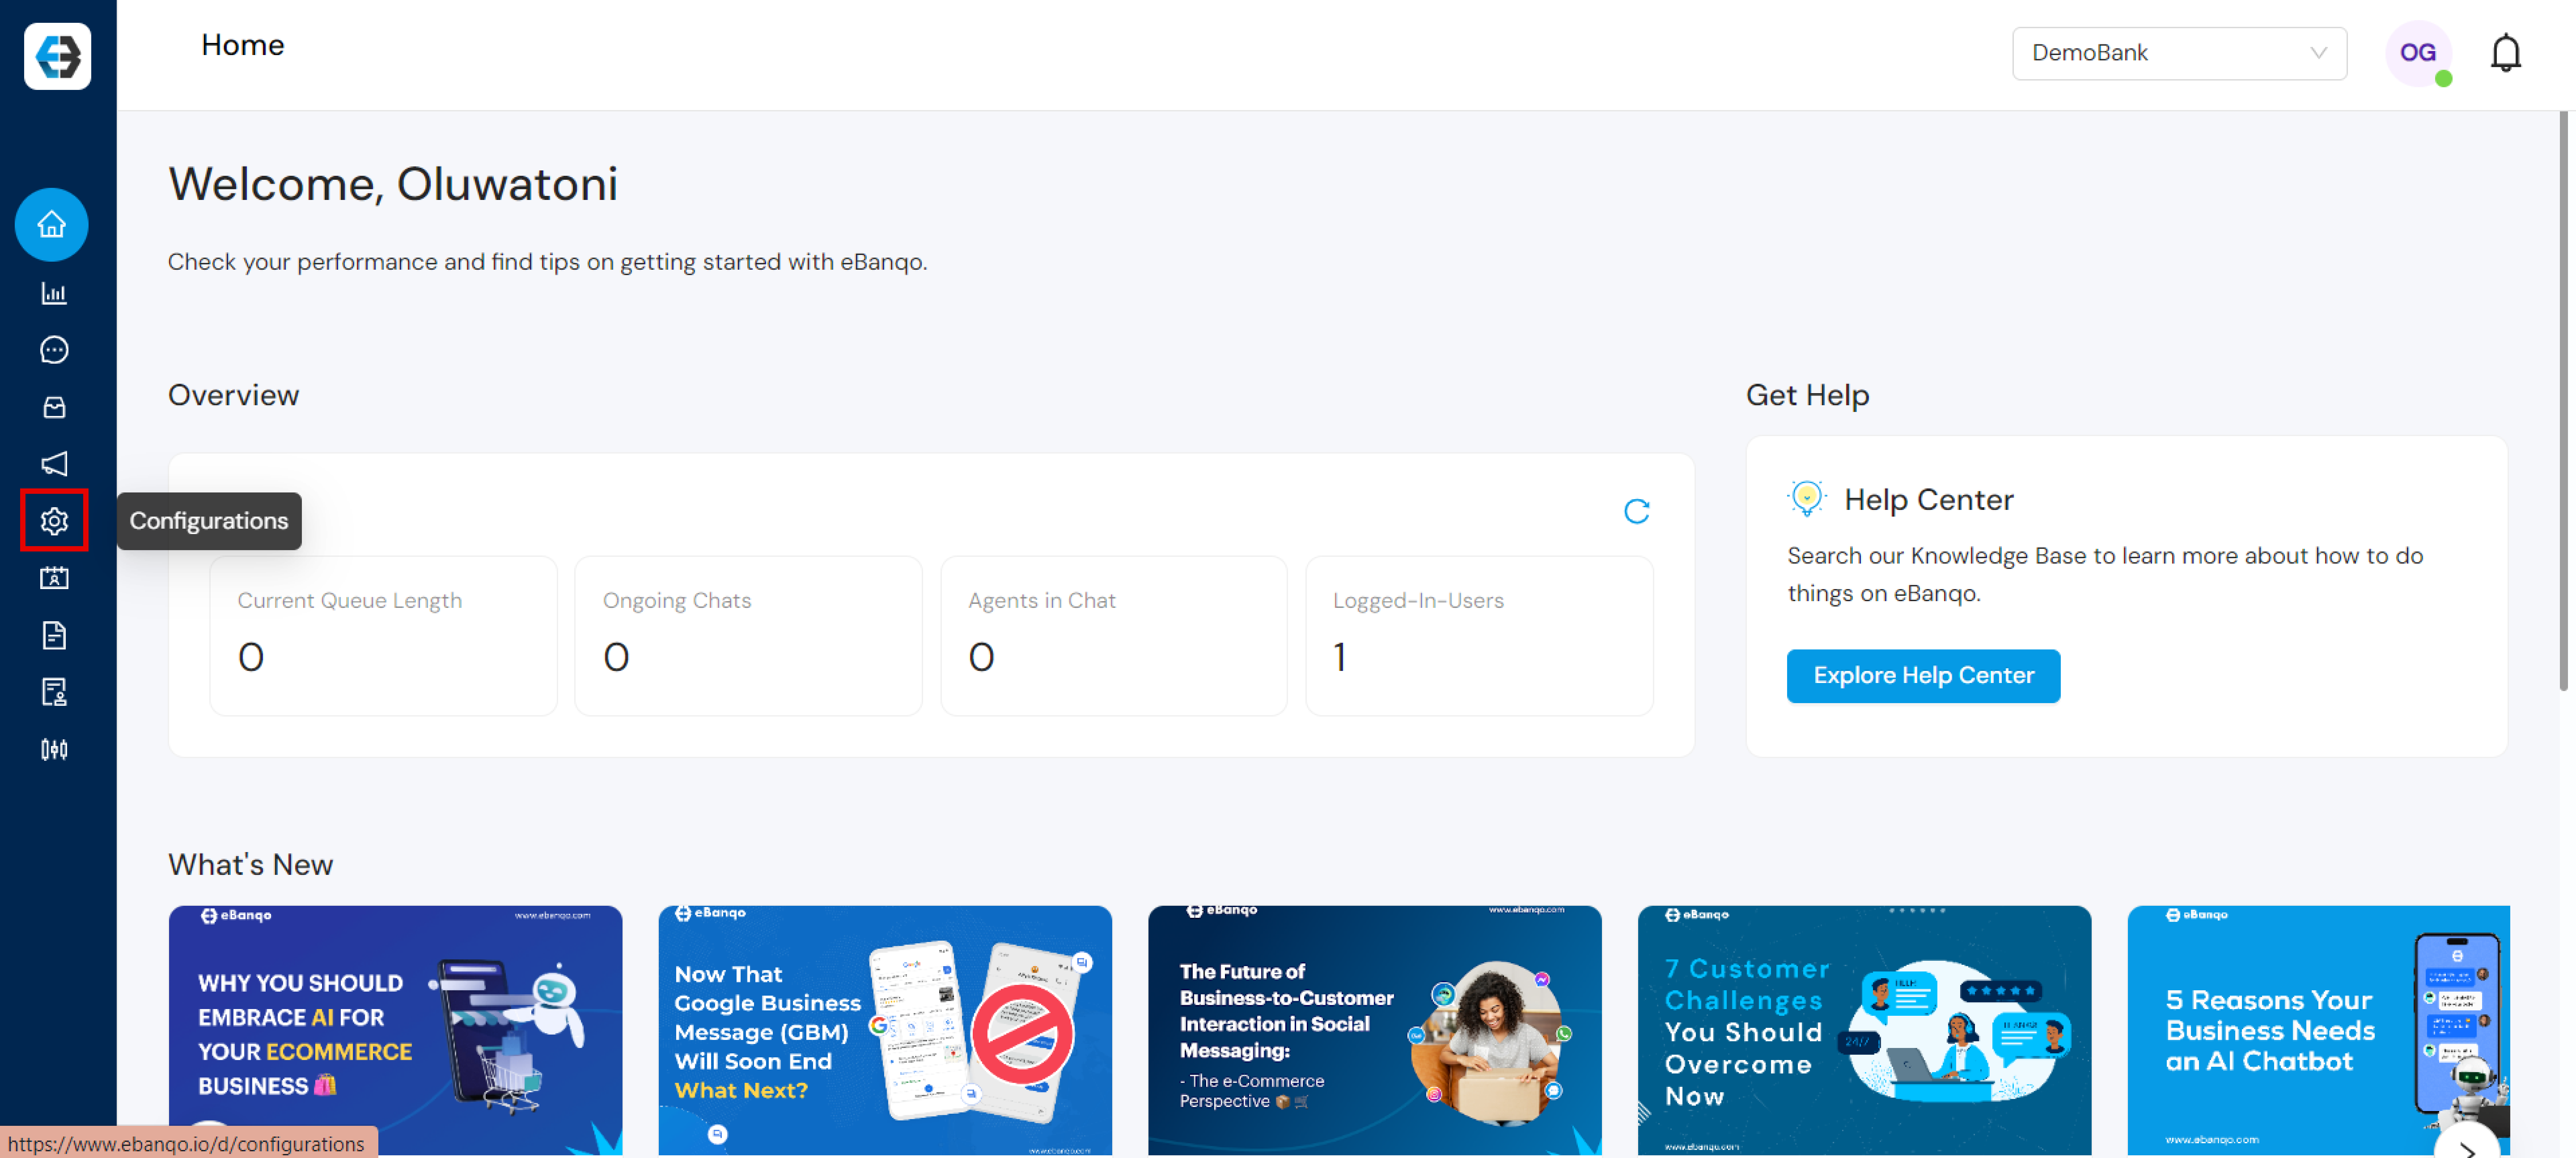
Once logged in, you will be directed to the dashboard.
Step 2: Navigate to the Users Section
Click on Configurations in the left-hand menu.
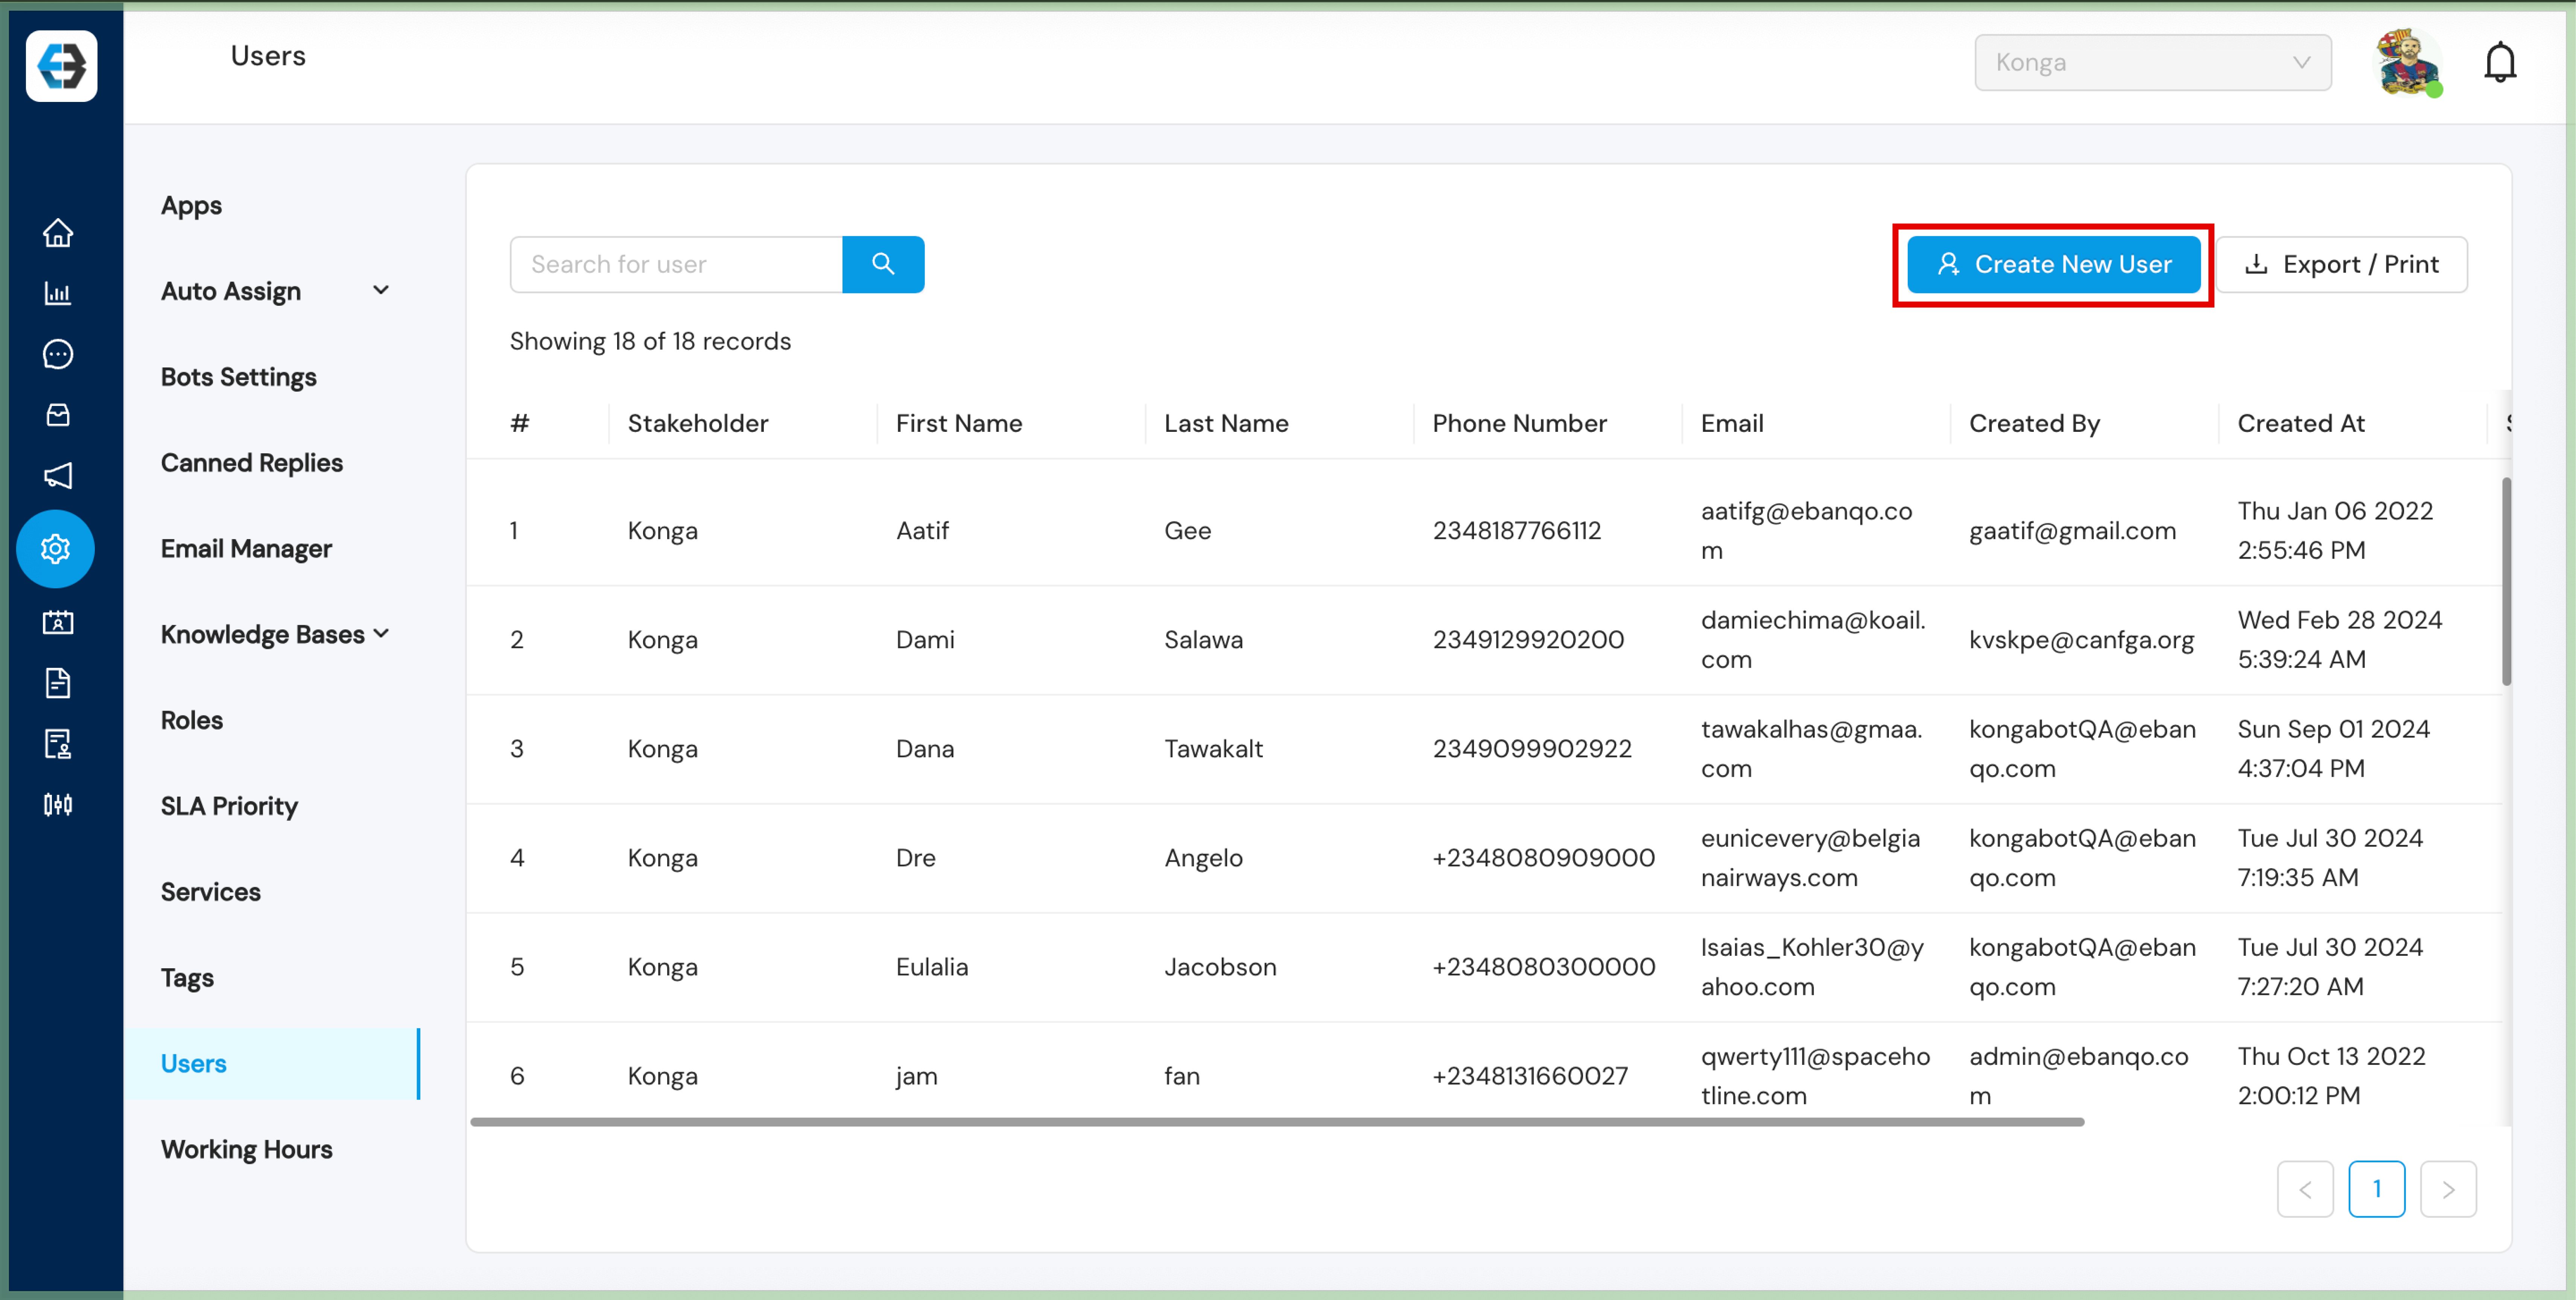
Select Users.
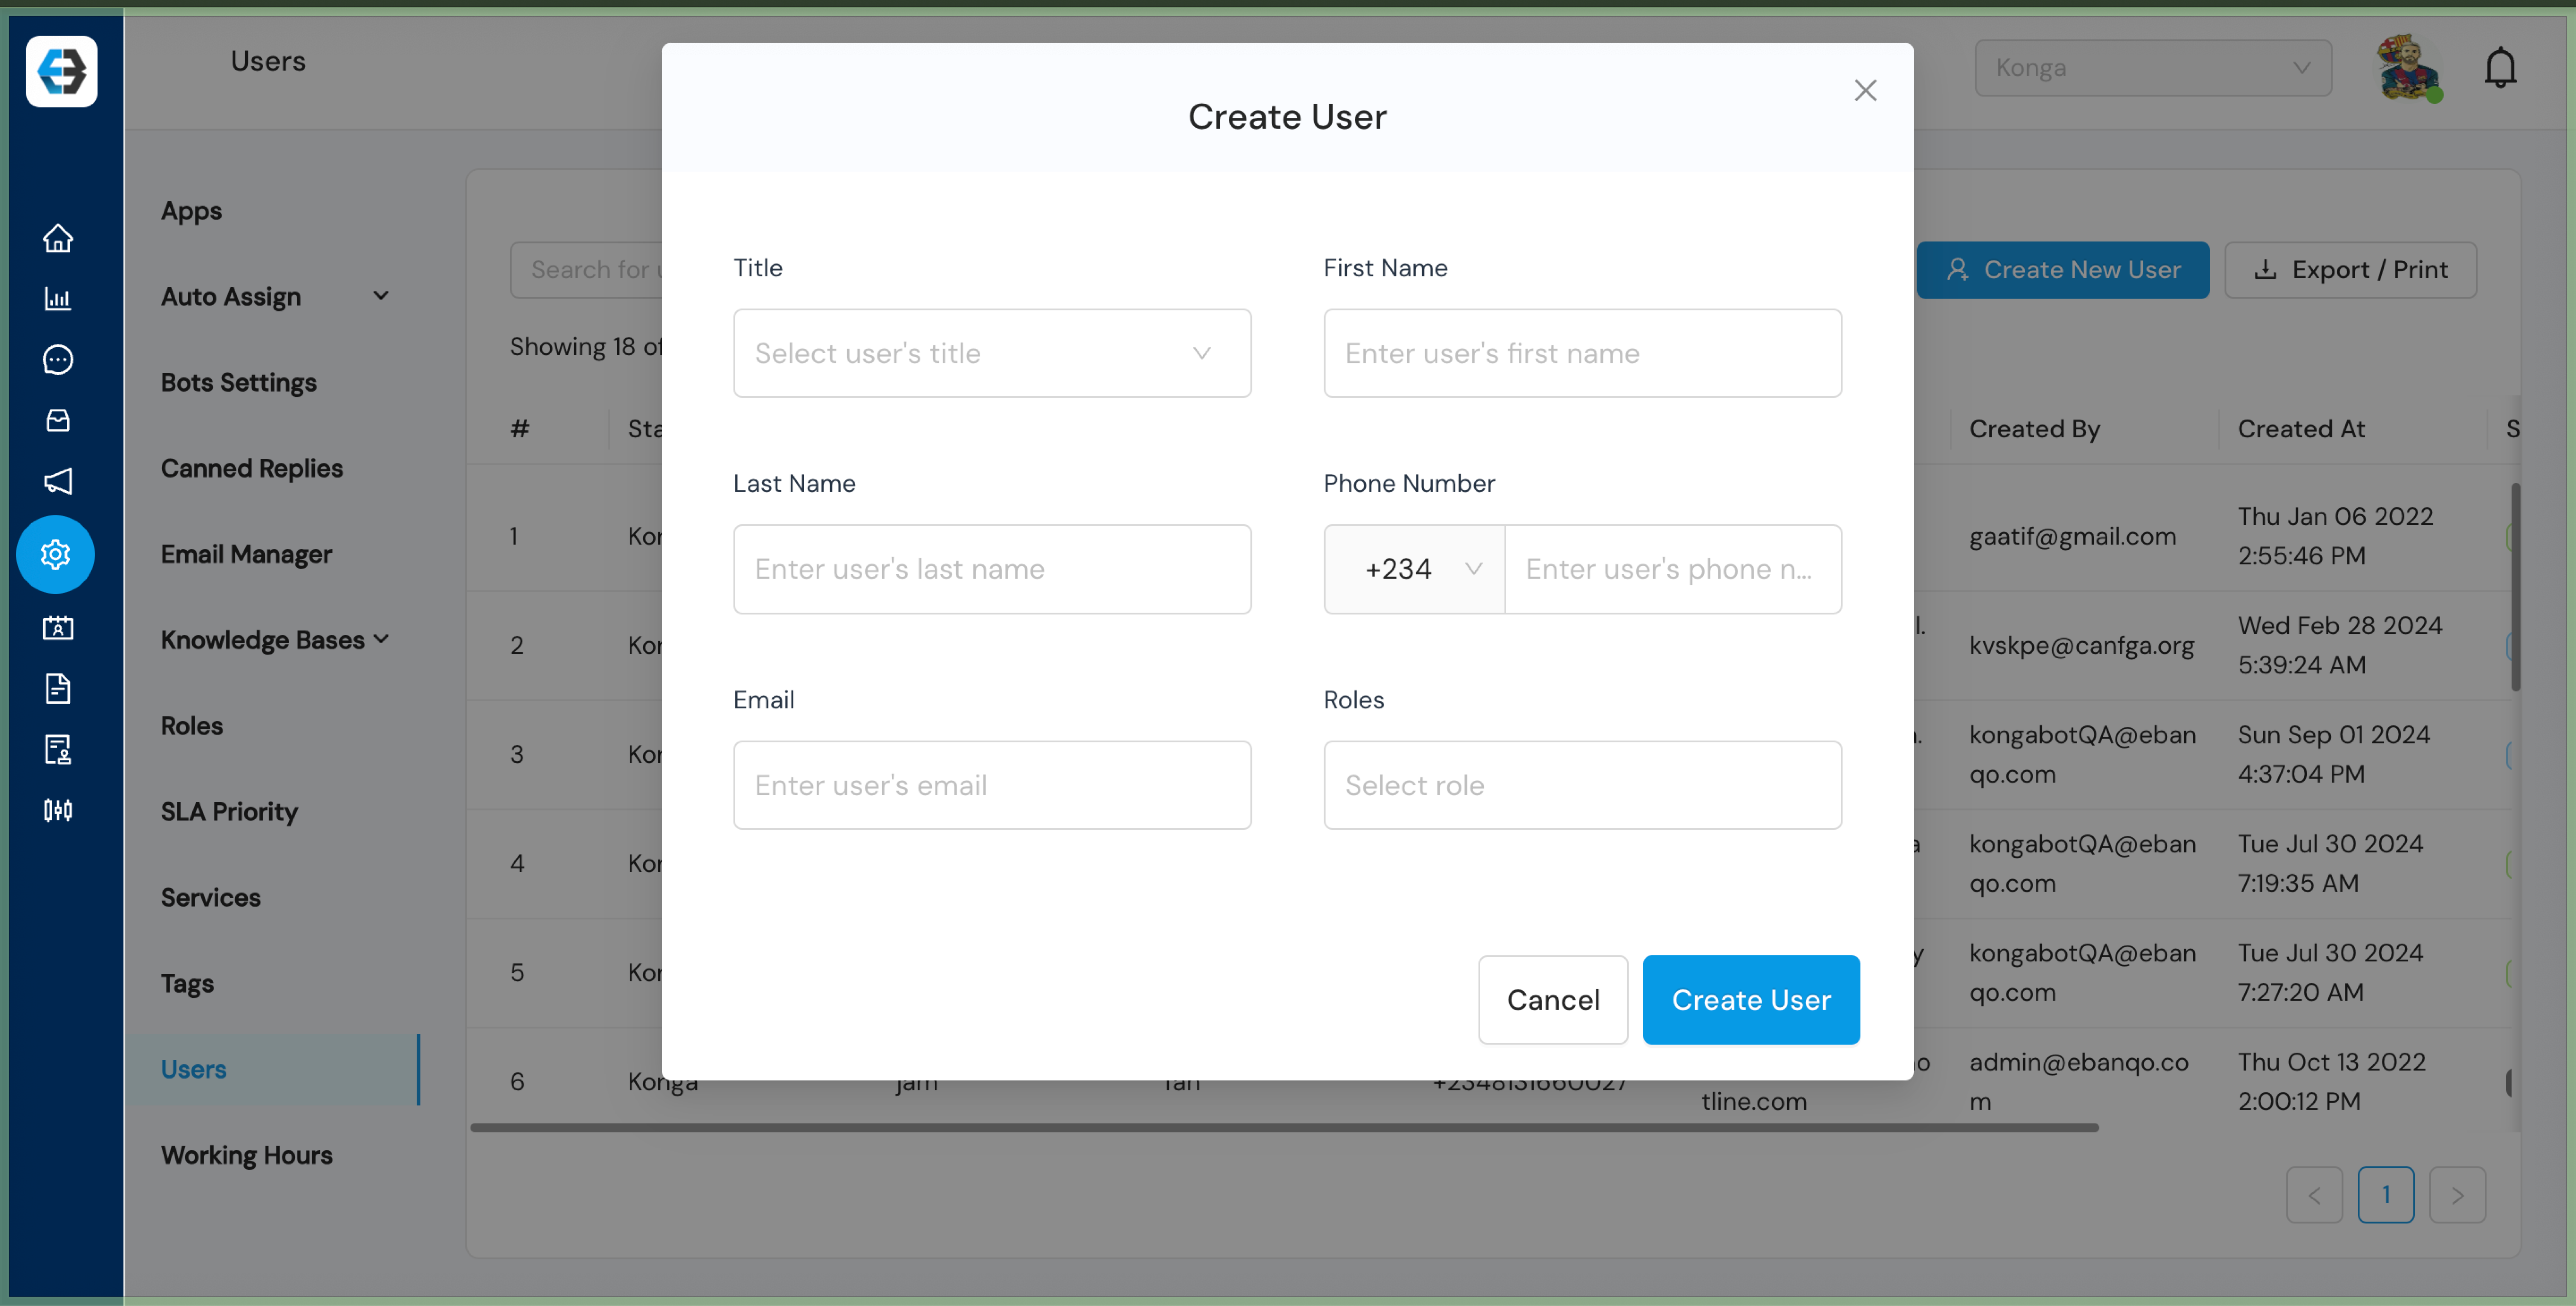
Step 3: Create a New User
Click the Create New User button.
A form will appear where you can enter the new user’s details.
Step 4: Fill in User Details
Provide the following information:
Full Name – Enter the user’s first and last name.
Email Address – The email the user will use to log in.
Phone Number – Enter the user’s contact phone number.
Role – Assign a role such as Admin, Agent, or Supervisor.
Step 5: Create and Send Credentials
Click Create User.
The system generates login credentials and sends them to the user’s email.
Step 6: Confirm User Creation
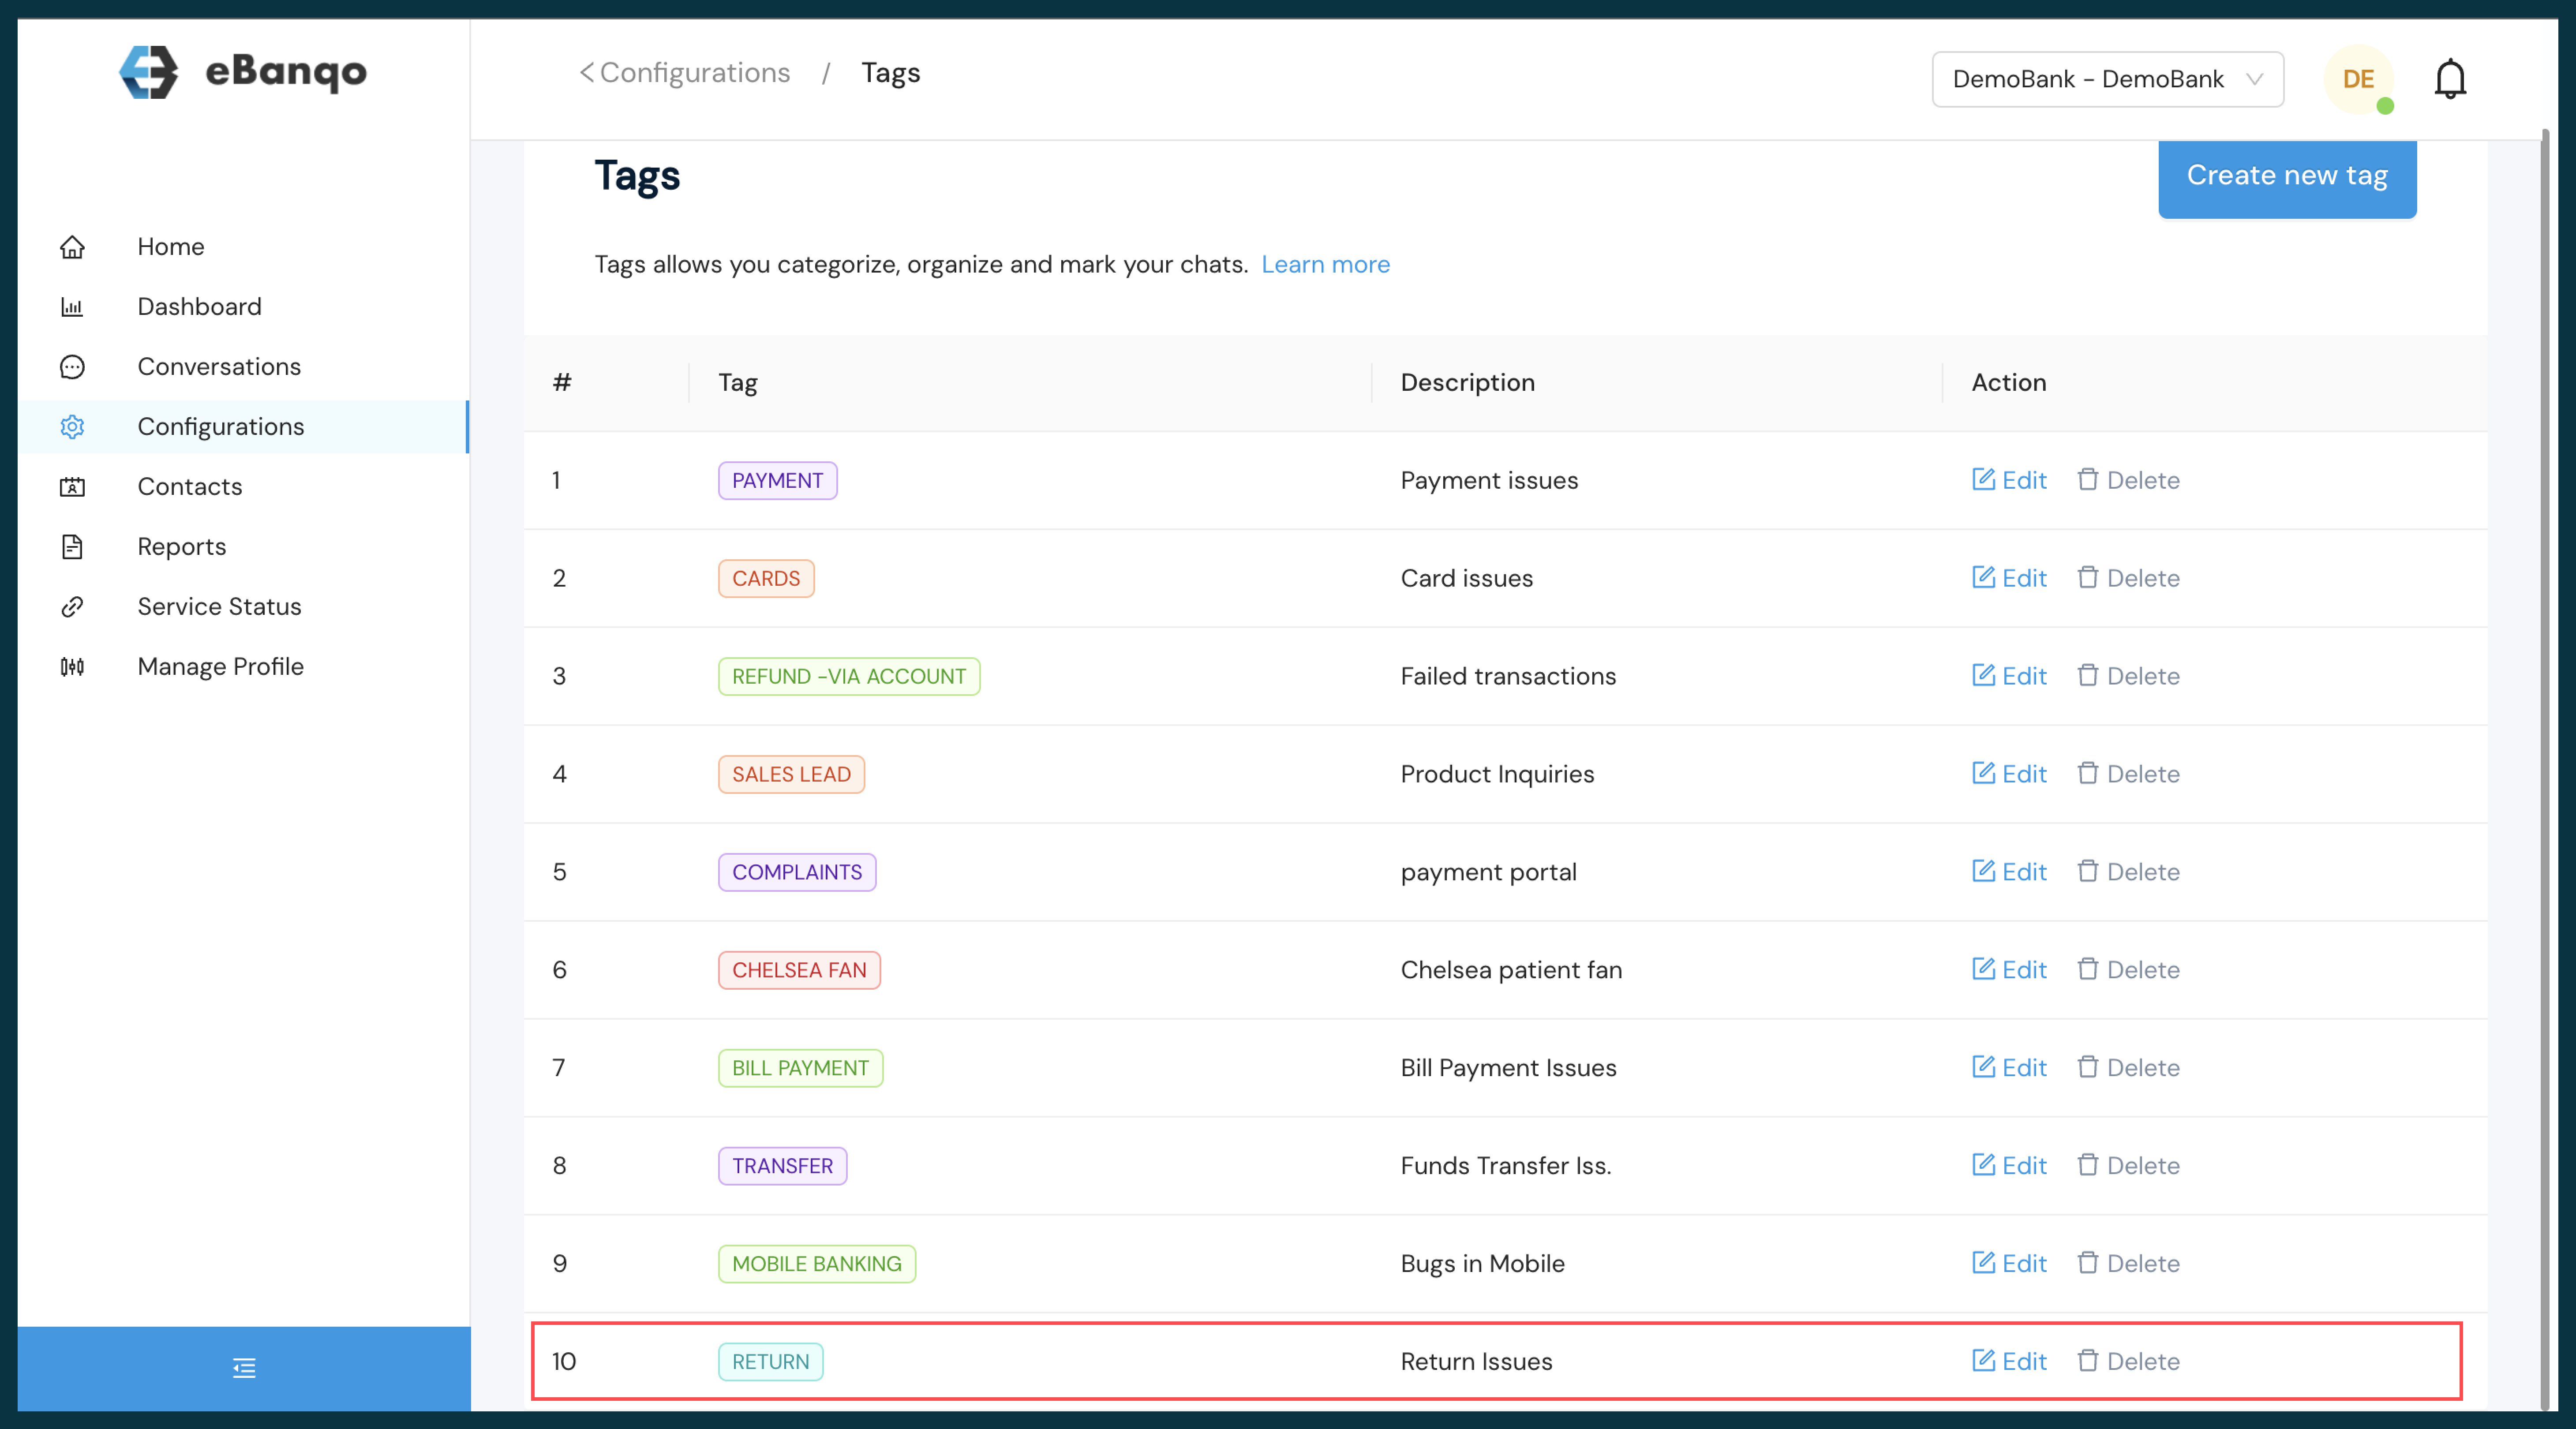
The new user will appear in the user list under the Users section.
Notes:
Ensure the email address is correct to avoid login issues.
Assign roles carefully to maintain proper access control.
You can deactivate users anytime from the Users section.
How to Deactivate Users on eBanqo
Deactivating a user ensures that inactive or former team members can no longer access your organization’s account.
Step 1: Log in to Your Account
Step 2: Navigate to the Users Section
Locate the Configurations icon in the left sidebar.
Select Users.
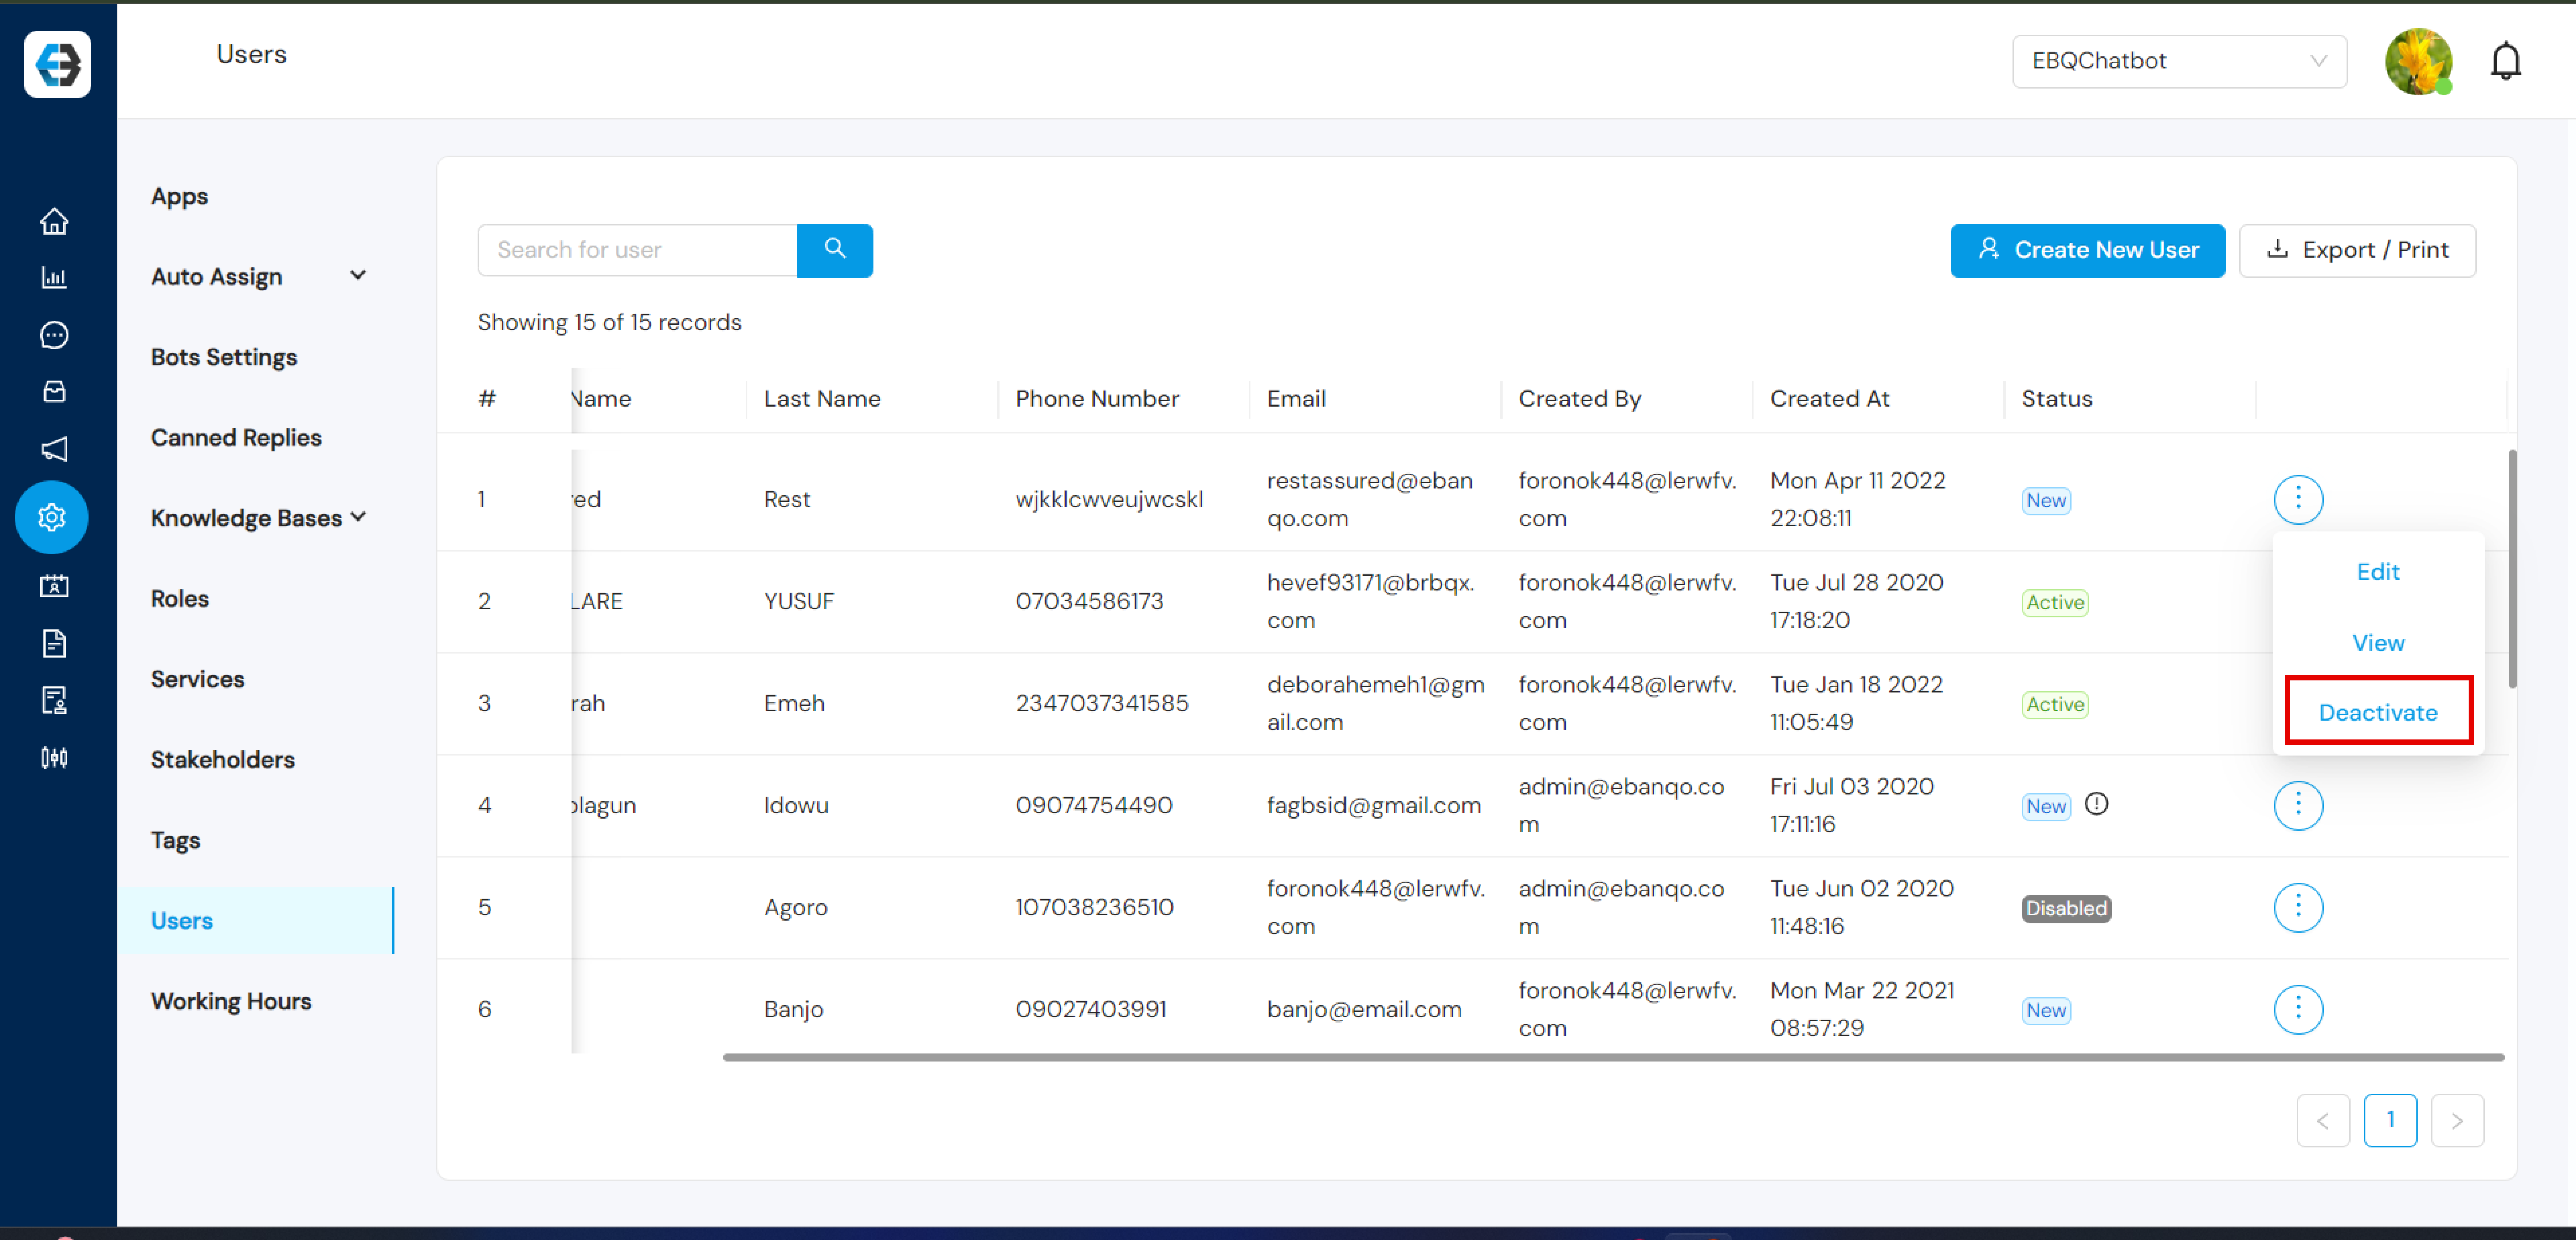
Step 3: Find the User
Search for the user by name or email.
Click the three-dot menu beside the user’s details.
Step 4: Deactivate the User
Select Deactivate in the user profile.
Click the deactivate button to remove platform access.
Step 5: Confirm Deactivation
A confirmation popup will appear.
Click Yes, Deactivate.
The user’s status will now appear as Inactive in the user list.
Managing your working hours on the eBanqo platform is essential, especially when using the live chat feature. It allows your customers to know when you’re available to provide real-time support, ensuring seamless interaction between your support team and customers.
Follow the steps below to configure your working hours.
Step 1: Setting up Working Hours
Go to the Configuration tab on the platform.
Select Working Hours from the list of configuration options.
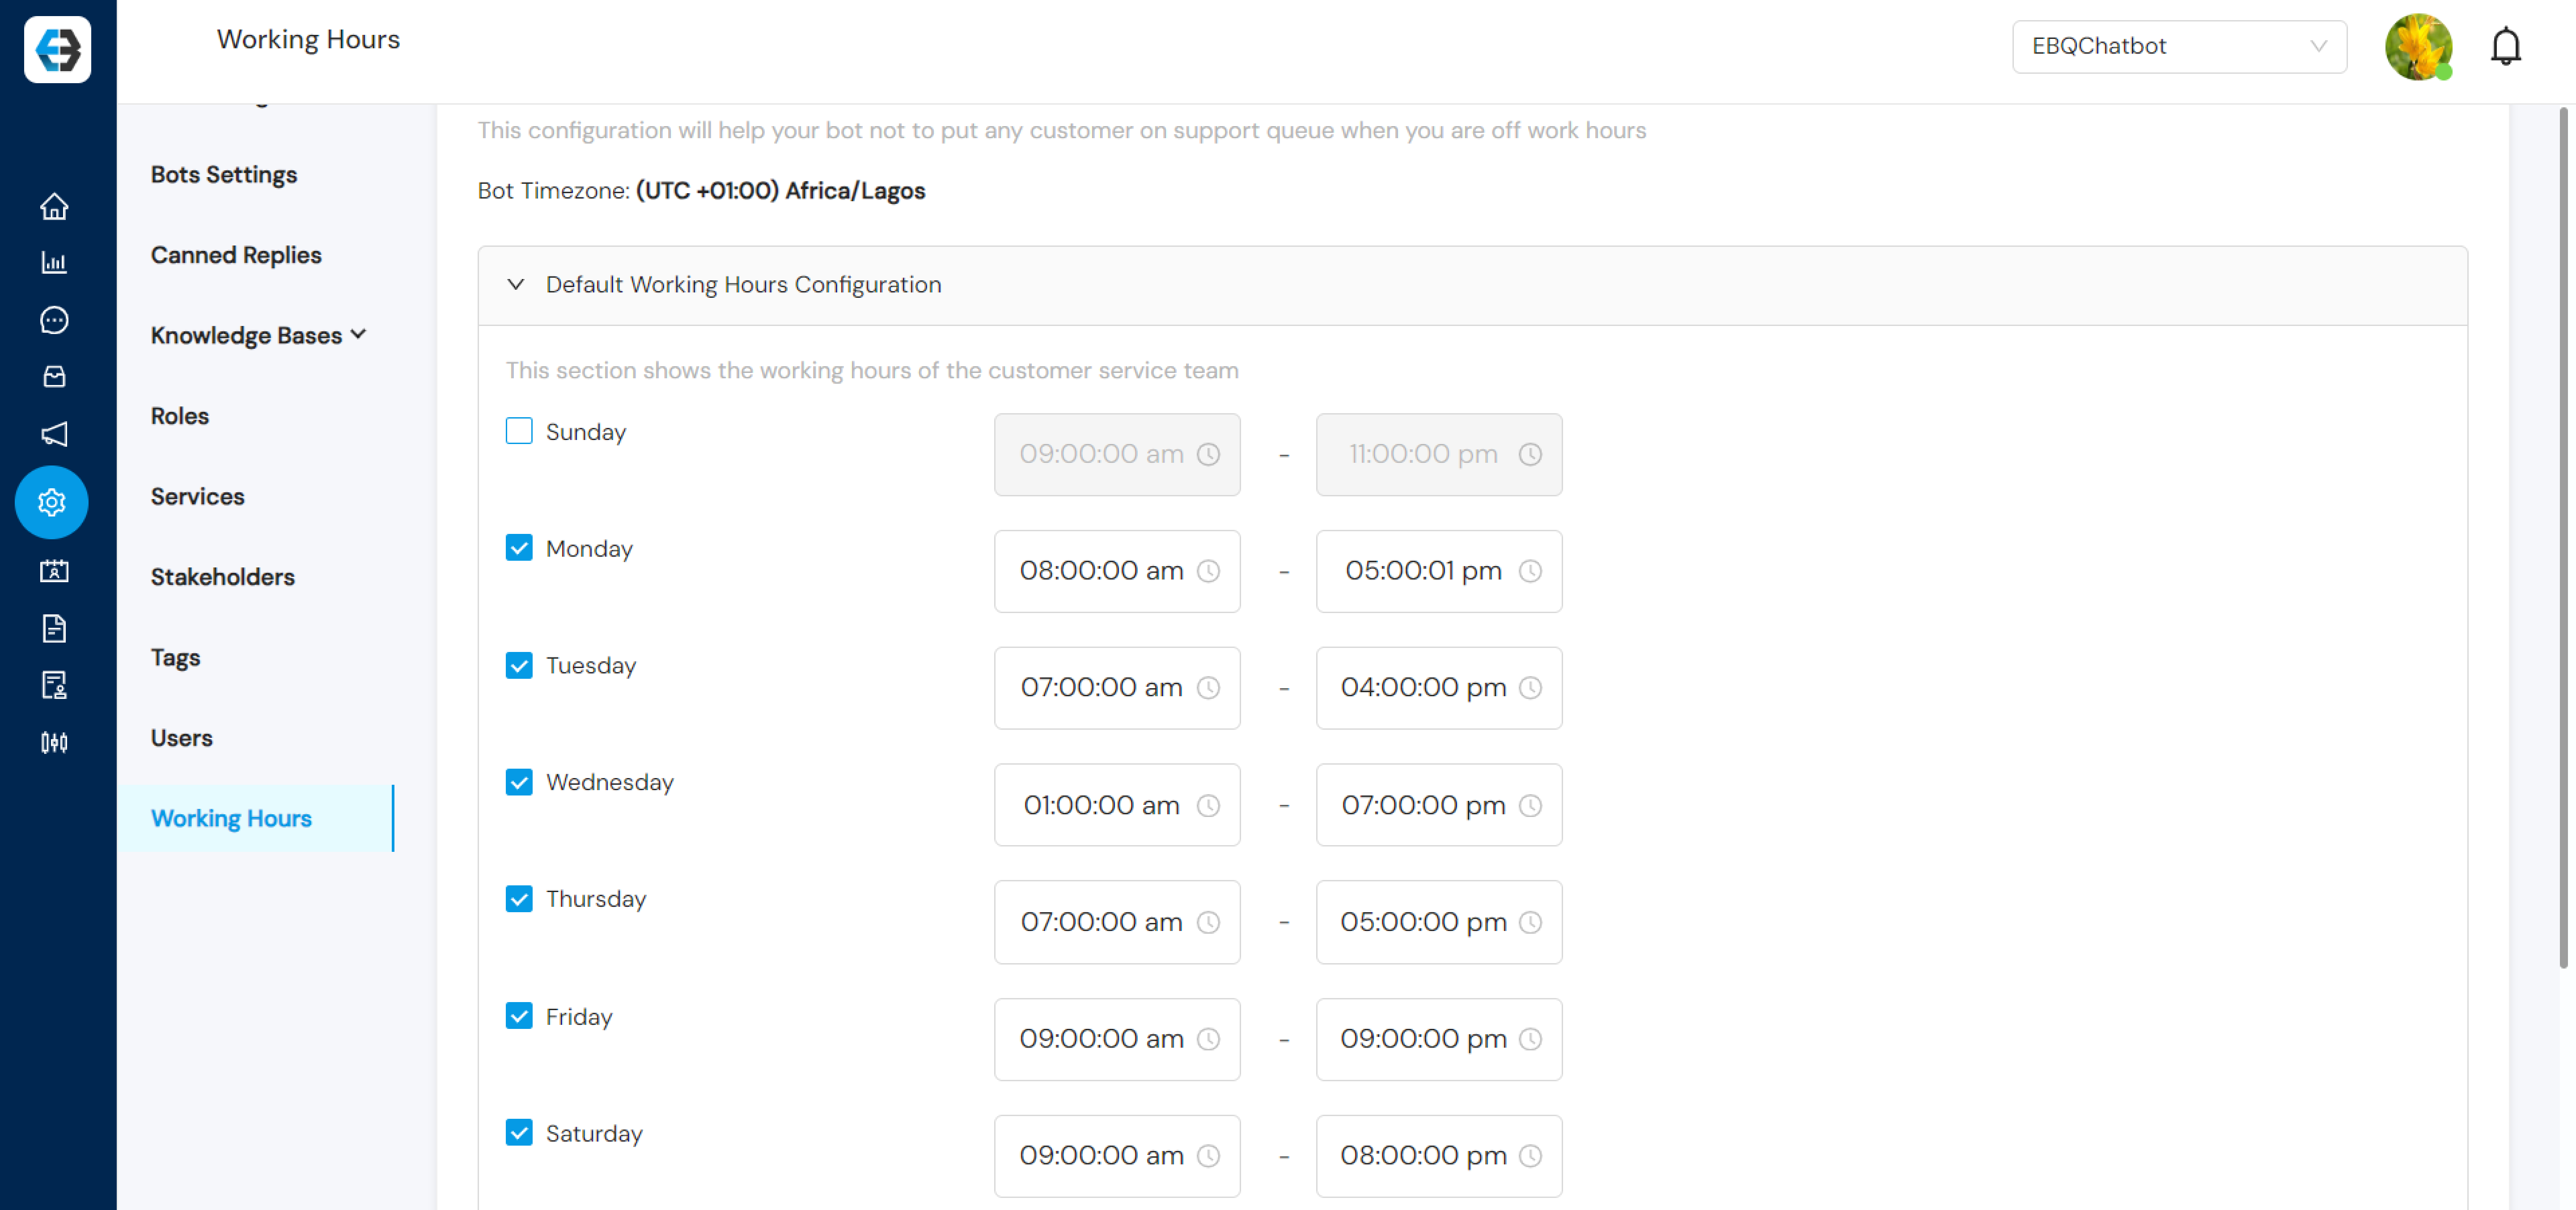
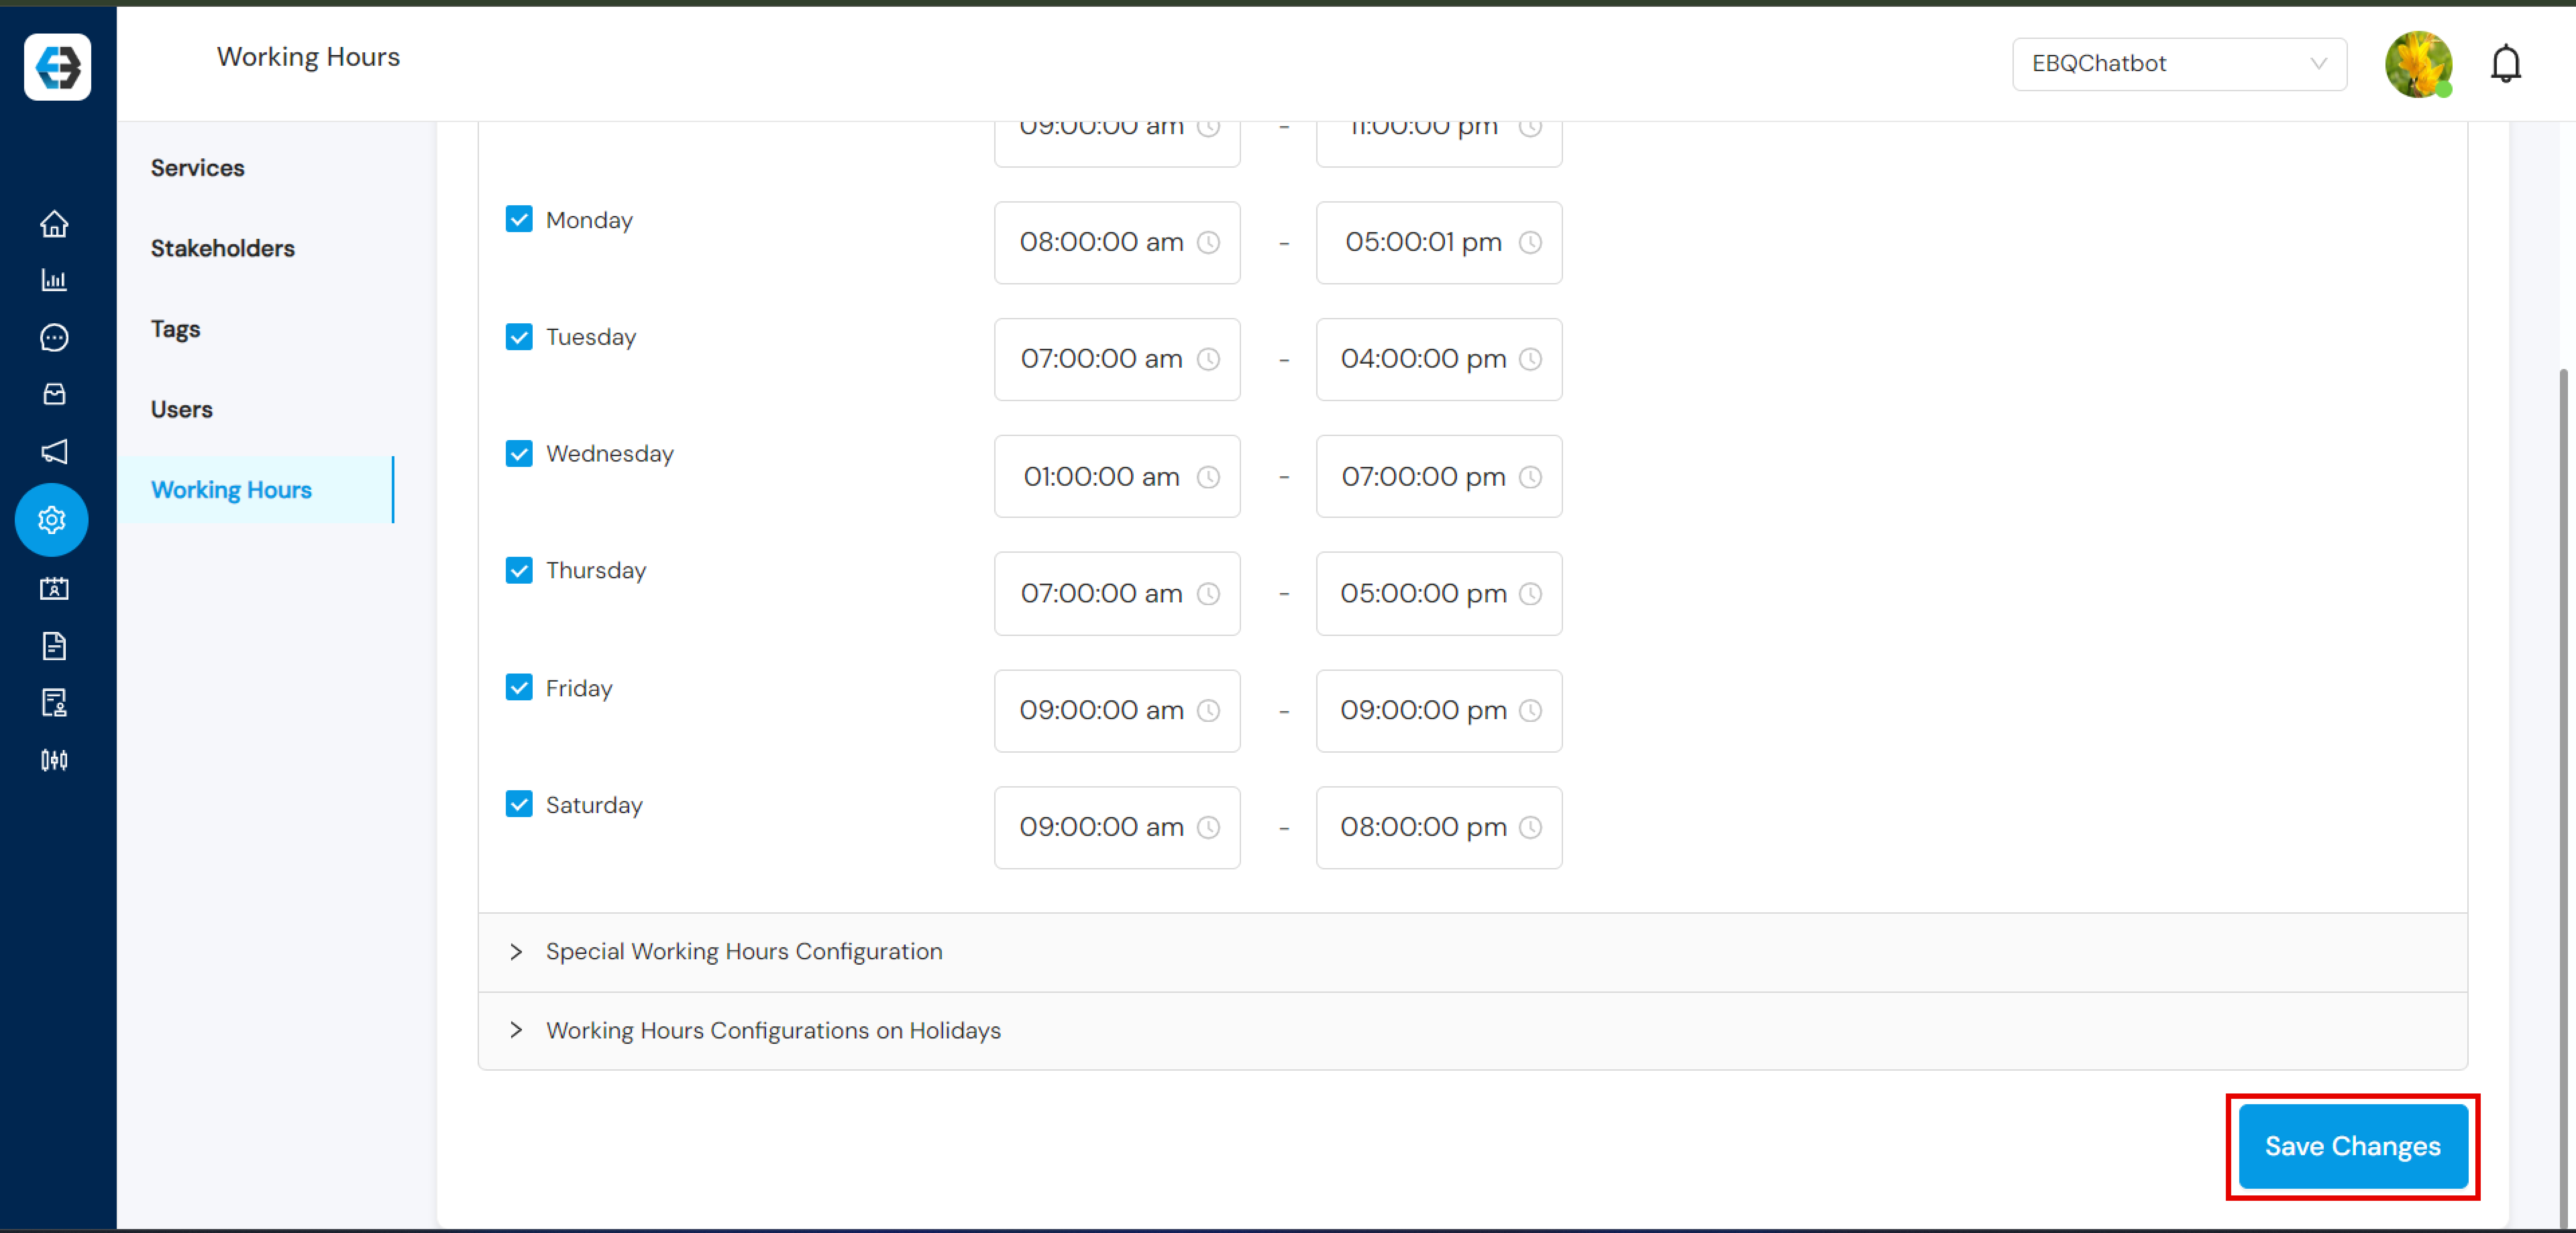
Step 2: Setting Up Standard Working Hours
Adjust your working days by unchecking any days when services will not be available (for example Saturday or Sunday).
For active days, set the start and end time when your support team will be available.
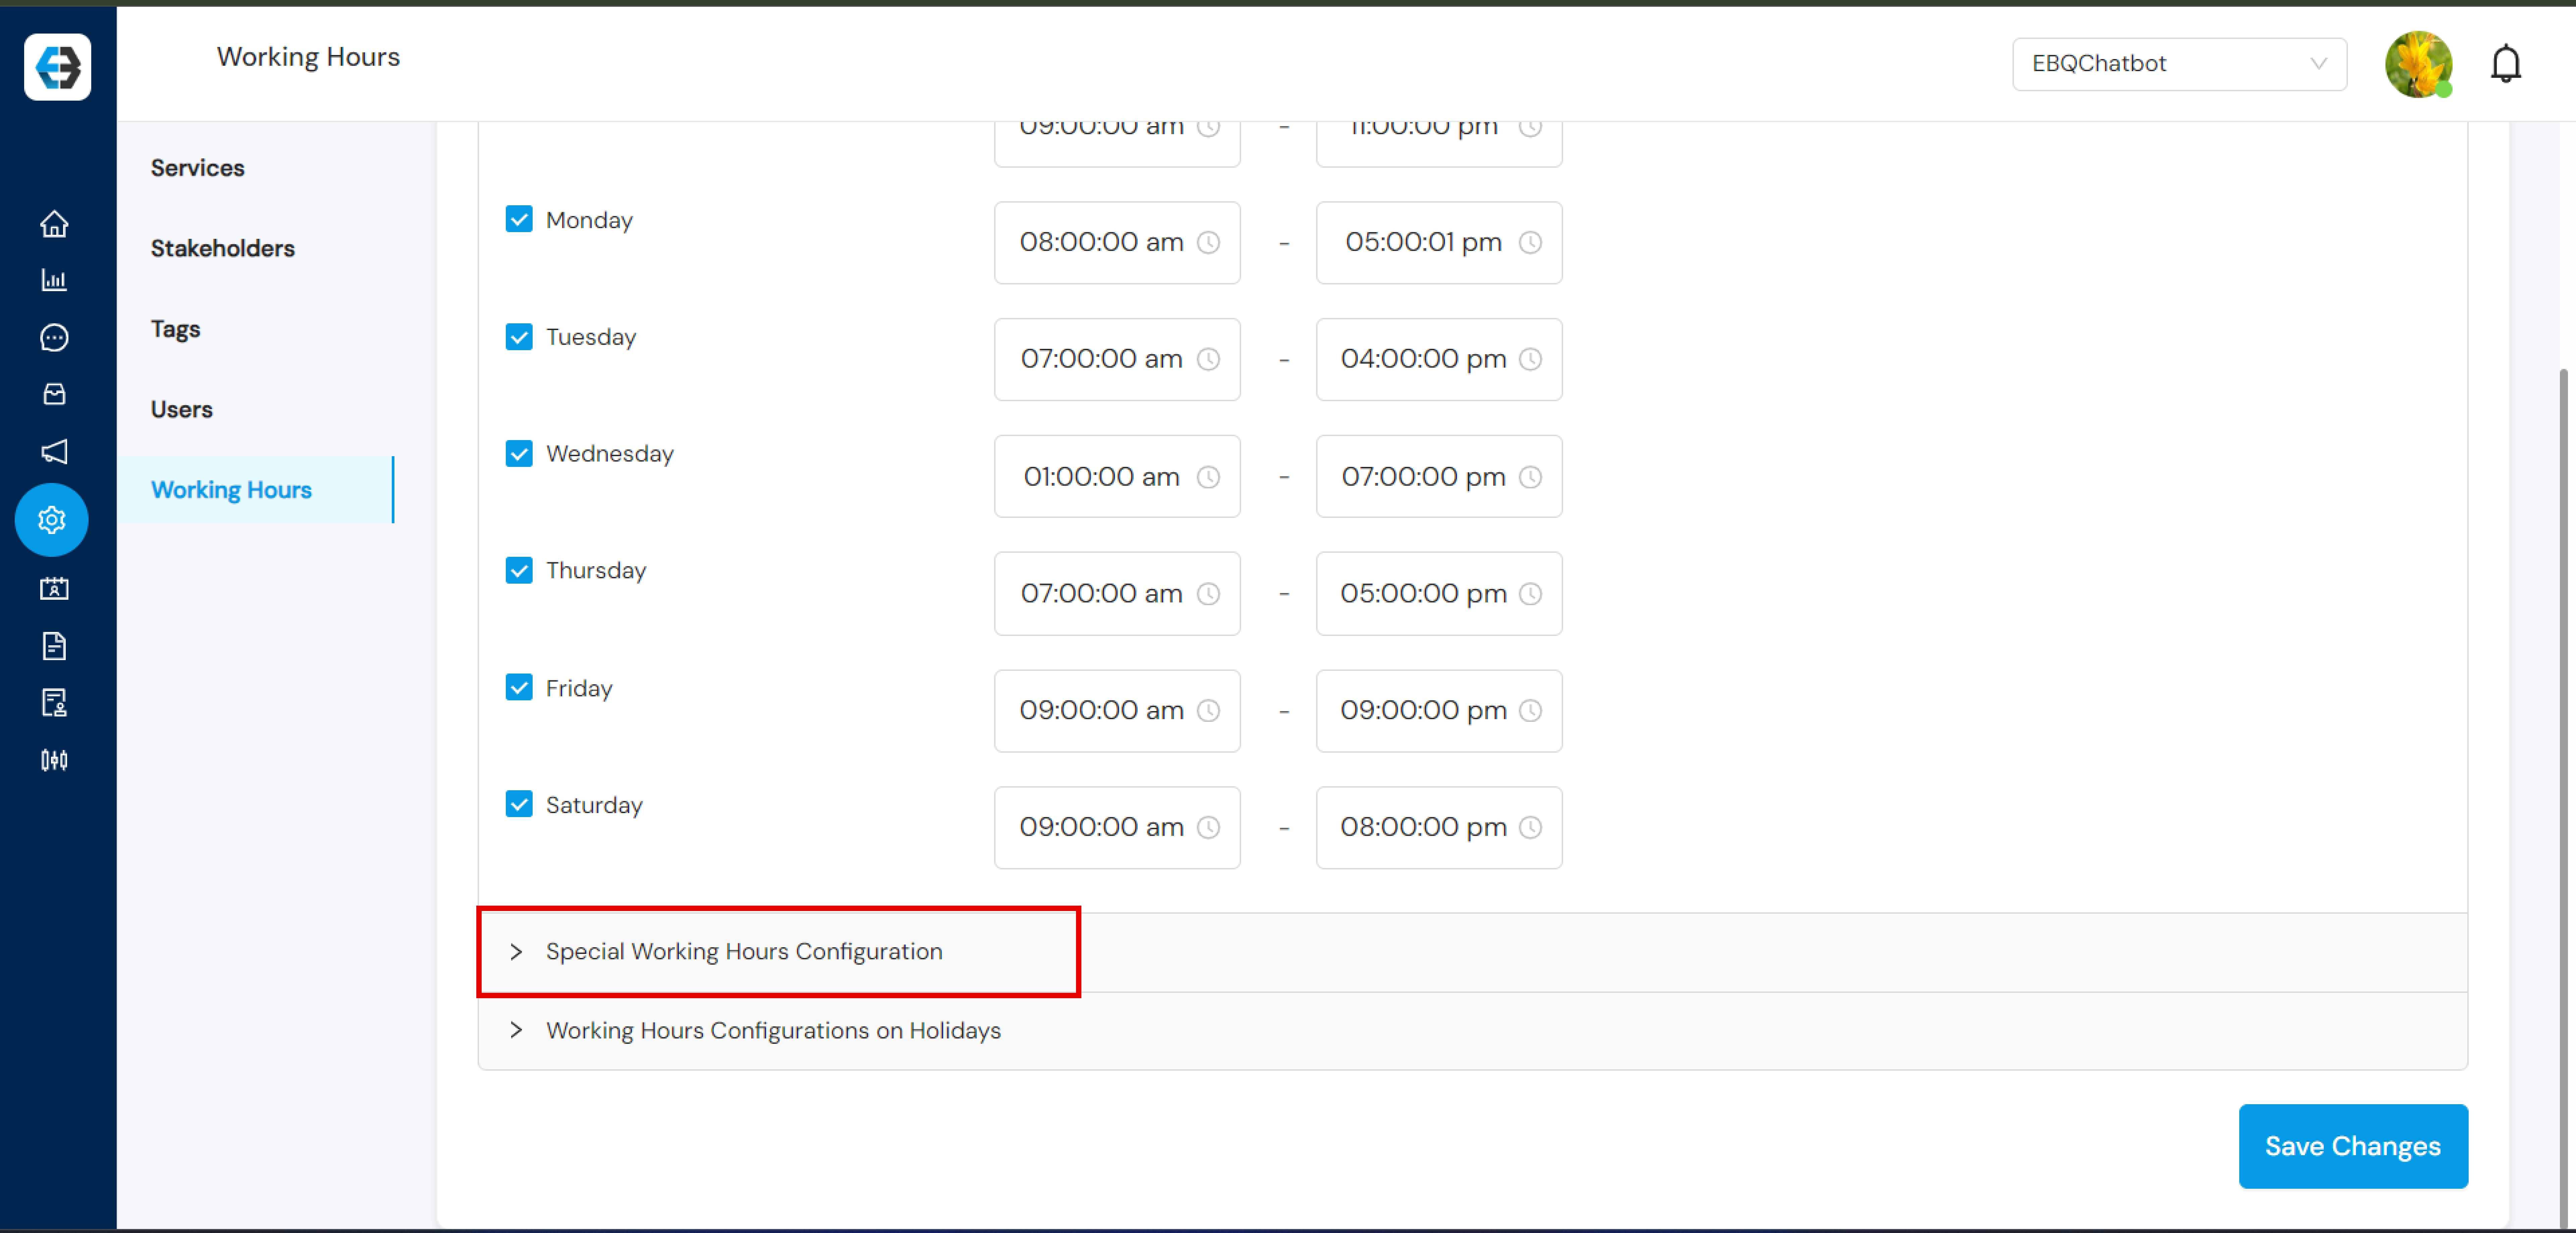
Step 3: Configuring Special Working Hours
If there are specific days when your working hours differ (such as holidays or special events), create a Special Working Hours Configuration.
Select the date(s) and define the modified working hours for those days.
This is useful for holidays like Christmas or special events where working hours change.
Step 4: Saving Your Configuration
After making the changes, click Save Changes to apply your new working hours.
Your updated working hours will be reflected during customer interactions, letting users know when your support team is available for live chat.
 Select the Manage Templates and click on “add template”