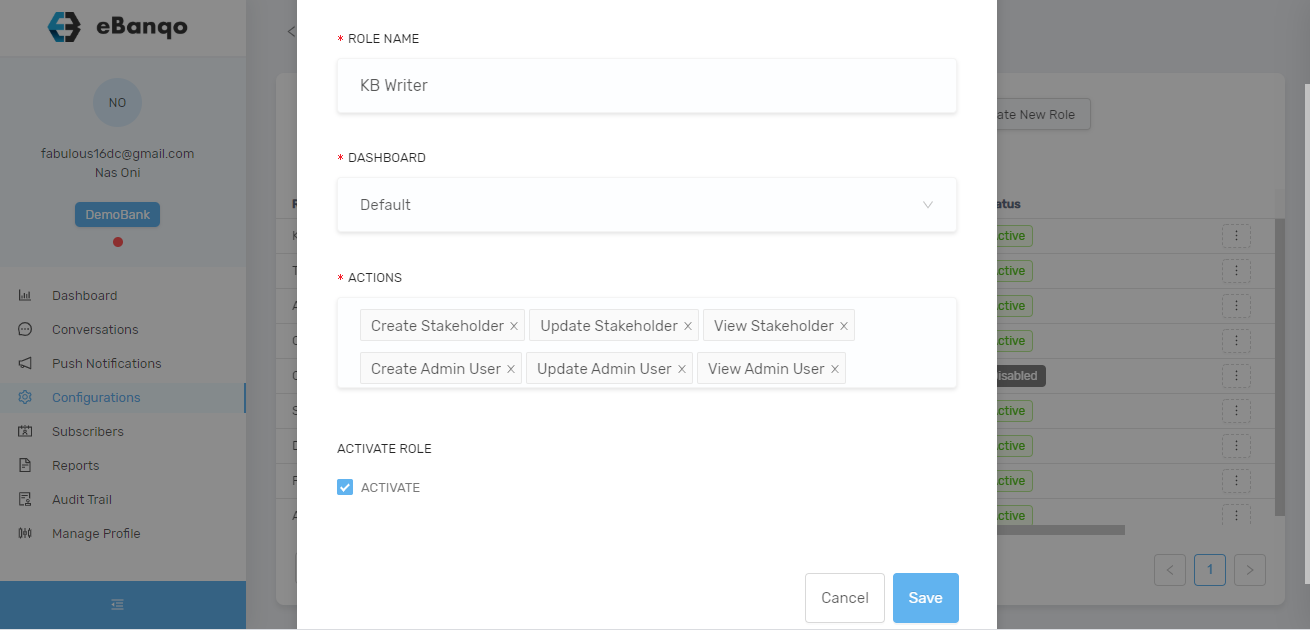
Your eBanqo Messenger dashboard contains four main sections:
- Customer Activity
- Customer’s Usage of Services
- Messages by Service
- Messages by Knowledge Base
Below is an explanation of each section.
1. Customer Activity
Customer activity measures how many times customers used each service offered by your digital assistant. It counts the frequency a service is used, not the number of people using it.
For example, if a customer asks the same question five times, it will be counted as five activities.
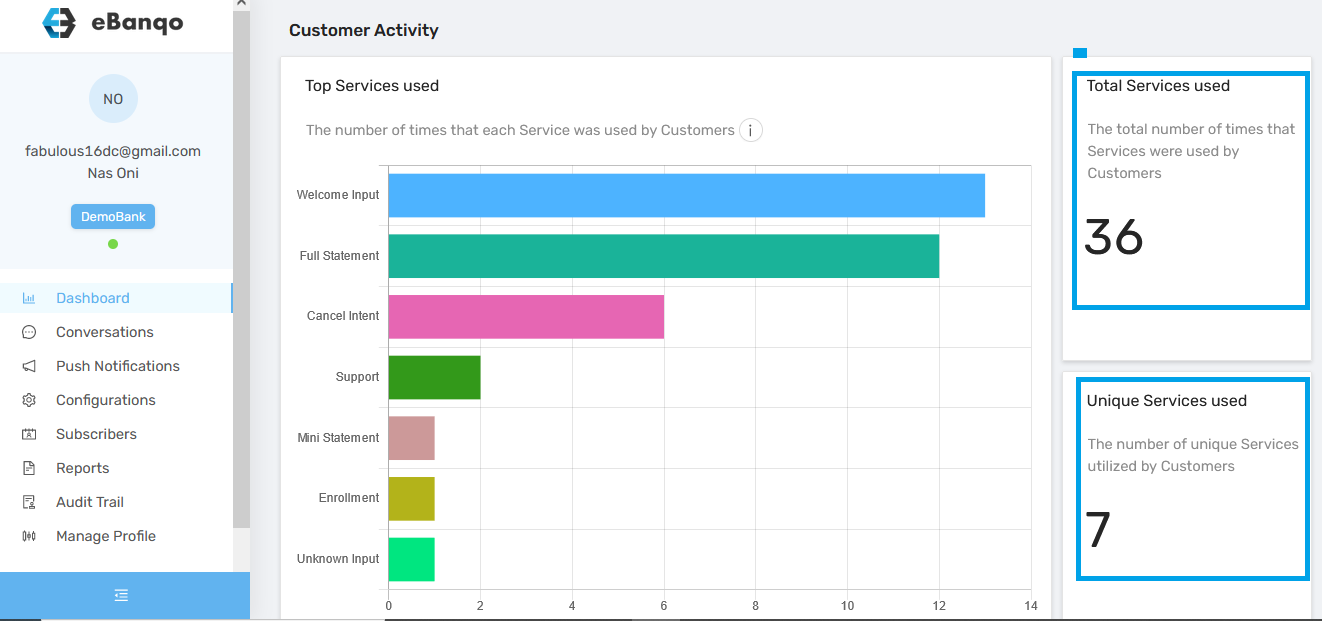
There are two statistics on the right side:
Total Services Used
This shows the number of times customers used services provided by your chatbot or assistant. If a customer repeats the same action multiple times, each instance is counted.
Unique Services Used
This counts only the services used, not how many times they were used. For example, if ten customers use the mini-statement service fifty times, it is counted as one service.
2. Customer Usage of Services
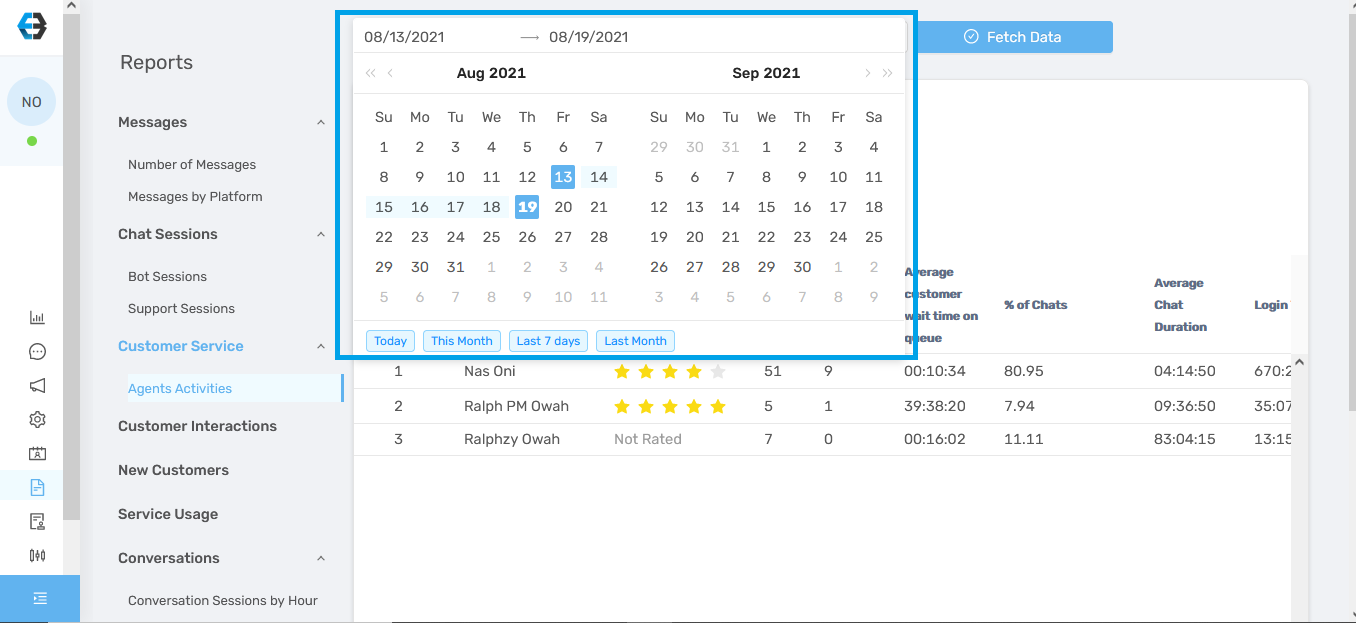
This report measures the number of customers using the services offered by the bot within a specific timeframe.
Unlike Customer Activity, it counts the number of people using the services rather than how many times the services were used.
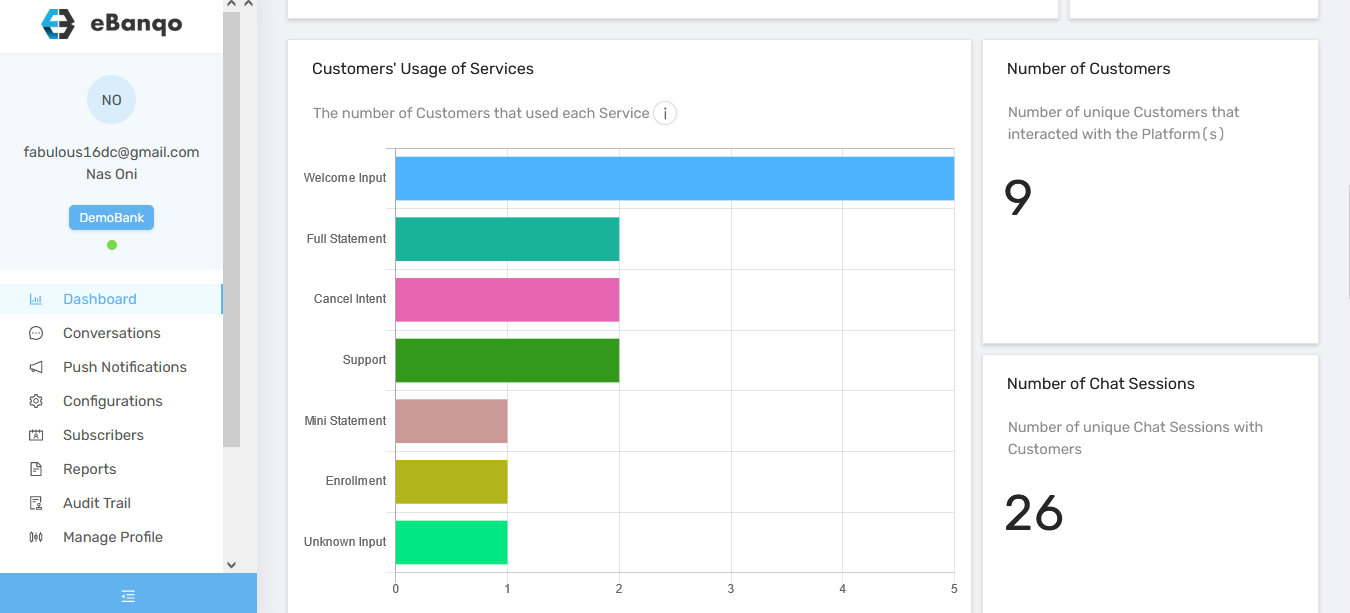
Two key statistics appear on the right:
Number of Customers
This represents the total number of individuals who used the service within the selected period.
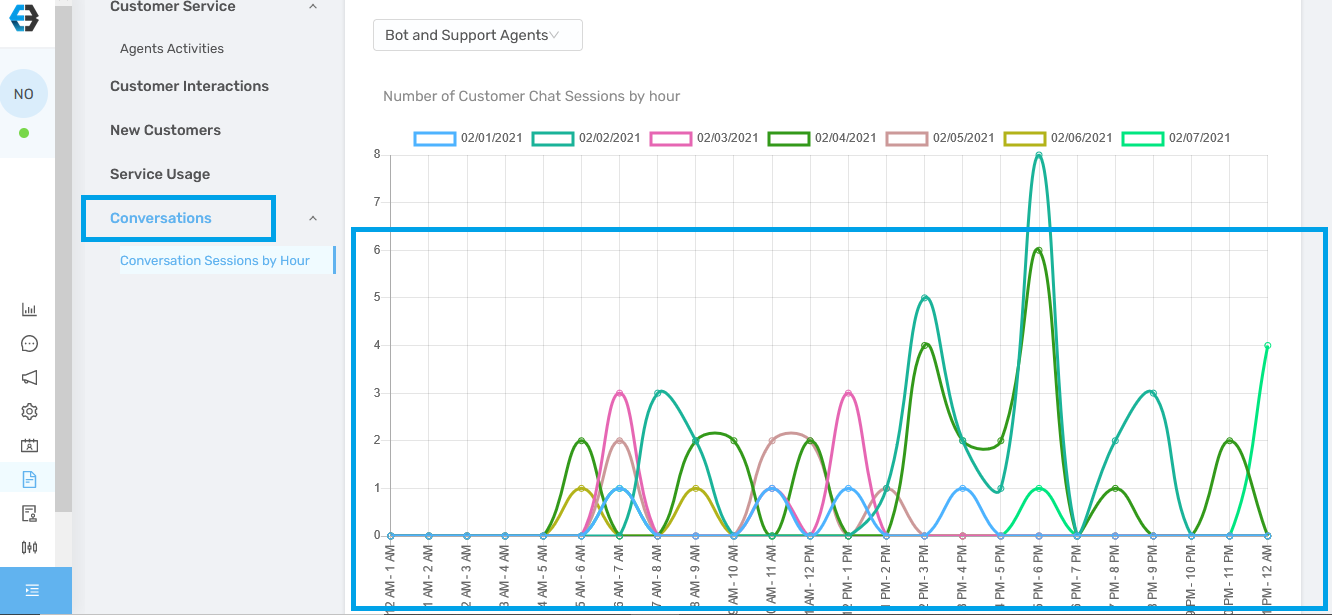
Number of Chat Sessions
This represents how many chat sessions occurred between customers and either the chatbot or support team.
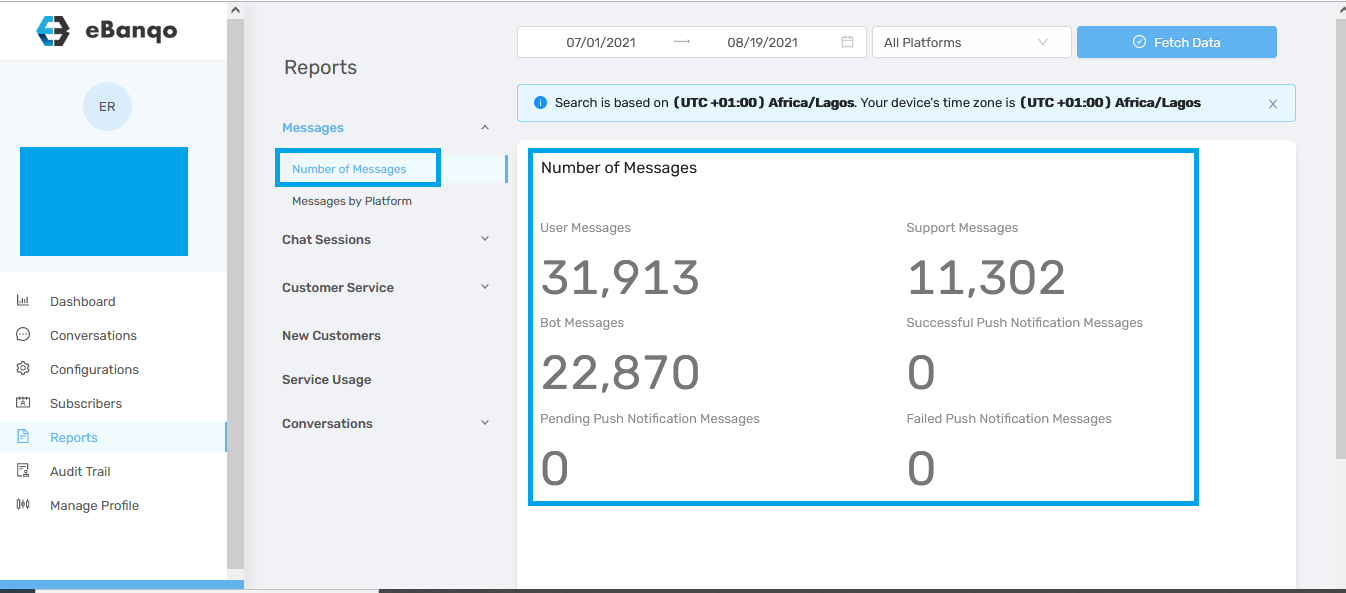
3. Messages by Service
This report counts the number of messages customers exchanged with your chatbot while completing an activity.
The purpose of this metric is to ensure that too many steps or messages are not required to complete a task.
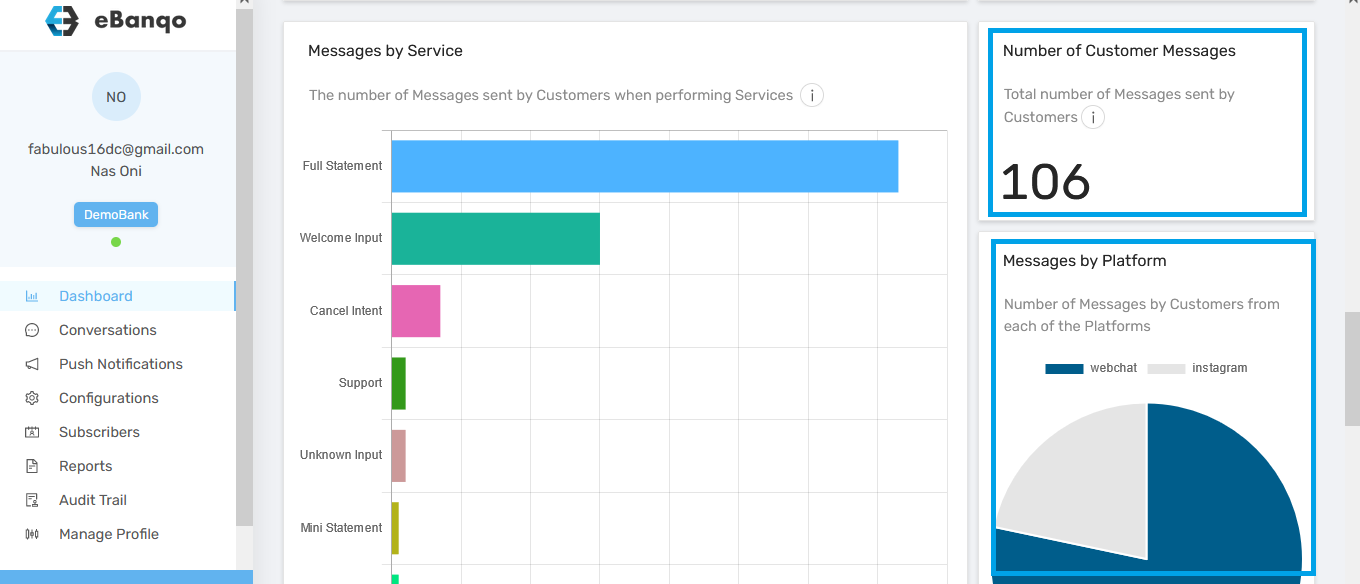
Two statistics appear on the right:
Number of Customer Messages
This is the total number of messages customers exchanged on your platform, including messages with the chatbot, support agents, and responses to system messages.
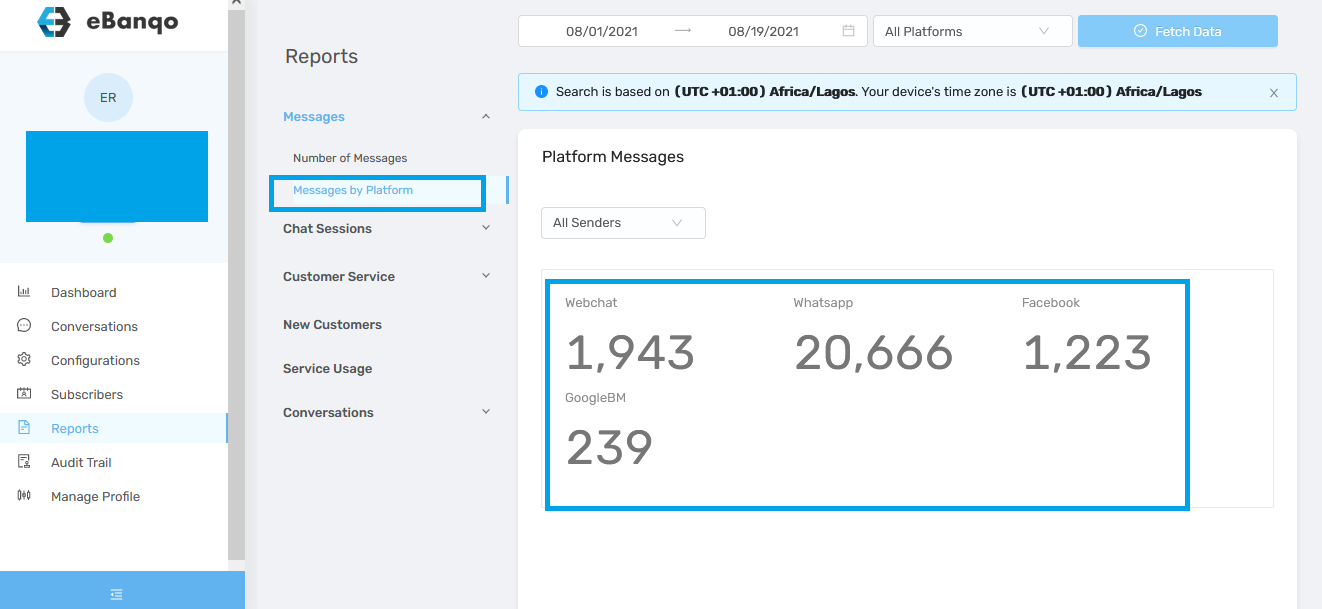
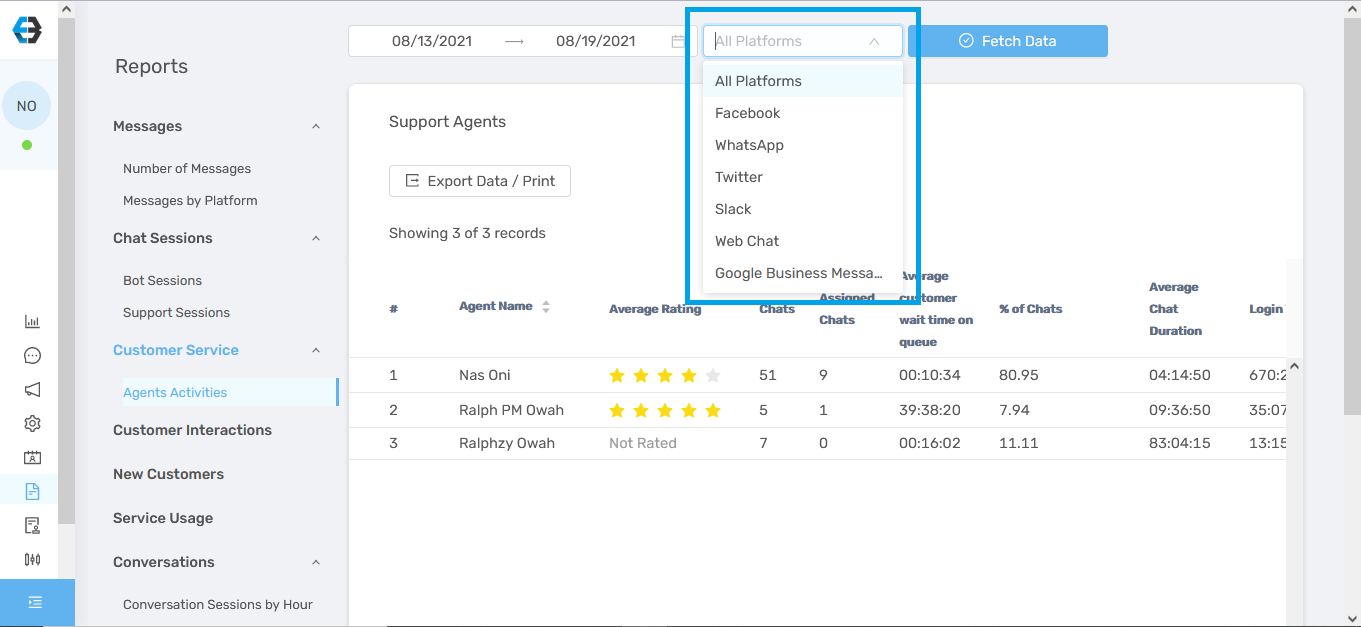
Messages by Platform
This shows the total number of messages exchanged across the different platforms where your bot is active.
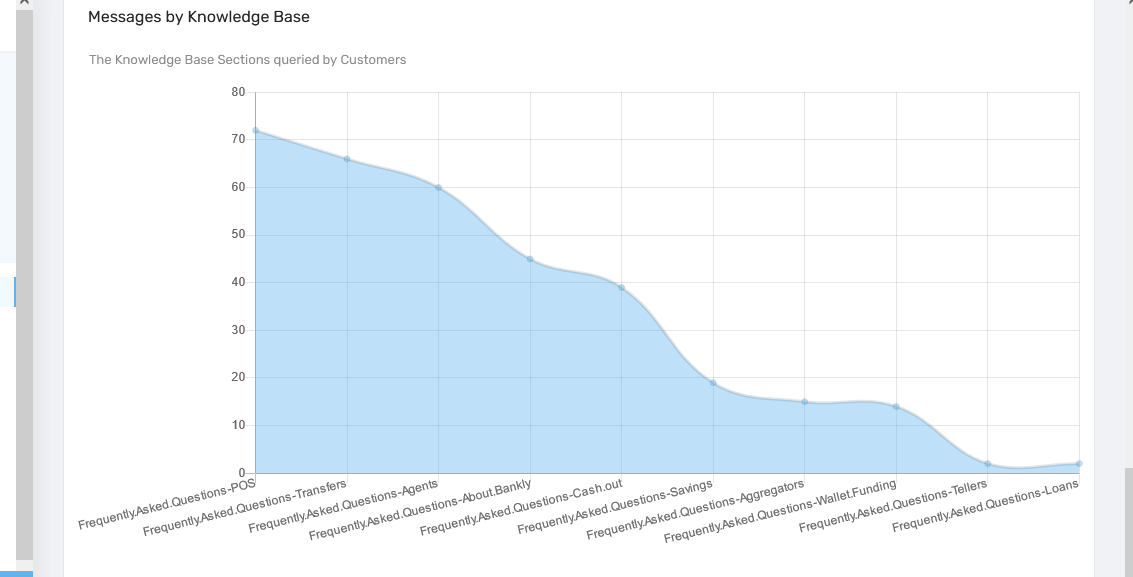
4. Messages by Knowledge Base
This report shows the number of customer messages that fall into different knowledge base categories.